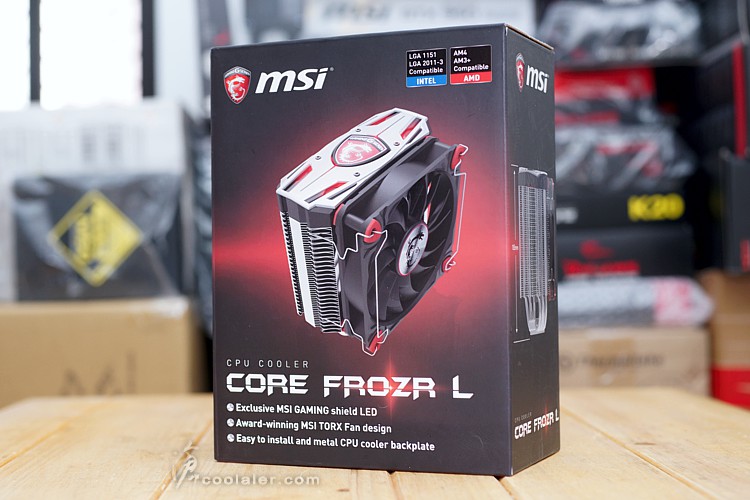
MSI 先前在八月 Gamescom 遊戲展中發布了新產品線– CPU 散熱器,
命名為 Core Frozr,最近正式在台灣上市,原本 Core Frozr 應該有兩款,
Core Frozr L 以及 Core Frozr XL,後綴字樣尺寸不同搭配散熱風扇數量不同,
不過搜尋了一下官網只看到 Core Frozr L,也就是單風扇的版本,
可能 MSI 覺得單風扇就夠用了?來看看是否如此。
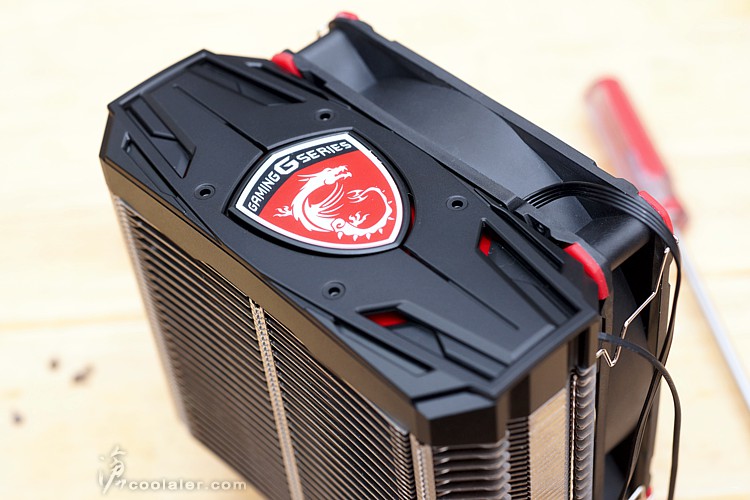
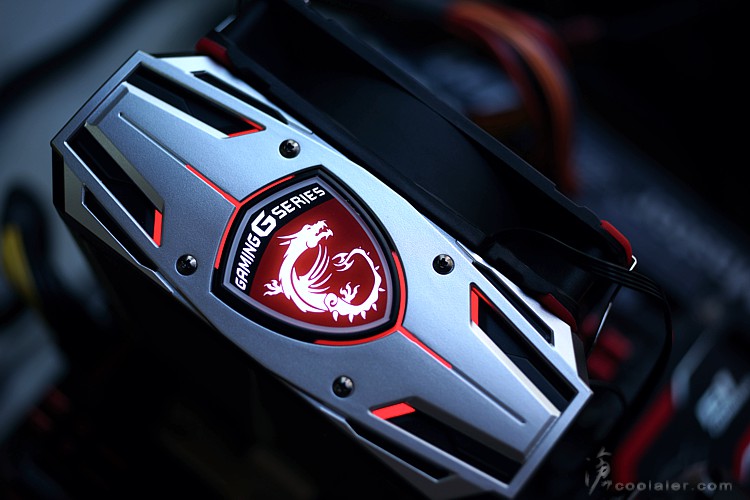
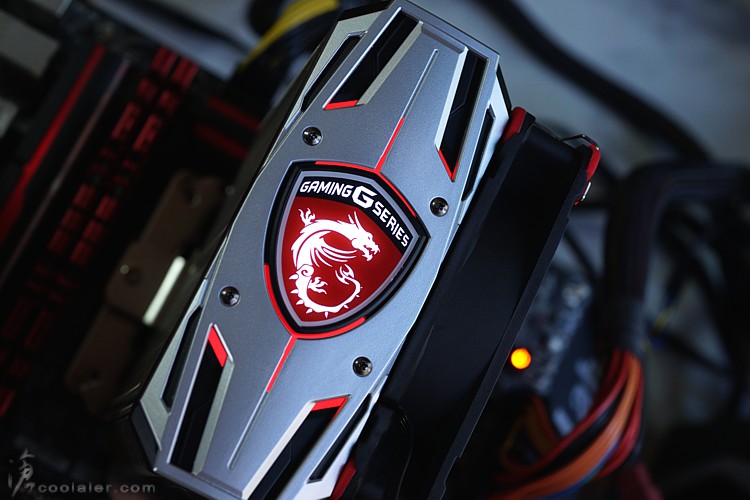
MSI 進軍 CPU 散熱器看來是頗認真的,直接歸納於 Gaming 系列,
包裝風格一致,龍紋圖案盾型標誌也沒少,頂部還有燈效,電競味十足。
透側看得到的可以直接搭一套,主板、顯卡、CPU散熱器,且…都…會…發..亮。
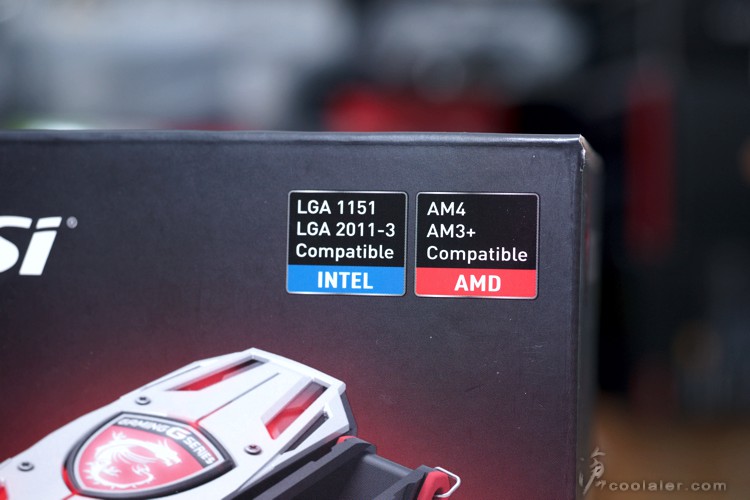
Intel、AMD 平台都適用,就連 AM4 也預備好了。
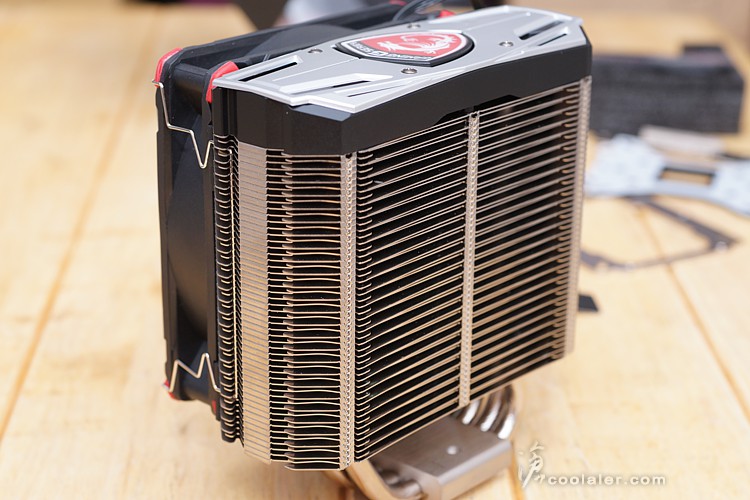
特色說明,12公分 MSI TORX 風扇、安裝容易、頂部飾板可更換、
4根8mm熱導管、特殊鰭片導流、與顯卡保持距離的設計。
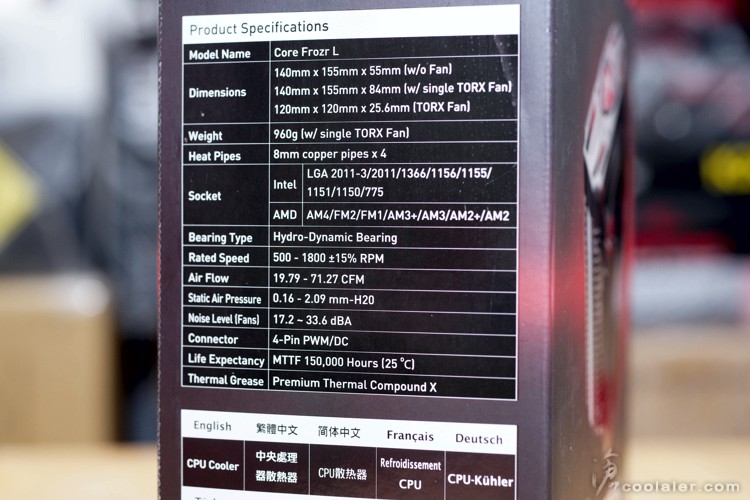
另外右下角也標示散熱器尺寸,高度為15.5公分,大多機殼都塞得下。

側邊有詳細規格,尺寸包含風扇是140x155x84mm,重量960g,
採用4根8mm熱導管,風扇轉速500~1800RPM,噪音值17.2~33.6dBA。
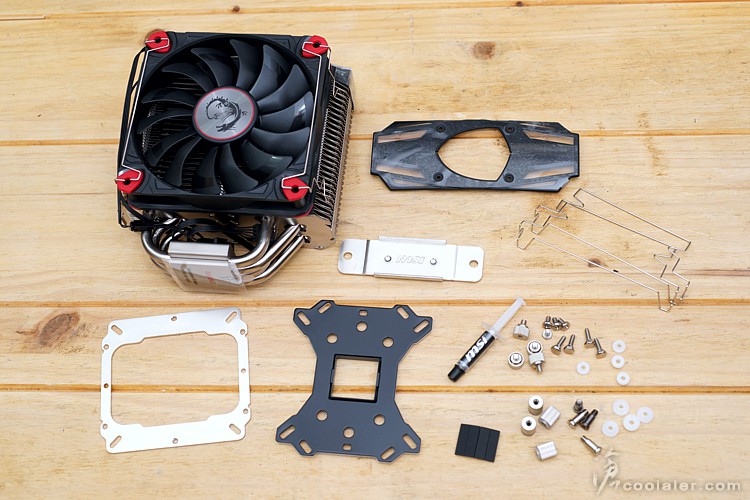
配件另外採用紙盒裝,可以看到有分門別類收納放置,看起來很素喜。
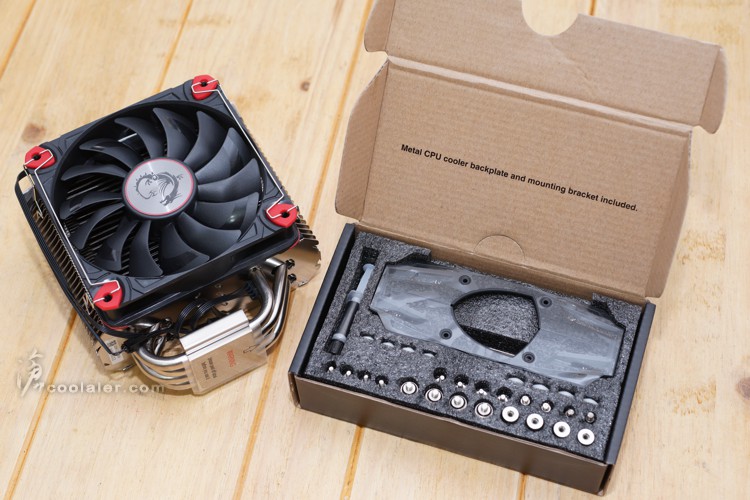
配件有頂部飾蓋、扣具、背板、風扇鐵線扣、散熱膏、螺絲、風扇防震墊片等。
Frozr 一直是 MSI 用於顯卡散熱器的名稱,
新推出的 CPU 散熱器則是直接以 Core Frozr 來命名,
當然之中也少不了一些在顯卡散熱器上看到的元素。

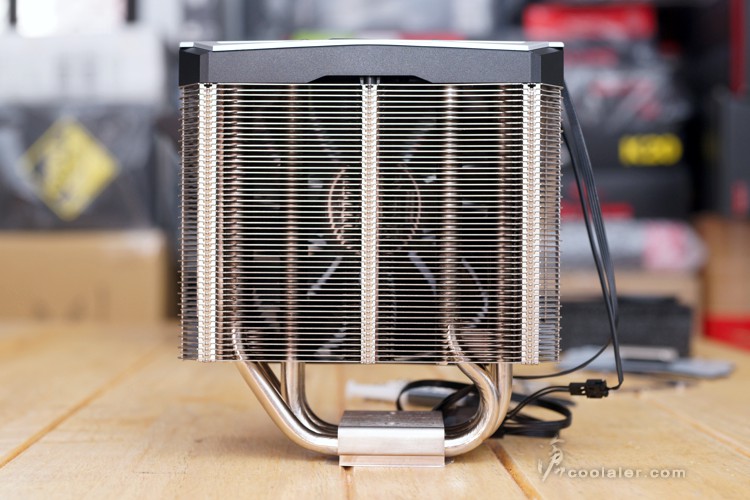
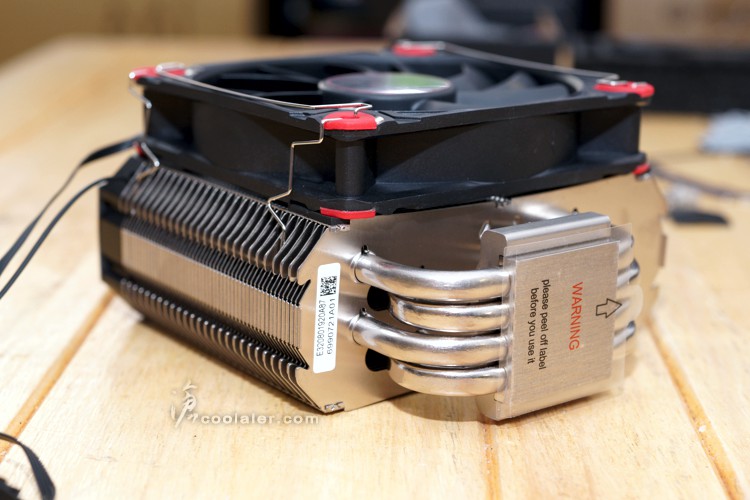
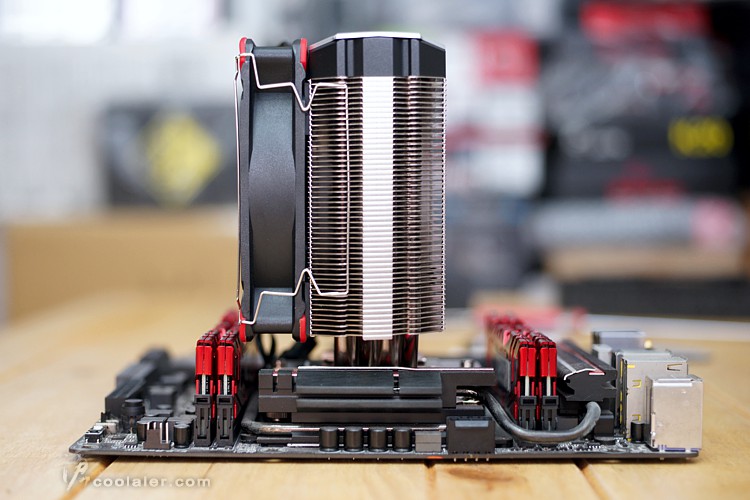
MSI Core Frozr L 採塔型設計,可以看得出來屬於Slim瘦身款,
也就是不干涉記憶體或PWM元件散熱片,搭配一顆12公分風扇,
採用鐵線扣的方式固定,另一側也可以安裝風扇,配件裡面有另一組風扇用的鐵線扣具還算是貼心,
有些單風扇散熱器雖然是可以擴充,但根本也沒有扣具給你。
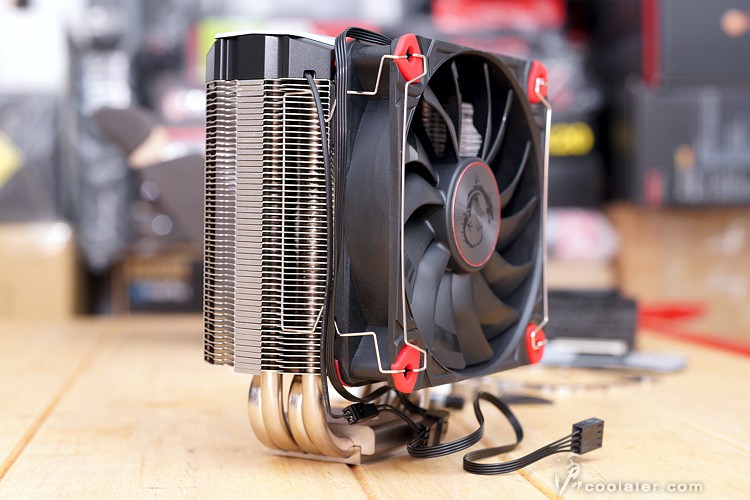
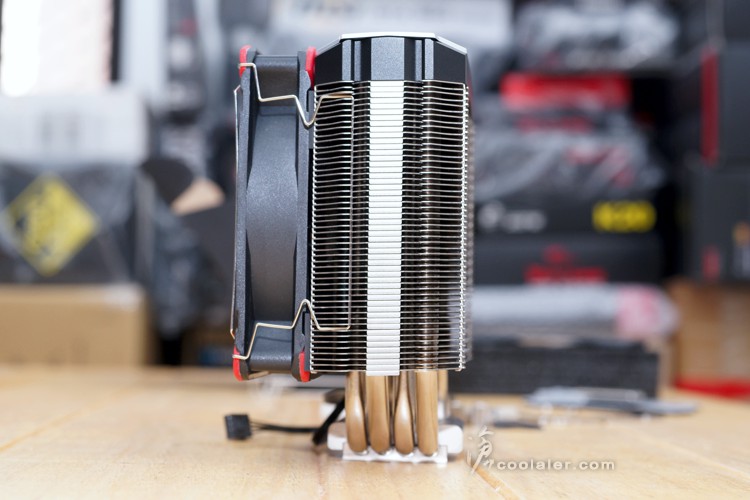
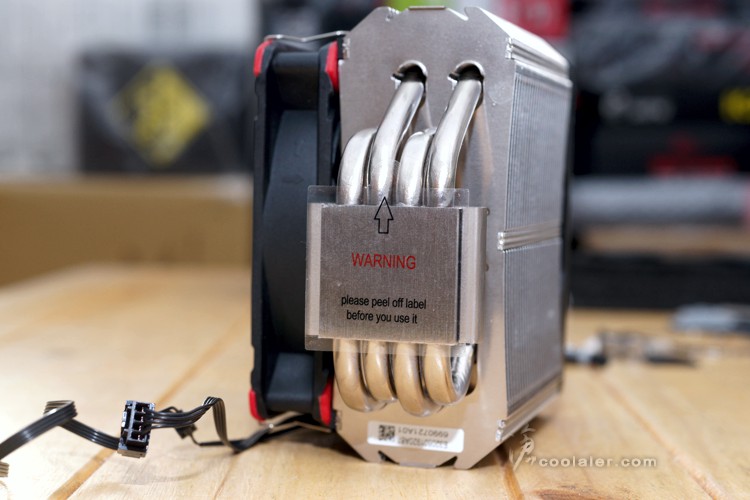
另一側可以看到鰭片與導管都是相當厚實。
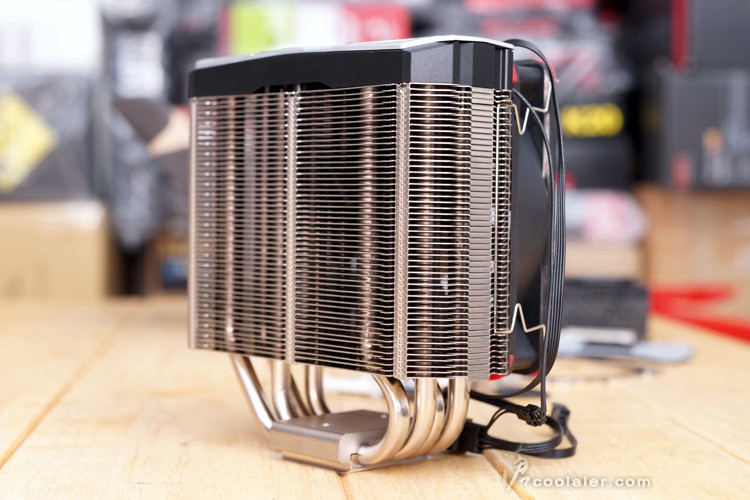
導管的部分穿插在鰭片內可以看到是有彎折錯開,
主要是風流吹過不會有阻隔可以更有效降溫。
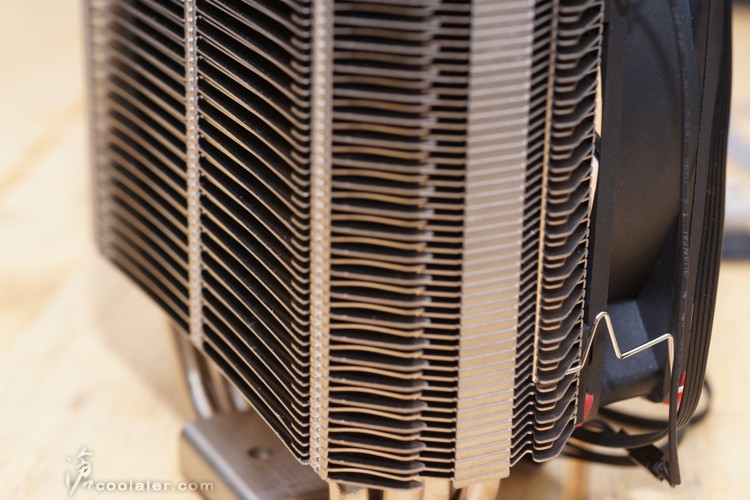
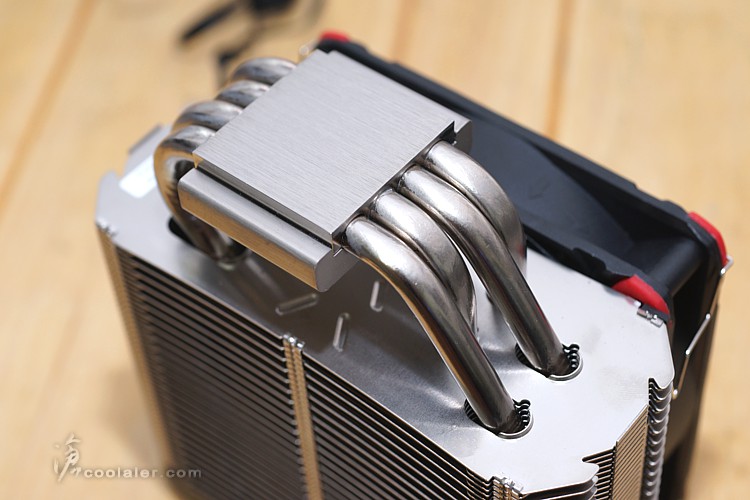
鰭片特寫
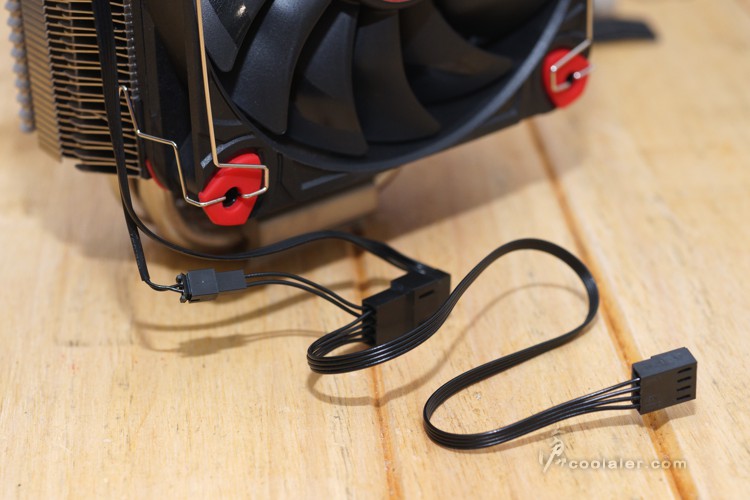
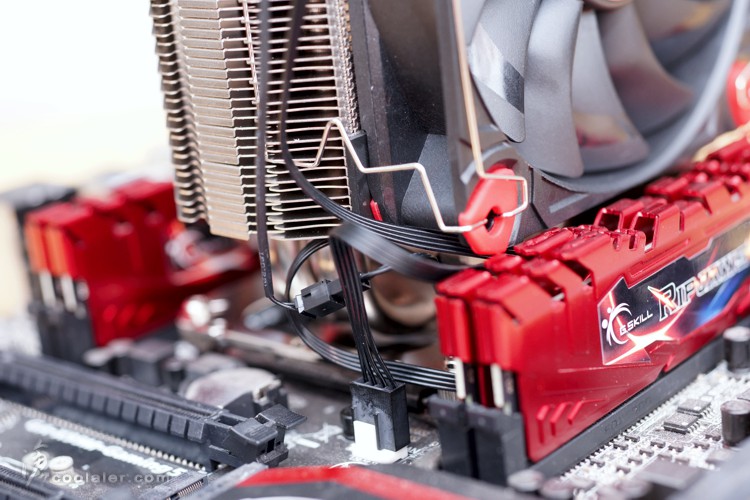
4Pin PWM 接頭,上方還有一個小接頭是LED燈效用的。
雖然只有4根熱導管,但都是8mm尺寸,很粗勇。
底座的透明膠紙安裝記得撕掉。
我不會承認我曾幹過這種蠢事才再罵說散熱效能很爛XDD。
底座採銅材質鍍鎳處理。
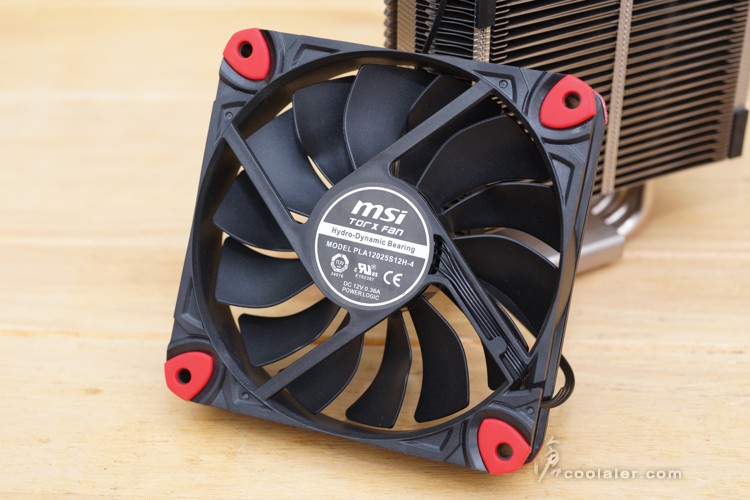
風扇的部分,12公分尺寸,HDB液態軸承,轉速500~1800RPM,噪音值17.2~33.6dBA。
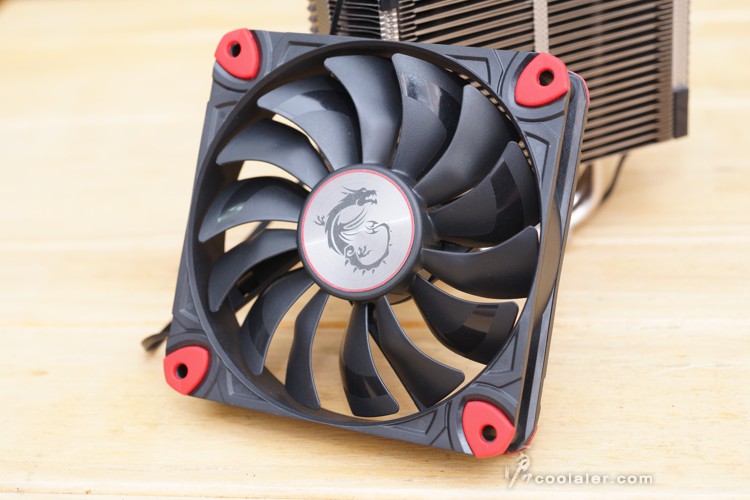
葉扇應該很熟悉,MSI 顯卡也是這種 TORX 葉片設計。

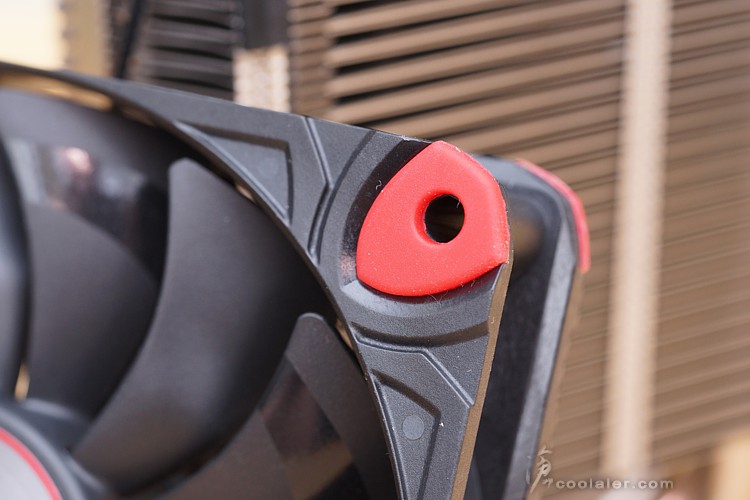
四邊有橡膠墊,可防止共振音。
12V 0.36A。
頂部飾蓋可以更換,上方有四根螺絲轉下,兩側邊有卡榫小心扳開。
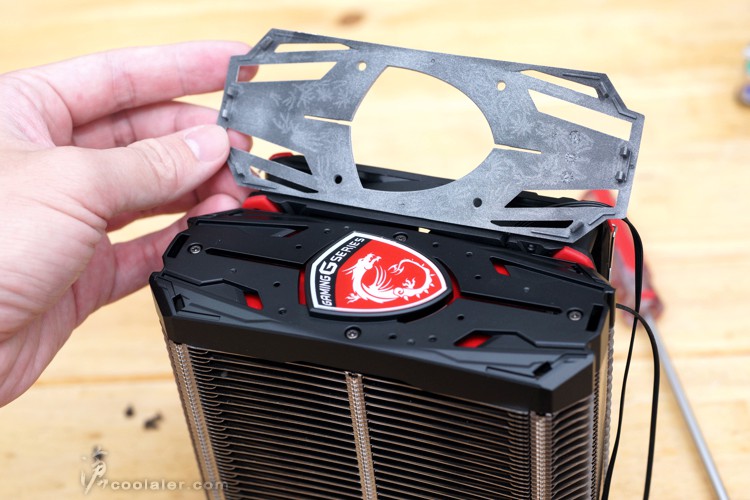
原本銀色不愛可以換成黑色,咦?換了怎麼跟上一張拆下時差不多,看不太出來XDD。
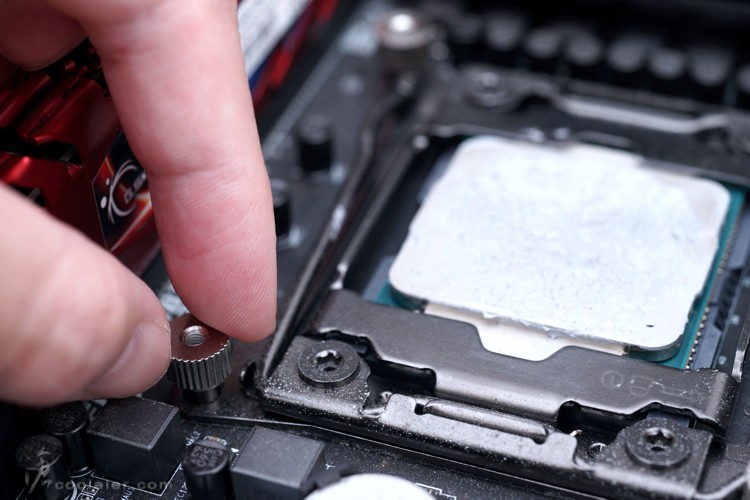
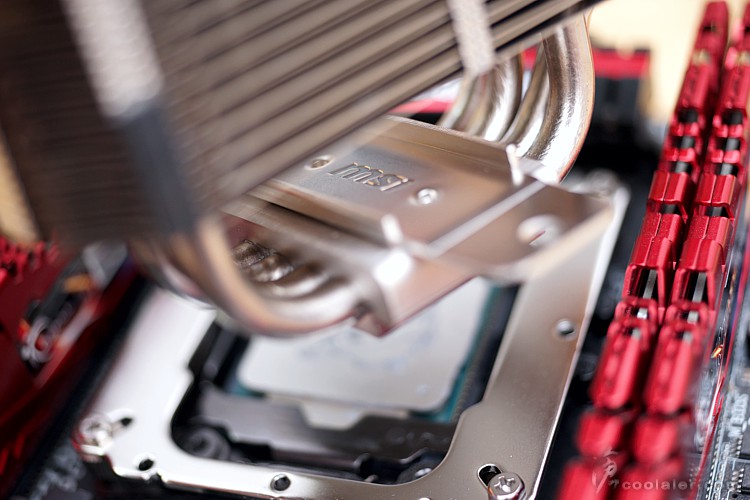
實際安裝,使用平台為 LGA2011-v3。
CPU四邊腳座鎖上墊高螺絲。
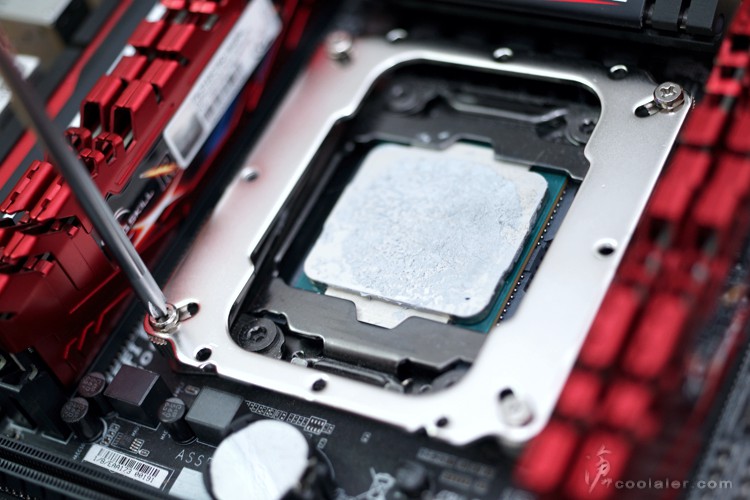
鎖上固定板。
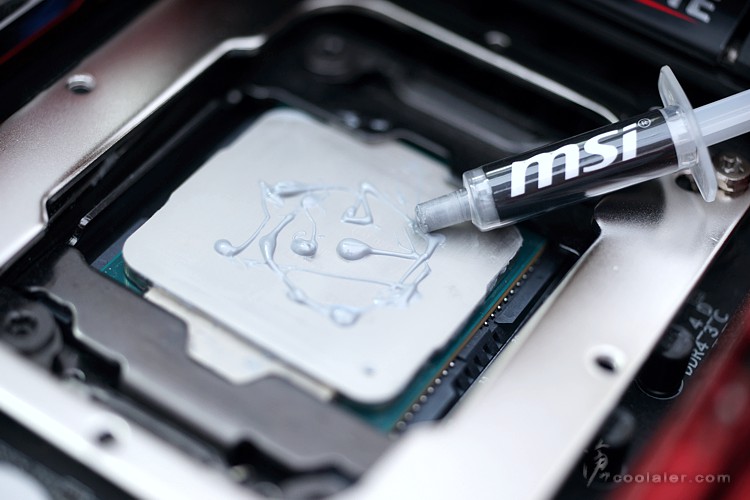
胡亂塗一些散熱膏…
散熱器底座上方合上扣具。
兩邊鎖上螺絲固定。
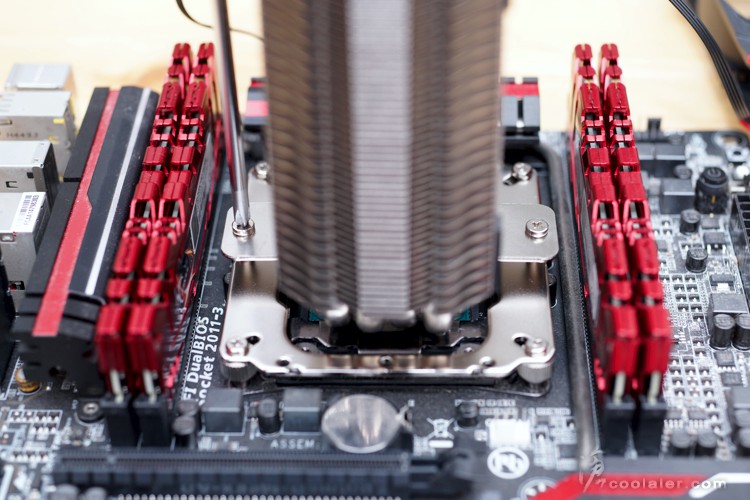
安裝風扇、接上風扇電源。
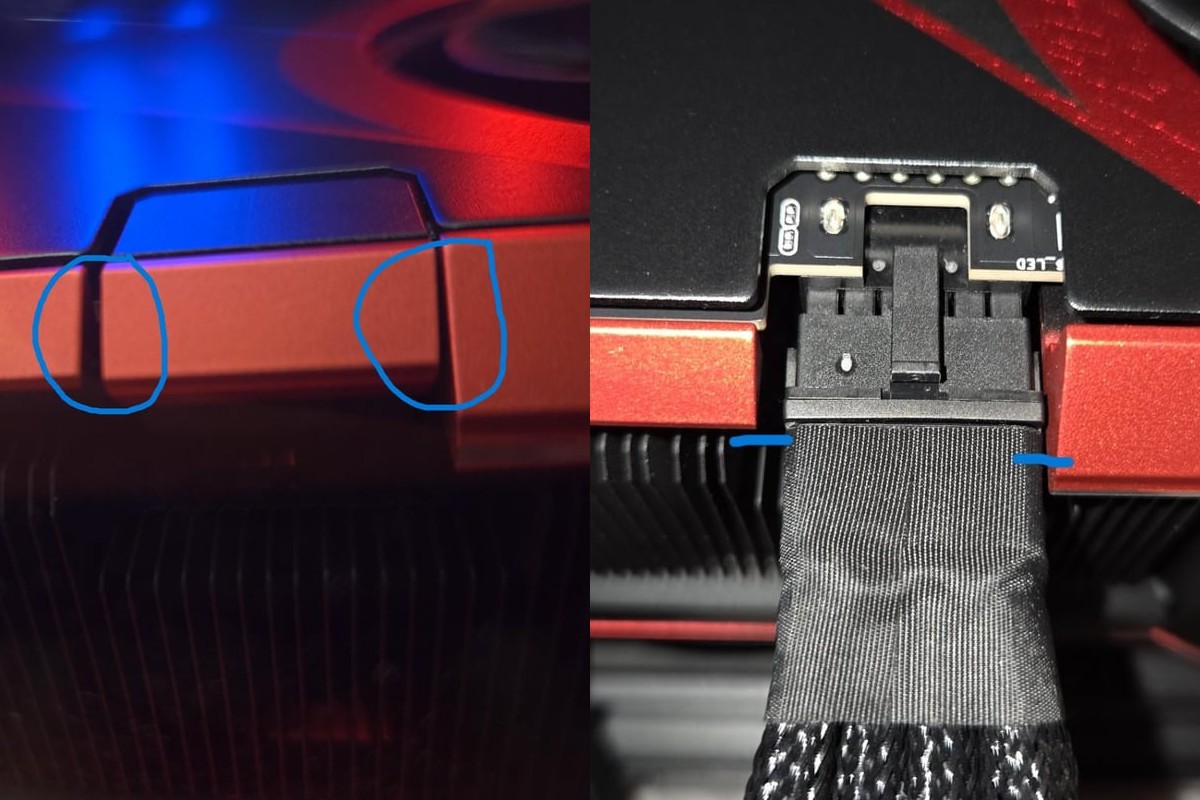
完成!左側風扇在這張板子上並不會干涉到記憶體,某些板子就不一定,可以參考2樓的回文。
測試平台
CPU: Intel Core i7-5960X ES
CPU Cooler: MSI Core Frozr L
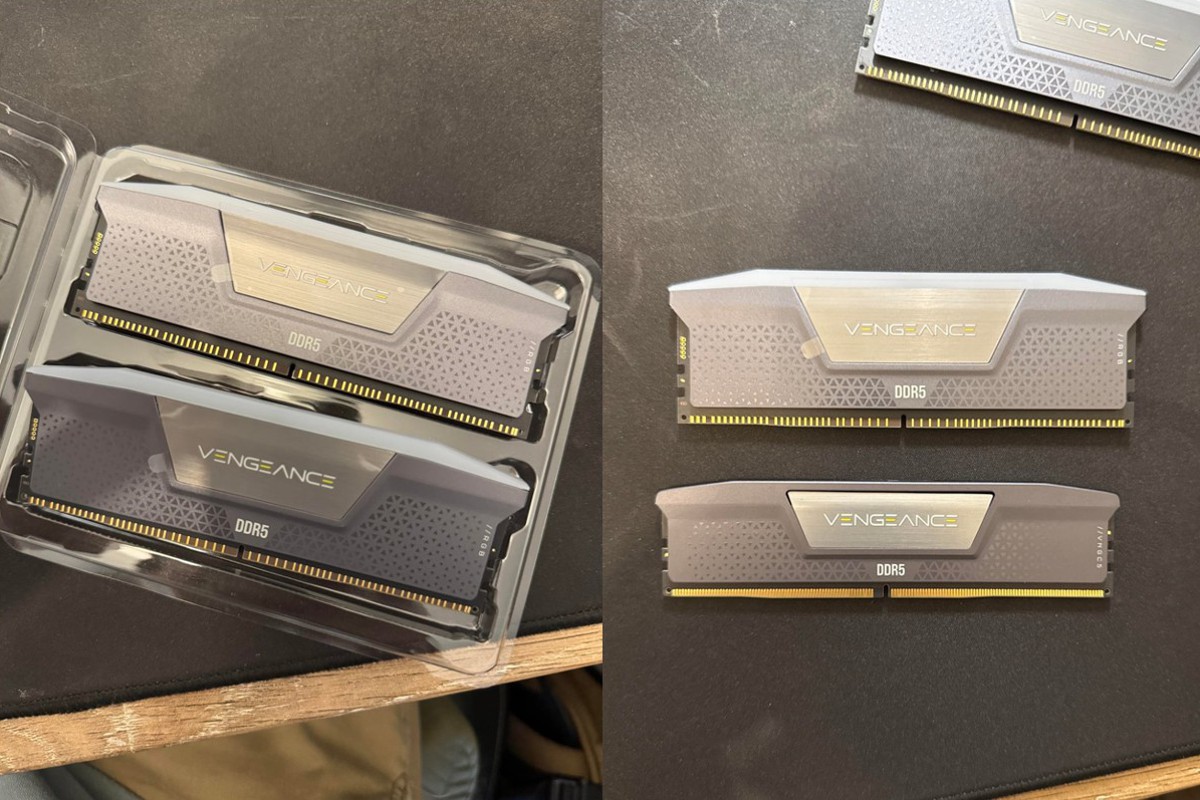
RAM: GSKILL DDR4 2133 4GBx4
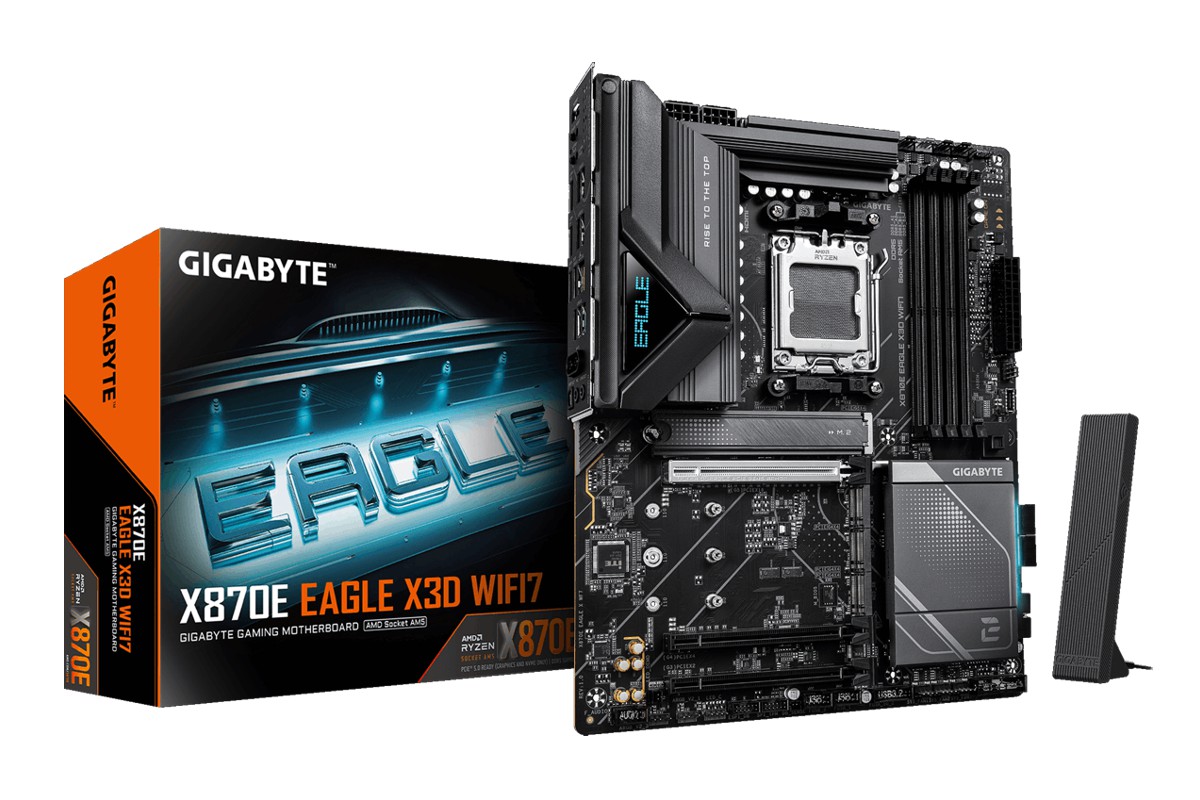
MB: GIGABYTE X99M-Gaming 5
VGA: MSI RX 460 2GB OC
HDD: OCZ TRION 150 480GB + Seagate 2TB
PSU: FSP 皇鈦極 AURUM PT 1000W 全模組化
OS: Windows 10 64bit
頂部燈效的質感還不錯!
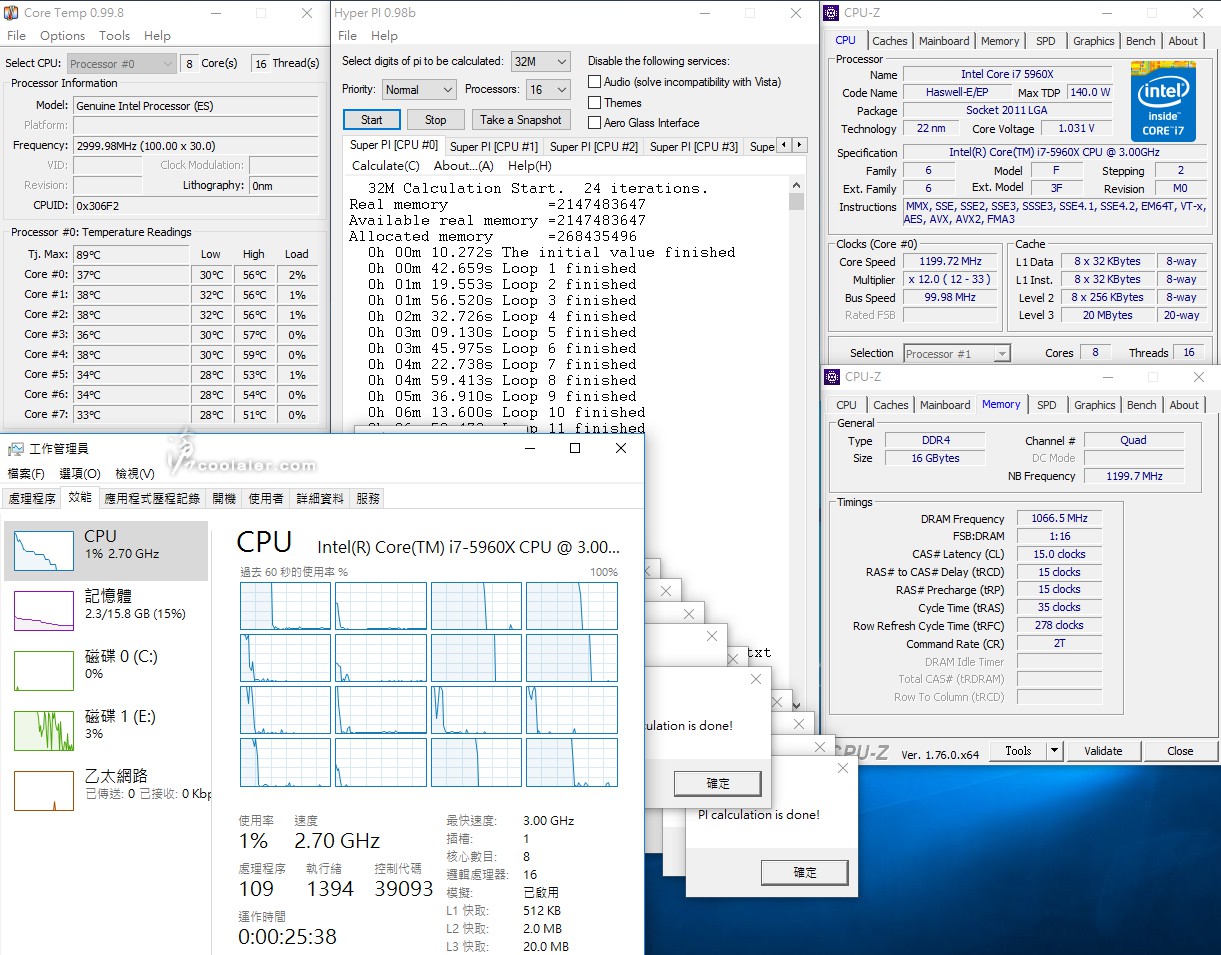
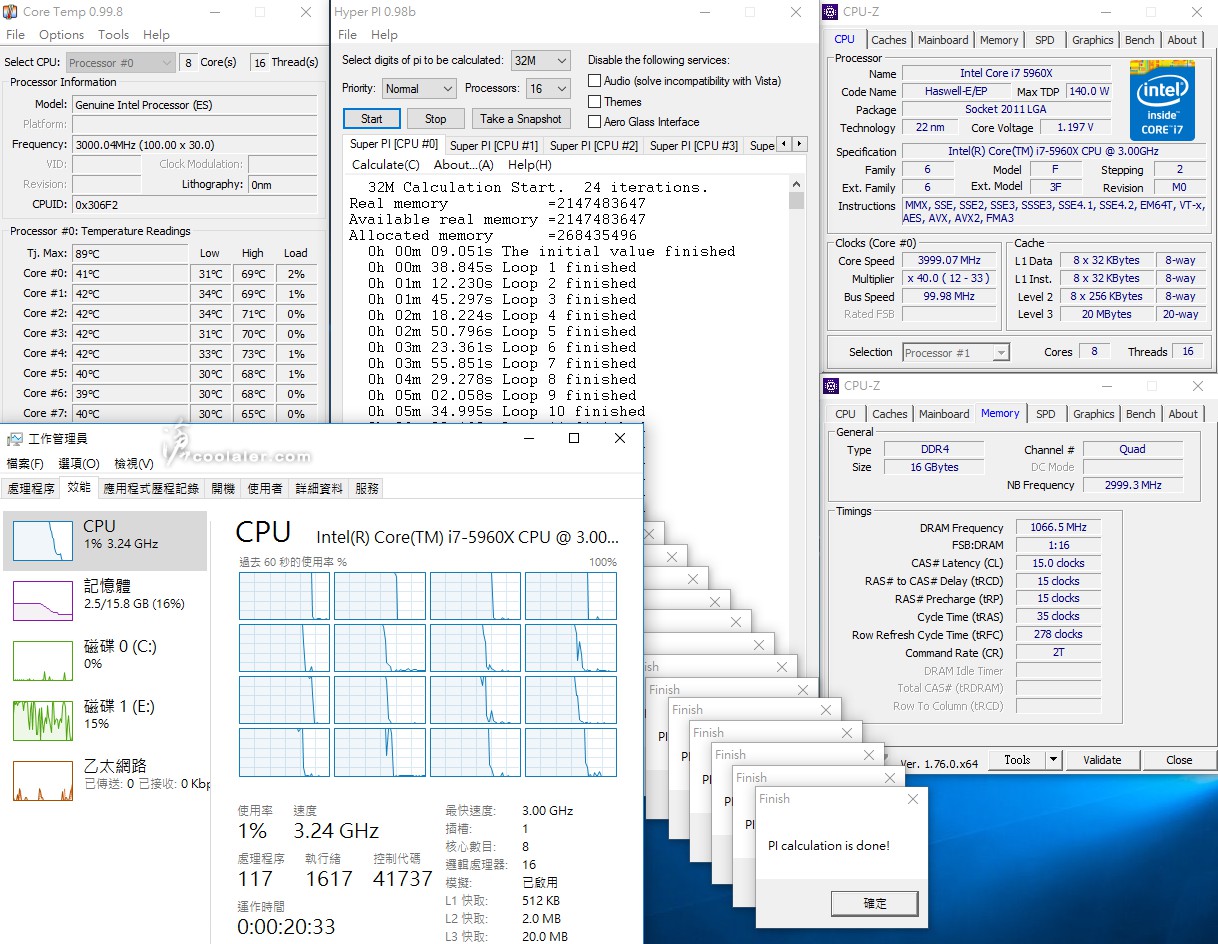
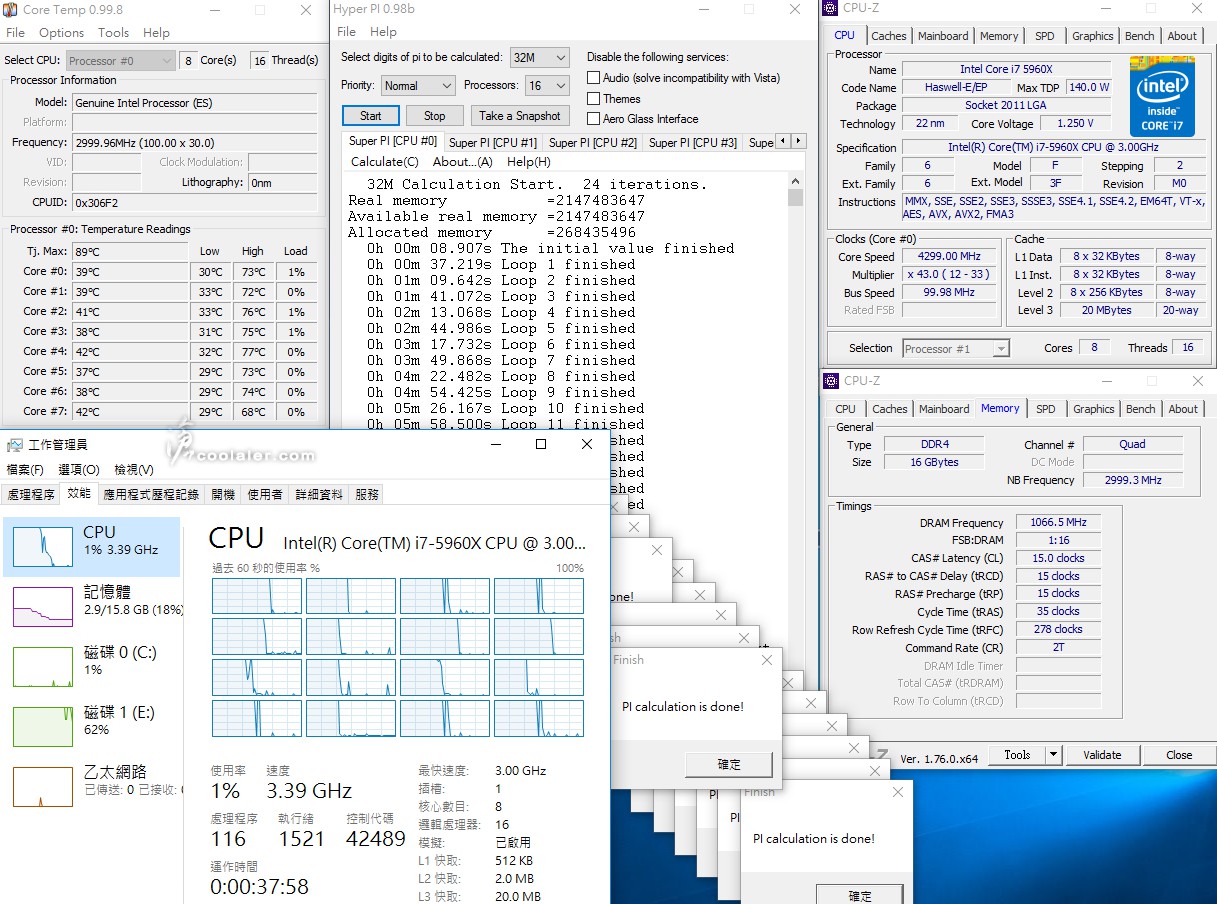
處理器使用 Intel Core i7-5960X,測試時執行HyperPI 32M x16使CPU滿載,
並記錄超頻時脈時最低及最高的溫度變化。風扇轉速為PWM控制,室溫27度,裸測平台。
Core i7-5960X 預設值
核心溫度待機低溫在28~32度,執行結束後,最高記錄在51~59度。
Core i7-5960X 超頻4GHz,懶人超,主板選項直上,CPU-Z抓到電壓約1.197V。
核心溫度待機低溫在30~34度,執行結束後,最高記錄在65~73度。
Core i7-5960X 超頻4.3GHz,懶人超,主板選項直上,CPU-Z抓到電壓約1.25V。
核心溫度待機低溫在29~33度,執行結束後,最高記錄在68~77度。
小結
從測試結果看來,MSI Core Frozr L 的散熱效能以這樣的體積來看算是相當優異,
比一般薄型Slim版的散熱器都要強,效能甚至堪比一些大型塔散,
而且僅搭配一顆12公分風扇,在高溫高載下風扇轉速拉升噪音值也並不會太明顯,
整體表現實屬優異,外觀顏值也高,頂部有龍紋圖案,且有燈效,
若連同 MSI 主板、顯卡一起並配上大透側,應該 Gaming 戰力十足。
命名為 Core Frozr,最近正式在台灣上市,原本 Core Frozr 應該有兩款,
Core Frozr L 以及 Core Frozr XL,後綴字樣尺寸不同搭配散熱風扇數量不同,
不過搜尋了一下官網只看到 Core Frozr L,也就是單風扇的版本,
可能 MSI 覺得單風扇就夠用了?來看看是否如此。
MSI 進軍 CPU 散熱器看來是頗認真的,直接歸納於 Gaming 系列,
包裝風格一致,龍紋圖案盾型標誌也沒少,頂部還有燈效,電競味十足。
透側看得到的可以直接搭一套,主板、顯卡、CPU散熱器,且…都…會…發..亮。
Intel、AMD 平台都適用,就連 AM4 也預備好了。
特色說明,12公分 MSI TORX 風扇、安裝容易、頂部飾板可更換、
4根8mm熱導管、特殊鰭片導流、與顯卡保持距離的設計。
另外右下角也標示散熱器尺寸,高度為15.5公分,大多機殼都塞得下。
側邊有詳細規格,尺寸包含風扇是140x155x84mm,重量960g,
採用4根8mm熱導管,風扇轉速500~1800RPM,噪音值17.2~33.6dBA。
配件另外採用紙盒裝,可以看到有分門別類收納放置,看起來很素喜。
配件有頂部飾蓋、扣具、背板、風扇鐵線扣、散熱膏、螺絲、風扇防震墊片等。
Frozr 一直是 MSI 用於顯卡散熱器的名稱,
新推出的 CPU 散熱器則是直接以 Core Frozr 來命名,
當然之中也少不了一些在顯卡散熱器上看到的元素。
MSI Core Frozr L 採塔型設計,可以看得出來屬於Slim瘦身款,
也就是不干涉記憶體或PWM元件散熱片,搭配一顆12公分風扇,
採用鐵線扣的方式固定,另一側也可以安裝風扇,配件裡面有另一組風扇用的鐵線扣具還算是貼心,
有些單風扇散熱器雖然是可以擴充,但根本也沒有扣具給你。
另一側可以看到鰭片與導管都是相當厚實。
導管的部分穿插在鰭片內可以看到是有彎折錯開,
主要是風流吹過不會有阻隔可以更有效降溫。
鰭片特寫
4Pin PWM 接頭,上方還有一個小接頭是LED燈效用的。
雖然只有4根熱導管,但都是8mm尺寸,很粗勇。
底座的透明膠紙安裝記得撕掉。
我不會承認我曾幹過這種蠢事才再罵說散熱效能很爛XDD。
底座採銅材質鍍鎳處理。
風扇的部分,12公分尺寸,HDB液態軸承,轉速500~1800RPM,噪音值17.2~33.6dBA。
葉扇應該很熟悉,MSI 顯卡也是這種 TORX 葉片設計。
四邊有橡膠墊,可防止共振音。
12V 0.36A。
頂部飾蓋可以更換,上方有四根螺絲轉下,兩側邊有卡榫小心扳開。
原本銀色不愛可以換成黑色,咦?換了怎麼跟上一張拆下時差不多,看不太出來XDD。
實際安裝,使用平台為 LGA2011-v3。
CPU四邊腳座鎖上墊高螺絲。
鎖上固定板。
胡亂塗一些散熱膏…
散熱器底座上方合上扣具。
兩邊鎖上螺絲固定。
安裝風扇、接上風扇電源。
完成!左側風扇在這張板子上並不會干涉到記憶體,某些板子就不一定,可以參考2樓的回文。
測試平台
CPU: Intel Core i7-5960X ES
CPU Cooler: MSI Core Frozr L
RAM: GSKILL DDR4 2133 4GBx4
MB: GIGABYTE X99M-Gaming 5
VGA: MSI RX 460 2GB OC
HDD: OCZ TRION 150 480GB + Seagate 2TB
PSU: FSP 皇鈦極 AURUM PT 1000W 全模組化
OS: Windows 10 64bit
頂部燈效的質感還不錯!
處理器使用 Intel Core i7-5960X,測試時執行HyperPI 32M x16使CPU滿載,
並記錄超頻時脈時最低及最高的溫度變化。風扇轉速為PWM控制,室溫27度,裸測平台。
Core i7-5960X 預設值
核心溫度待機低溫在28~32度,執行結束後,最高記錄在51~59度。
Core i7-5960X 超頻4GHz,懶人超,主板選項直上,CPU-Z抓到電壓約1.197V。
核心溫度待機低溫在30~34度,執行結束後,最高記錄在65~73度。
Core i7-5960X 超頻4.3GHz,懶人超,主板選項直上,CPU-Z抓到電壓約1.25V。
核心溫度待機低溫在29~33度,執行結束後,最高記錄在68~77度。
小結
從測試結果看來,MSI Core Frozr L 的散熱效能以這樣的體積來看算是相當優異,
比一般薄型Slim版的散熱器都要強,效能甚至堪比一些大型塔散,
而且僅搭配一顆12公分風扇,在高溫高載下風扇轉速拉升噪音值也並不會太明顯,
整體表現實屬優異,外觀顏值也高,頂部有龍紋圖案,且有燈效,
若連同 MSI 主板、顯卡一起並配上大透側,應該 Gaming 戰力十足。