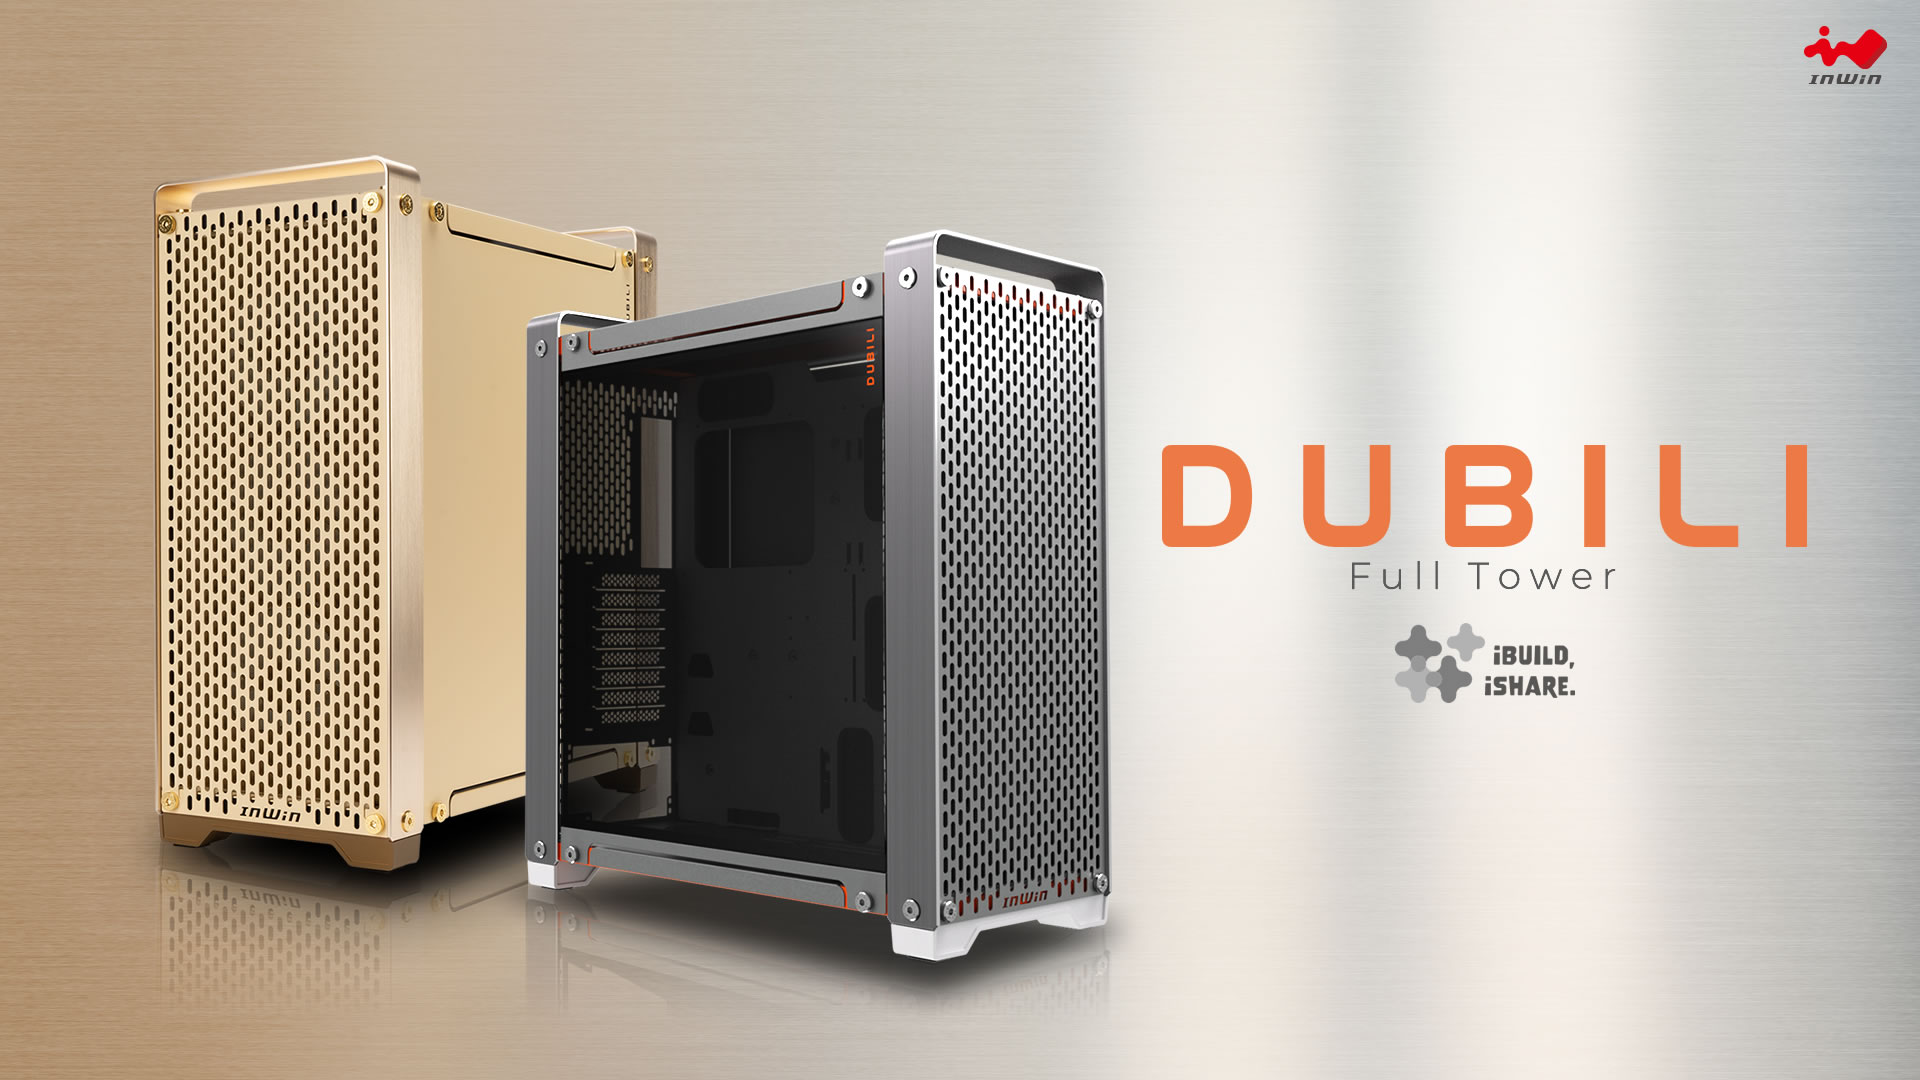
迎廣 InWin 在今年的 Comptuex 上曾展示一款相當有質感的機殼 " DUBILI ",作為首款 iBuildiShare 模組化系列以精品為取向的款式,提供鈦灰以及奶油香檳金兩種顏色可選擇,並有整機以及散裝 DIY 兩種形式,不過台灣僅提供整機包裝,也就是拆箱即用,簡單快速,不過也少了一步一步組裝完成的樂趣,當然你自己夠閒也是可以全拆掉重裝,畢竟 iBuildiShare 標榜就是每個零件都能拆卸。
DUBILI 有鈦灰以及奶油香檳兩色,都好看!在命名上面也是相當有意涵,DUBILI 是 iBuild 的重組,也是 Do Believe 的讀音,完全體現 DIY 的精神,去做並相信自己可以辦到。
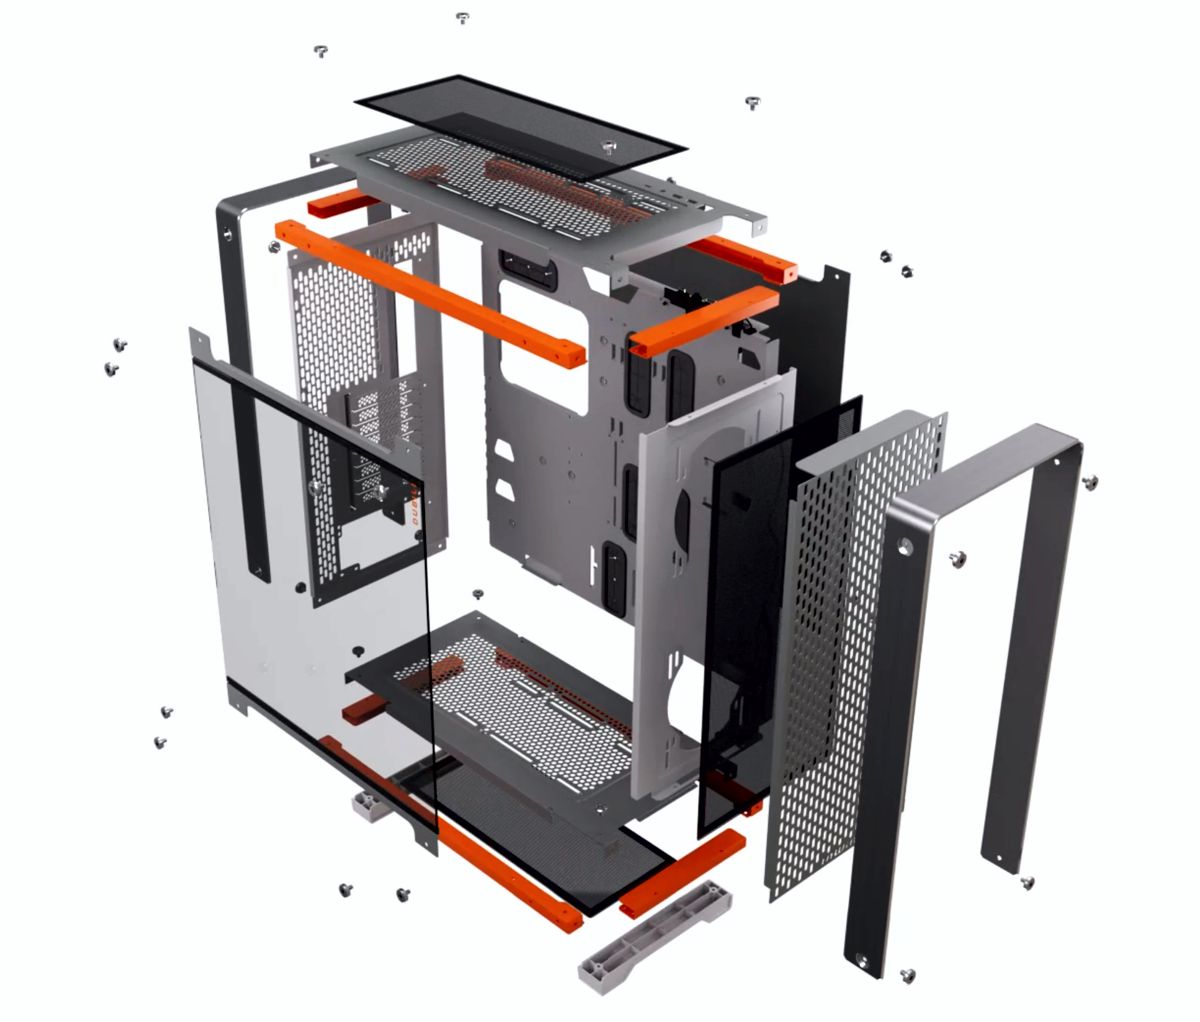
DUBILI 採用模組化組件組裝概念,雖然台灣版本是整機(已組裝完成)的版本,但這樣的設計每個零件都能輕鬆拆卸,也提供給一些使用者可輕鬆改裝的條件。InWin 也表示日後會推出不同材質、顏色的配件,以滿足 DUBILI 個性化與客製化的需求。
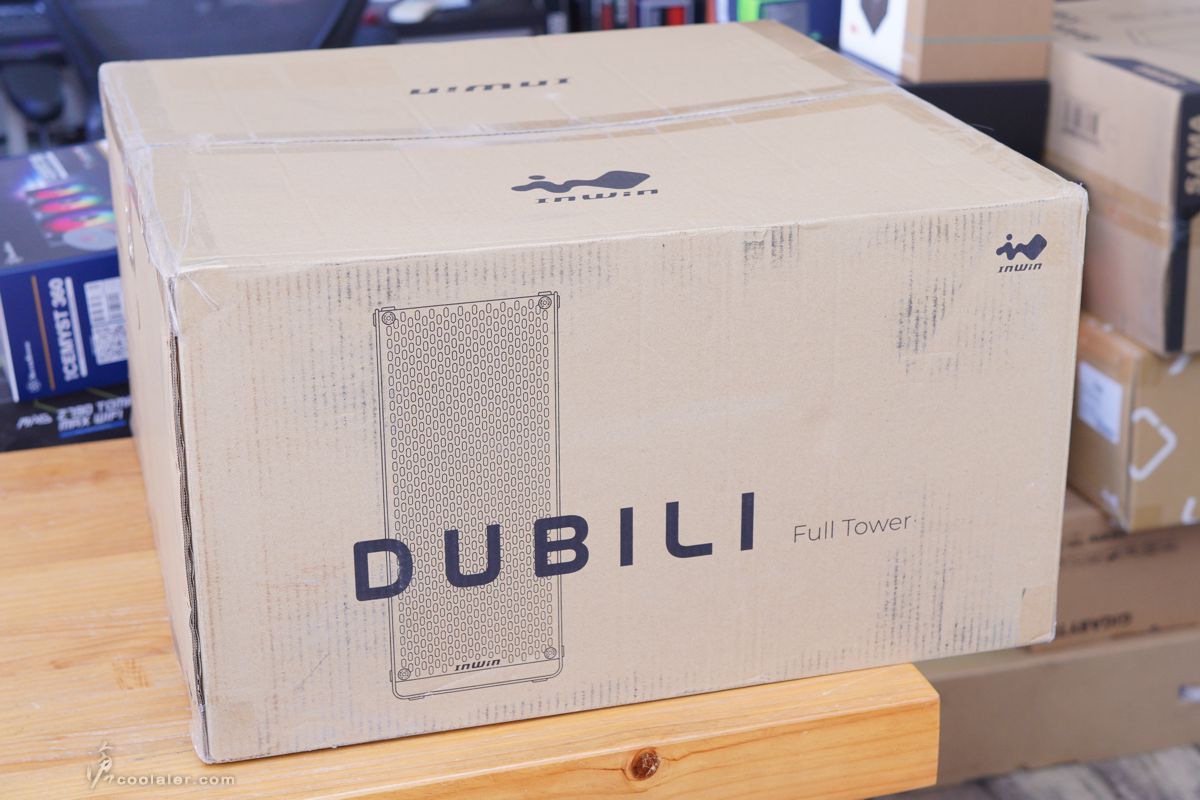
入手的是鈦灰色,相當大一箱,不含外箱重量就有15.5公斤。
InWin DUBILI規格
體積:523 x 244 x 567 mm
硬碟擴充:2顆3.5吋/2.5吋、4顆2.5吋硬碟
擴充卡槽:8
主機板:E-ATX 向下相容
前置 IO:USB 3.2 Gen 2×2 Type-C x1 、 USB 3.0 x2 、 HD Audio
CPU 散熱器高度限制:16公分
顯卡長度限制:43公分
電源供應器長度限制:18公分
預裝風扇:4個 InWin Jupiter AJ140 風扇
風扇支援:前3個12/14公分,上3個12或2個14公分,下2個12或1個14公分,後1個12或14公分
水冷支援:前36或42公分,上36或28公分
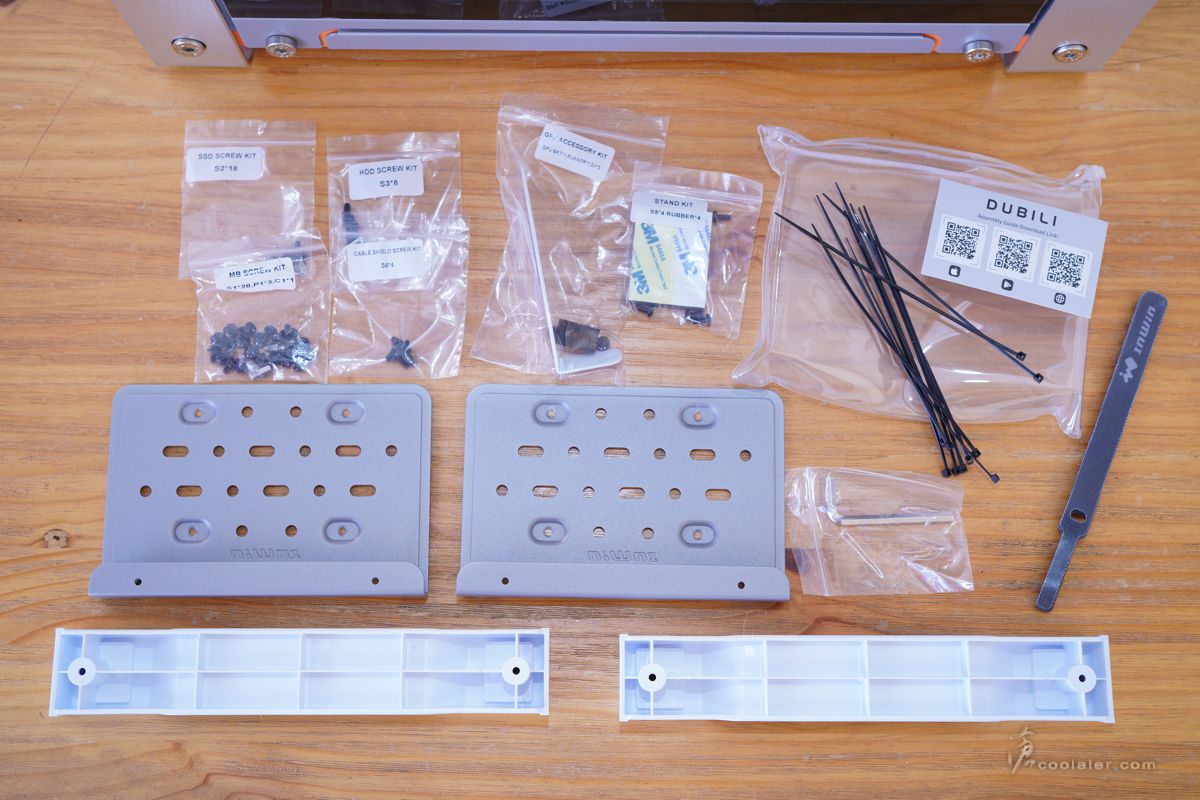
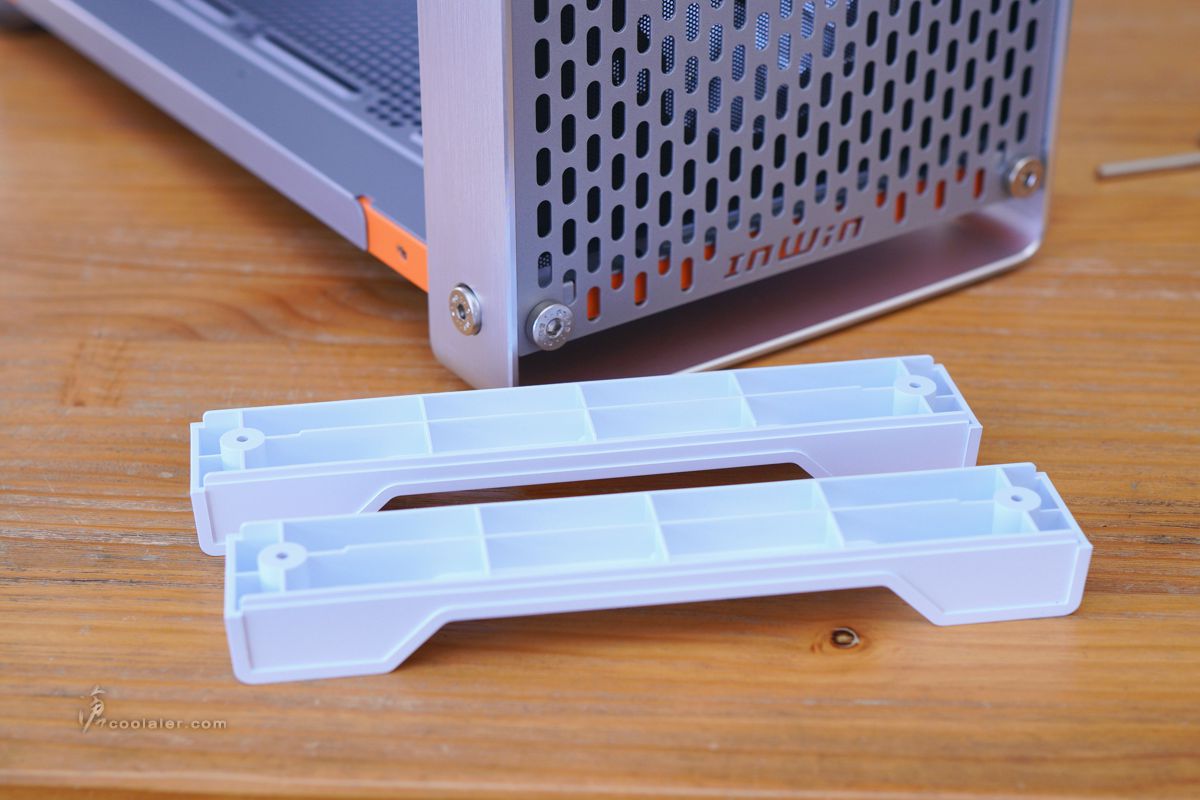
配件有螺絲包、顯卡支撐架、2個整線板兼2.5吋支架、2個腳座、六角扳手、一把一次性束帶、數條魔鬼氈整線束帶、QR Code 說明書連結。
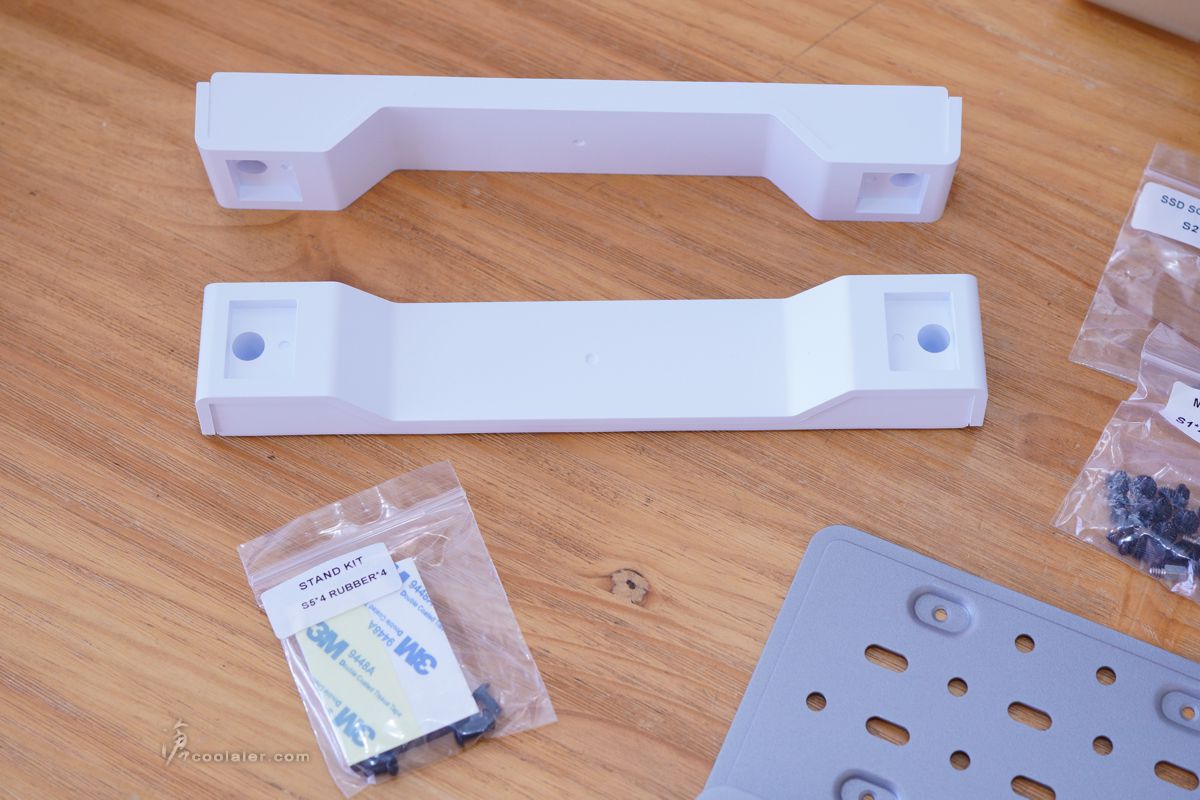
腳座可選擇性安裝,這個下方會有詳細說明。
InWin DUBILI 台灣販售的版本是整機版,也就是不需要拼湊零件。國外一些地區則是 DIY 版本,需要自行組裝。

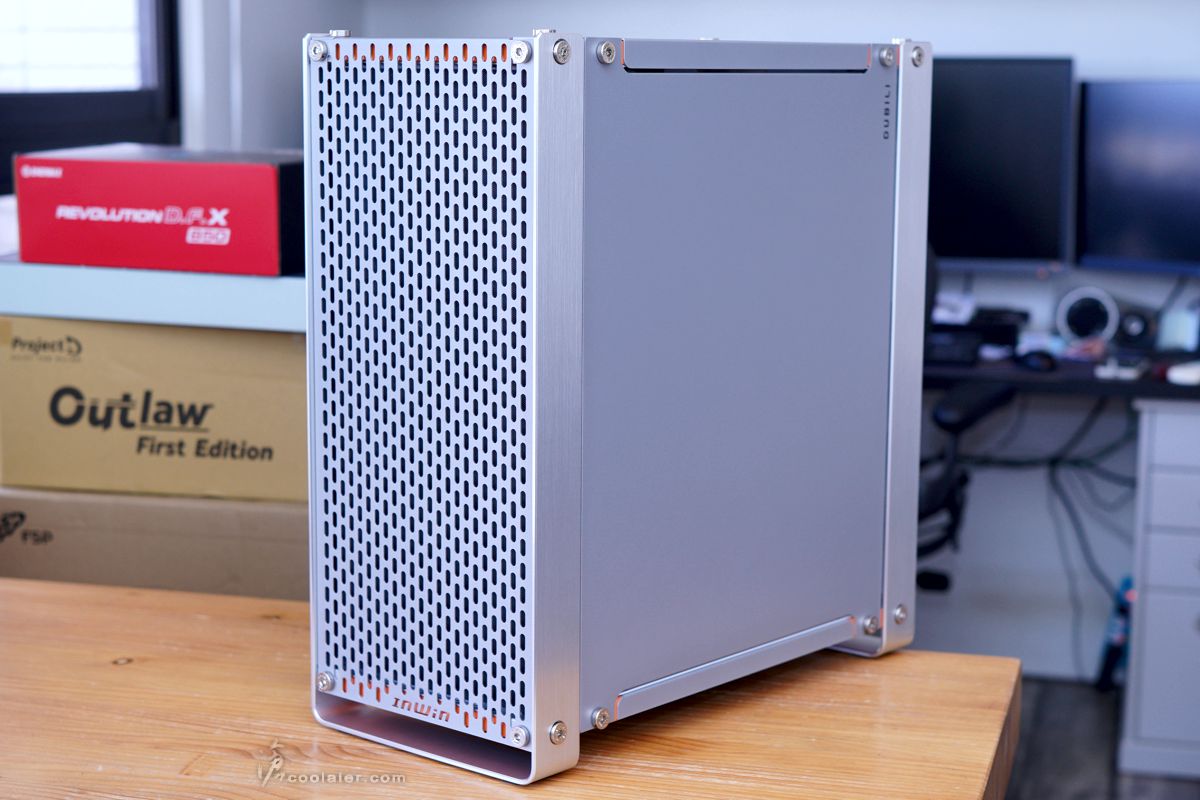
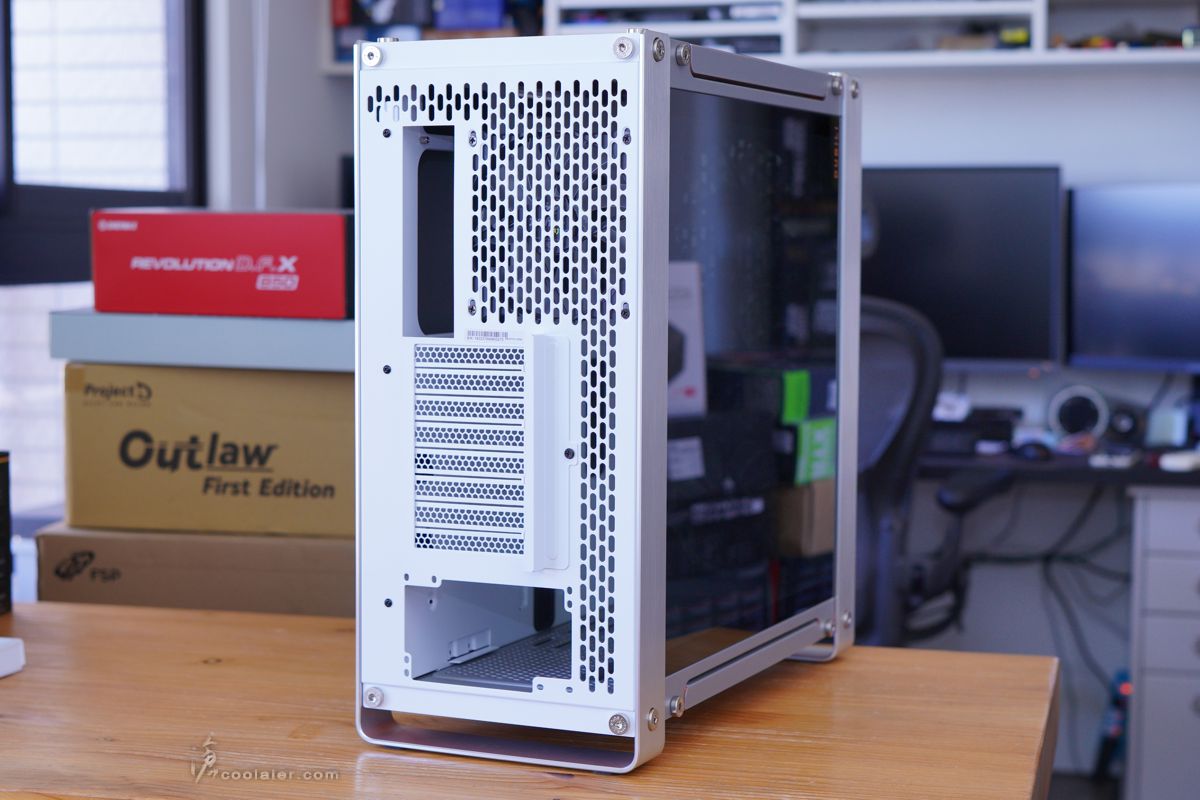
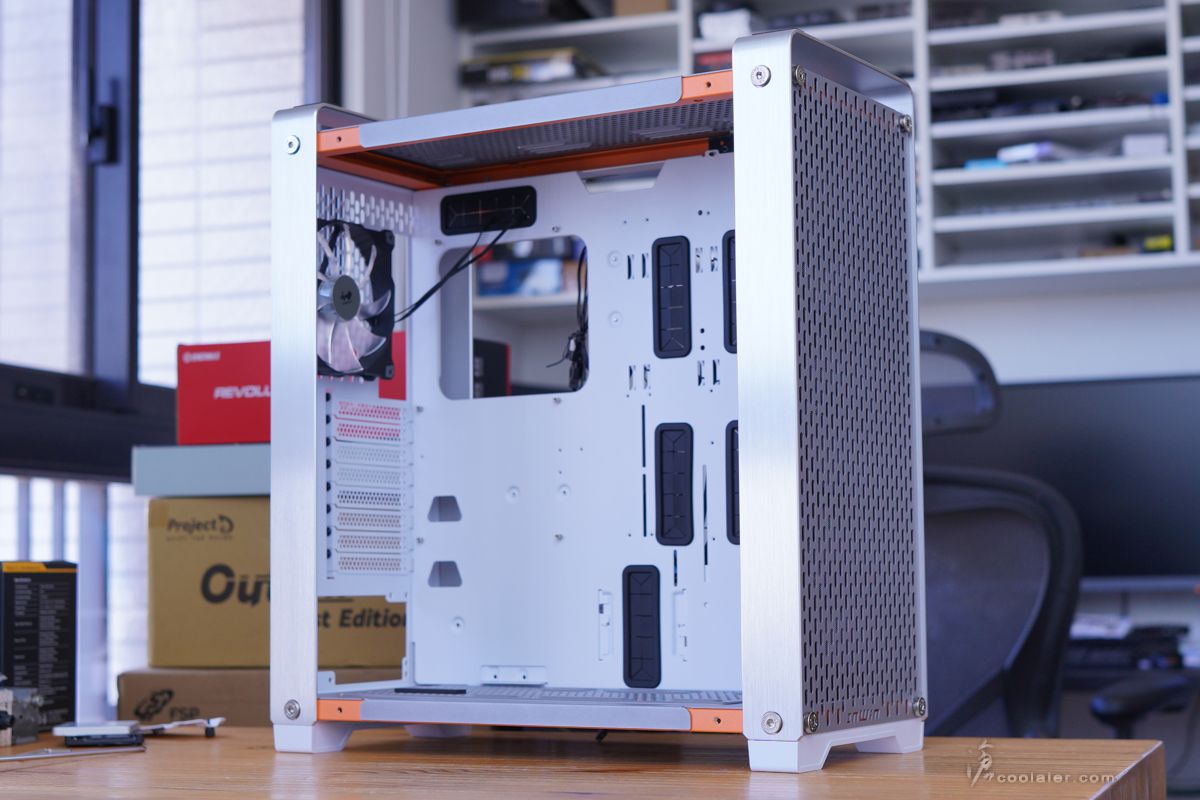
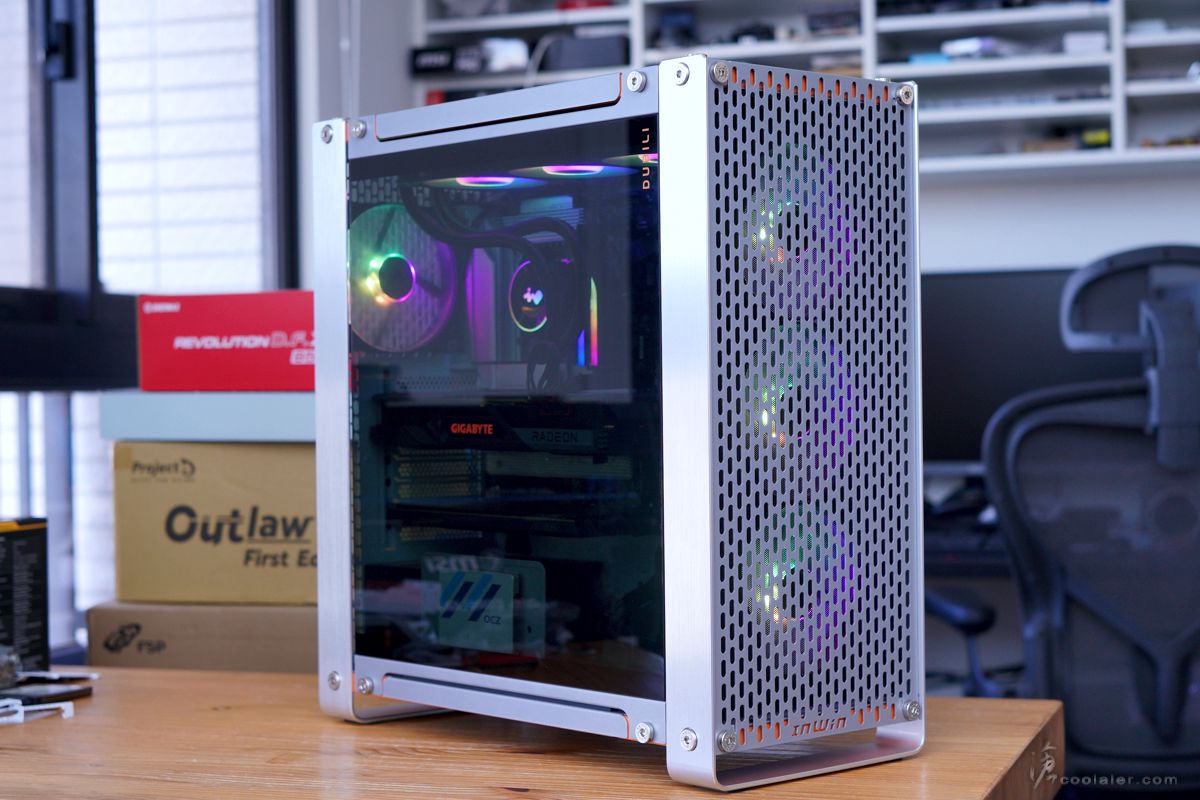
外觀是很有質感的,前後以兩個 U 型鋁合金支架包覆,表面有髮絲紋處理,左側板為不是太透明的鋼化玻璃,玻璃上下採用金屬架固定。整體外觀為鈦灰、銀色搭配,並有少少的橘色點綴。
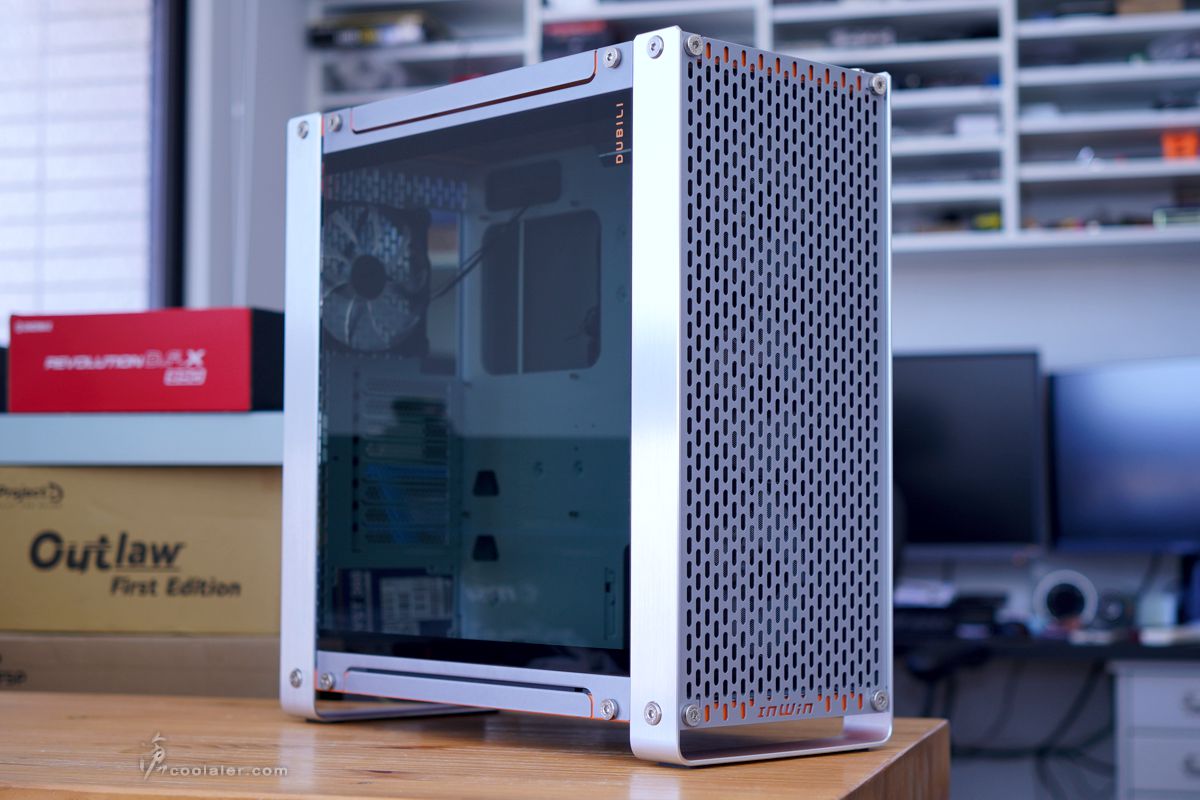
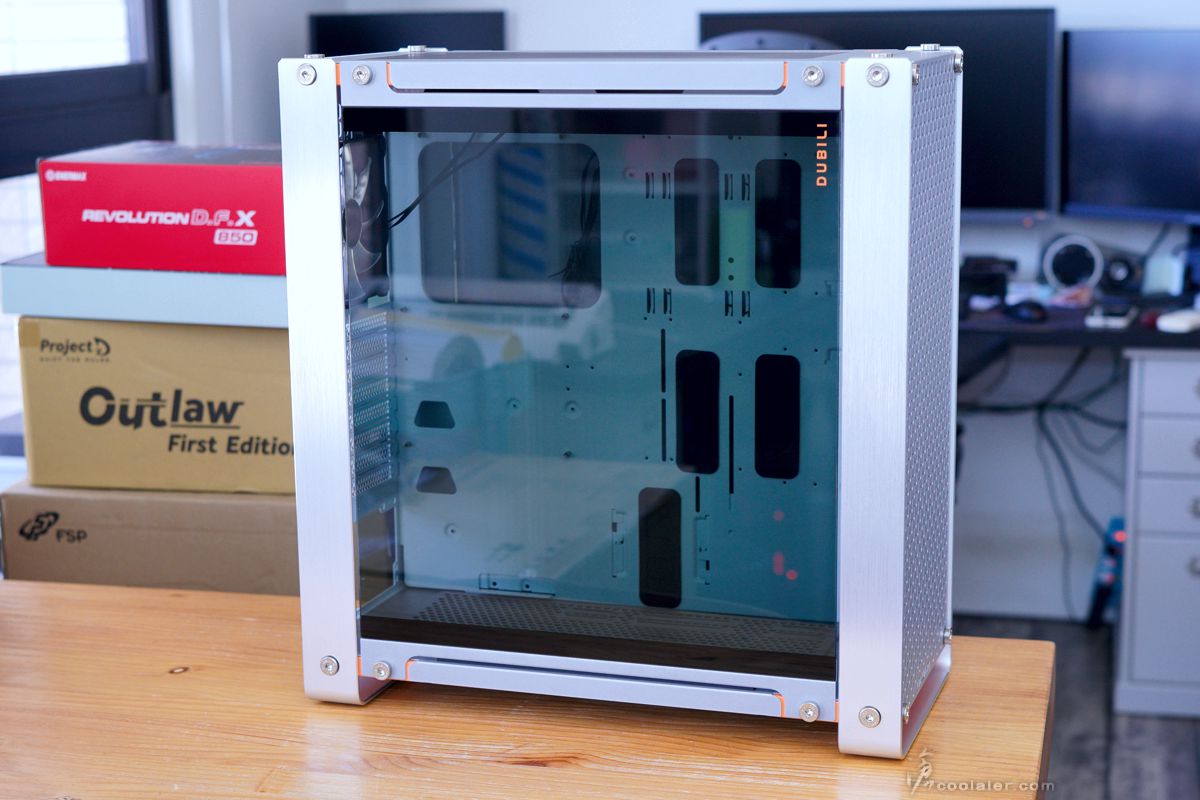
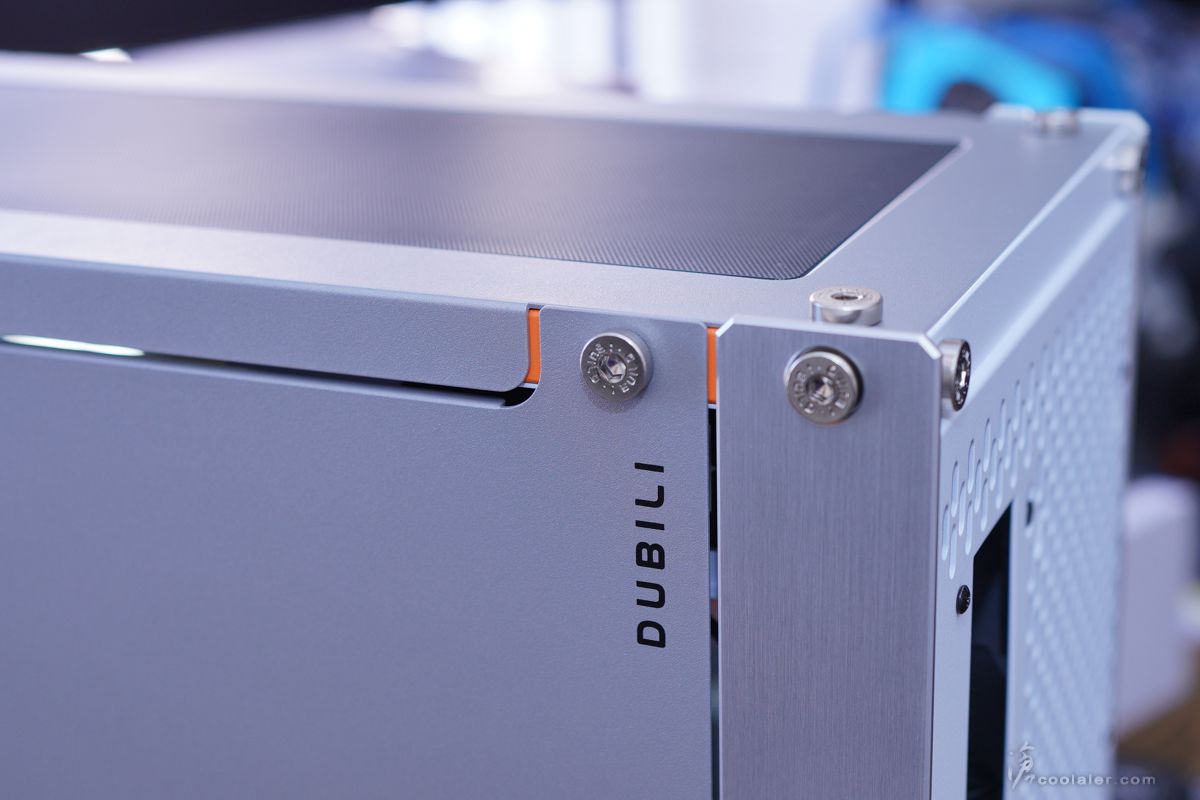
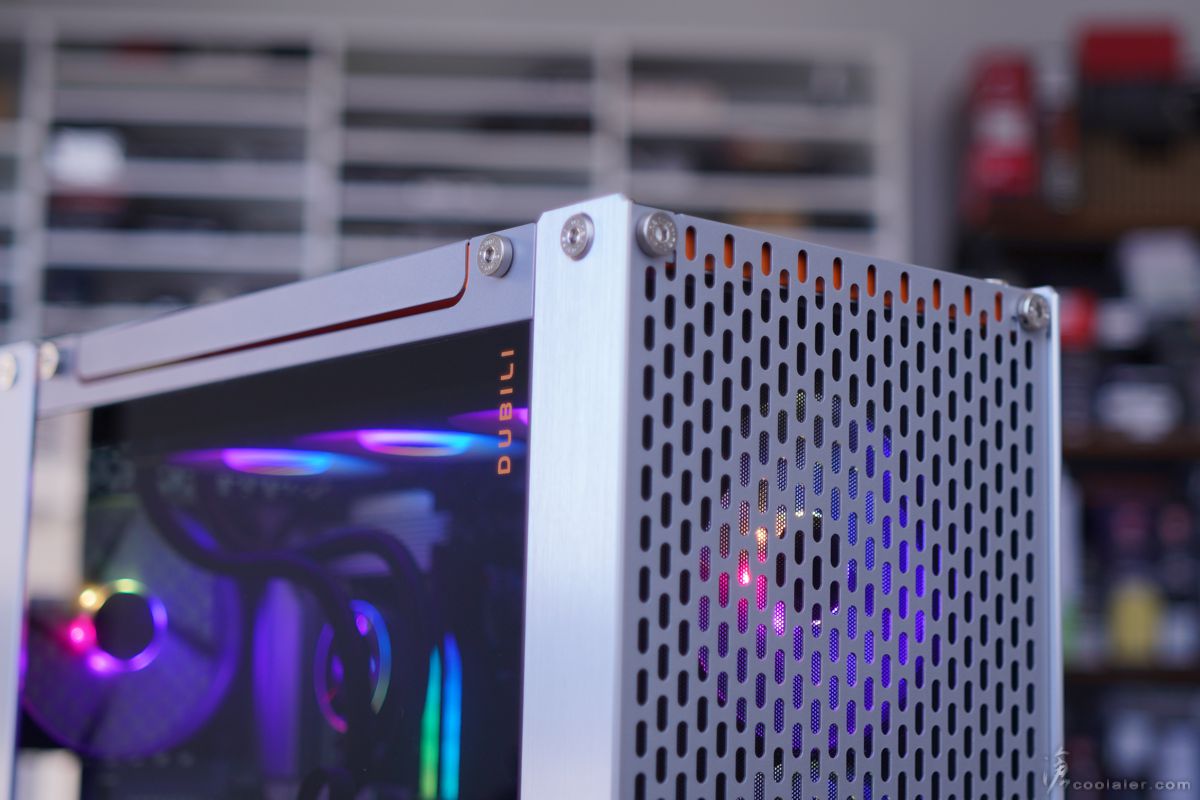
玻璃右上側有 DUBILI 的字樣。

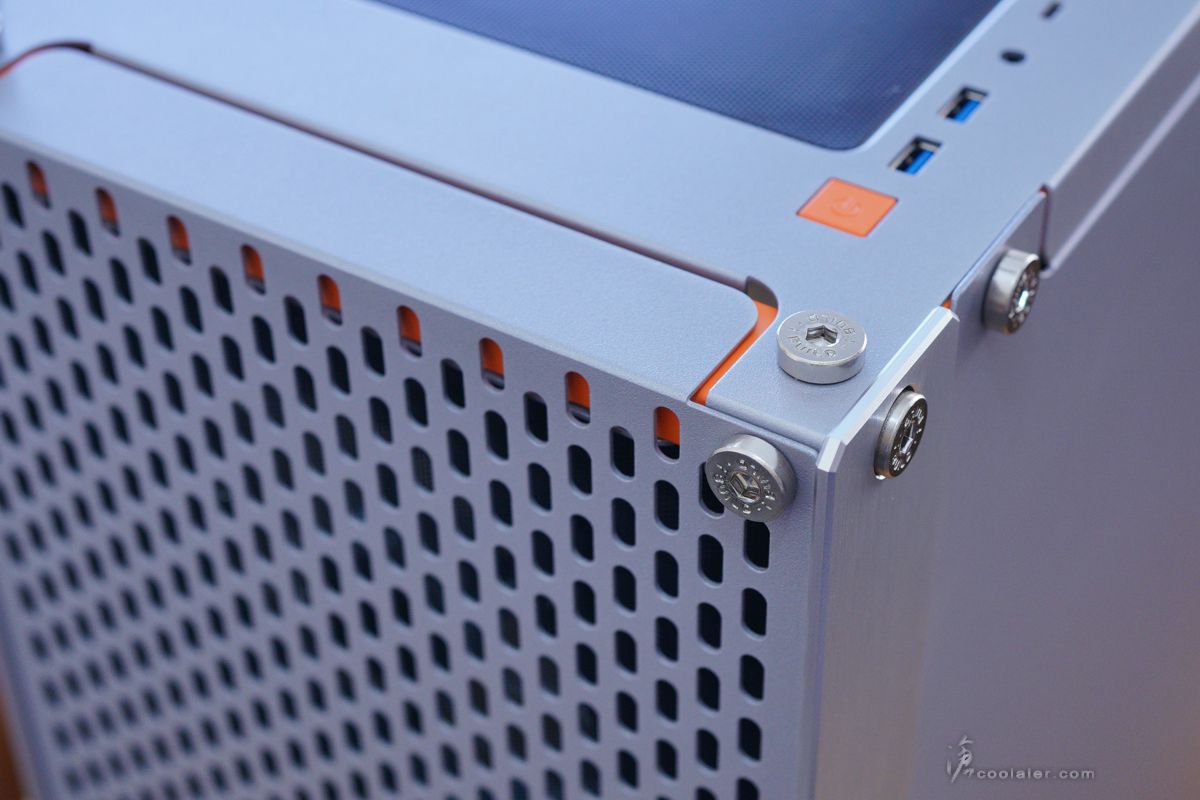
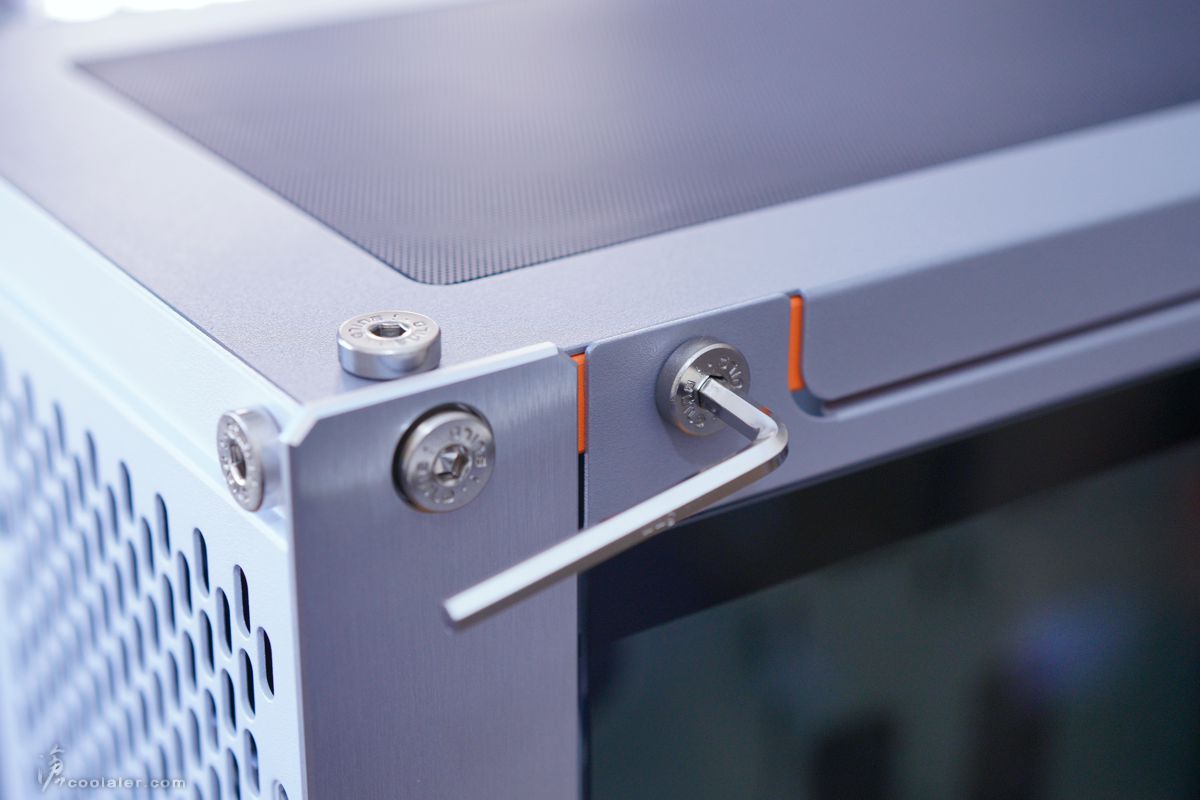
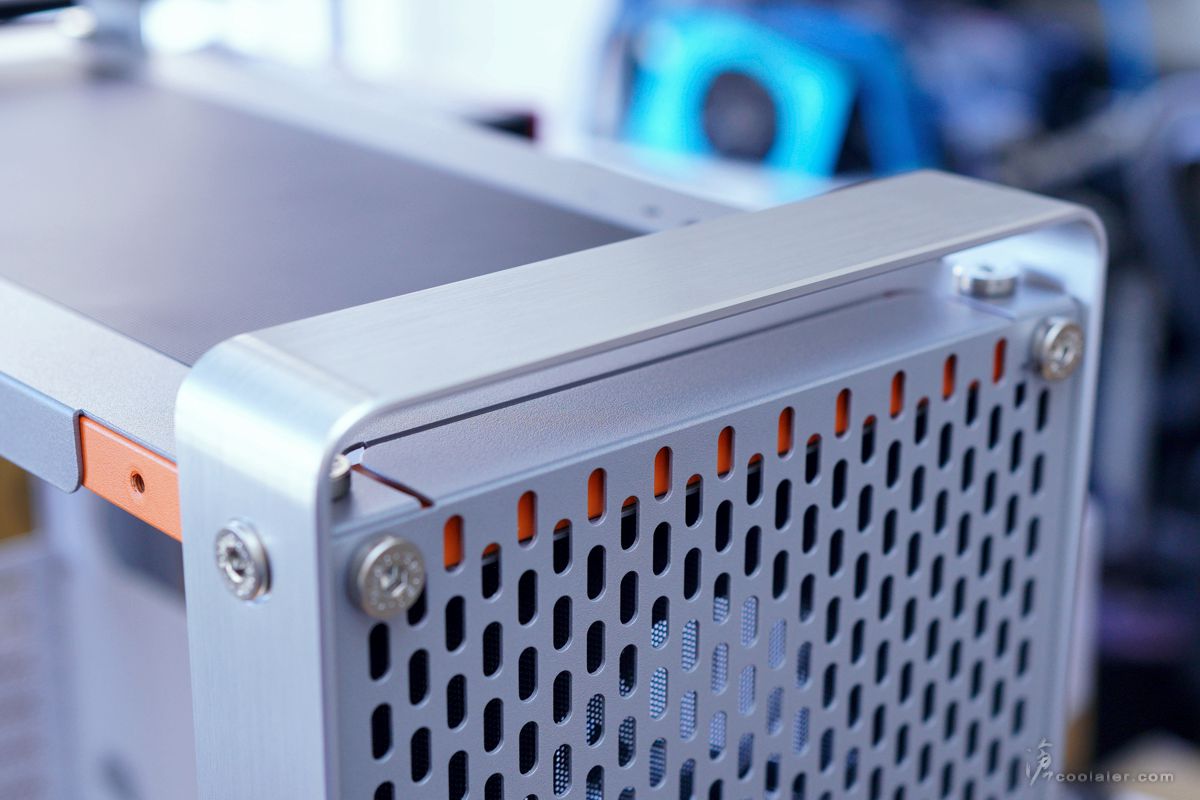
側板、支架、面板等板件固定都是採用相當有質感的螺絲。前後的髮絲紋U型鋁合金支架邊緣有採用鑽切處理。
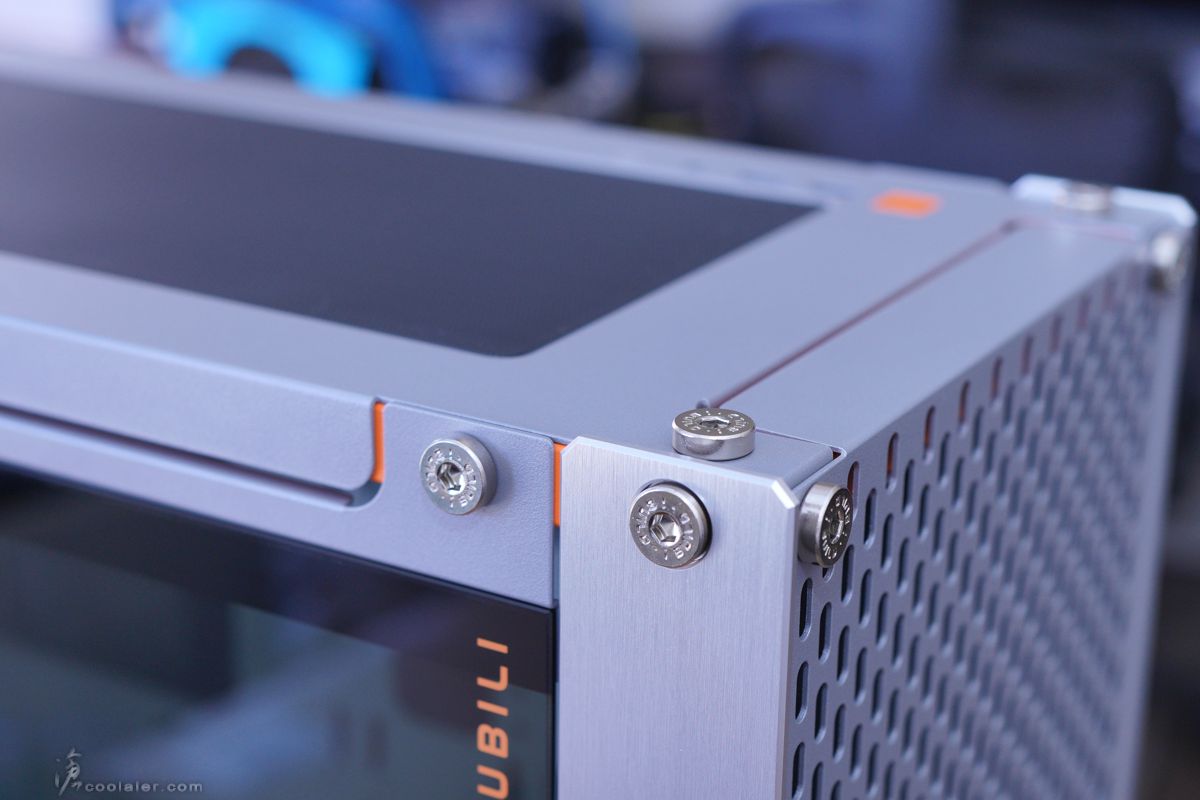
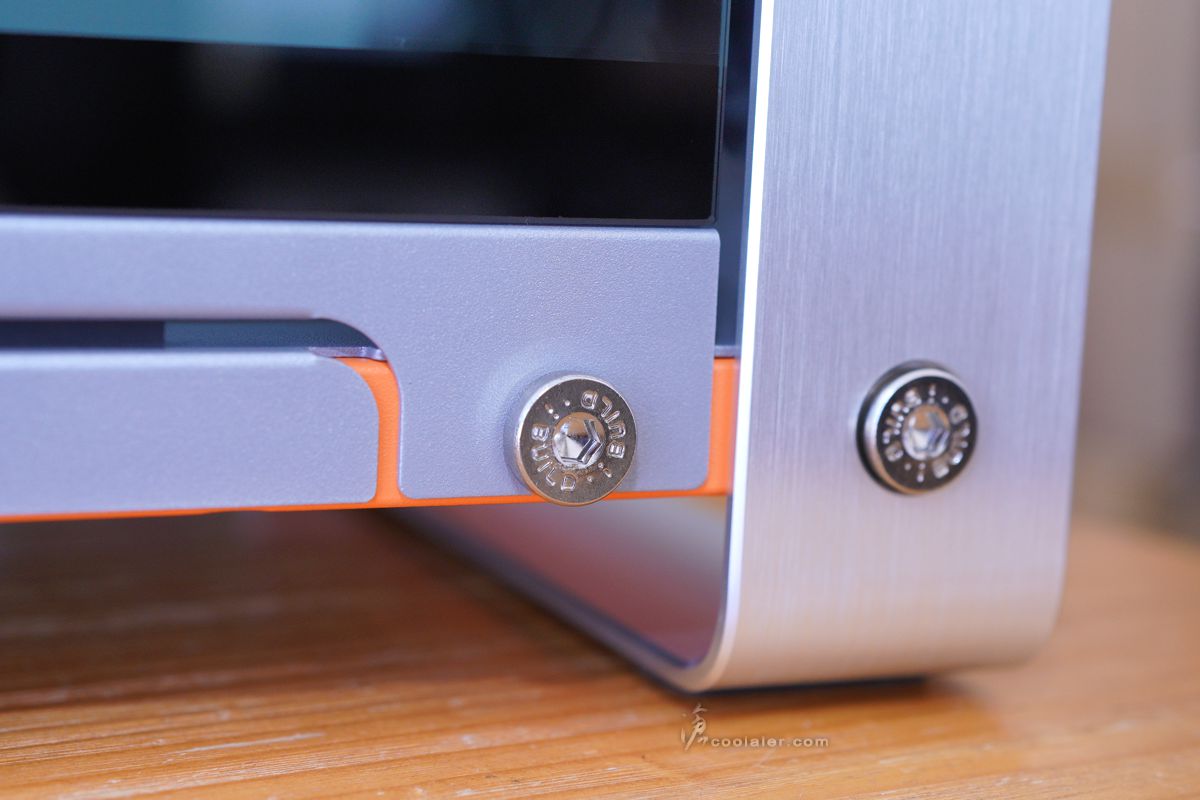
外部固定螺絲上面還有 iBUILD 鐳雕字樣,內六角的規格。
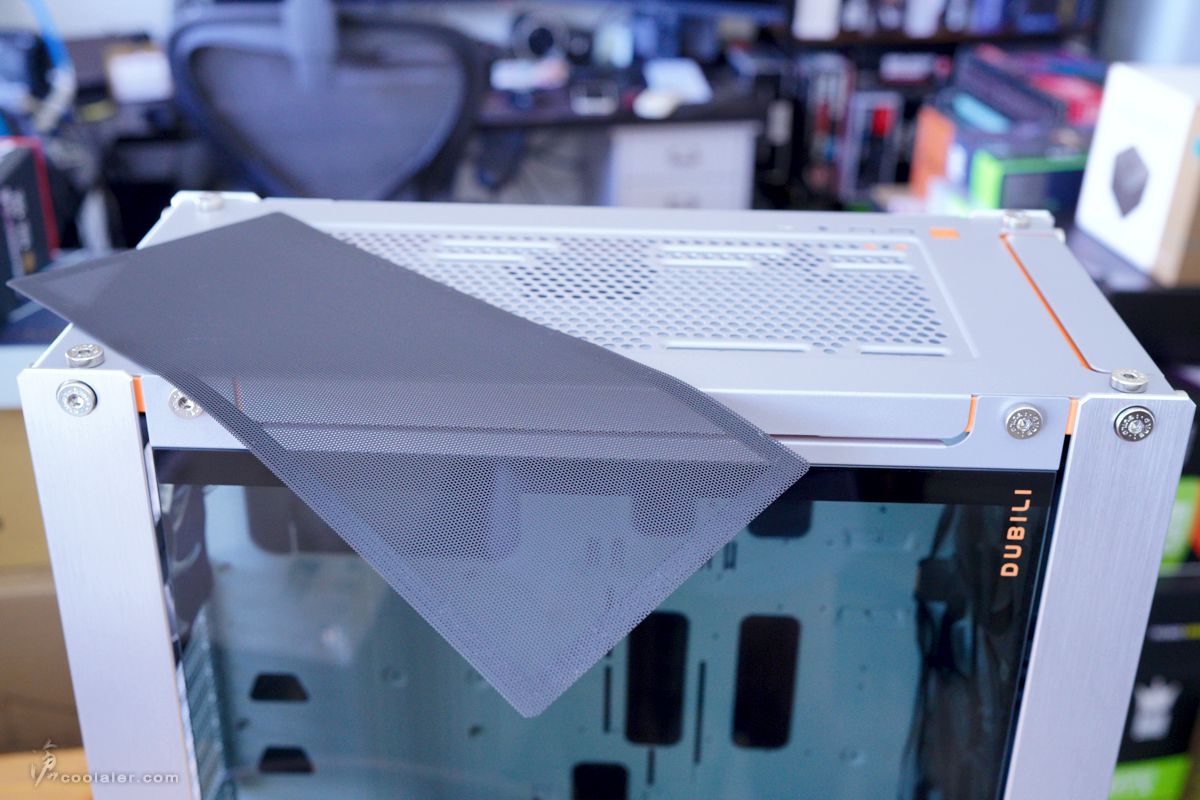
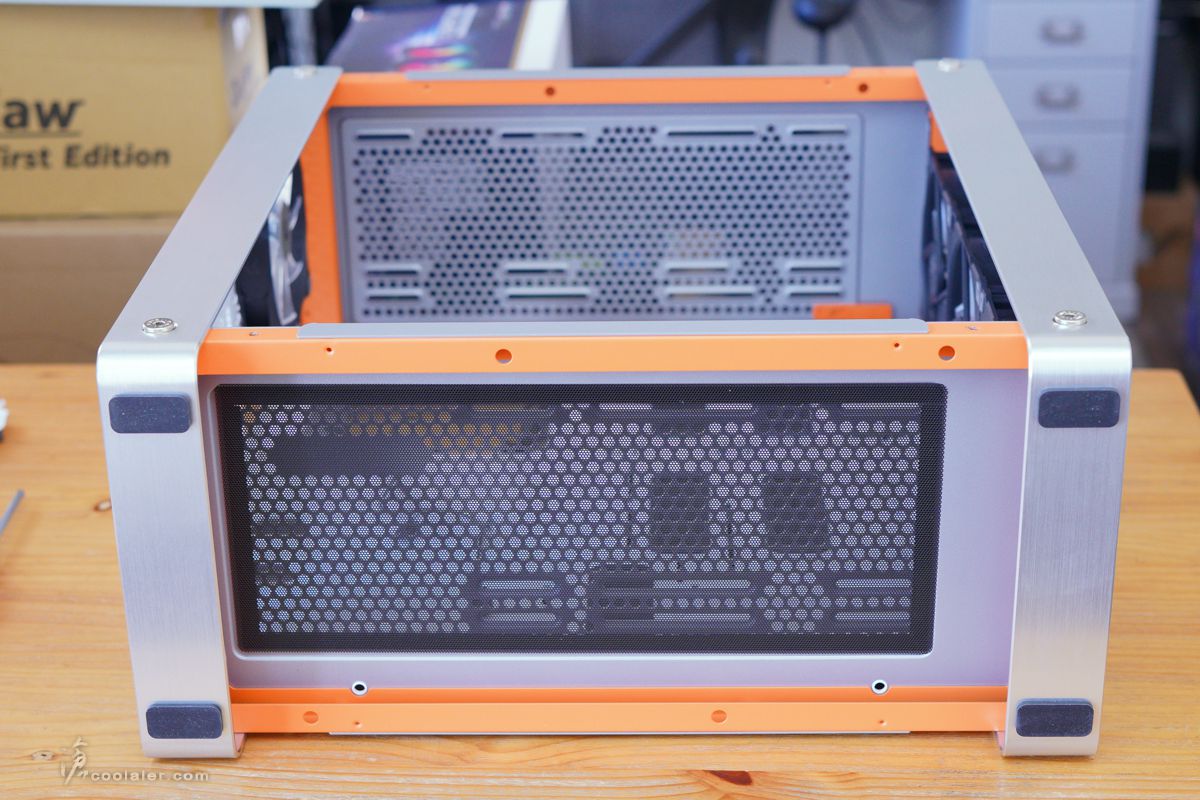
頂部採用大面積通風孔,外部則鋪有磁吸式濾網。
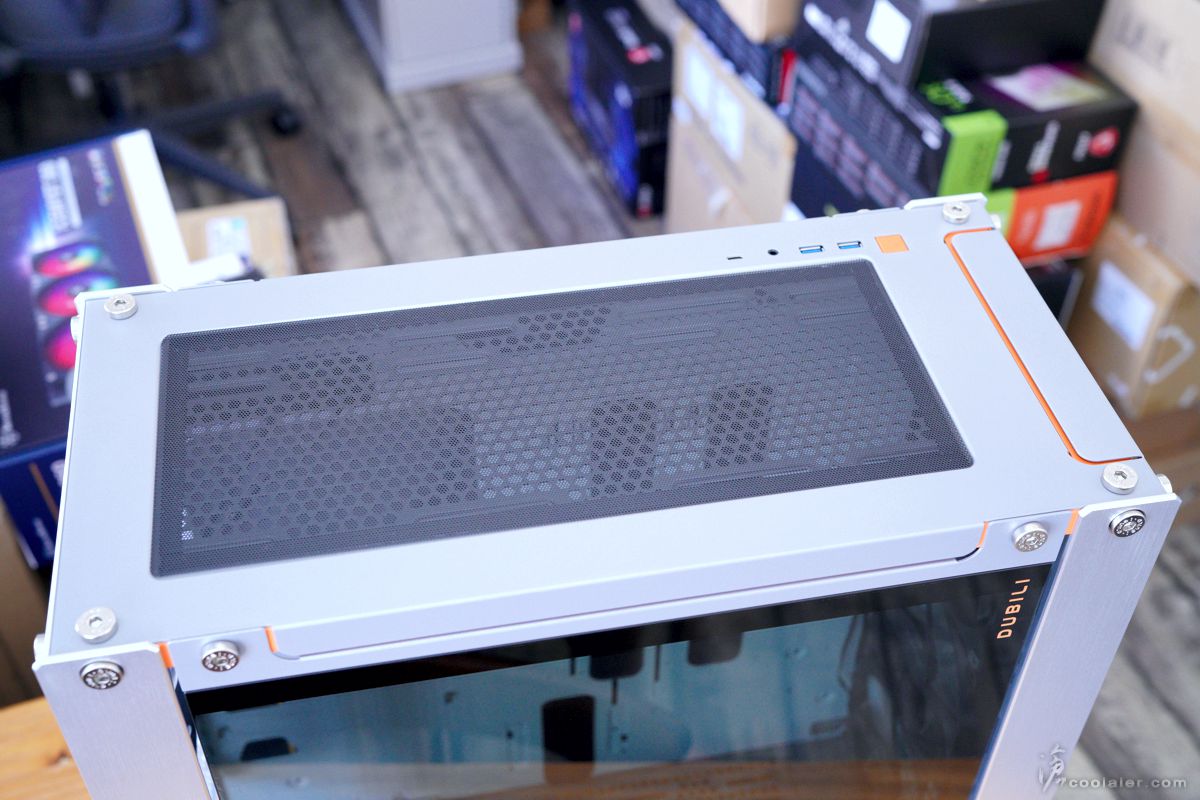
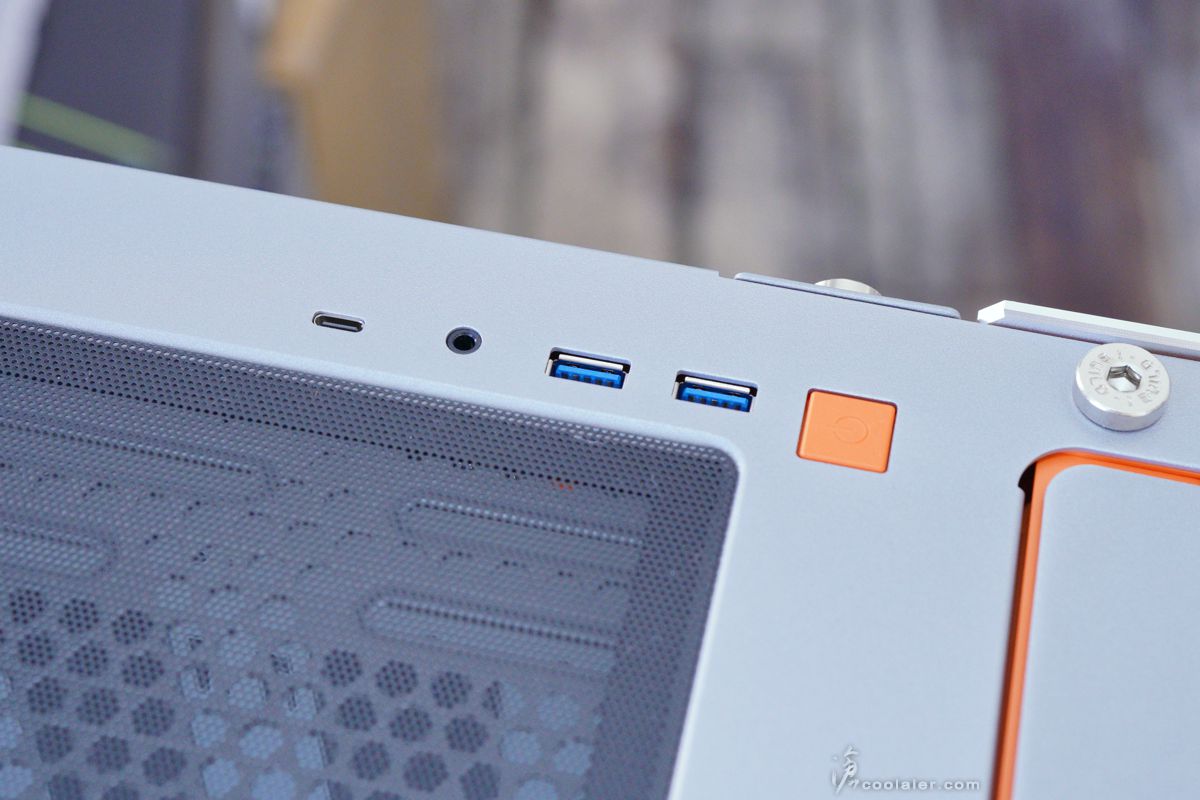
IO 埠在頂部右側邊位置,有 USB 3.2 Gen 2×2 Type-C、複合式耳麥孔、2個 USB 3.0、電源鍵。
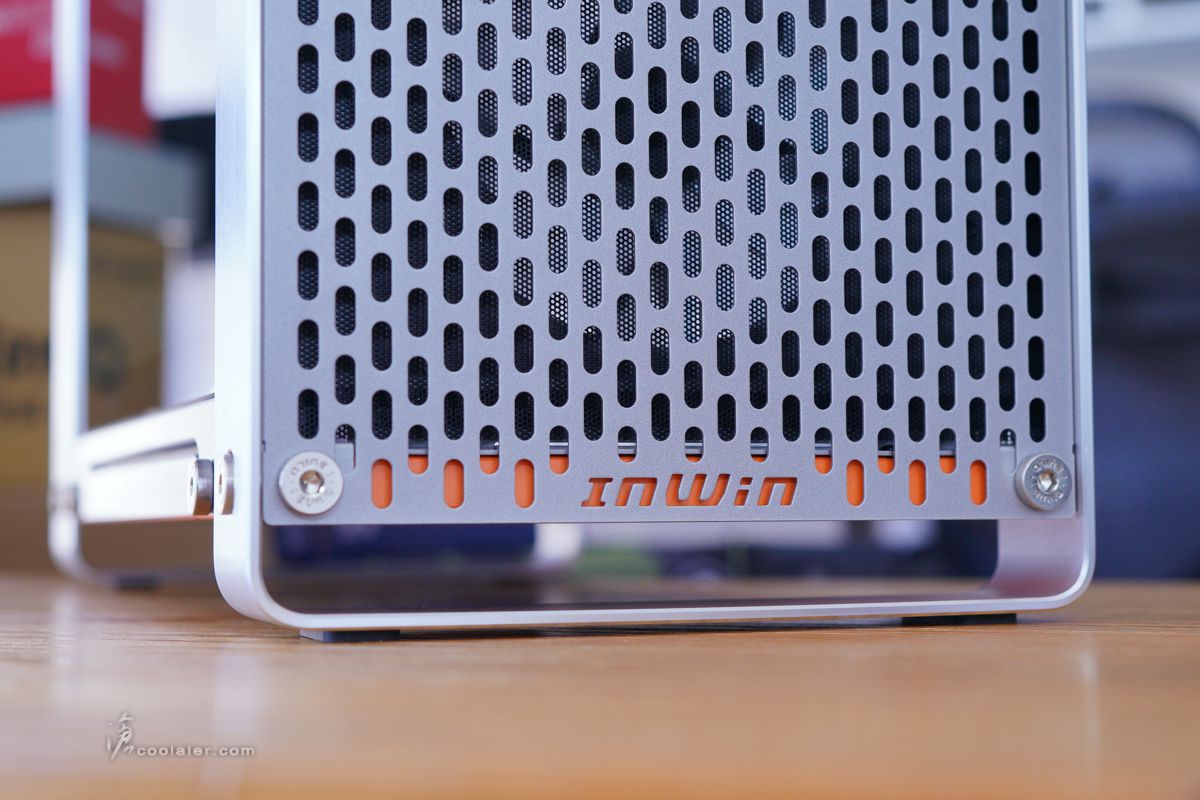
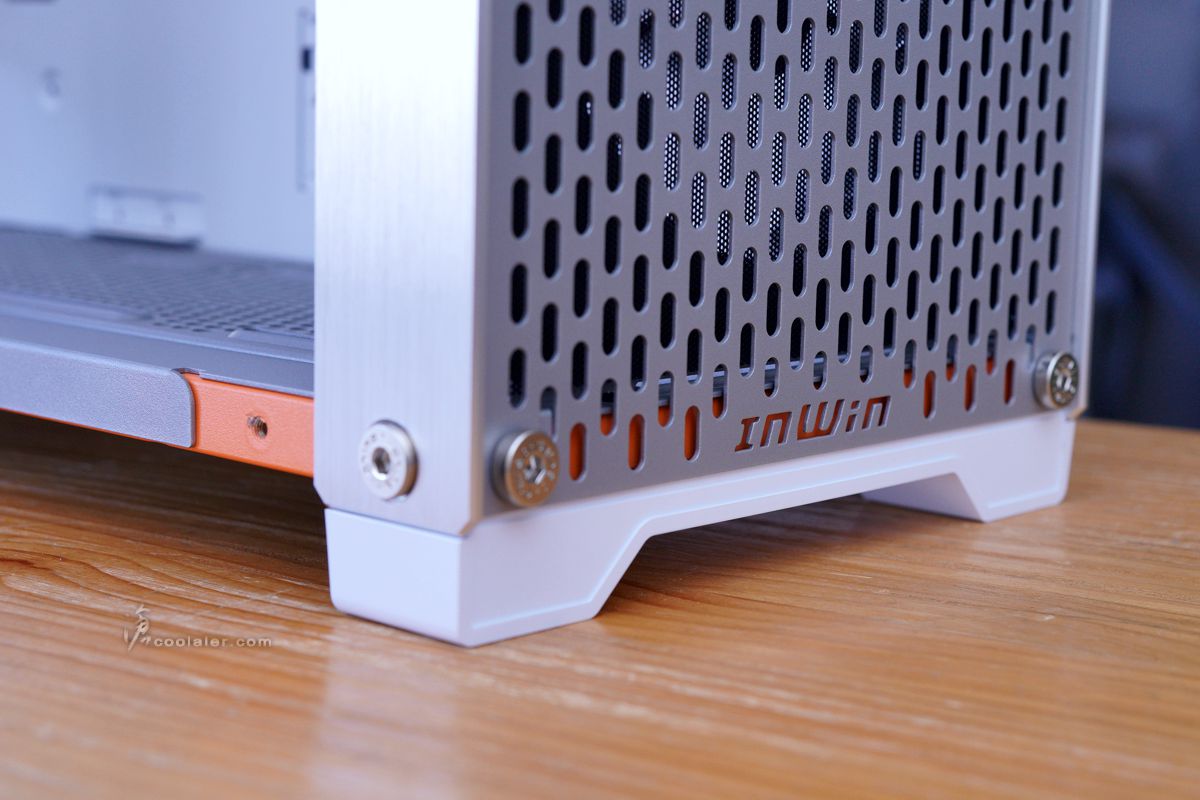
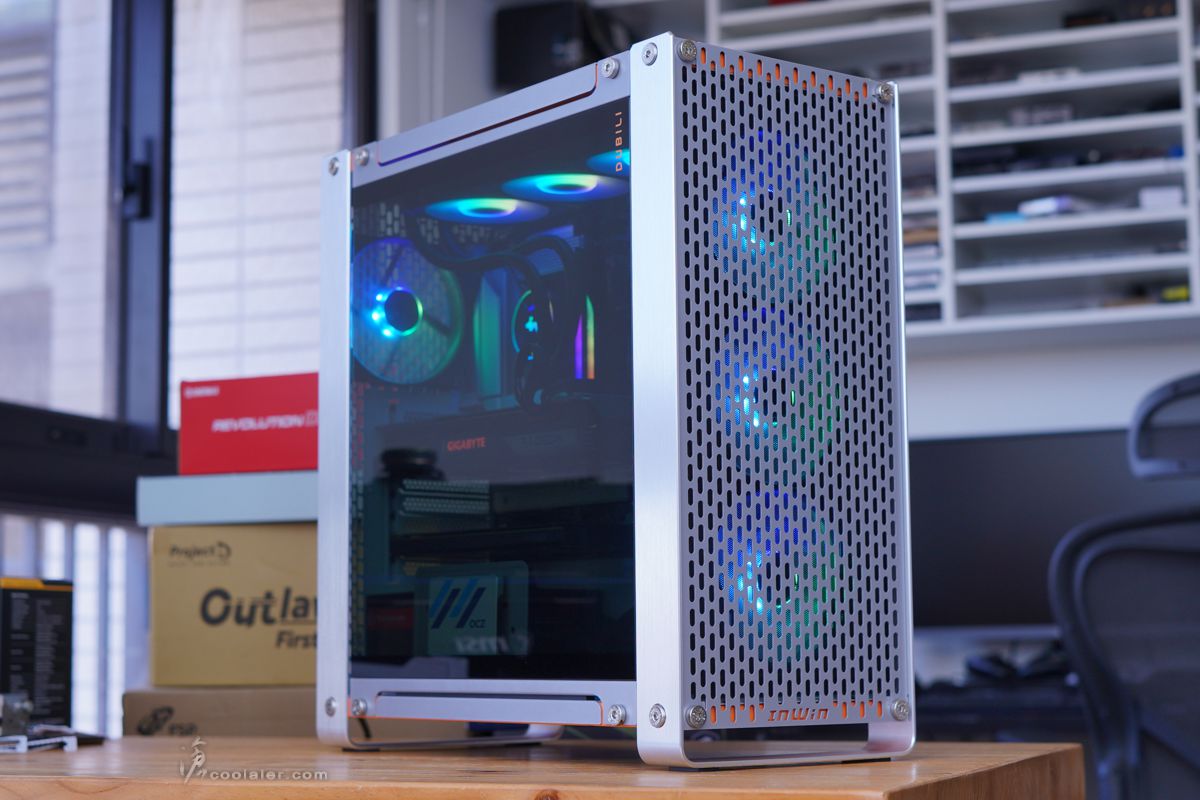
面板為全通風孔,長橢圓形排列,內部有濾網。

面板也是採用大圓形螺絲固定。
原本出廠預設的腳墊是以鋁合金支架為支撐,這部分可以倒裝翻轉到上面作為提把。
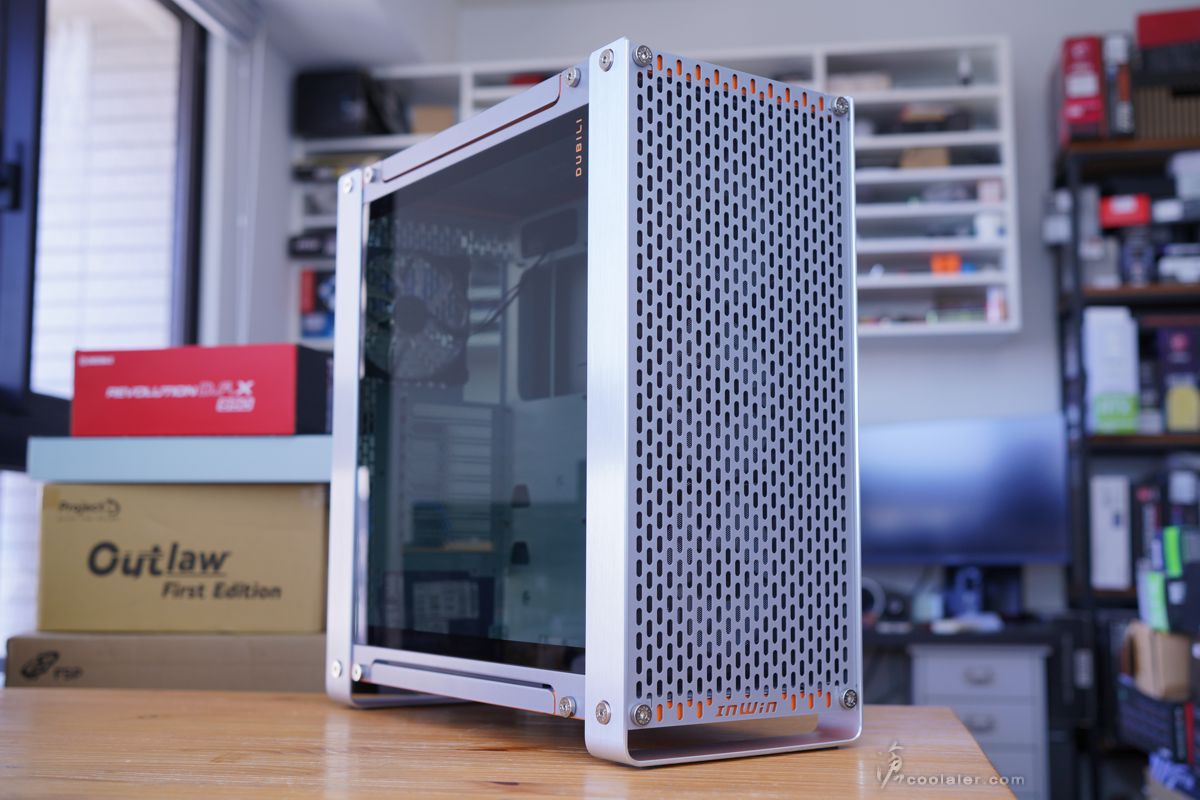
面板上下內部有橘色組件綴飾,下方剛好襯托出 InWin 字樣。
右側板無打孔,造型上與左側板相同。
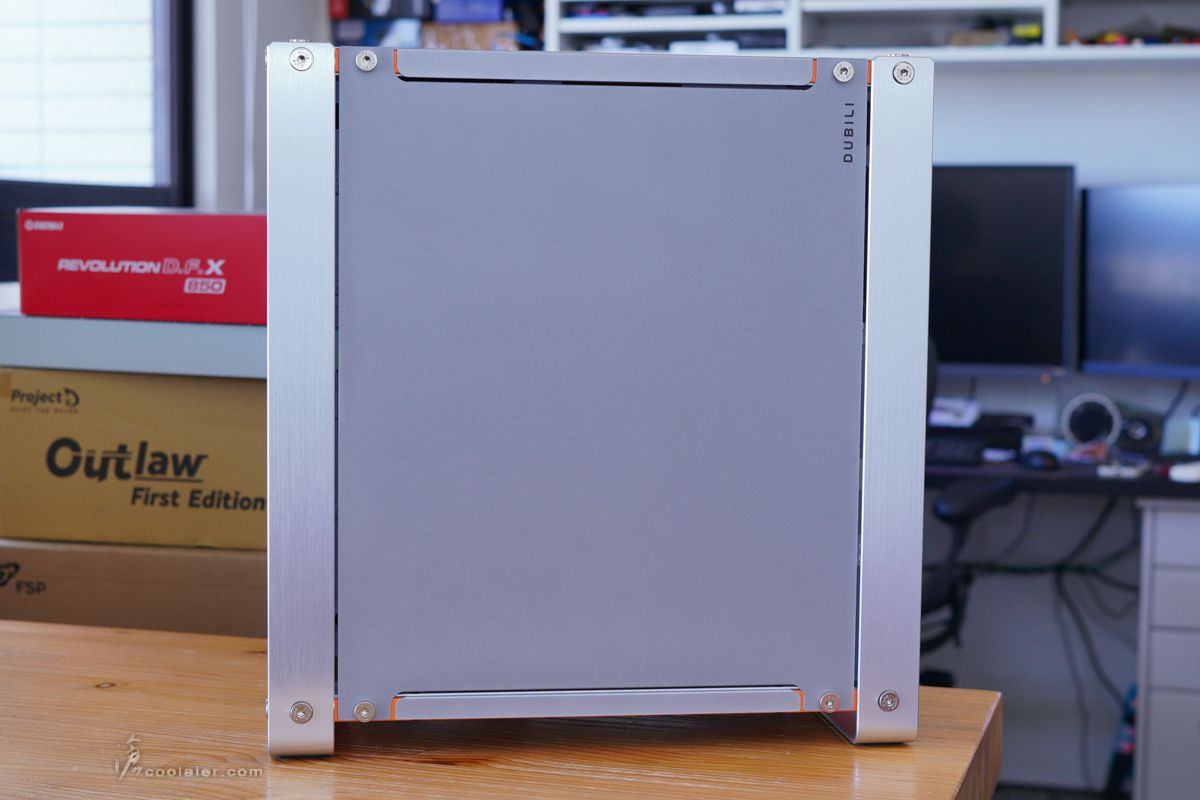
在右上側一樣有 DUBILI 字樣。
後方也盡可能打上長橢圓形的通風開孔。
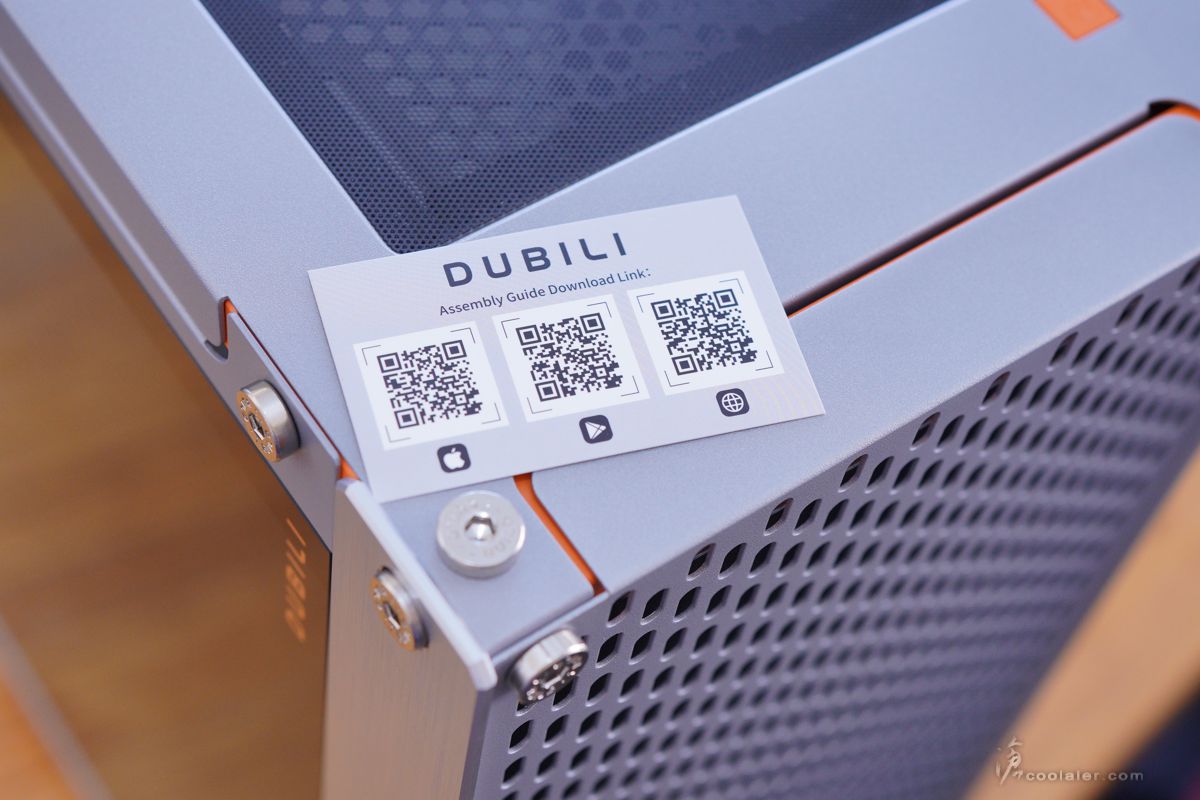
打開內部之前先來看一下說明書的部分, InWin 目前都是給一張 QR Code 讓玩家掃,連結可以對應 Apple、Android 或網路版,前兩者為 App,需要安裝。
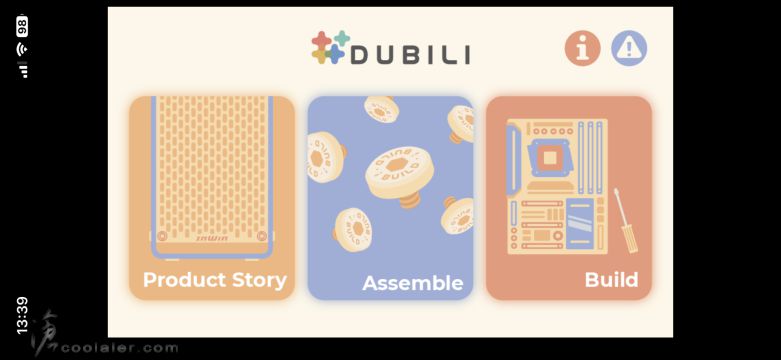
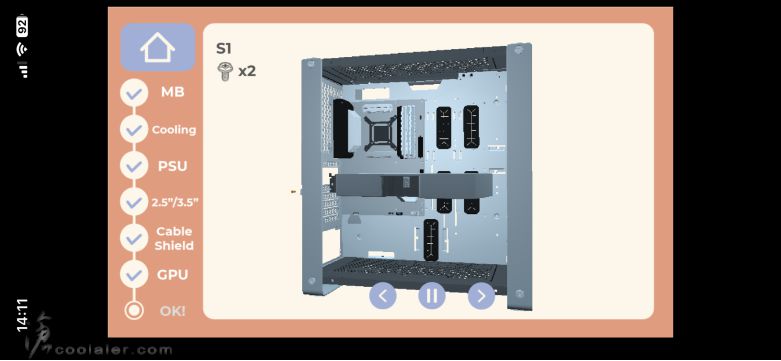
這個說明書 App 頗為用心,點開之後可以看到三個部分,產品故事、零件與數量、安裝說明。
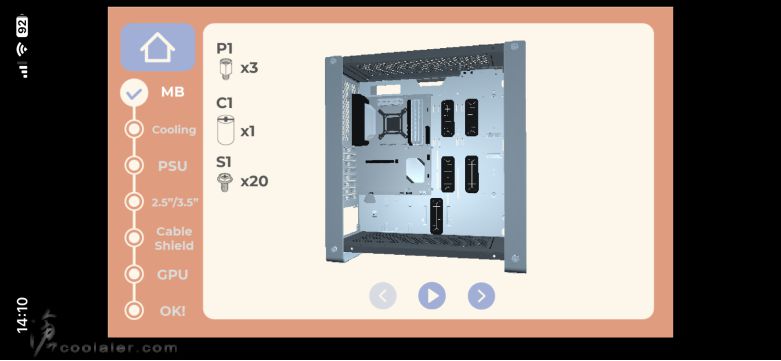
說明書也不是一般 PDF 那種,而是採用 3D 動畫教學,相當直觀方便,在畫面上也直接標註了需要使用那些螺絲或工具。
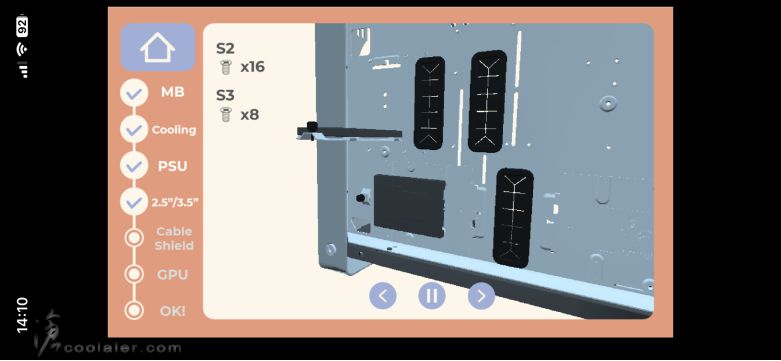
側板採用四邊螺絲固定,配件中有一個六角扳手可用。拆側板時需要注意,因為沒有防掉落設計,所以拆下第四個螺絲時請用手扶好側板,或者讓機殼平躺著拆是比較保險。
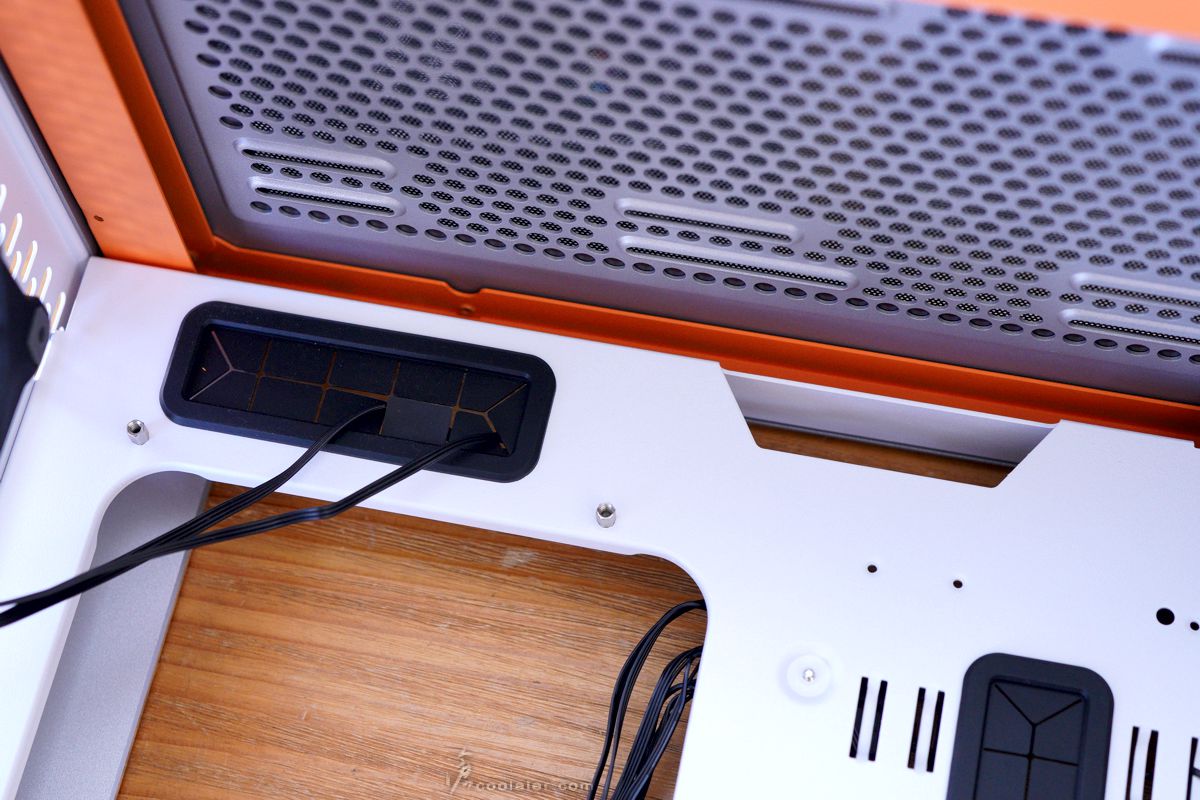
內部空間是相當大,下方電源沒有分倉遮板,安裝底板是白色,主板位側邊則是有走線開孔,並且套上橡膠墊增添質感。
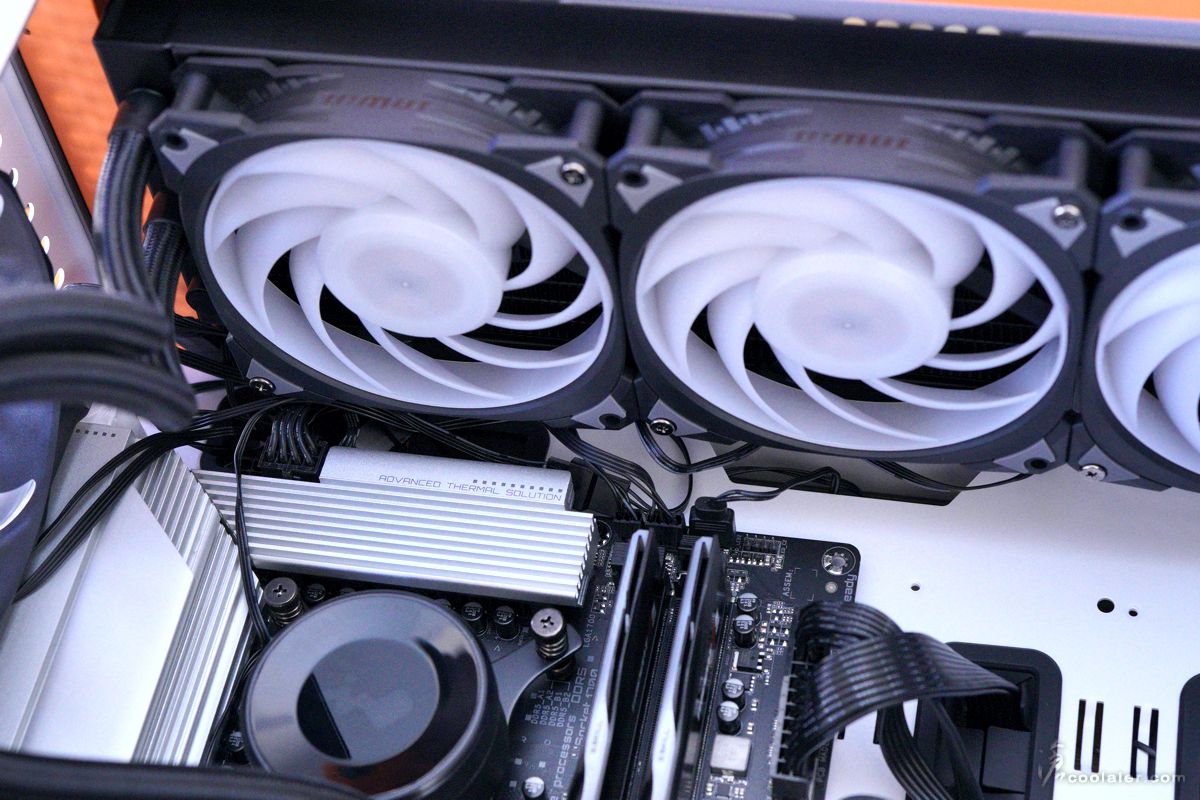
頂部可安裝3顆12或2顆14公分風扇,亦可支援36或28公分水冷。
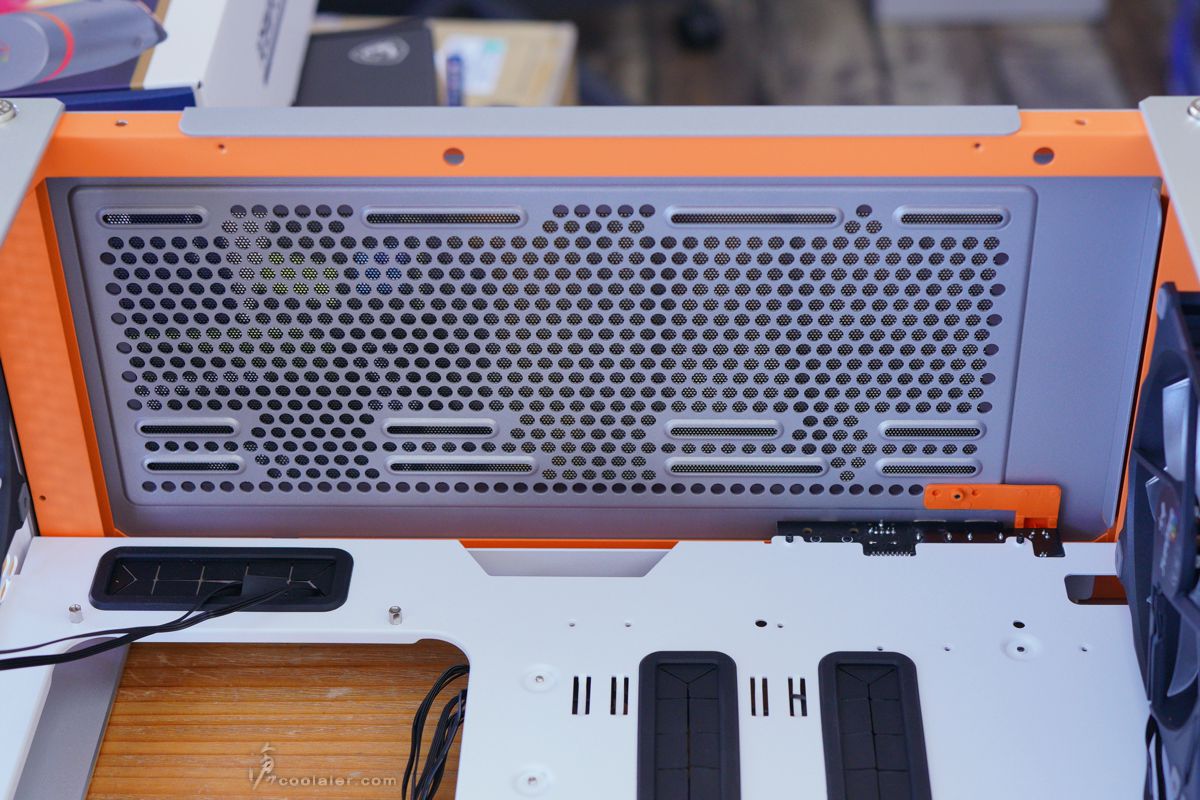
主板上方有預留較多的空間給水冷安裝。
後方預裝1顆14公分 Jupiter AJ140 風扇,支援 ARGB。擴充卡槽有8個,檔板可重複使用。
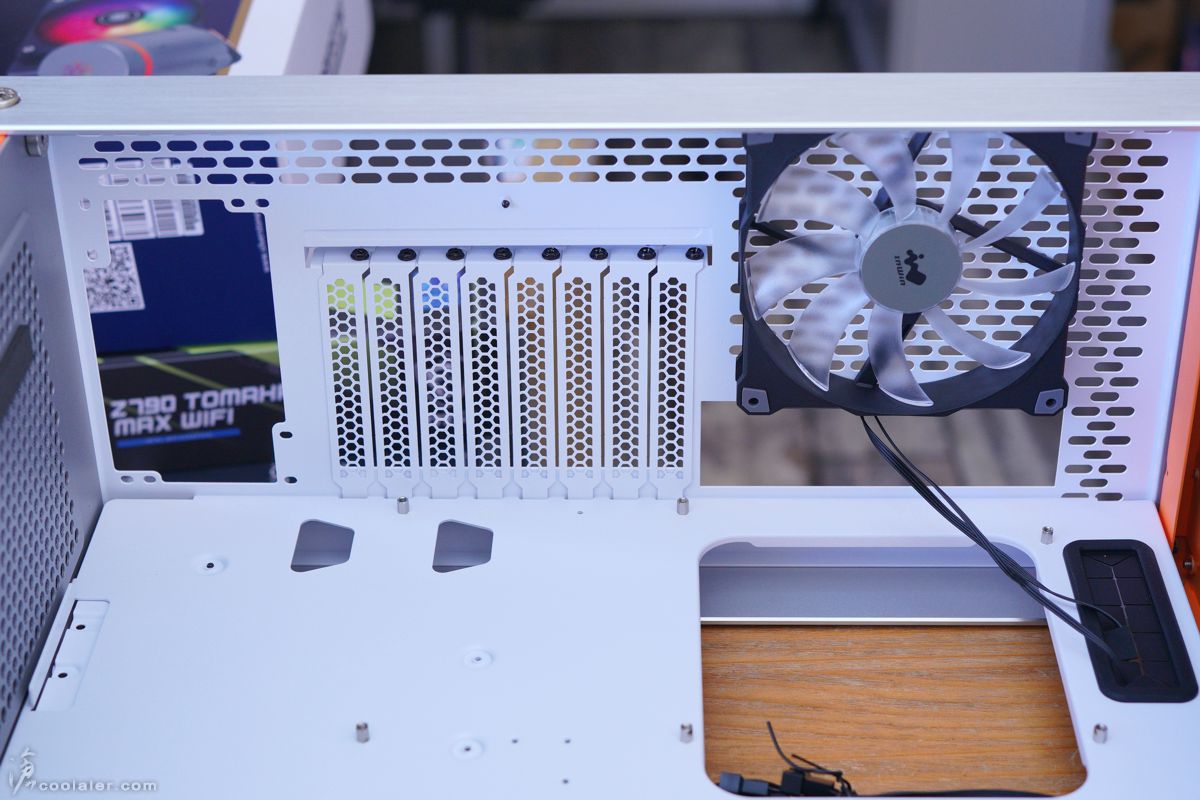
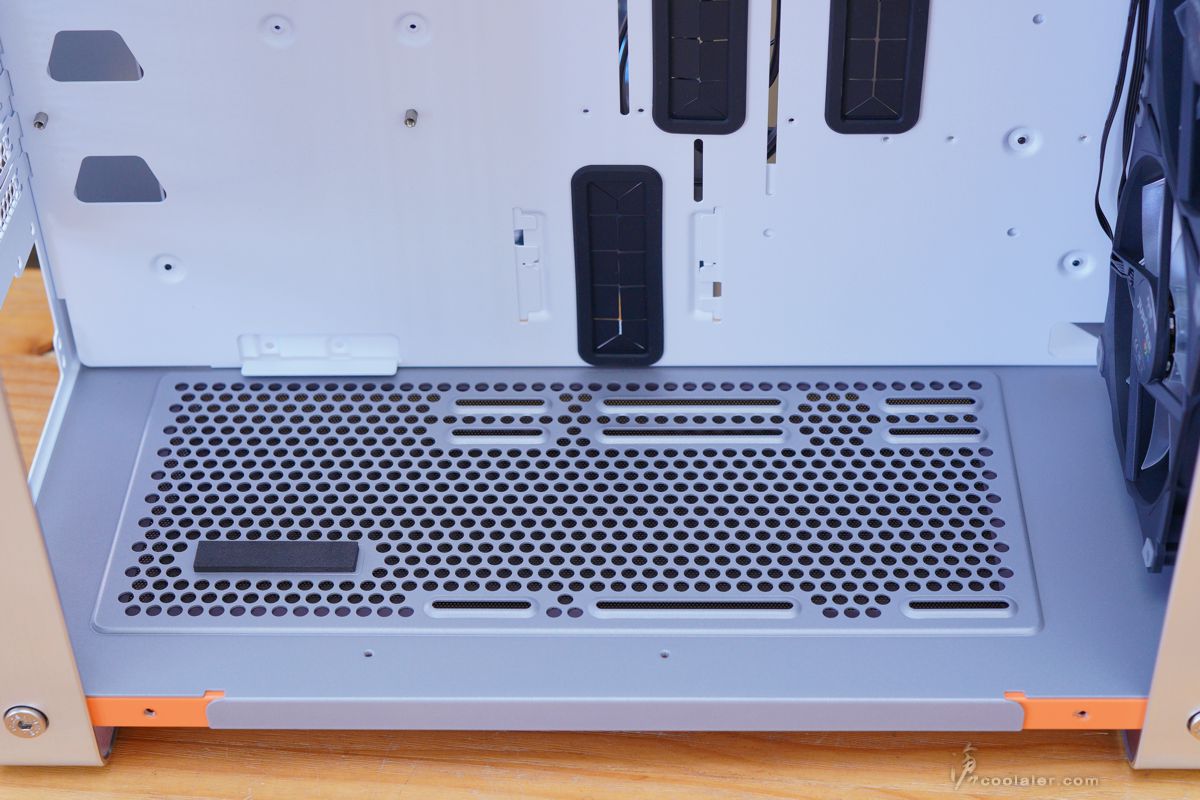
下方為電源安裝位,右側邊如果不安裝風扇幾乎是沒甚麼長度限制就是。右側位置可以安裝2顆12公分或1顆14公分風扇。
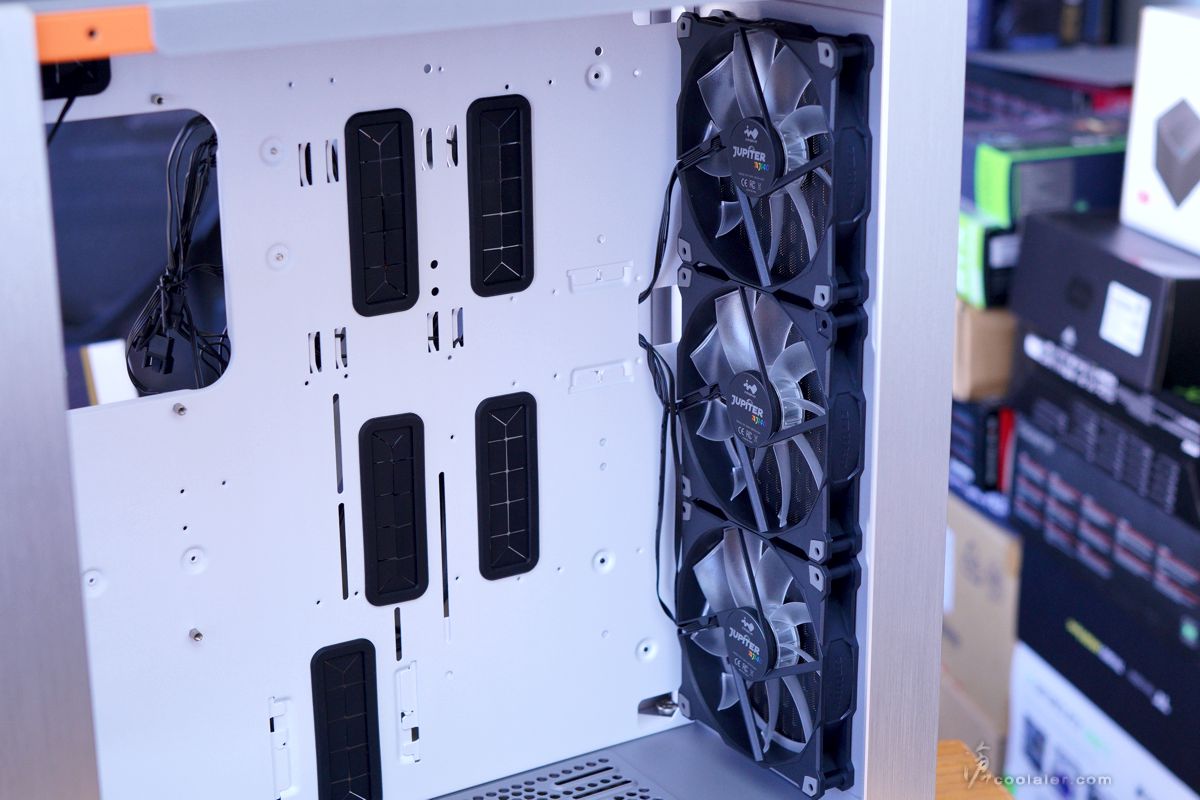
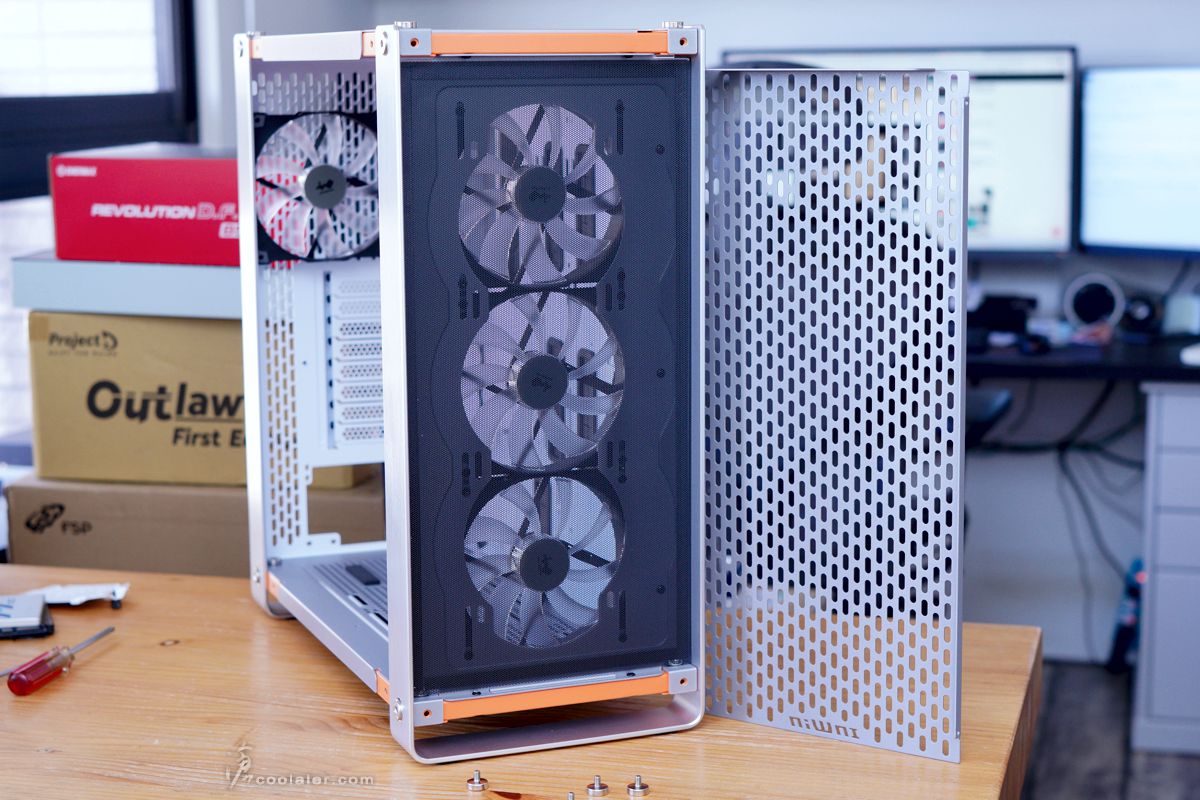
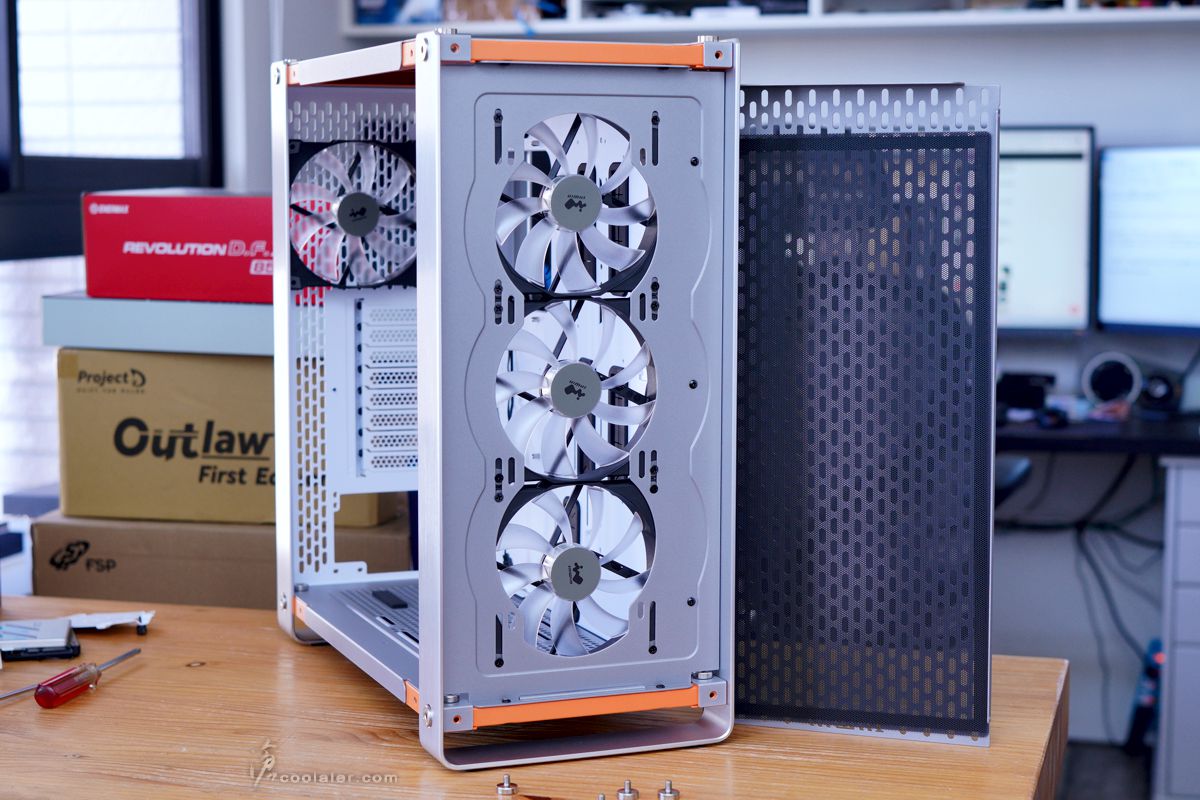
前面板內側預裝3顆14公分 Jupiter AJ140 風扇,支援 ARGB。
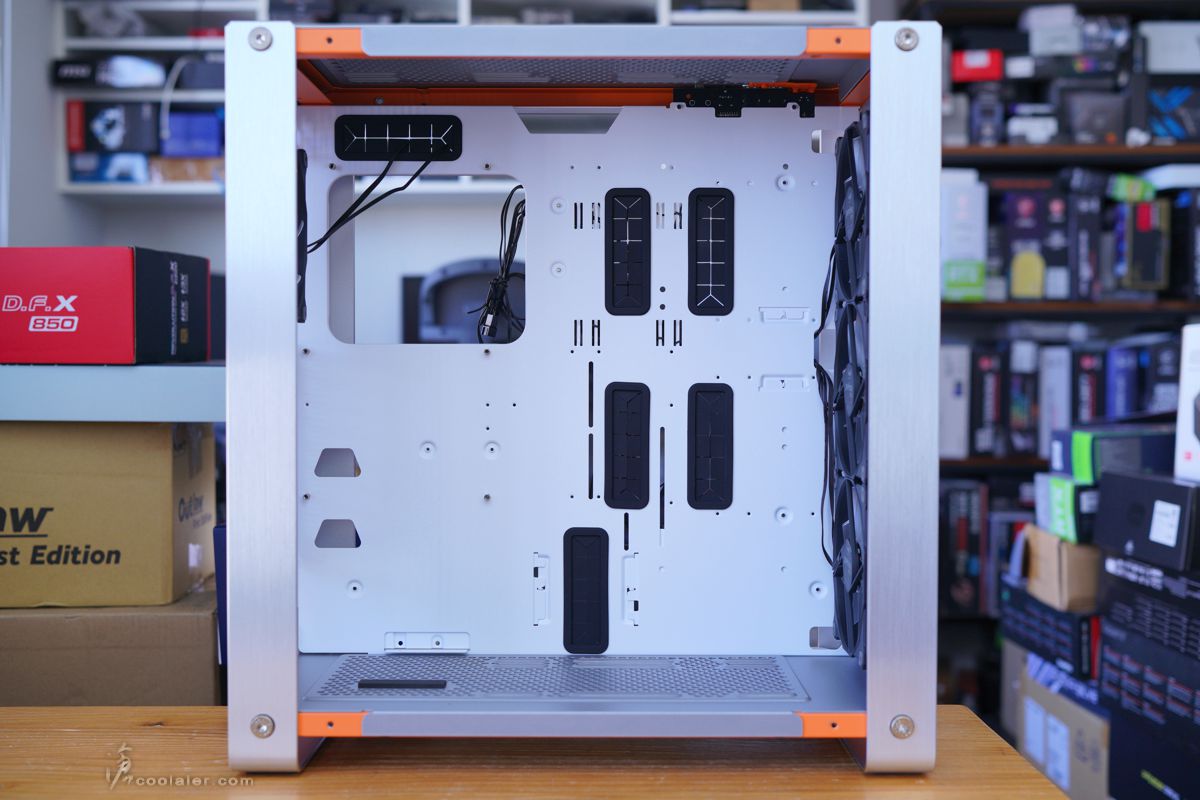
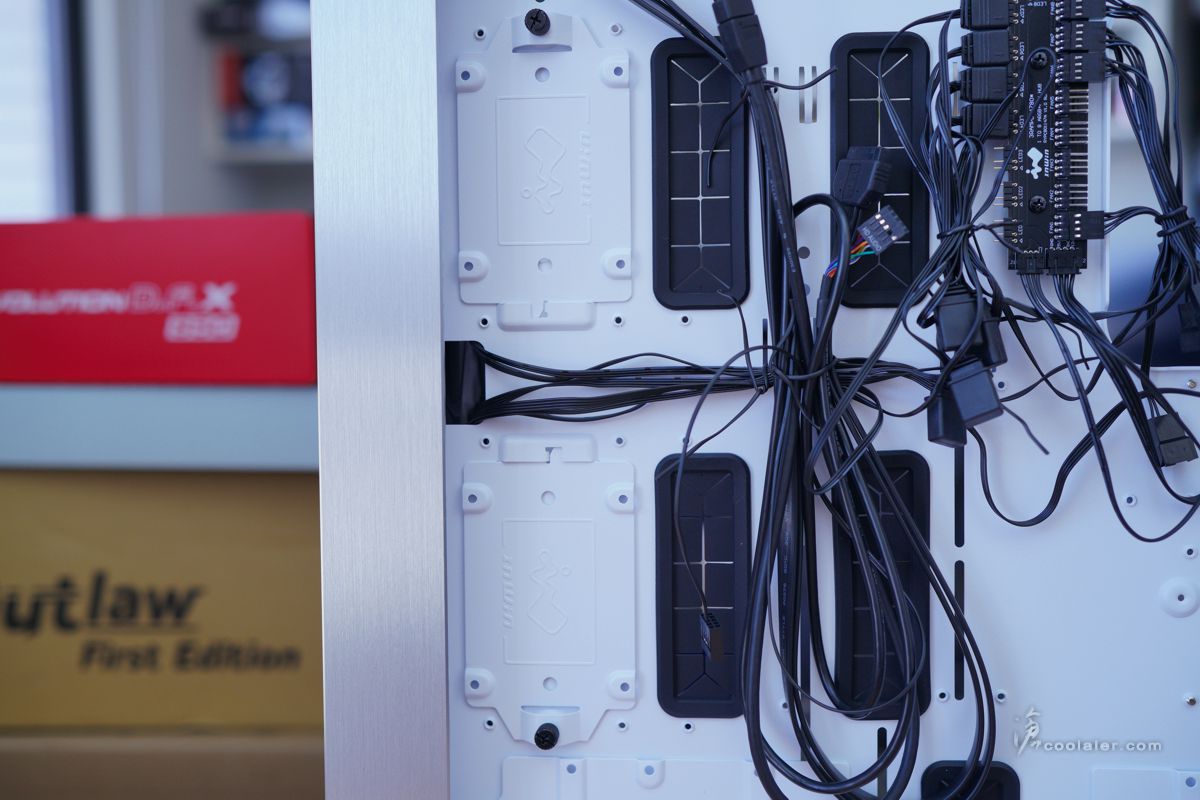
安裝底板背部,硬碟配在左邊以及下方位置,採用安裝板固定。
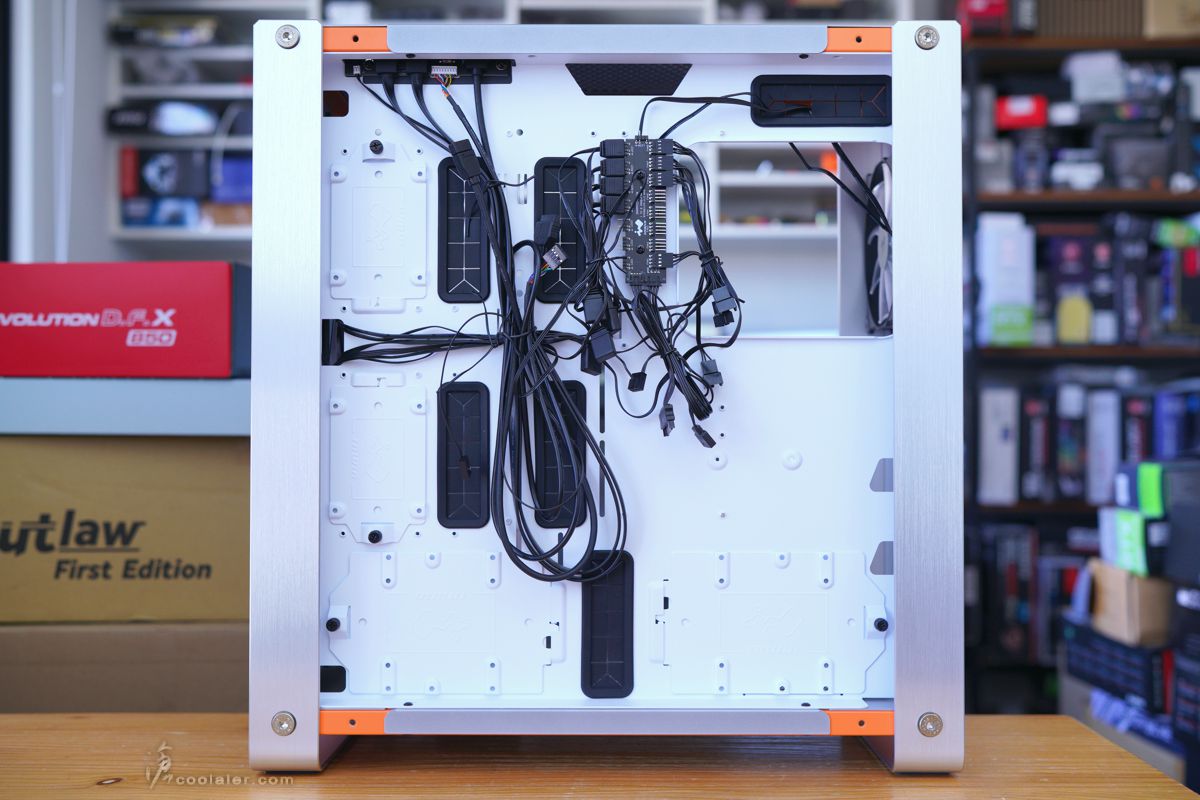
中間上方有一個燈效與風扇集線器,支援8個燈效與風扇。
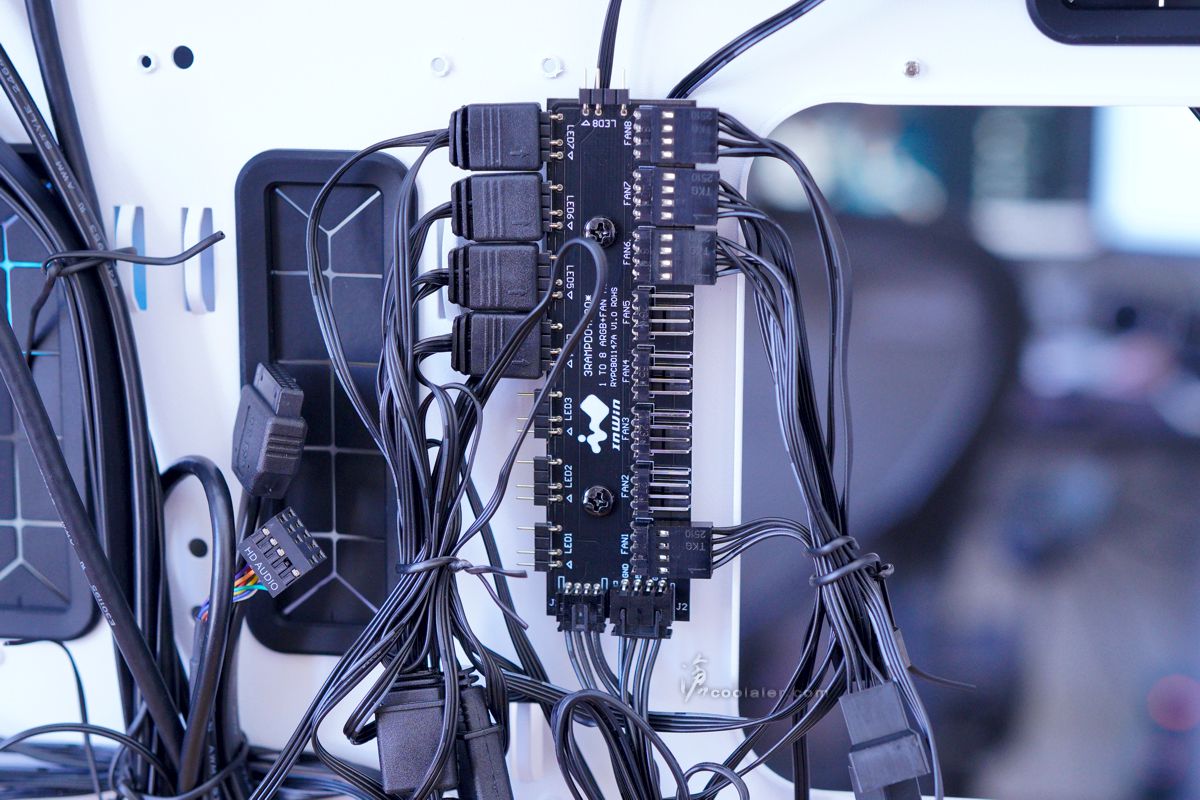
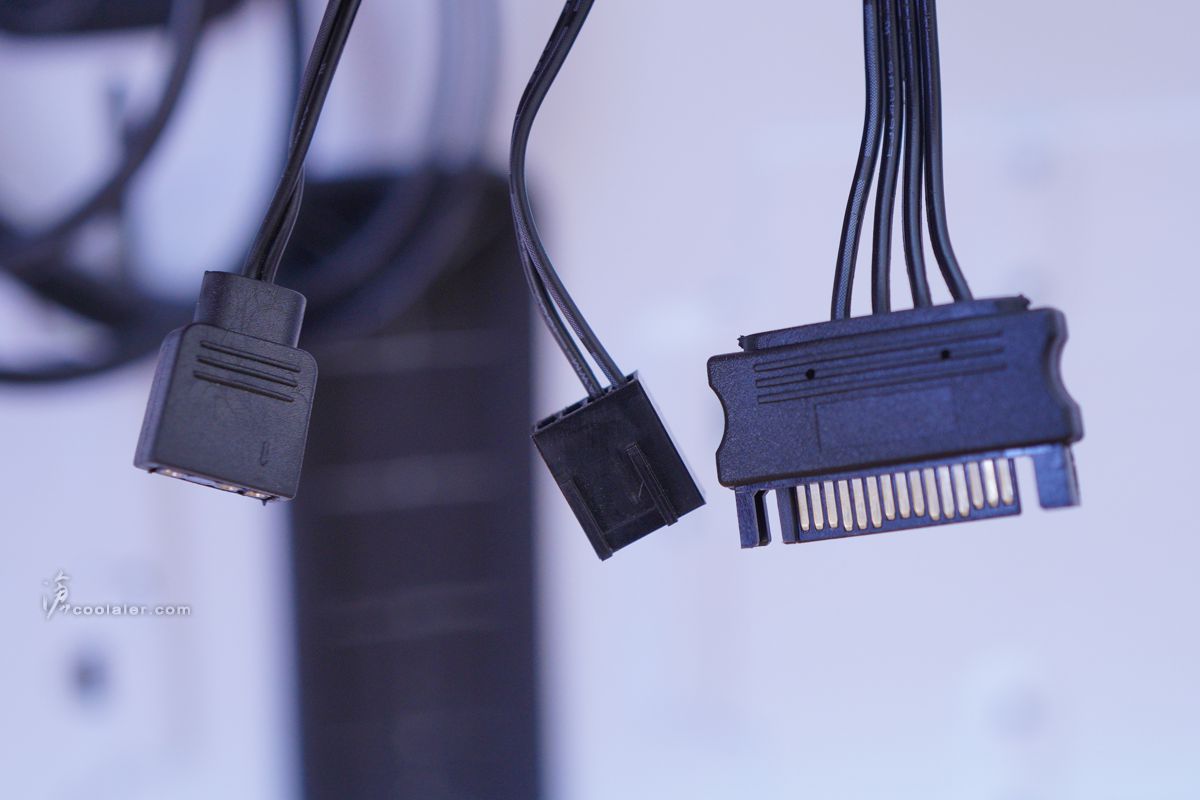
集線器需要外接1個 SATA 電源,另外這個集線器並沒有燈效控制的功能,所以需要連接到主板上,由主板軟體來控制顏色與效果。
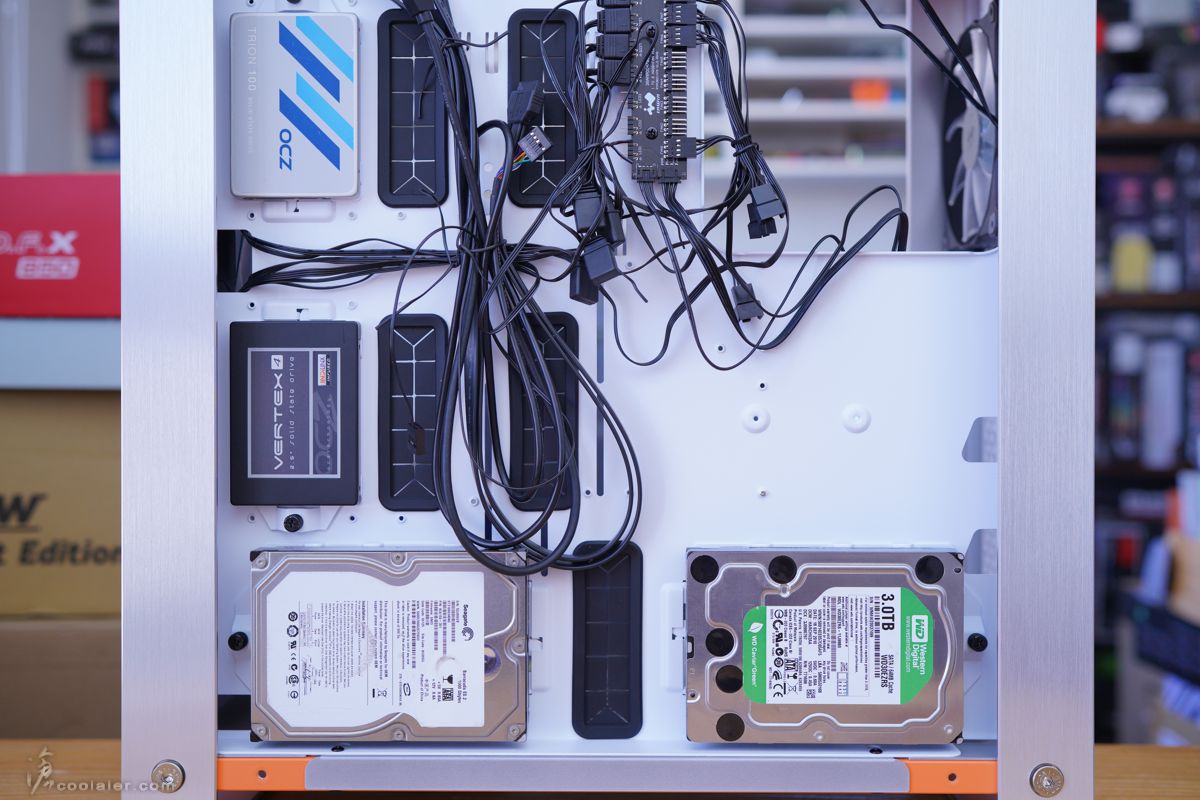
左側邊可安裝2顆2.5吋硬碟。
下方可安裝2顆3.5吋硬碟。
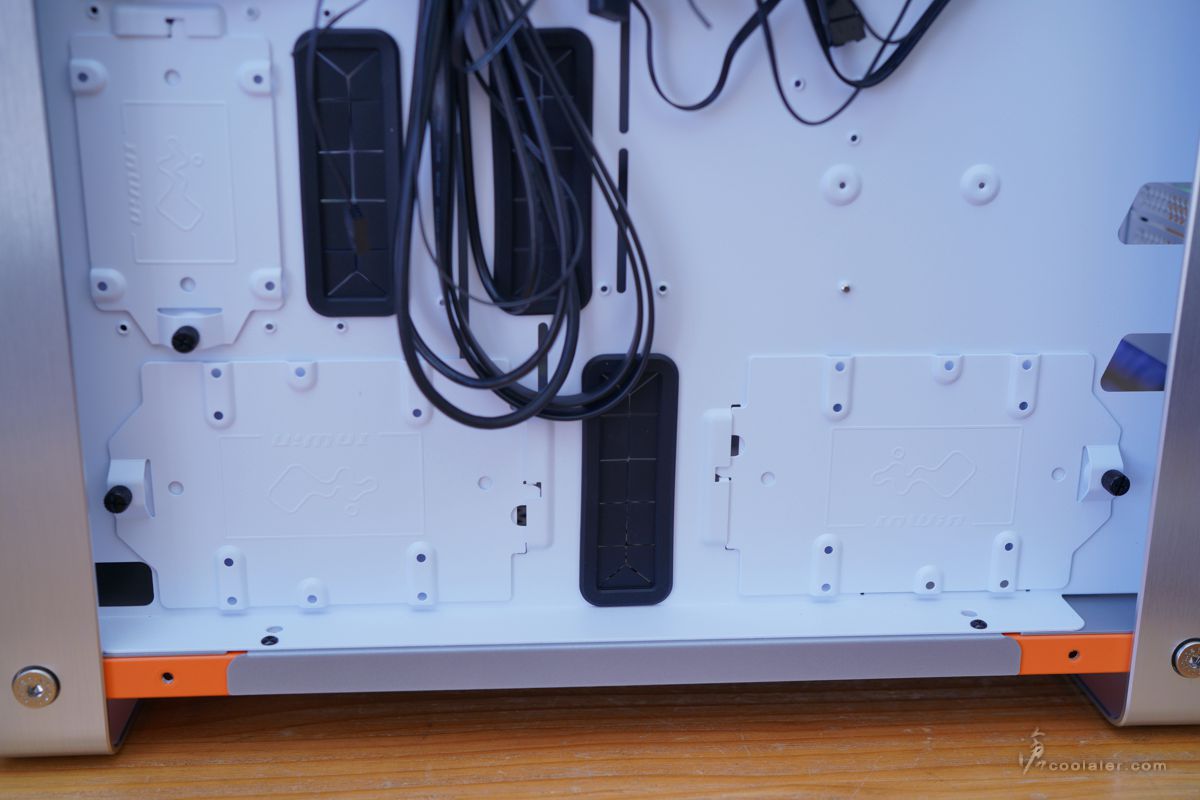
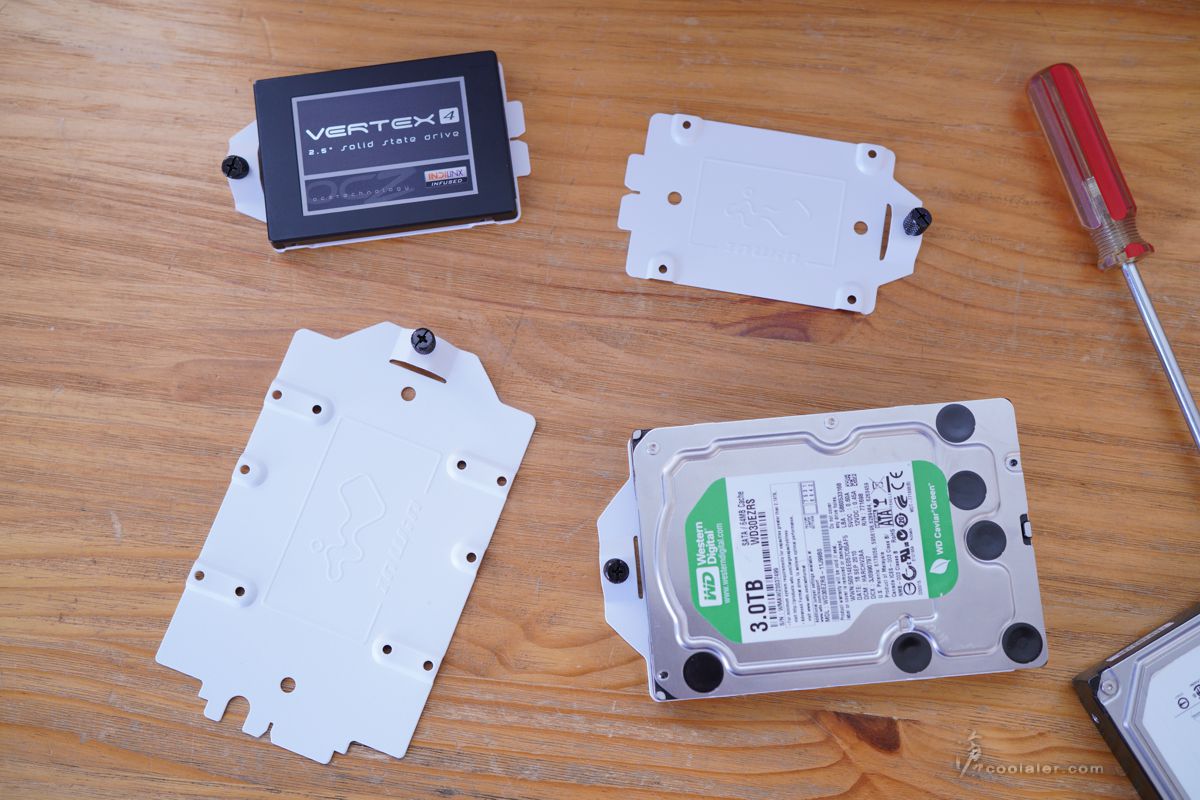
安裝板拆下後從底部固定硬碟。
底部對應通風孔外側舖有磁吸式濾網。
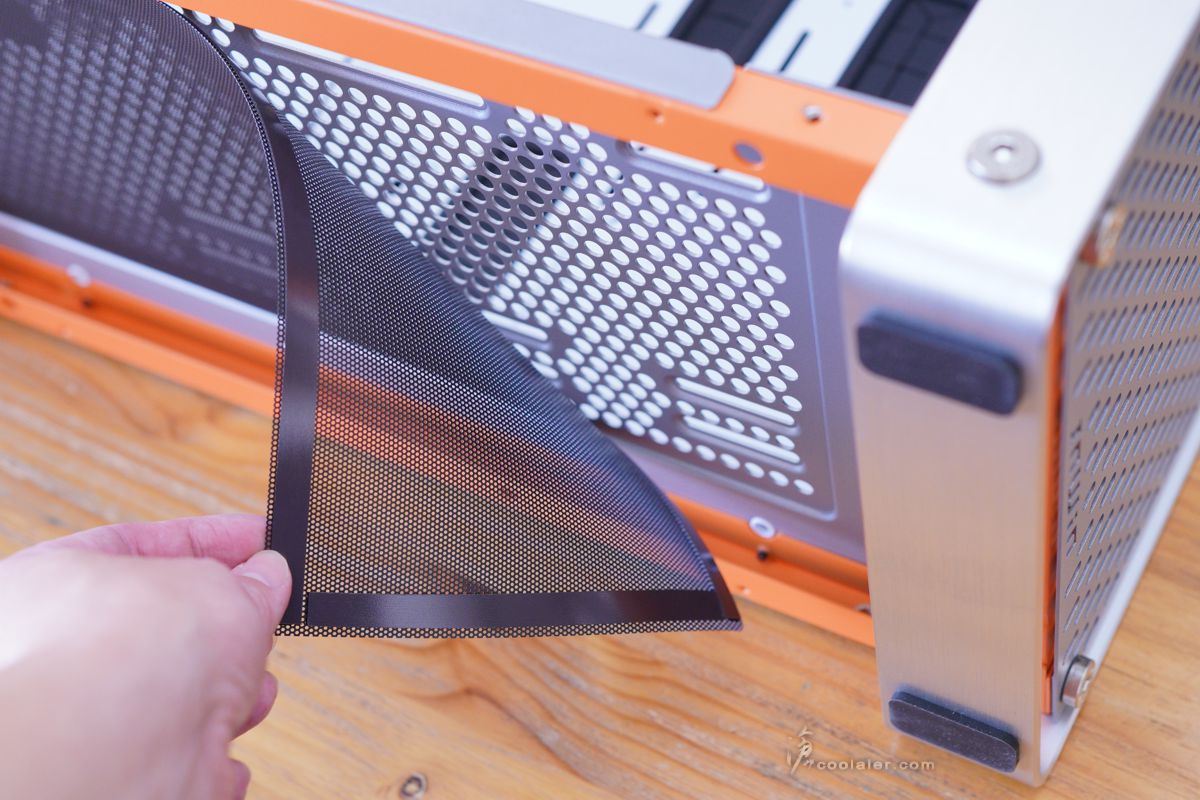
面板四邊螺絲轉下就可拆下,內部一樣是舖有磁吸式濾網。
如果覺得面板燈效不夠明亮,倒是可以選擇不裝濾網,如果不怕惹塵的話。
原本前後的鋁合金邊框是可以倒轉安裝變成提把,底部則需另安裝上腳墊。
變成提把感覺又不有一樣的風格。
下方感覺就有一點突兀,如果能採用相同材質應該就滿分了。
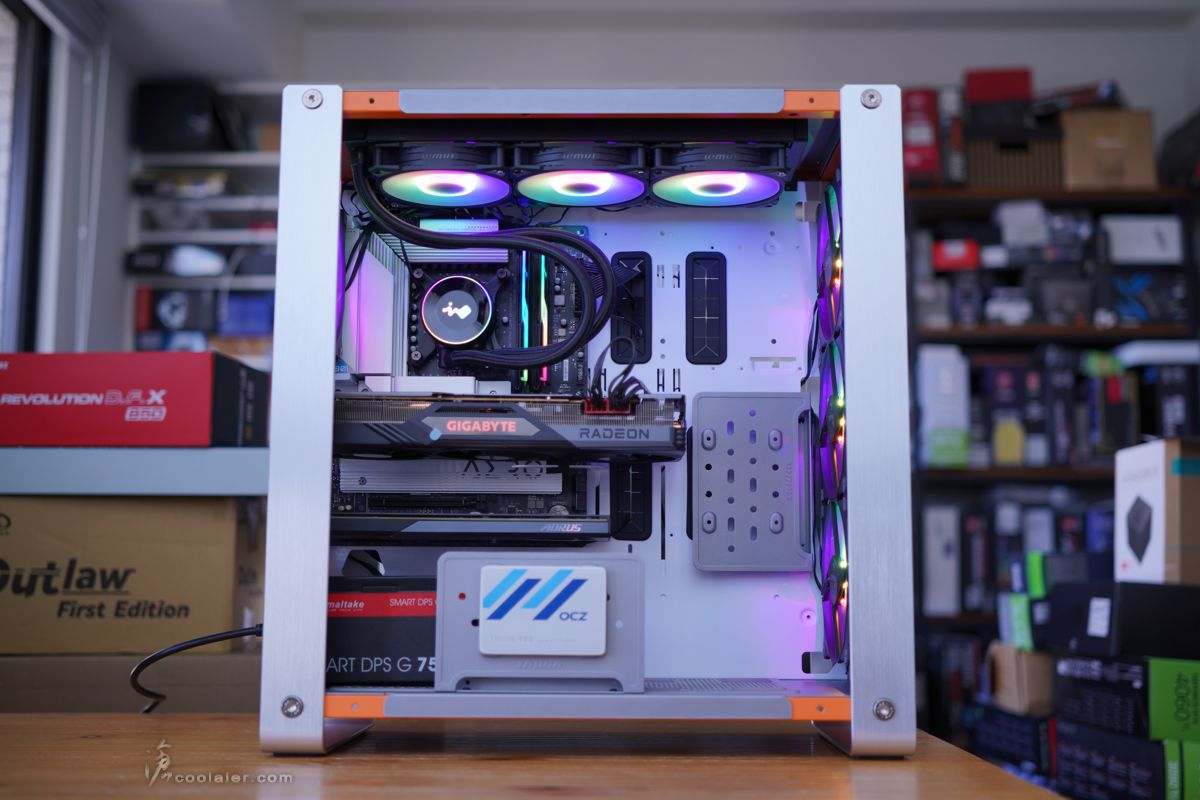
實際試裝一下,標準的 ATX 尺寸下去側邊都還是蠻空曠的。畢竟最大是可以支援到 E-ATX。
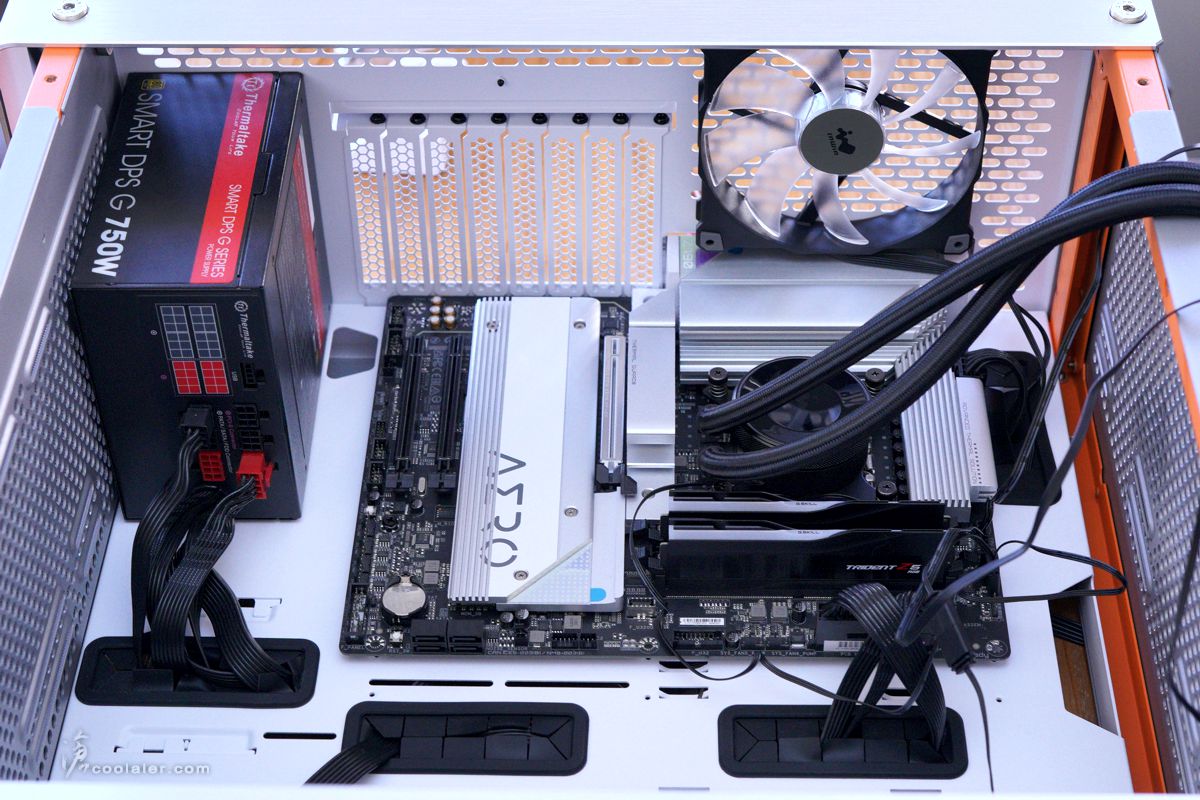
雖然主板上方有預留較多空間,不過如果要裝水冷建議還是先把主板的 8pin 接上。
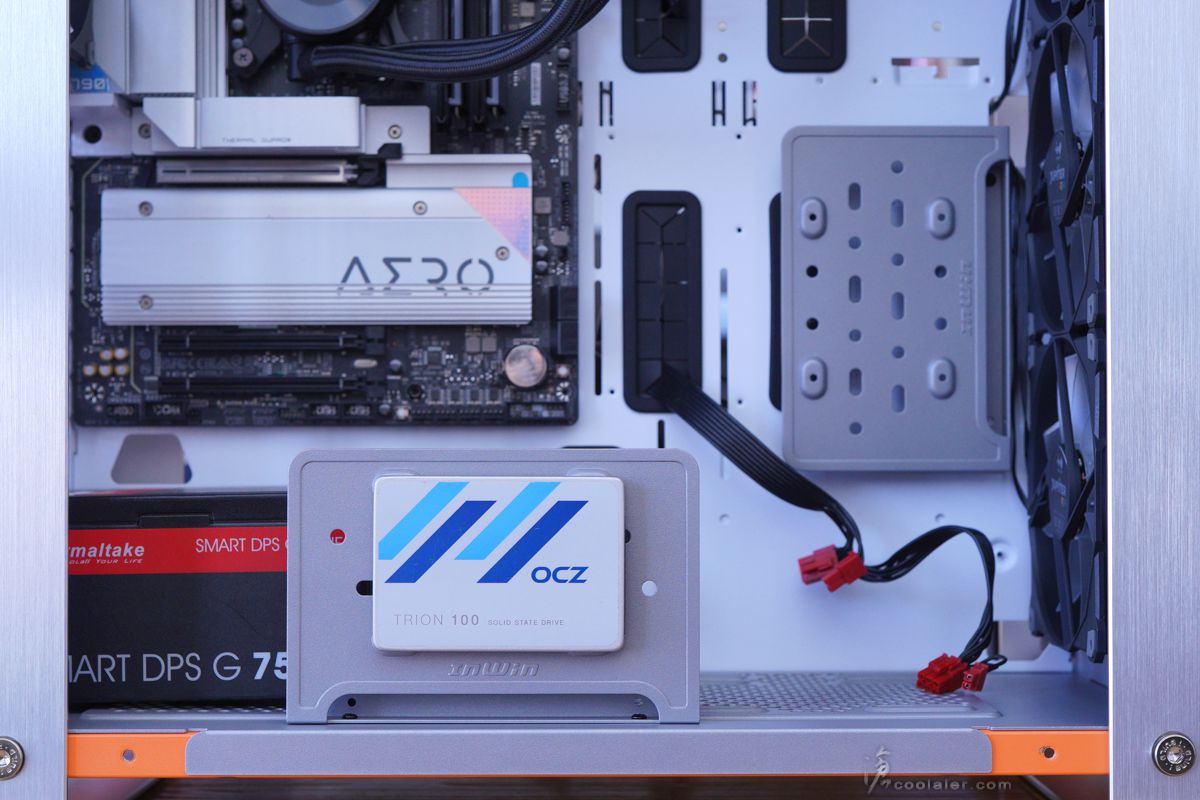
在配件上有2塊整線兼2.5吋支架的金屬板,可選擇安裝。位置可以安裝於主板右側或下方。
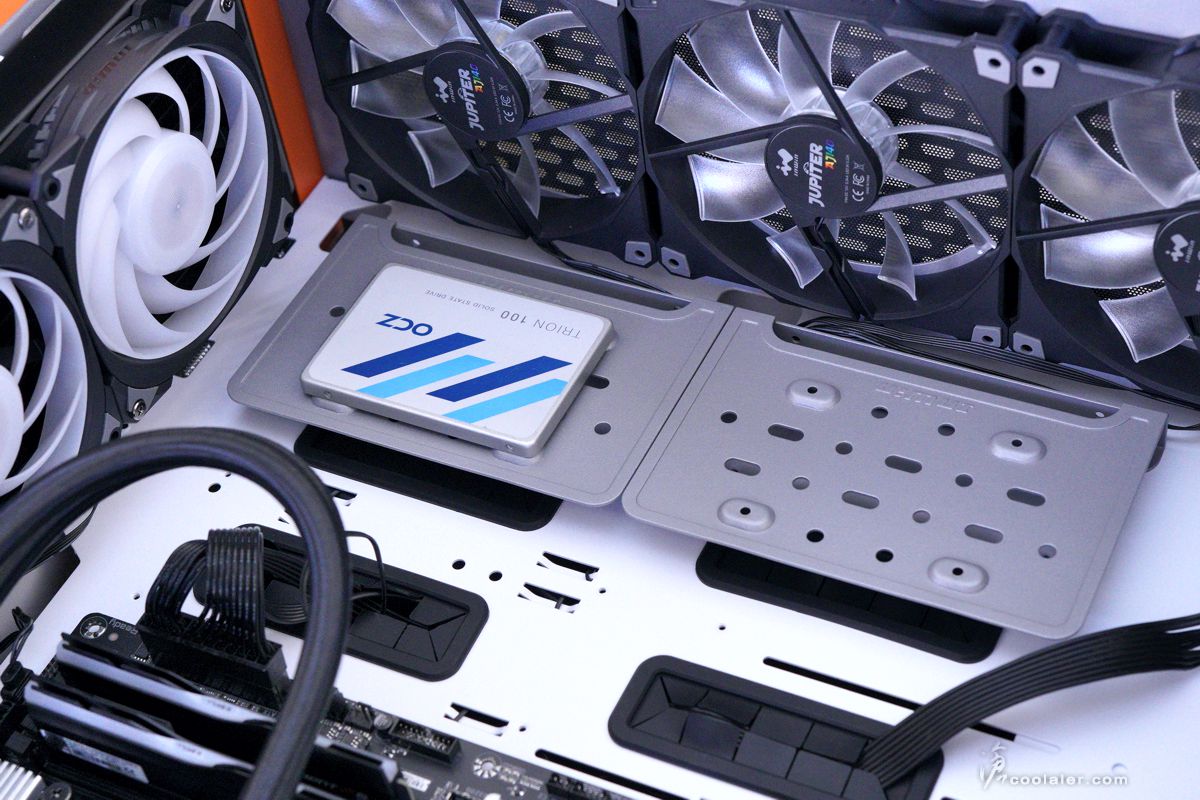
下方位置為直立式安裝,可以當成是遮板。這塊支架上方有2.5吋硬碟的鎖點,全機可安裝4個2.5吋。
顯卡長度可支援到43公分,目前市售顯卡應該沒有超過這尺寸。
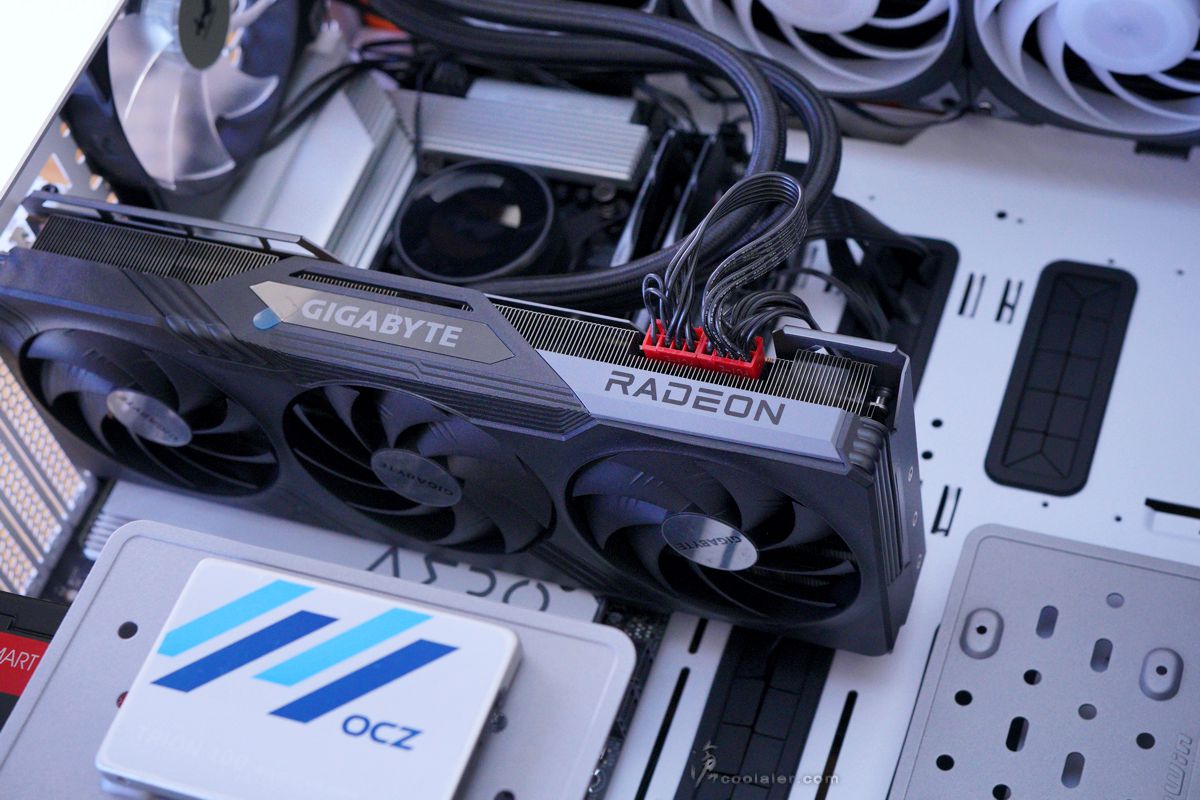
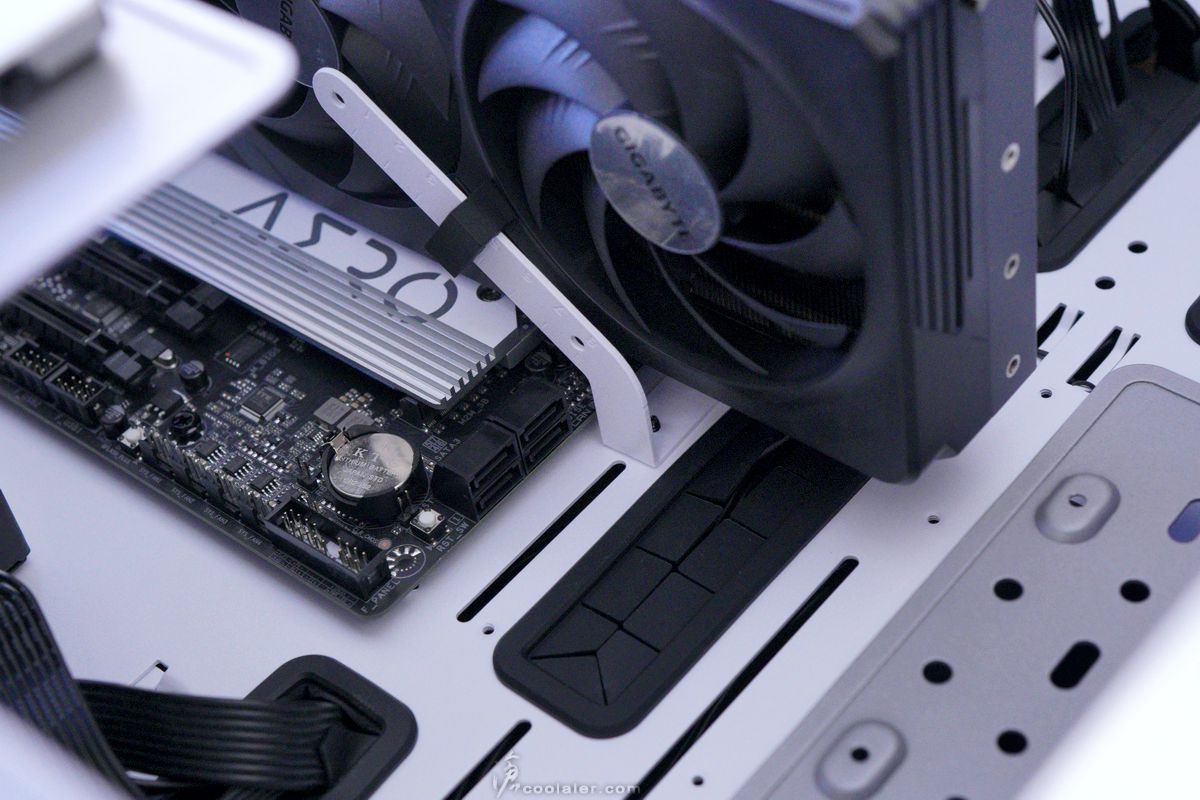
顯卡支撐架,方向與橡膠墊可針對顯卡外觀調整,注意別卡到風扇就是。
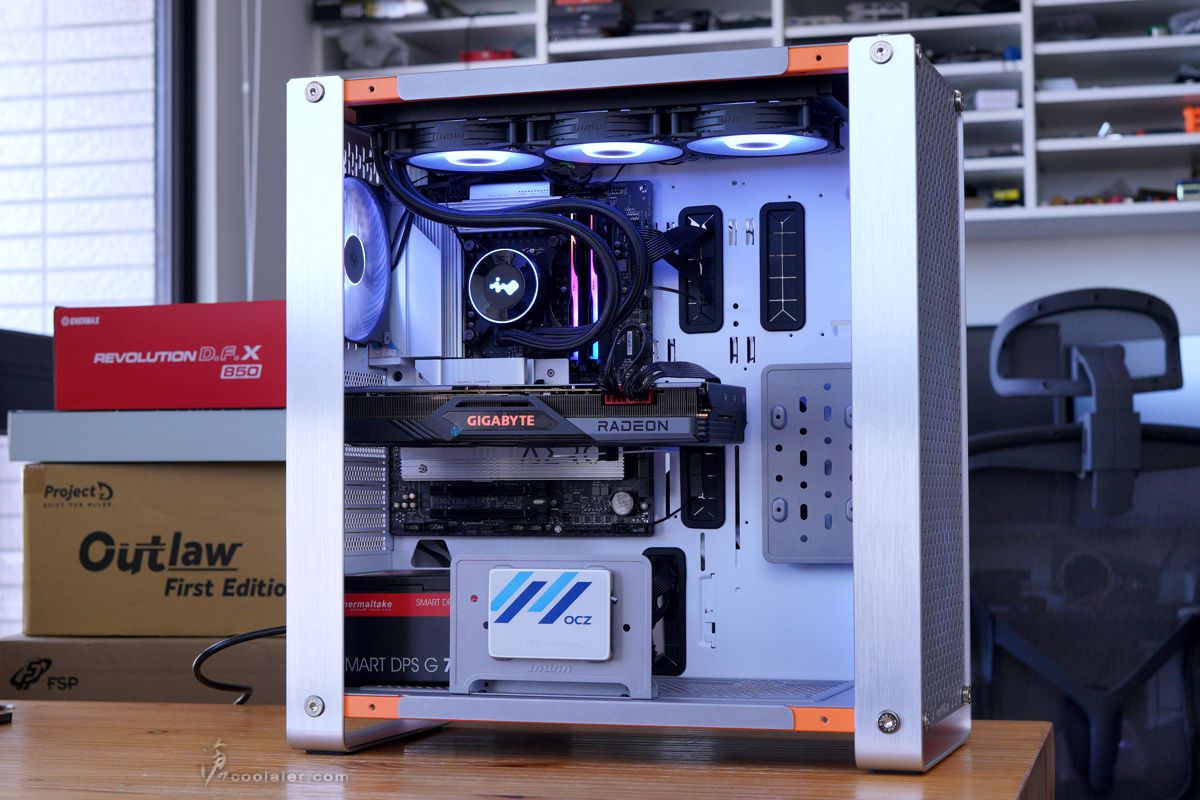
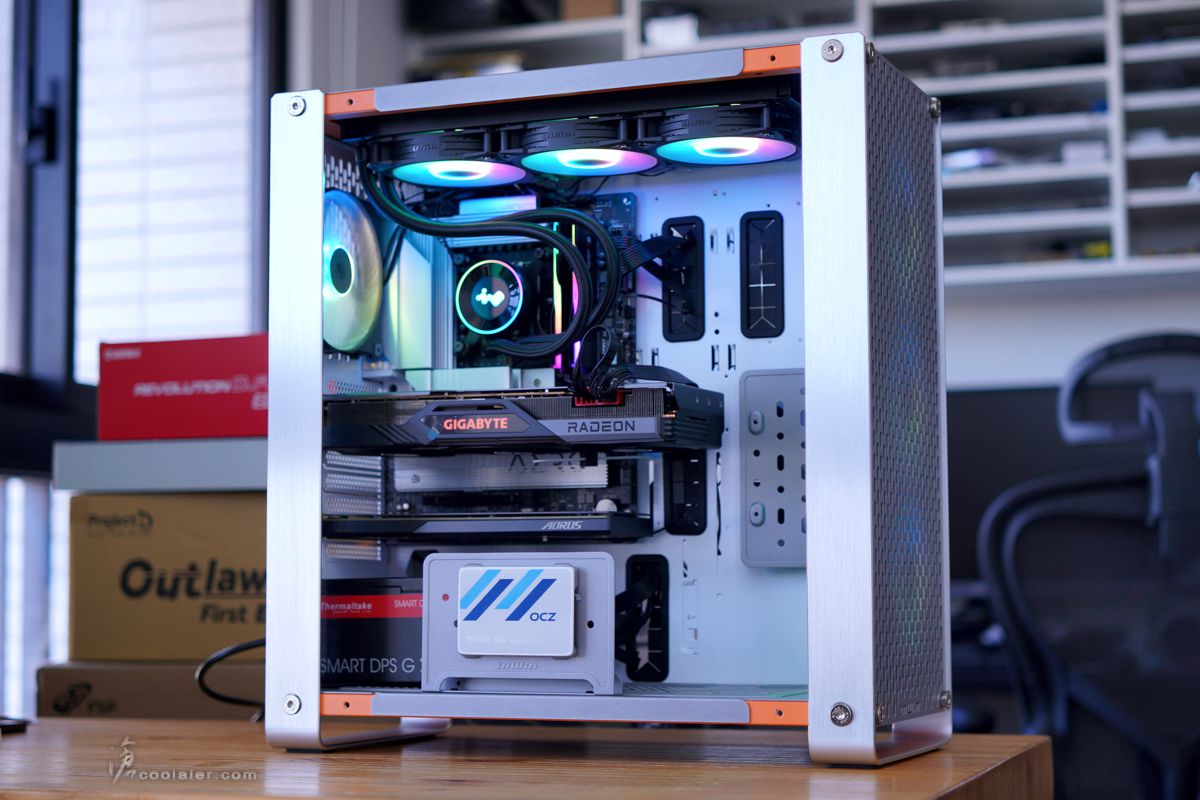
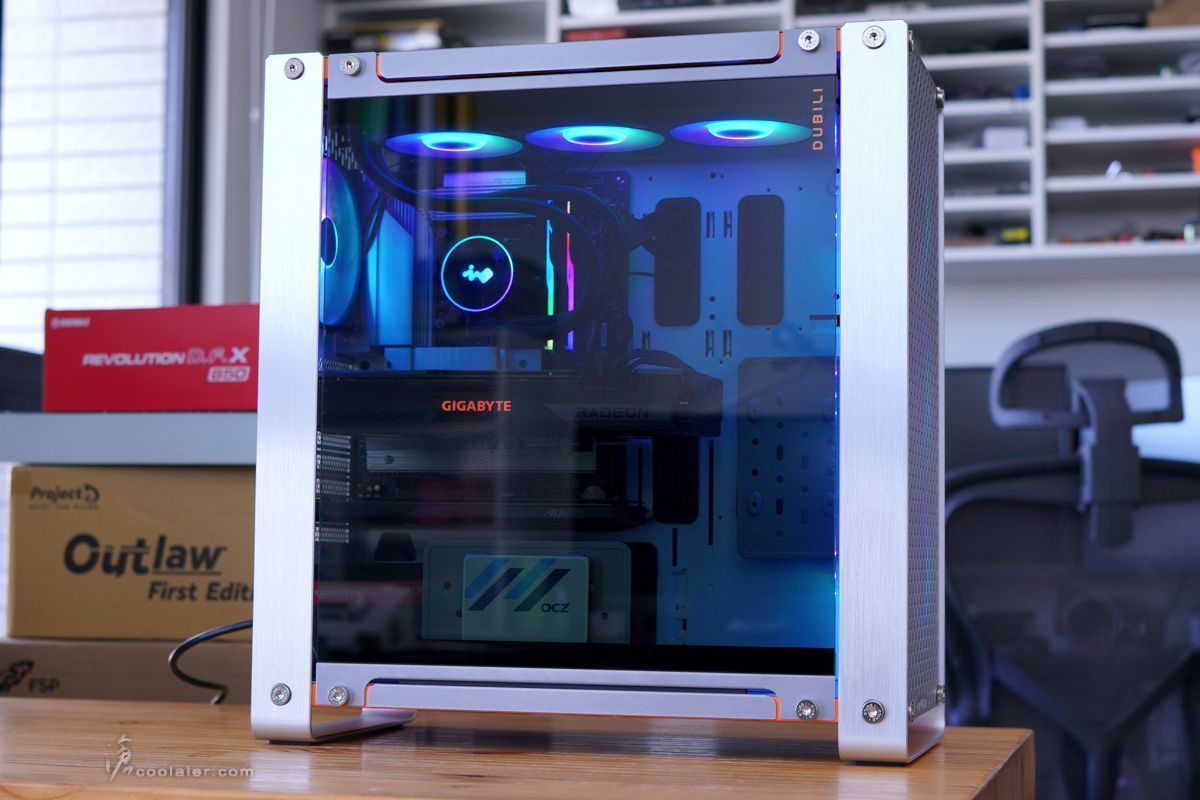
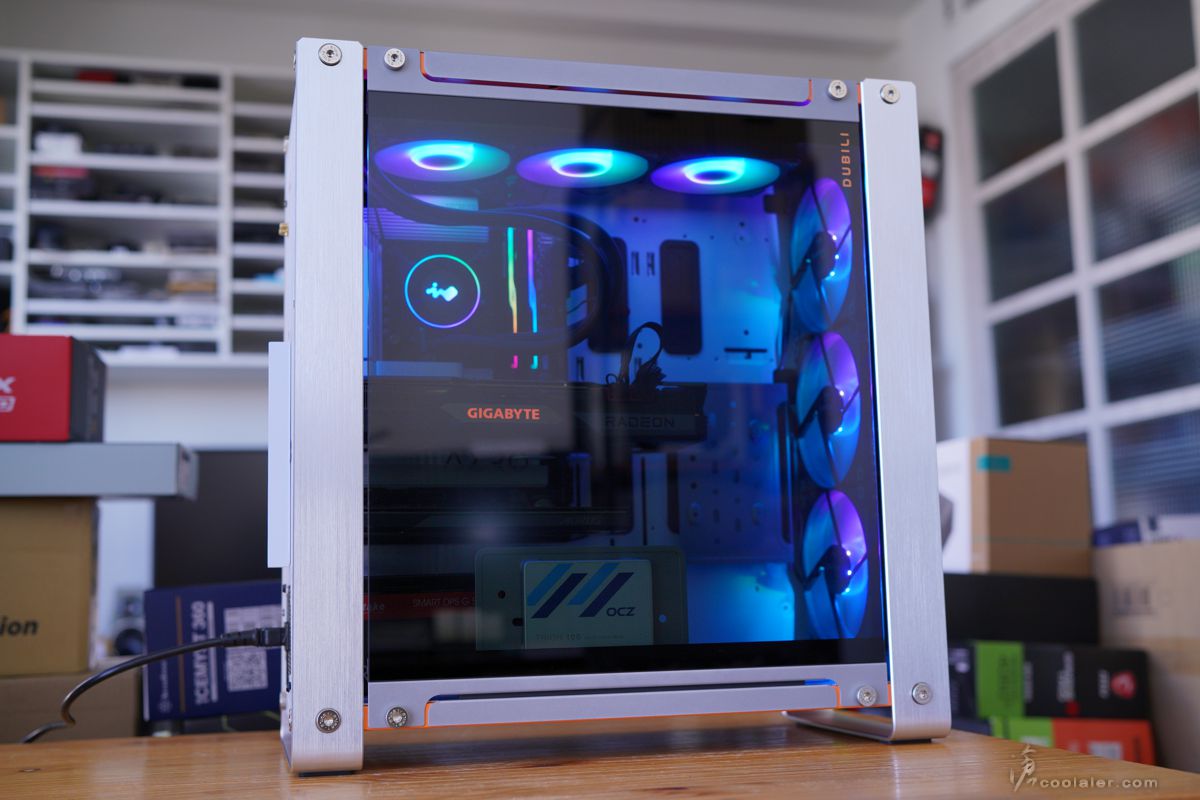
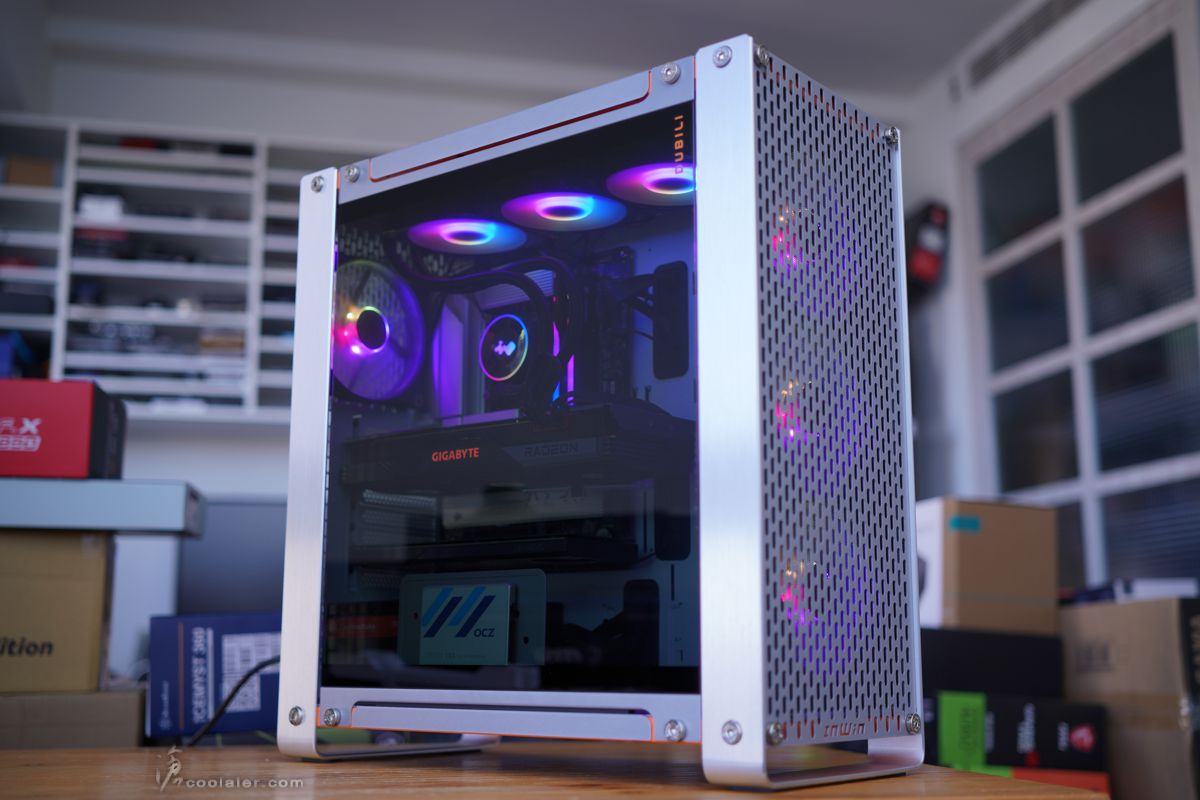
最後來幾張燈效圖。燈效是直接由主板控制,需從集線器連接到主板上。
裝上玻璃側板,燈效感覺就較為低調一些。基本應該都會放置在桌上或較顯眼位置,不要那麼亮眼也比較不干擾螢幕。
小結
InWin DUBILI 無疑是相當有質感,髮絲紋鋁合金框架、面板、側板甚至固定用的螺絲等,都有很好的用料以及做工細節,可以稱得上是精品。散熱的部分也是相當優秀,全部可安裝到9顆風扇之多,預裝的4顆14公分風扇,如果再搭配36或24水冷對於多數玩家來說應該不用另外擴充了,前面板內側可支援到42公分水冷,頂部也能支援36公分,對應旗艦硬體是完全沒問題。不過如果你是堅持塔型散熱器的玩家,可能要留意一下這機殼只能安裝16公分的高度限制。
DUBILI 有鈦灰以及奶油香檳兩色,都好看!在命名上面也是相當有意涵,DUBILI 是 iBuild 的重組,也是 Do Believe 的讀音,完全體現 DIY 的精神,去做並相信自己可以辦到。
DUBILI 採用模組化組件組裝概念,雖然台灣版本是整機(已組裝完成)的版本,但這樣的設計每個零件都能輕鬆拆卸,也提供給一些使用者可輕鬆改裝的條件。InWin 也表示日後會推出不同材質、顏色的配件,以滿足 DUBILI 個性化與客製化的需求。
入手的是鈦灰色,相當大一箱,不含外箱重量就有15.5公斤。
InWin DUBILI規格
體積:523 x 244 x 567 mm
硬碟擴充:2顆3.5吋/2.5吋、4顆2.5吋硬碟
擴充卡槽:8
主機板:E-ATX 向下相容
前置 IO:USB 3.2 Gen 2×2 Type-C x1 、 USB 3.0 x2 、 HD Audio
CPU 散熱器高度限制:16公分
顯卡長度限制:43公分
電源供應器長度限制:18公分
預裝風扇:4個 InWin Jupiter AJ140 風扇
風扇支援:前3個12/14公分,上3個12或2個14公分,下2個12或1個14公分,後1個12或14公分
水冷支援:前36或42公分,上36或28公分
配件有螺絲包、顯卡支撐架、2個整線板兼2.5吋支架、2個腳座、六角扳手、一把一次性束帶、數條魔鬼氈整線束帶、QR Code 說明書連結。
腳座可選擇性安裝,這個下方會有詳細說明。
InWin DUBILI 台灣販售的版本是整機版,也就是不需要拼湊零件。國外一些地區則是 DIY 版本,需要自行組裝。
外觀是很有質感的,前後以兩個 U 型鋁合金支架包覆,表面有髮絲紋處理,左側板為不是太透明的鋼化玻璃,玻璃上下採用金屬架固定。整體外觀為鈦灰、銀色搭配,並有少少的橘色點綴。
玻璃右上側有 DUBILI 的字樣。
側板、支架、面板等板件固定都是採用相當有質感的螺絲。前後的髮絲紋U型鋁合金支架邊緣有採用鑽切處理。
外部固定螺絲上面還有 iBUILD 鐳雕字樣,內六角的規格。
頂部採用大面積通風孔,外部則鋪有磁吸式濾網。
IO 埠在頂部右側邊位置,有 USB 3.2 Gen 2×2 Type-C、複合式耳麥孔、2個 USB 3.0、電源鍵。
面板為全通風孔,長橢圓形排列,內部有濾網。
面板也是採用大圓形螺絲固定。
原本出廠預設的腳墊是以鋁合金支架為支撐,這部分可以倒裝翻轉到上面作為提把。
面板上下內部有橘色組件綴飾,下方剛好襯托出 InWin 字樣。
右側板無打孔,造型上與左側板相同。
在右上側一樣有 DUBILI 字樣。
後方也盡可能打上長橢圓形的通風開孔。
打開內部之前先來看一下說明書的部分, InWin 目前都是給一張 QR Code 讓玩家掃,連結可以對應 Apple、Android 或網路版,前兩者為 App,需要安裝。
這個說明書 App 頗為用心,點開之後可以看到三個部分,產品故事、零件與數量、安裝說明。
說明書也不是一般 PDF 那種,而是採用 3D 動畫教學,相當直觀方便,在畫面上也直接標註了需要使用那些螺絲或工具。
側板採用四邊螺絲固定,配件中有一個六角扳手可用。拆側板時需要注意,因為沒有防掉落設計,所以拆下第四個螺絲時請用手扶好側板,或者讓機殼平躺著拆是比較保險。
內部空間是相當大,下方電源沒有分倉遮板,安裝底板是白色,主板位側邊則是有走線開孔,並且套上橡膠墊增添質感。
頂部可安裝3顆12或2顆14公分風扇,亦可支援36或28公分水冷。
主板上方有預留較多的空間給水冷安裝。
後方預裝1顆14公分 Jupiter AJ140 風扇,支援 ARGB。擴充卡槽有8個,檔板可重複使用。
下方為電源安裝位,右側邊如果不安裝風扇幾乎是沒甚麼長度限制就是。右側位置可以安裝2顆12公分或1顆14公分風扇。
前面板內側預裝3顆14公分 Jupiter AJ140 風扇,支援 ARGB。
安裝底板背部,硬碟配在左邊以及下方位置,採用安裝板固定。
中間上方有一個燈效與風扇集線器,支援8個燈效與風扇。
集線器需要外接1個 SATA 電源,另外這個集線器並沒有燈效控制的功能,所以需要連接到主板上,由主板軟體來控制顏色與效果。
左側邊可安裝2顆2.5吋硬碟。
下方可安裝2顆3.5吋硬碟。
安裝板拆下後從底部固定硬碟。
底部對應通風孔外側舖有磁吸式濾網。
面板四邊螺絲轉下就可拆下,內部一樣是舖有磁吸式濾網。
如果覺得面板燈效不夠明亮,倒是可以選擇不裝濾網,如果不怕惹塵的話。
原本前後的鋁合金邊框是可以倒轉安裝變成提把,底部則需另安裝上腳墊。
變成提把感覺又不有一樣的風格。
下方感覺就有一點突兀,如果能採用相同材質應該就滿分了。
實際試裝一下,標準的 ATX 尺寸下去側邊都還是蠻空曠的。畢竟最大是可以支援到 E-ATX。
雖然主板上方有預留較多空間,不過如果要裝水冷建議還是先把主板的 8pin 接上。
在配件上有2塊整線兼2.5吋支架的金屬板,可選擇安裝。位置可以安裝於主板右側或下方。
下方位置為直立式安裝,可以當成是遮板。這塊支架上方有2.5吋硬碟的鎖點,全機可安裝4個2.5吋。
顯卡長度可支援到43公分,目前市售顯卡應該沒有超過這尺寸。
顯卡支撐架,方向與橡膠墊可針對顯卡外觀調整,注意別卡到風扇就是。
最後來幾張燈效圖。燈效是直接由主板控制,需從集線器連接到主板上。
裝上玻璃側板,燈效感覺就較為低調一些。基本應該都會放置在桌上或較顯眼位置,不要那麼亮眼也比較不干擾螢幕。
小結
InWin DUBILI 無疑是相當有質感,髮絲紋鋁合金框架、面板、側板甚至固定用的螺絲等,都有很好的用料以及做工細節,可以稱得上是精品。散熱的部分也是相當優秀,全部可安裝到9顆風扇之多,預裝的4顆14公分風扇,如果再搭配36或24水冷對於多數玩家來說應該不用另外擴充了,前面板內側可支援到42公分水冷,頂部也能支援36公分,對應旗艦硬體是完全沒問題。不過如果你是堅持塔型散熱器的玩家,可能要留意一下這機殼只能安裝16公分的高度限制。