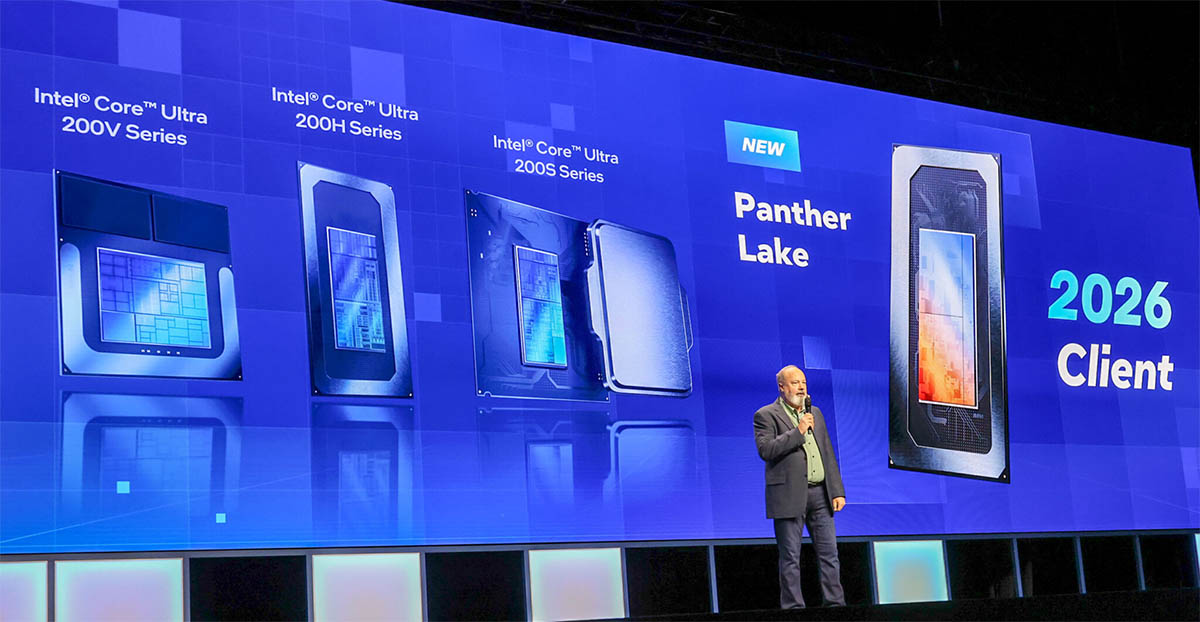
Intel 預計在不久之後推出新一代處理器,不過晶片組的部分這一代並沒有更新,仍是 700 系列,也就意味著主板處理器實際上是可以通用的,舊的板子可能需要更新 BIOS 以支援,雖然沒有新的晶片組,但各主板廠也會推出新的板子加入新的功能支援或加強硬體設計。
GIGABYTE 在 Z790 晶片組的部分則是更新推出了 " X " 世代,與舊版相比在型號上就是多了 X 字樣以利區隔。新的 X 世代主機板特別在 DDR5 記憶體效能上、BIOS 改良和創新的硬體功能進行加強,為新一代處理器做好預備。目前已經推出的包括 AORUS XTREME X、MASTER X、ELITE X、PRO X 等,未來也會有 B760 晶片組更新。
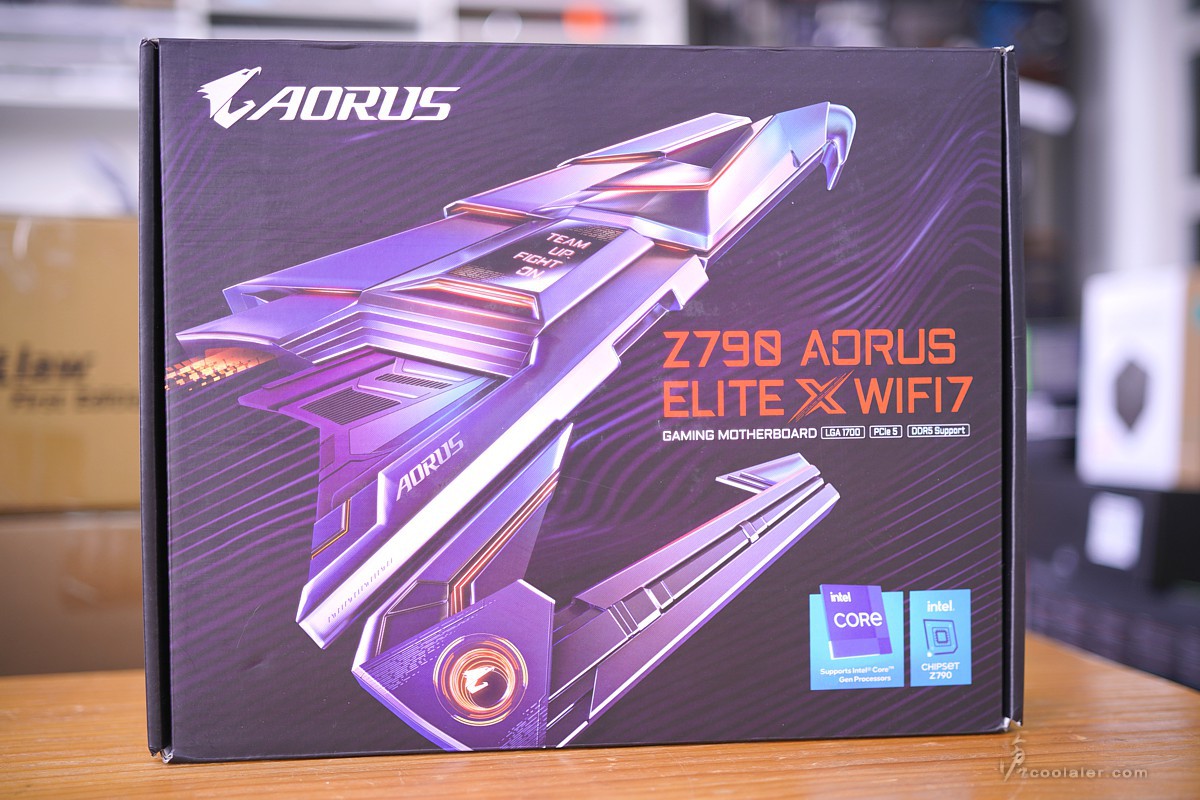
入手開箱的是 Z790 AORUS ELITE X WIFI7 。ELITE X 有三種,在於無線網路的差異,包括沒有支援無線功能的 ELITE X 、支援 WIFI 6E 的 ELITE X AX 、支援 WIFI 7 的 ELITE X WIFI7。
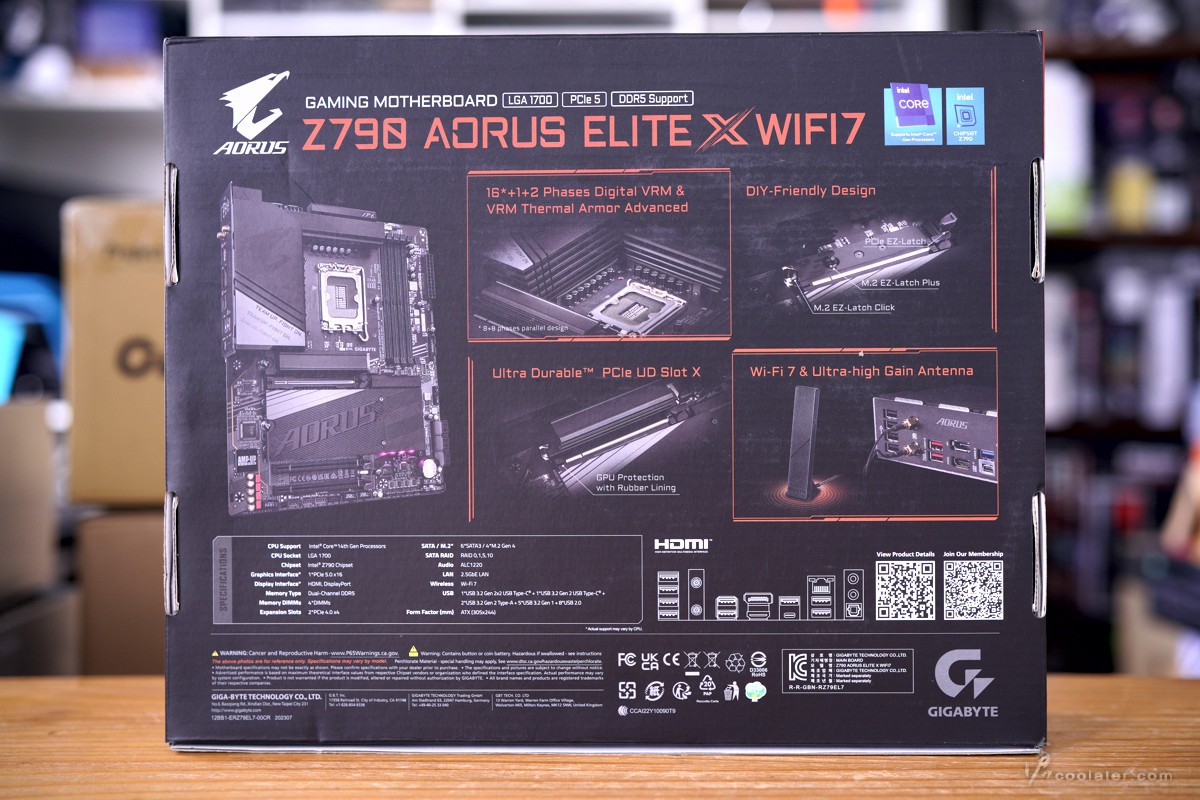
主要特色,採用 16+1+2 相數位供電、DIY 友善設計、PCIe UD Slot X 插槽強化、WI-FI 7 無線網路等。
配件有說明書、無線天線、M.2 導熱墊、2條 SATA、G-Connector 前置快速接頭。

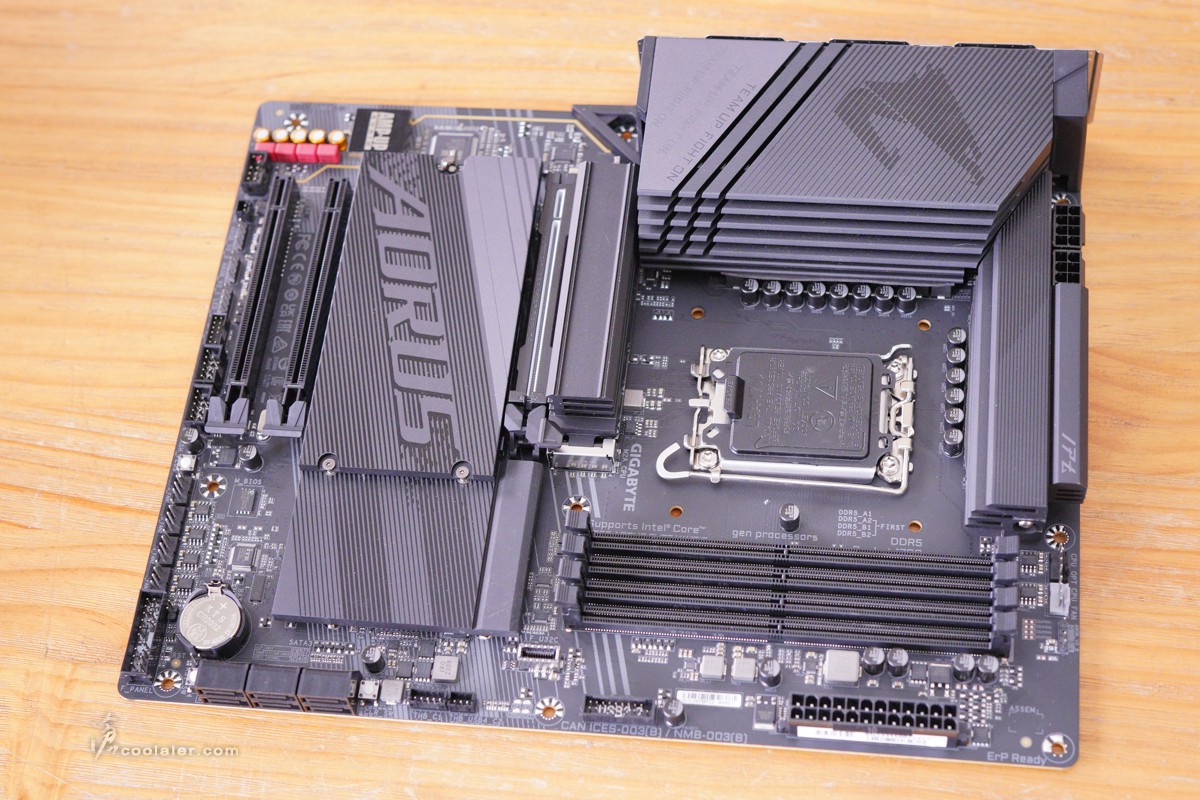
Z790 AORUS ELITE X WIFI7 外觀上與之前的 ELITE 也有明顯的差異,不過整體的線條元素、老鷹標、AORUS 字樣都還是有的。
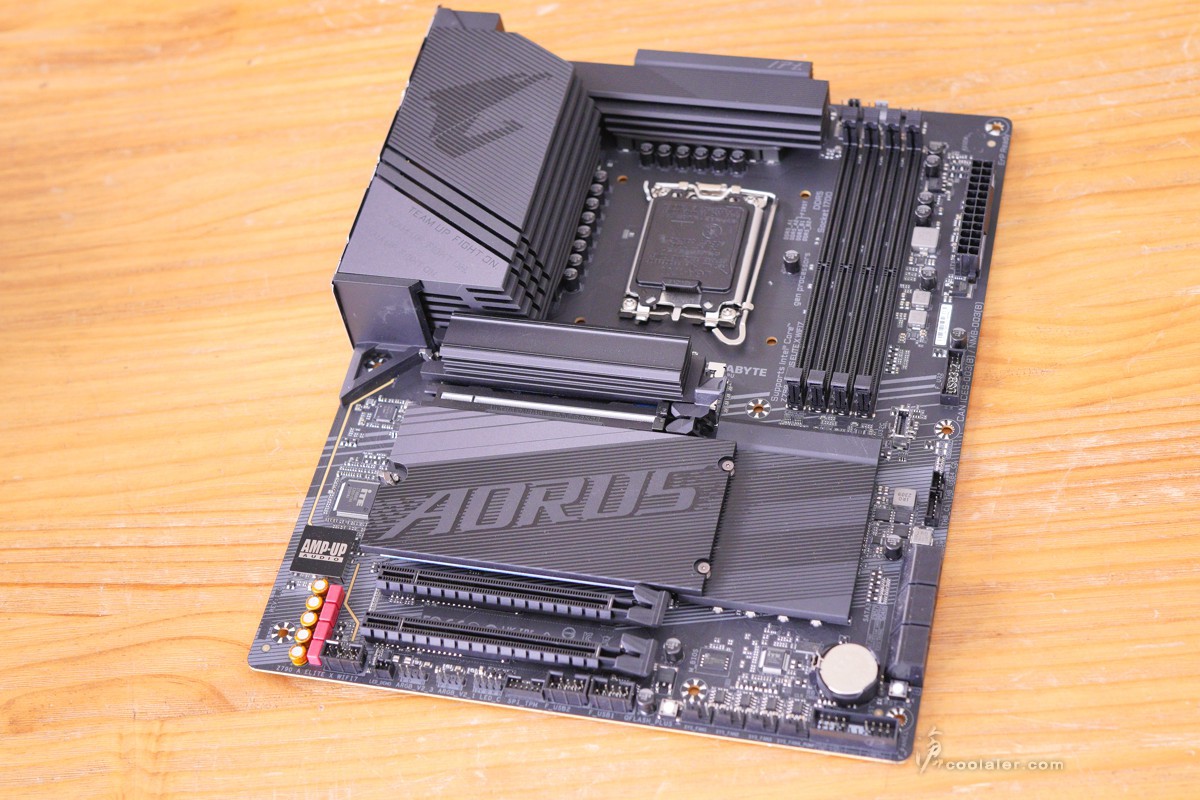
採用標準的 ATX 尺寸,整體黑灰色低調路線。X 系列在硬體、規格上也有明顯差異性,如 DDR5 可以支援達到 8266+MHz,M.2 散熱片改採無螺絲設計,並且 AORUS X 全系列都用上了 8mm 熱導管,並且應對旗艦重量級顯卡,針對了 PCIe 顯卡插槽進行耐受力強化,PCB 也都有8層板(以上)的設計。
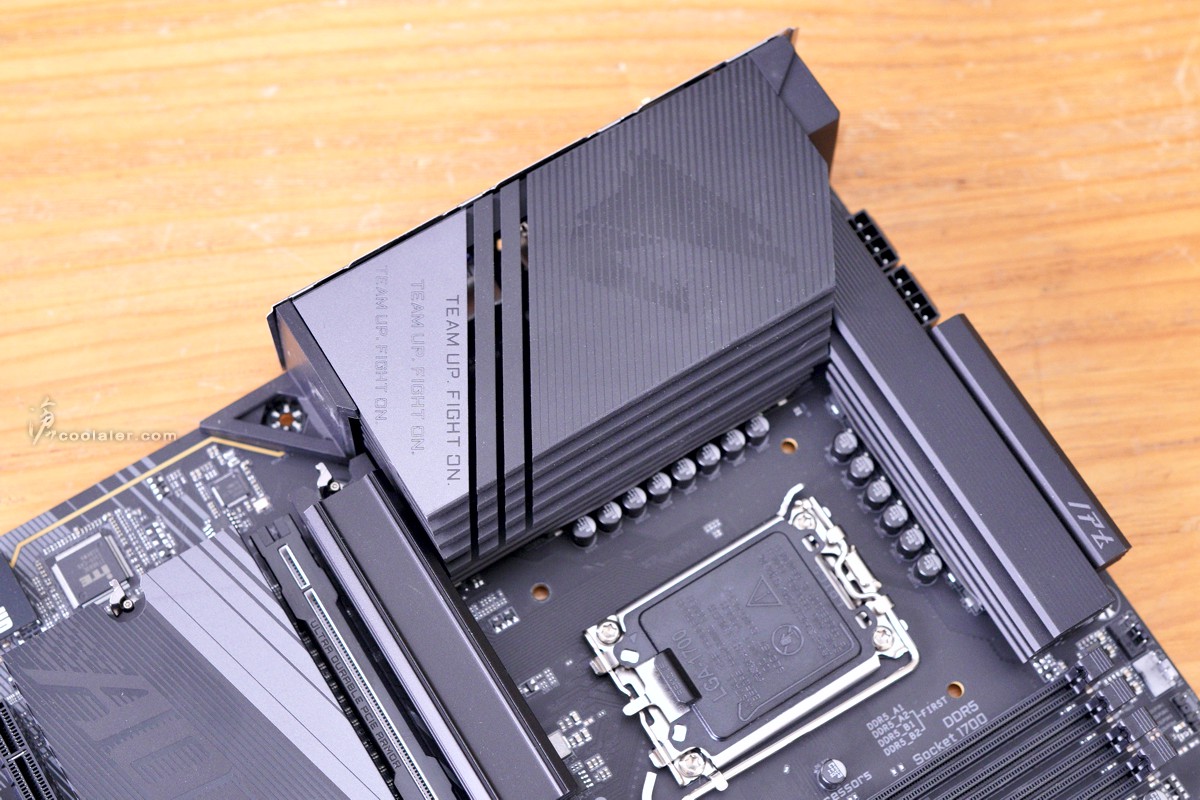
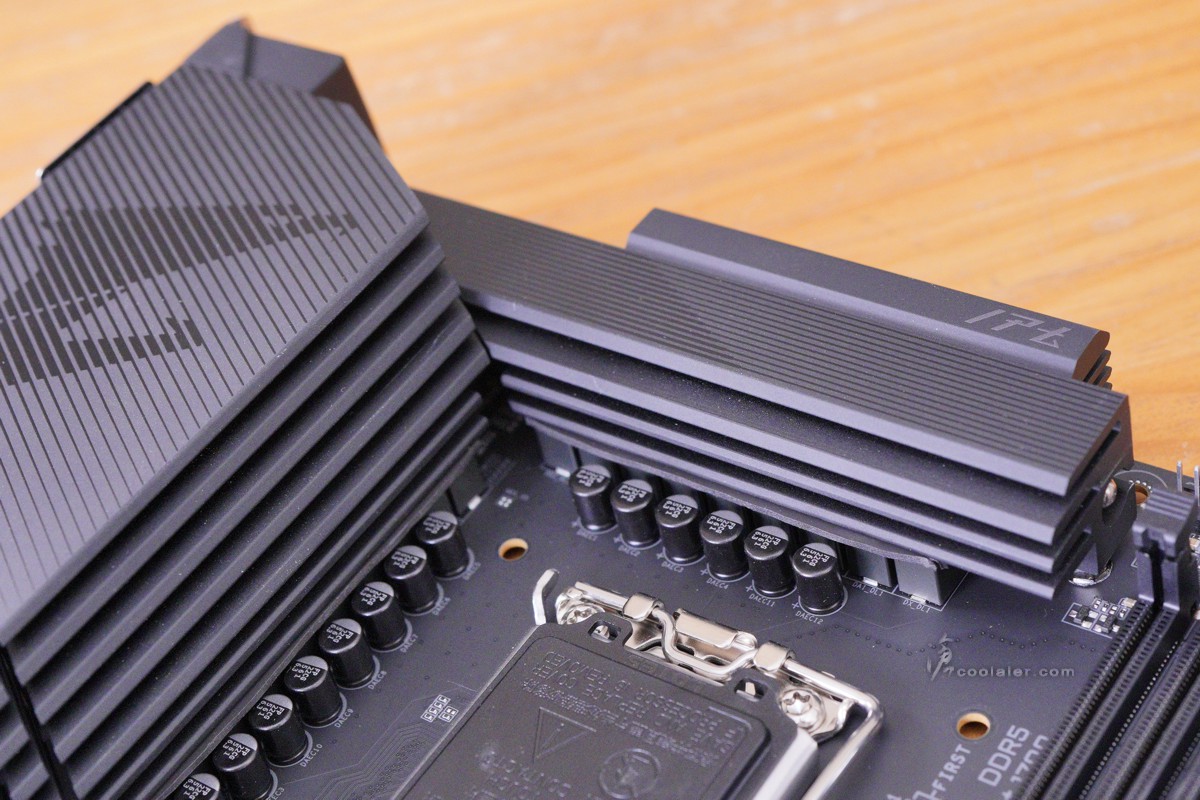
Z790 AORUS ELITE X WIFI7 採用 VRM Thermal Armor Advanced 散熱設計,有著大面積的散熱鰭片,上方斜切紋隱約可見老鷹標。

側邊可以看到複合式剖溝,盡可能的增加散熱面積。
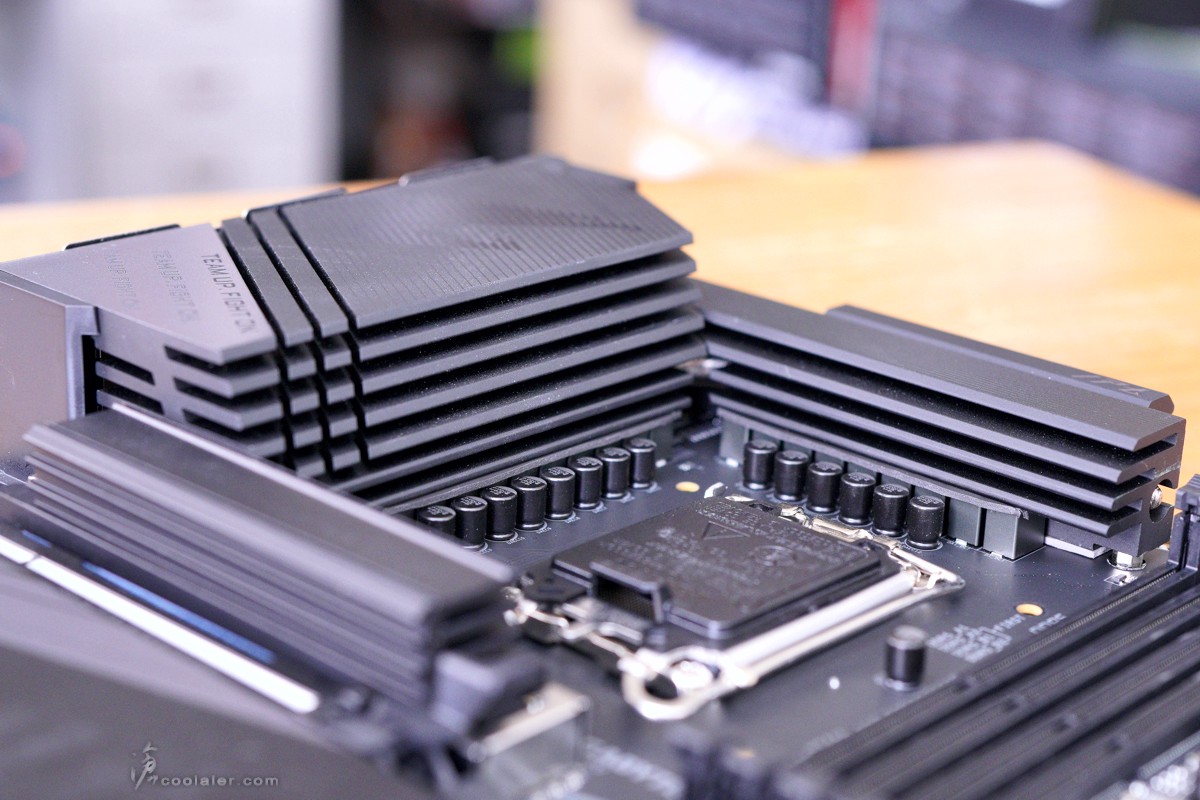
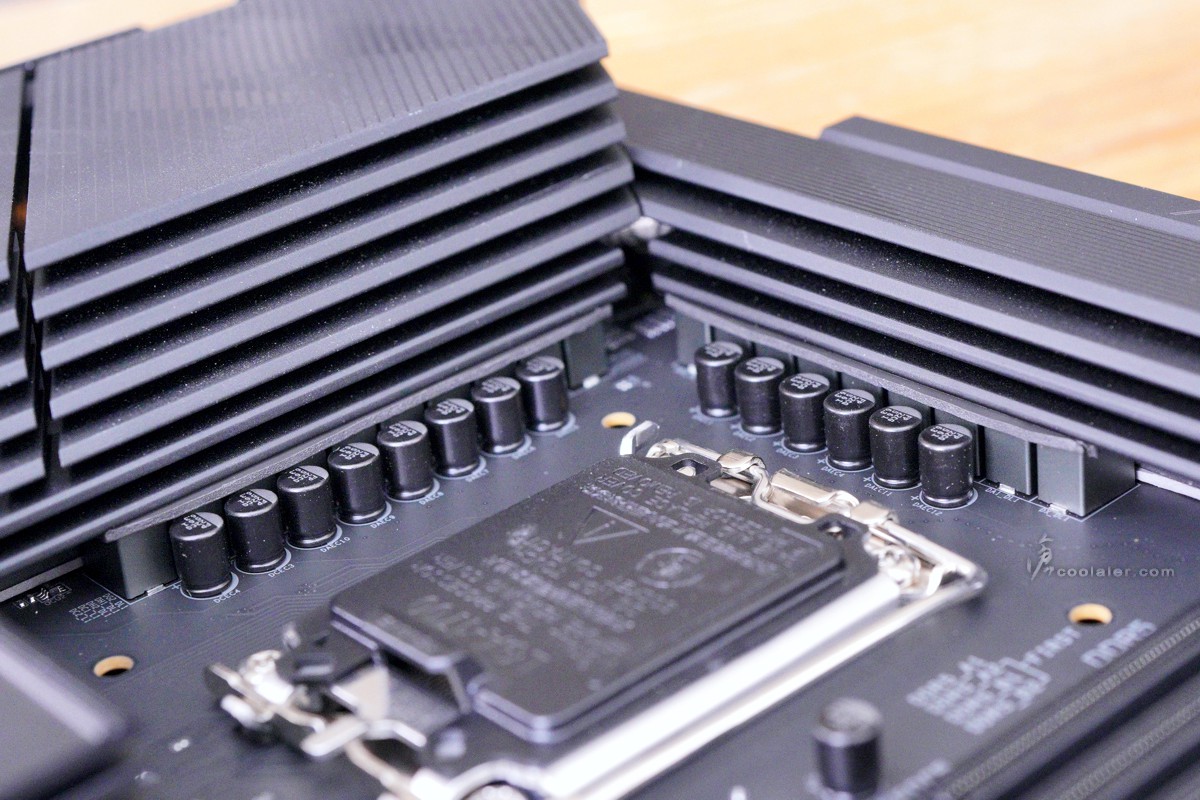
採用16+1+2相數位 VRM 供電設計。在元件上面也貼上了 7 W/mK 導熱墊與散熱器接觸加強導熱。
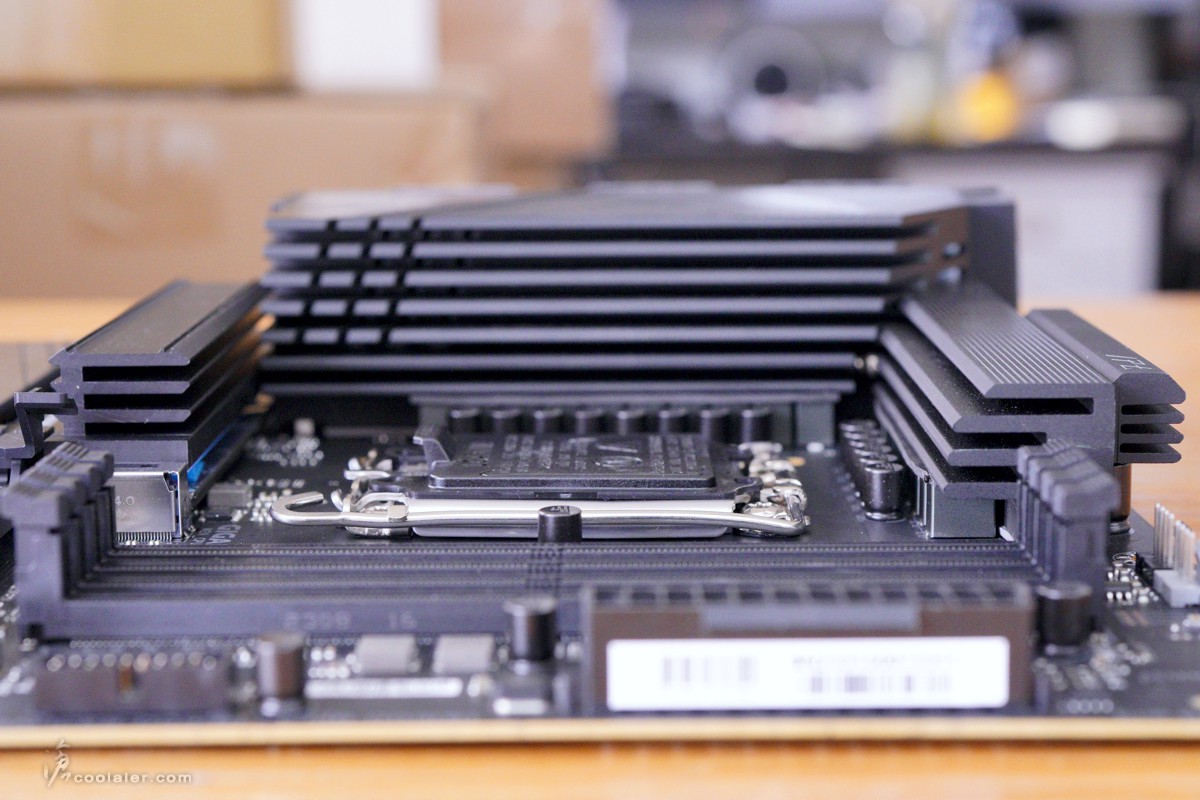
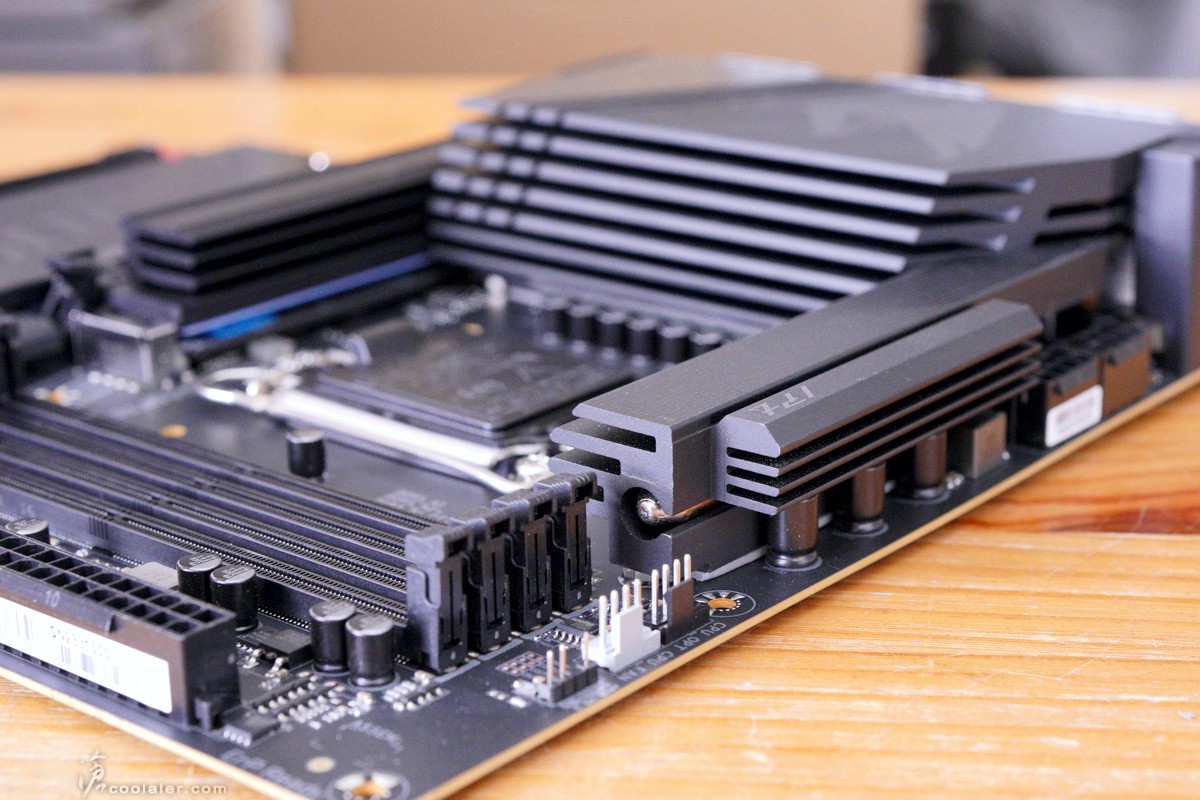
另一側可以看到散熱片採用 8mm 的熱導管貫穿強化散熱。
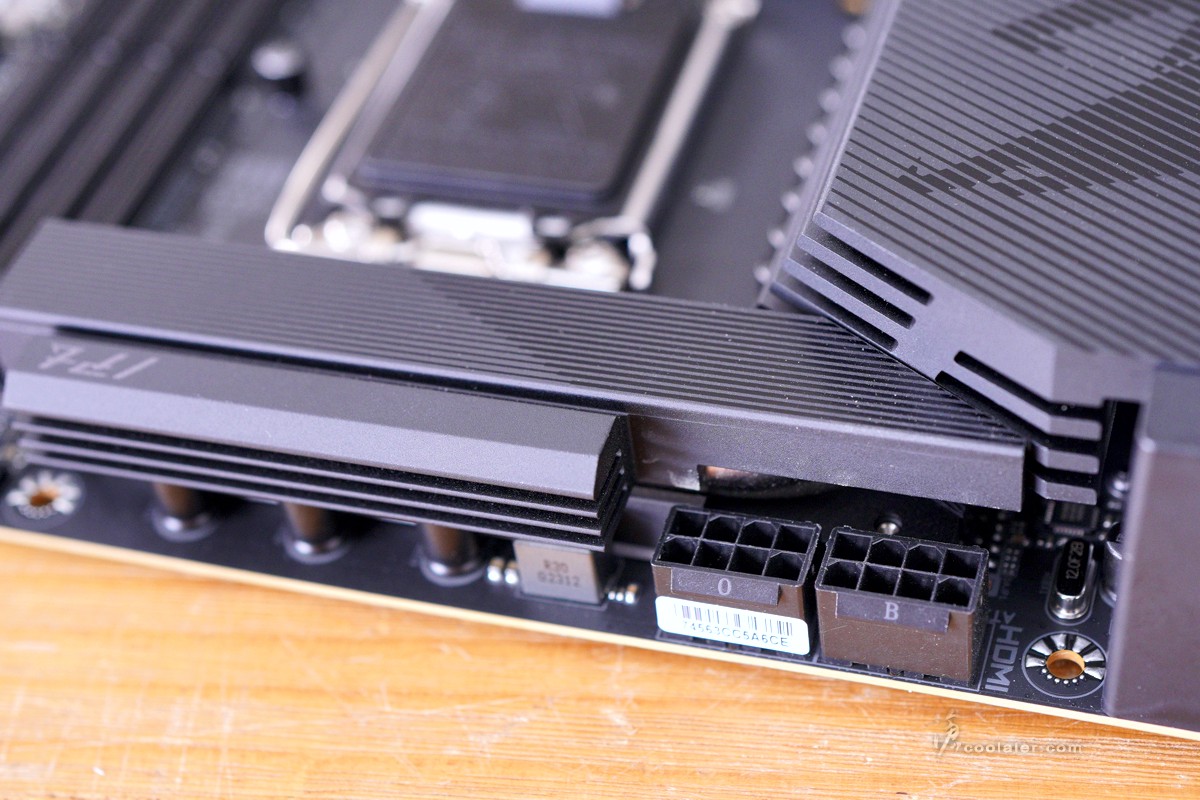
CPU 供電為8+8pin。
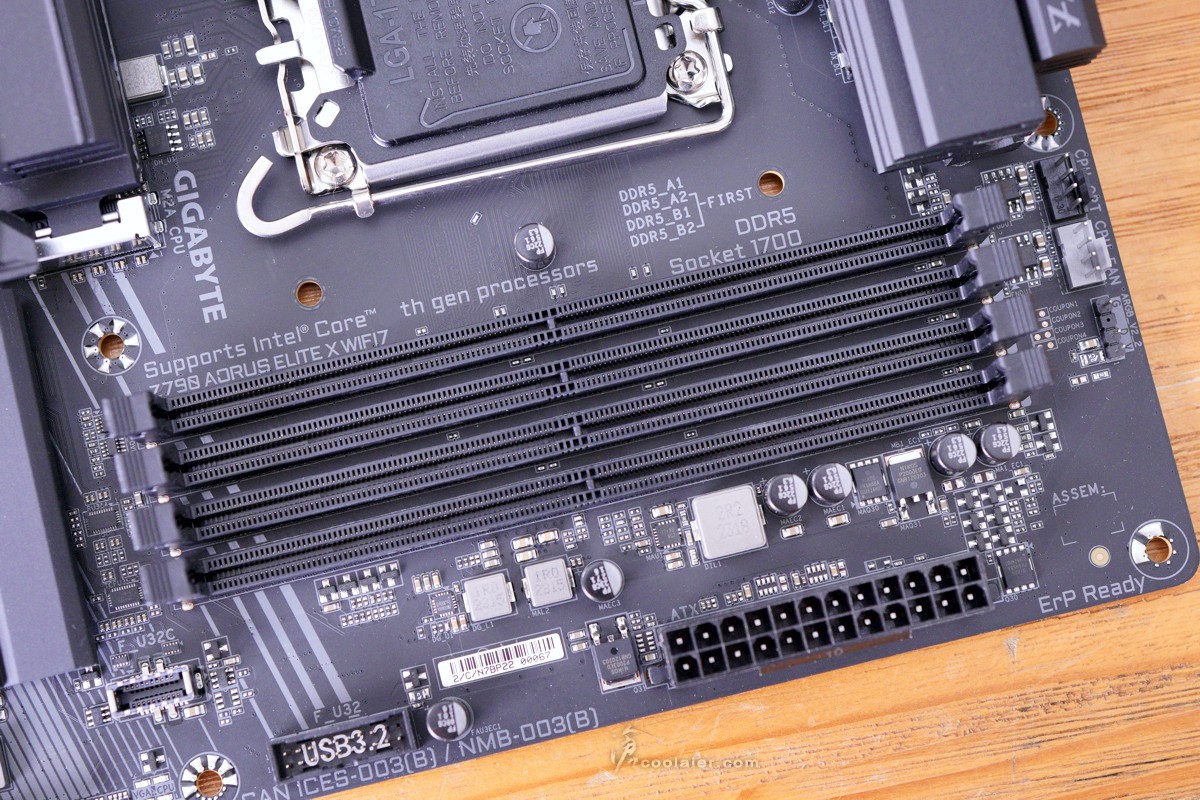
DDR5 在 X 系列最高可支援到 8266+MHz。容量最高可以擴充到 192GB。
1個 USB 3.2 Gen 2 Type-C、1組 USB 3.2 Gen 1。在 Type-C 接口下面有1組簡易的 Debug 燈。
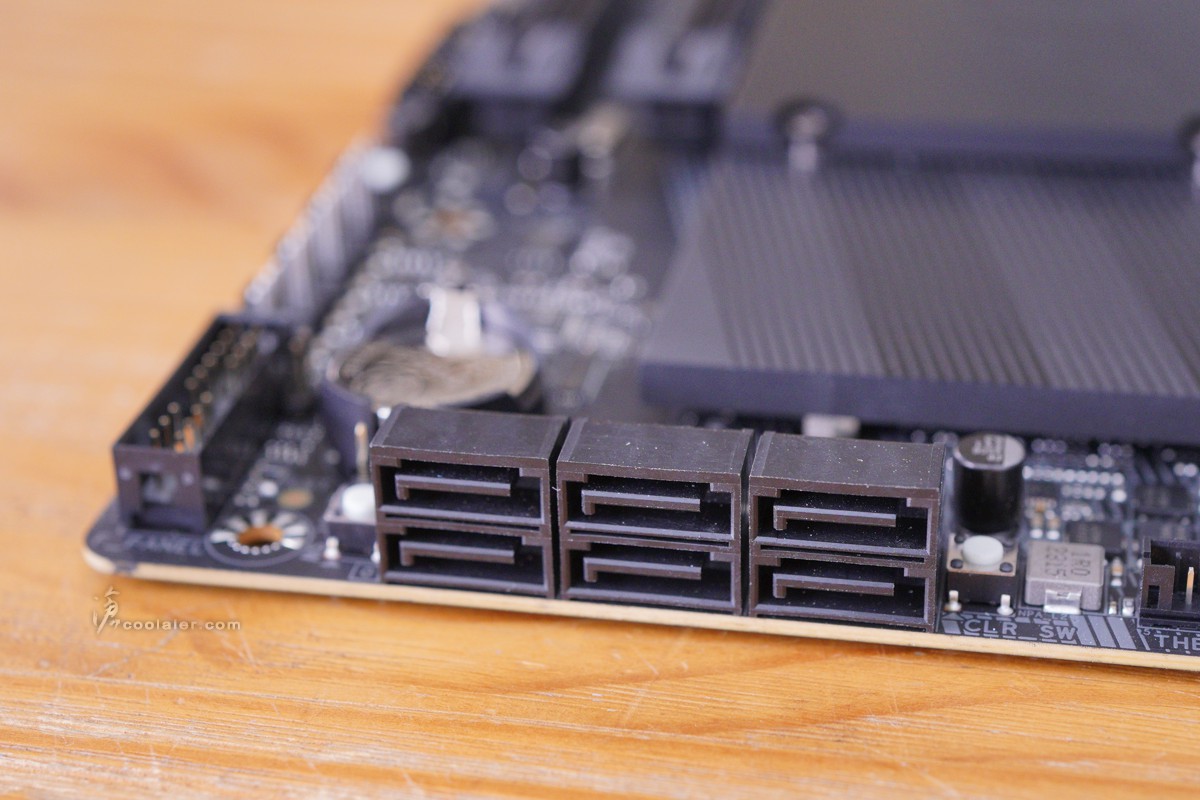
6個 SATA。在 SATA 右側則有1個 CMOS 鍵用來快速重置 BIOS。
晶片組散熱片間接延伸到擴充卡槽中間 M.2 安裝位上。
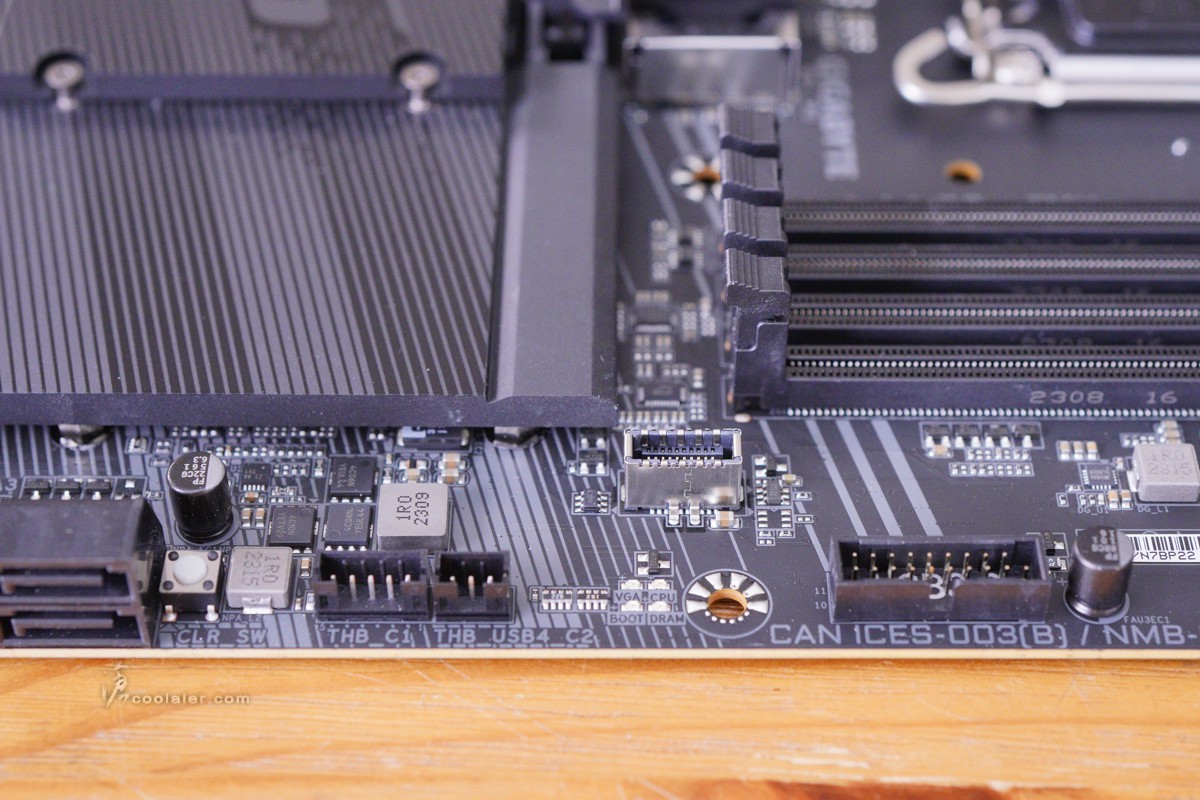
主板下側邊有 Q-Flash Plus 按鈕,支援無硬體刷 BIOS 功能。另外在電池旁邊則有一顆重置鍵。

3個 PCIe x16 插槽,第一根為 PCIe 5.0 x16,其餘兩個為 PCIe 4.0 x4 規格。
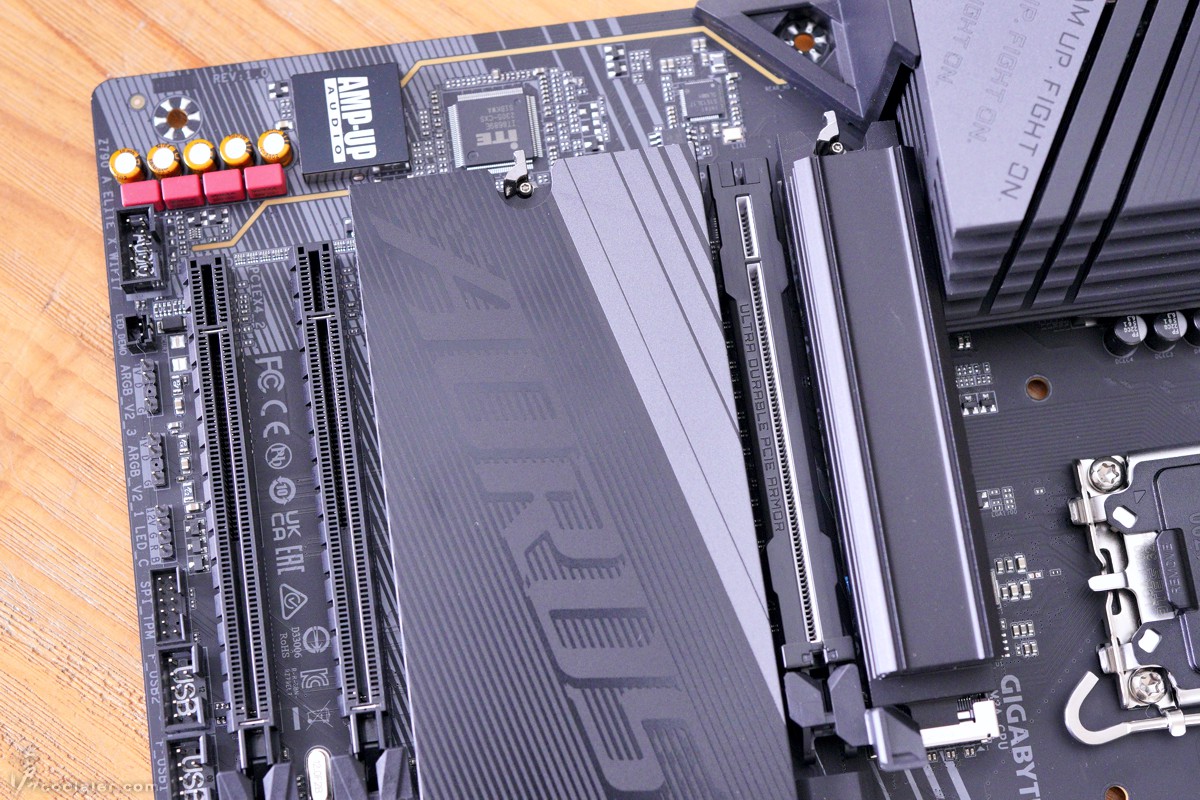
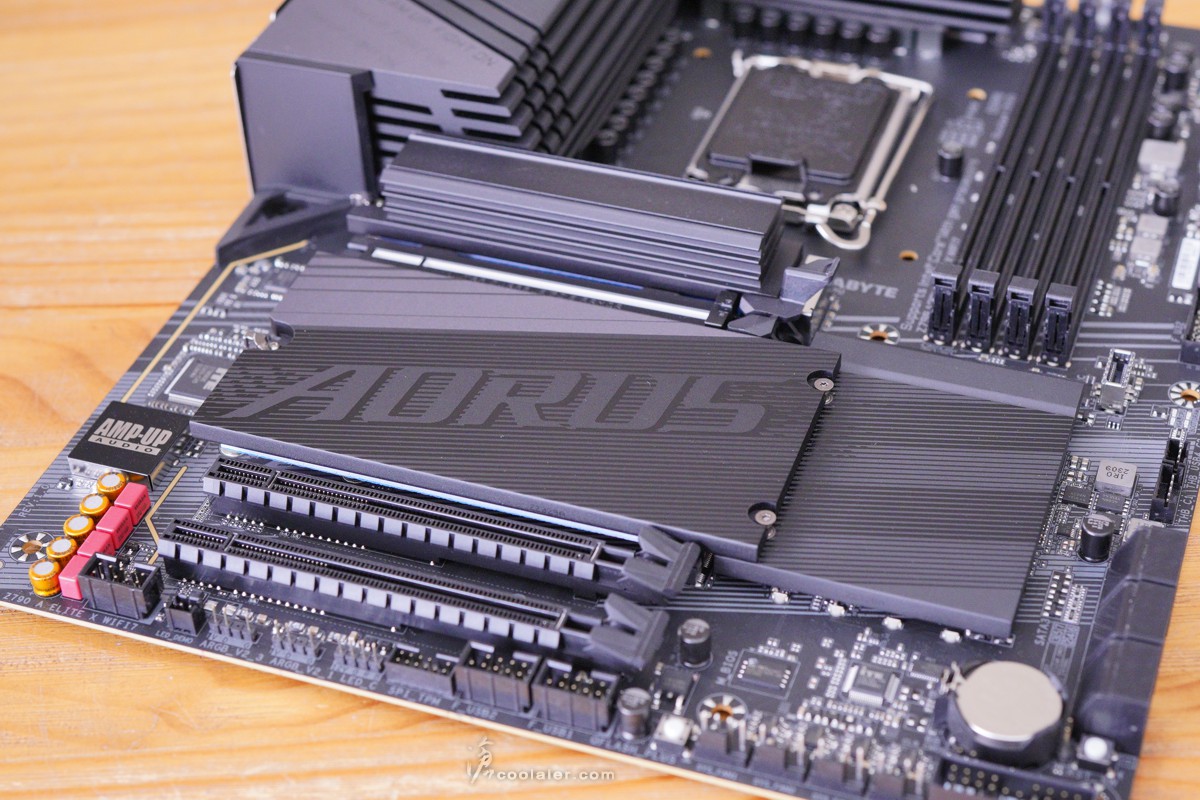
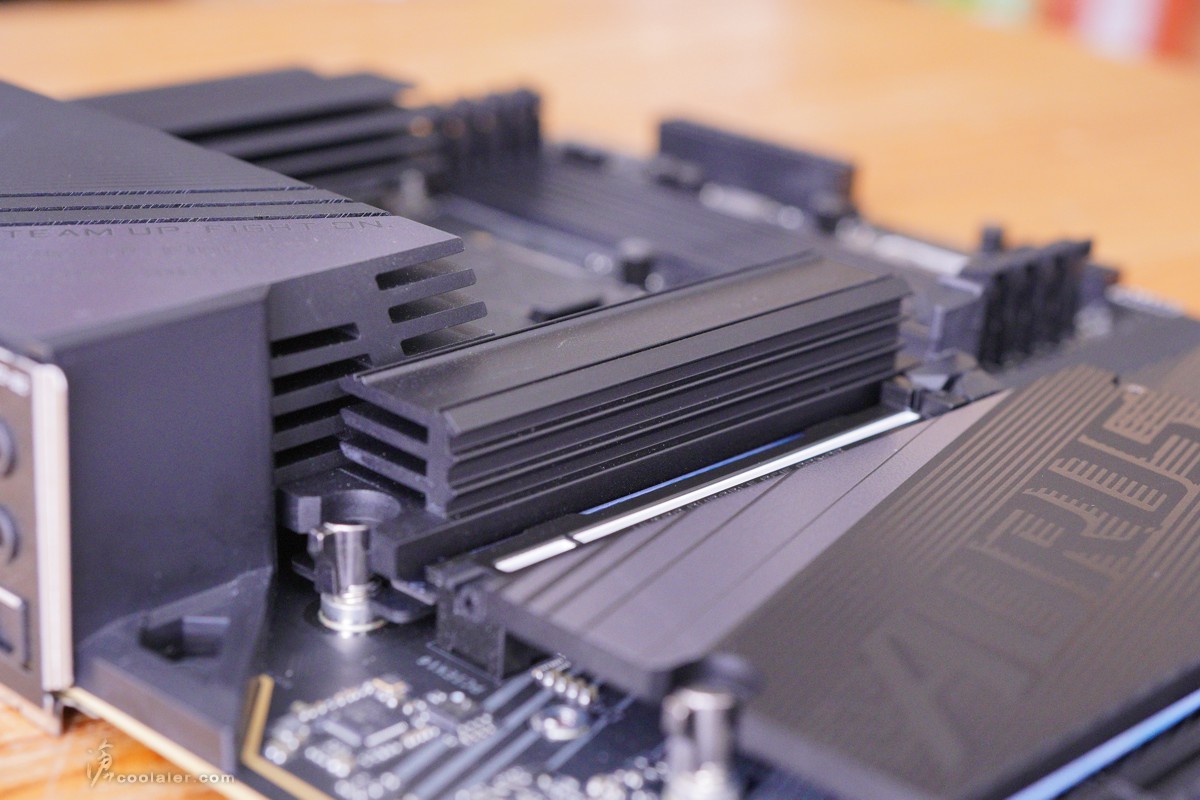
第一個 M.2 插槽為 PCIe 4.0 x4 規格,也對應了比較高級的 M.2 Thermal Guard L 散熱片。
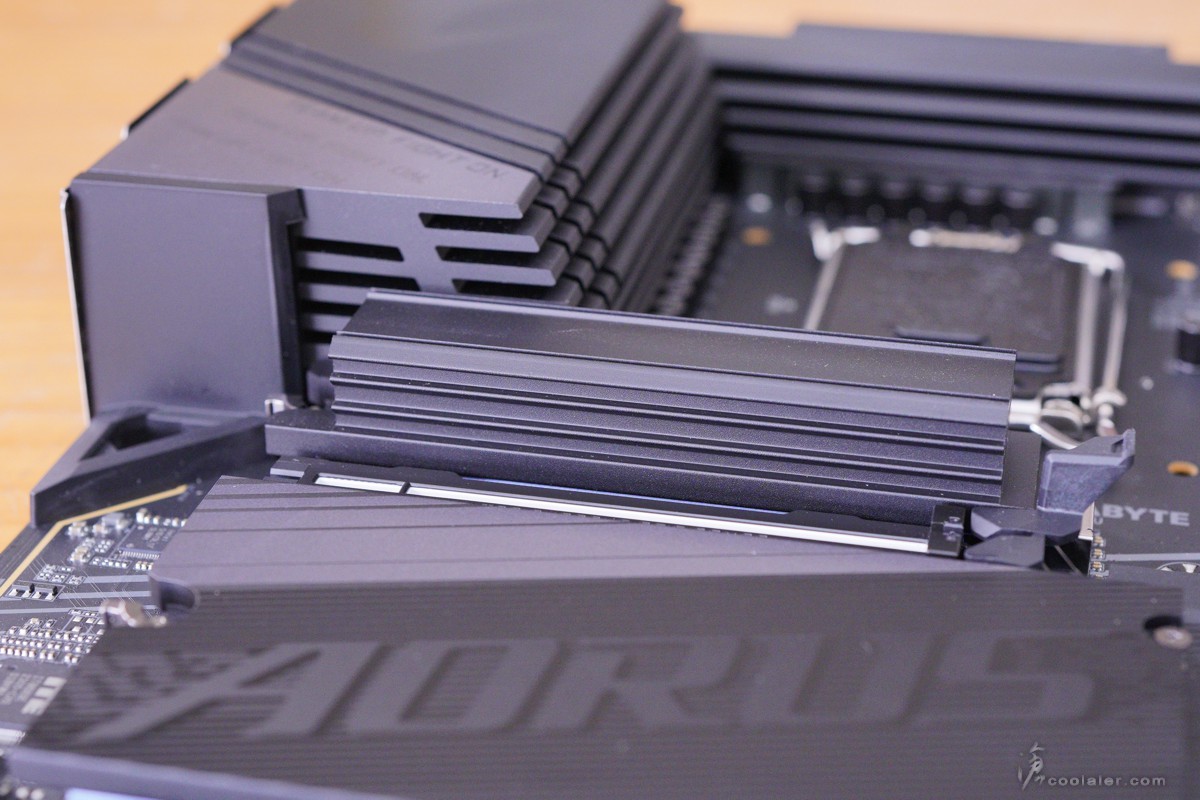
側邊可看到是有比較大的散熱面積。
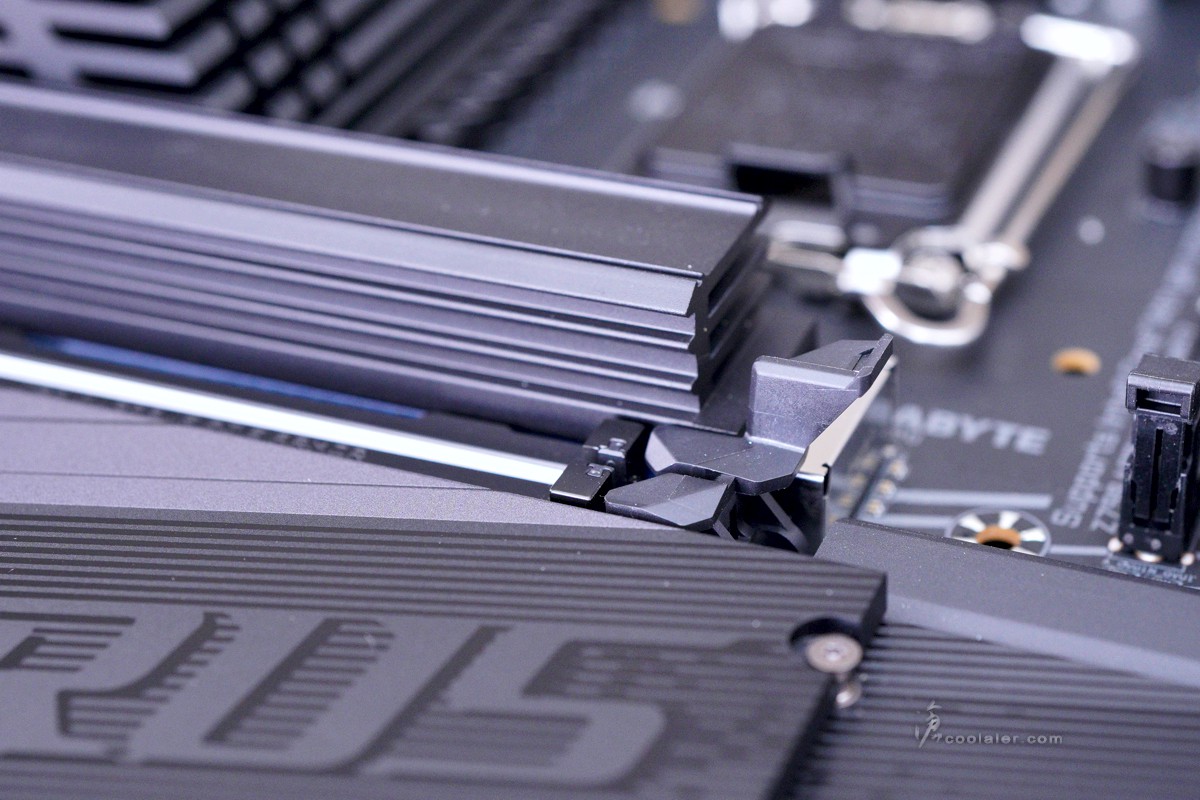
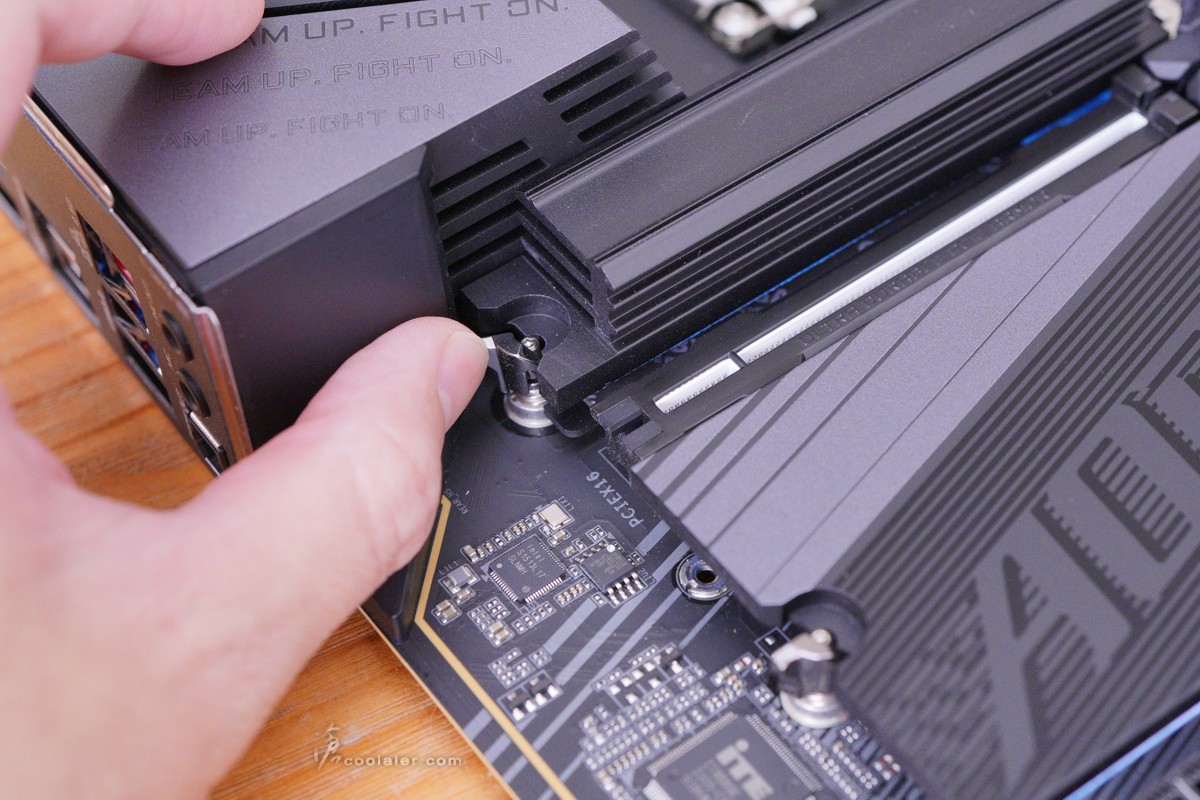
在 PCIe x16 插槽的後方的拆卸卡榫做了 PCIe EZ-Latch 加高設計,可使拆卸更容易。
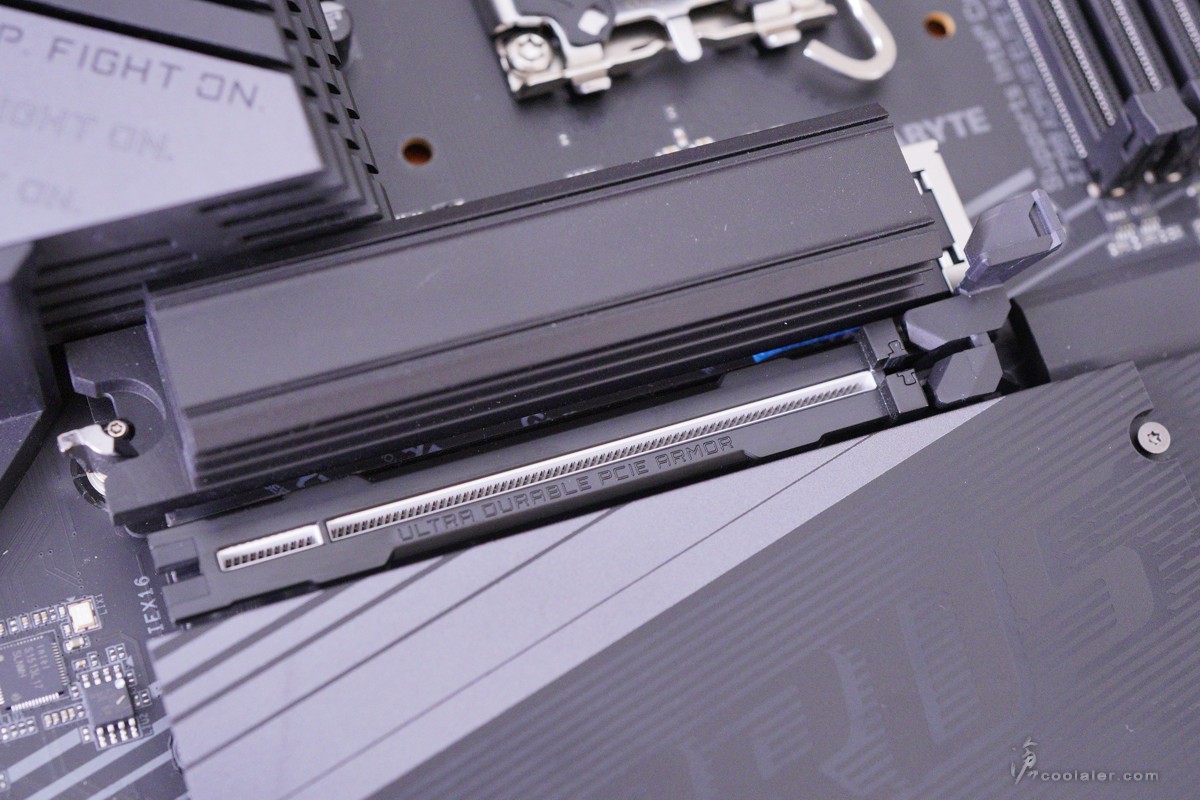
第一根 PCIe x16 插槽針對了現在旗艦顯卡越來越重的對應設計,原本採用加固金屬板,而 X 系列則用上了一體式無接縫的金屬裝甲,可承受50公斤,相比一般設計要高出10倍,另外在前端內側也採用了膠條配置,避免刮傷顯卡。
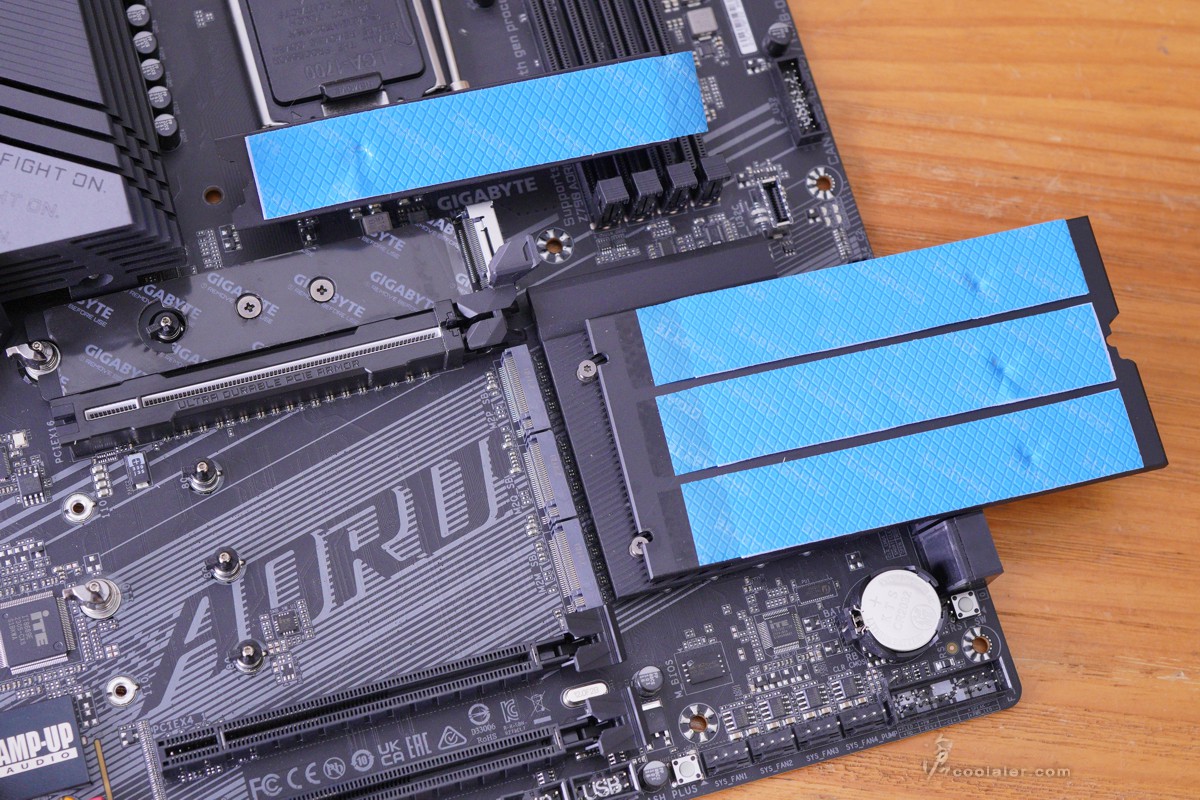
在 M.2 的散熱片上面則改用了無螺絲卡榫 M.2 EZ-Latch Click 設計。簡單一扳就可以拆下散熱片,也不用擔心螺絲噴飛找不到的問題。
4個 M.2 都是 PCIe 4.0 x4 規格,皆有應散熱片,並且有導熱墊。第一個 M.2 的底部也有導熱墊,這部分在配件上還貼心的多附了一張可替換。另外在 M.2 安裝也是免螺絲的 EZ-Latch Plus 設計。
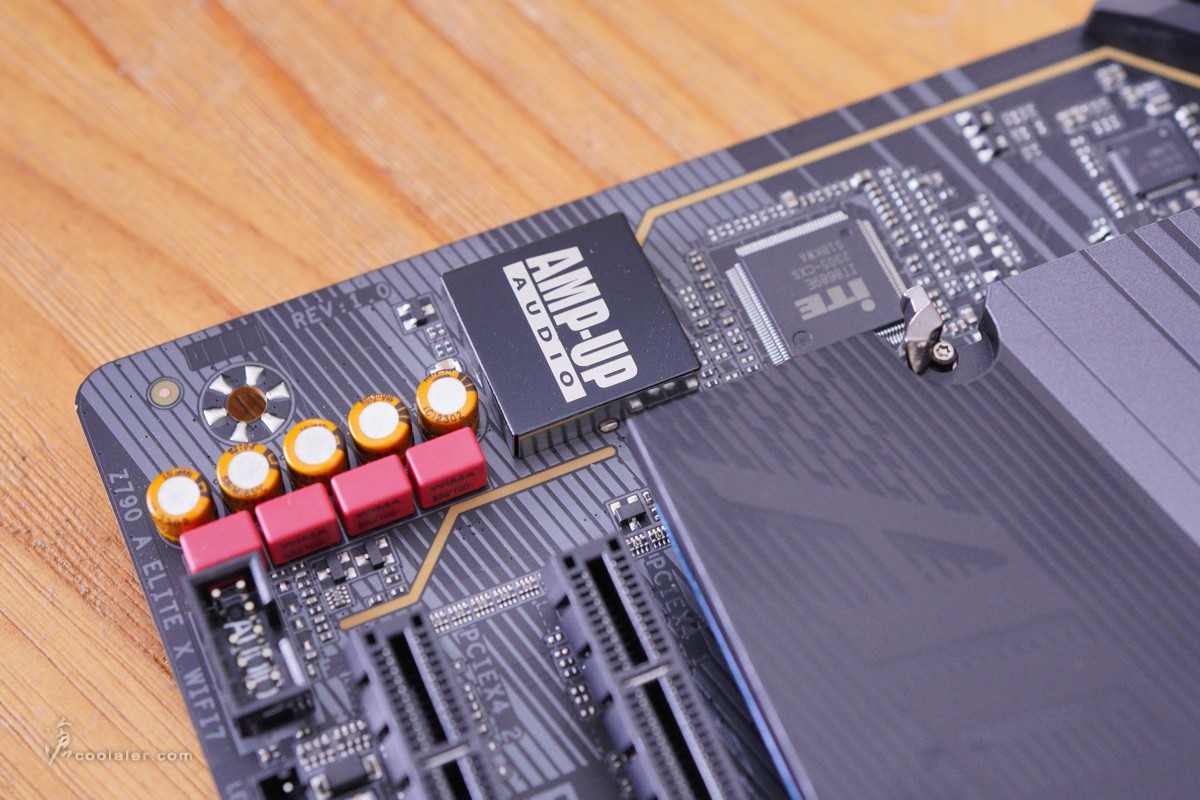
音效採隔離區域設計,使用 Realtek ALC1220-VB 晶片並搭配 WIMA 音效電容。
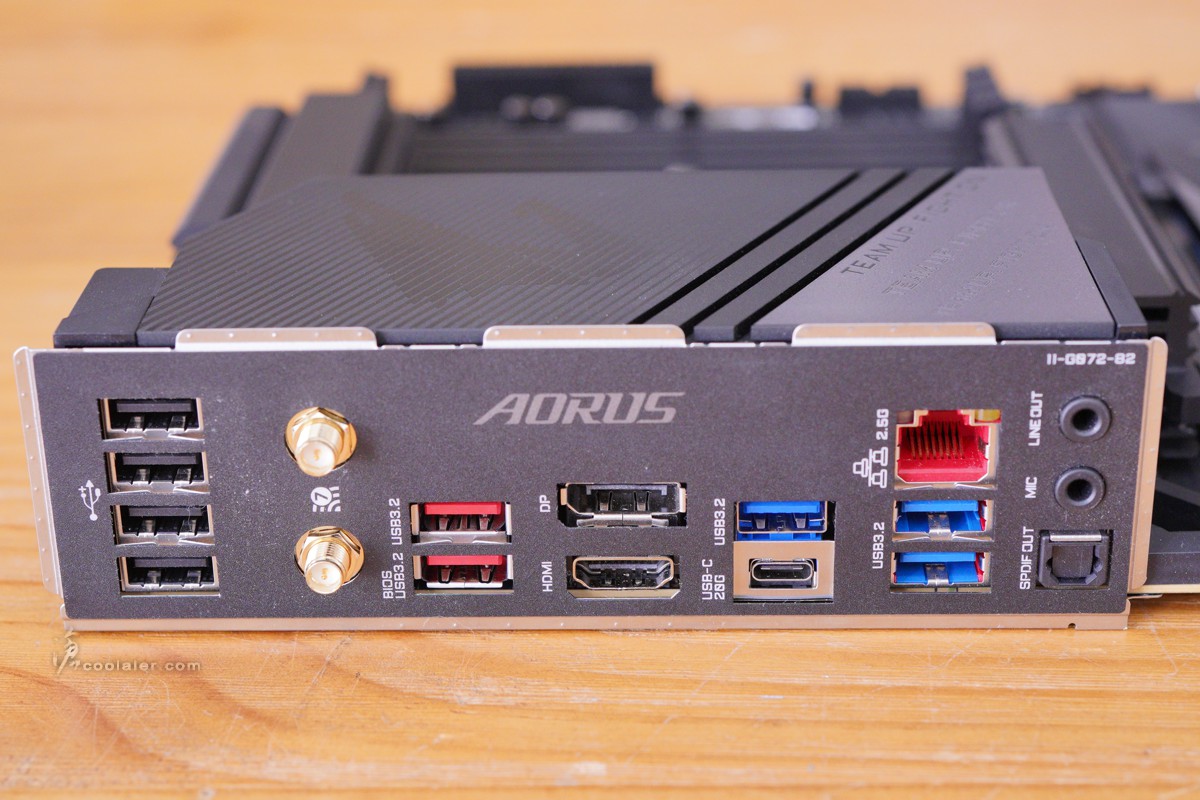
後方 IO 埠,4個USB 2.0、WI-FI 7 無線天線埠、2個 USB 3.2 Gen 2、1個 DP、1個 HDMI、3個 USB 3.2 Gen 1、1個 USB 3.2 Gen 2×2 Type-C、1個 RJ-45(Intel 2.5GbE)、2個音源輸出入、S/PDIF 光纖輸出。
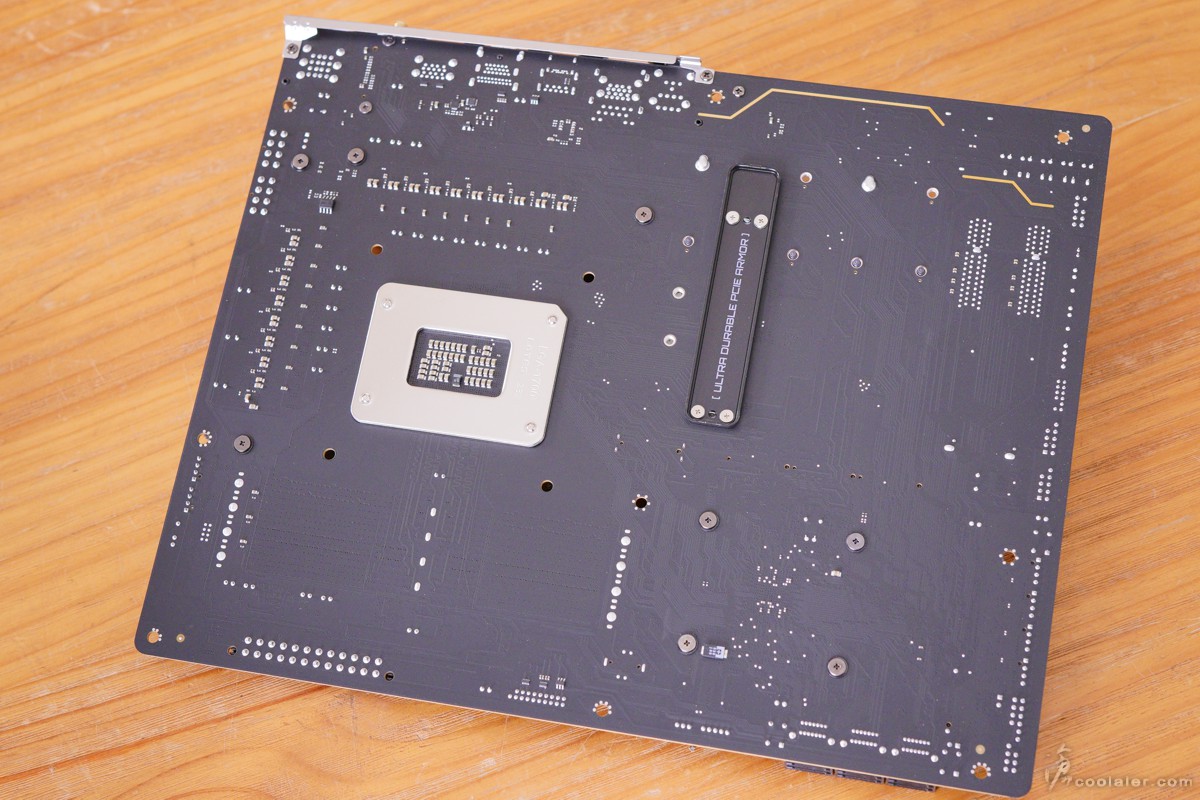
背部可以看到 PCIe 顯卡插槽的金屬裝甲底部還有一片金屬板強化。
BIOS 簡介
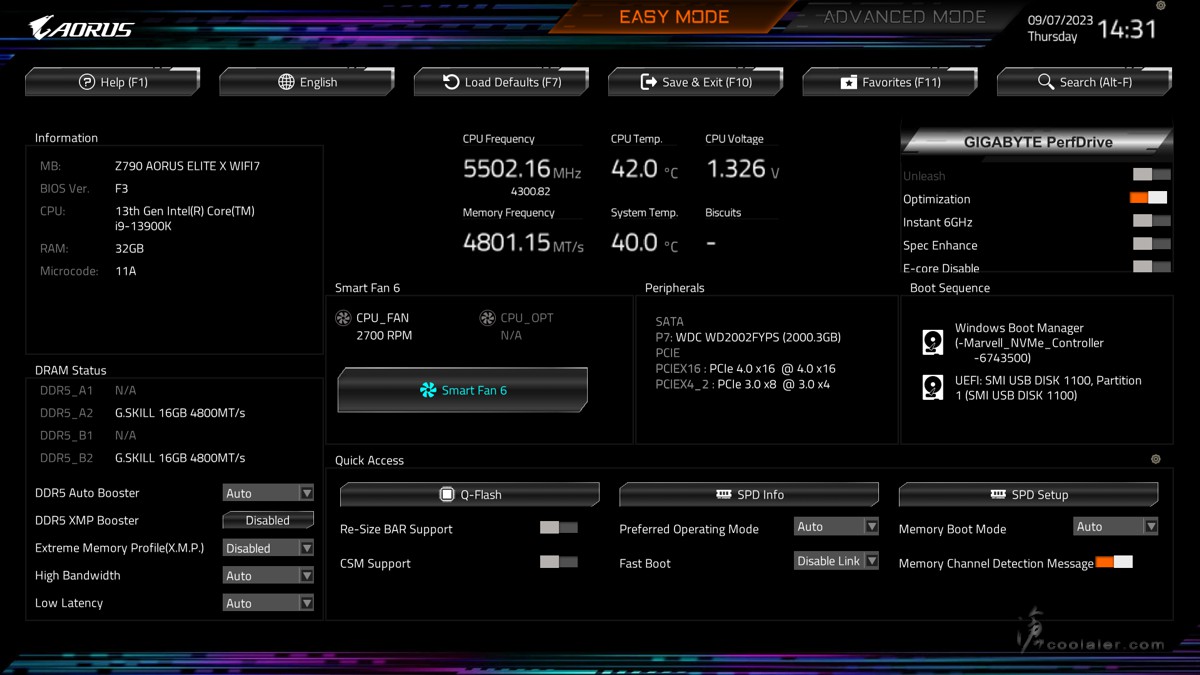
X 系列的 BIOS 介面有著不同的設計,在 EASY MODE 上面除了原本的系統資訊顯示、快速調整之外,還多了 Quick Access 區塊,這邊技嘉把最常用的 BIOS 選項從進階模式移植到簡易模式之中,讓使用者更為直覺且快速的操作。
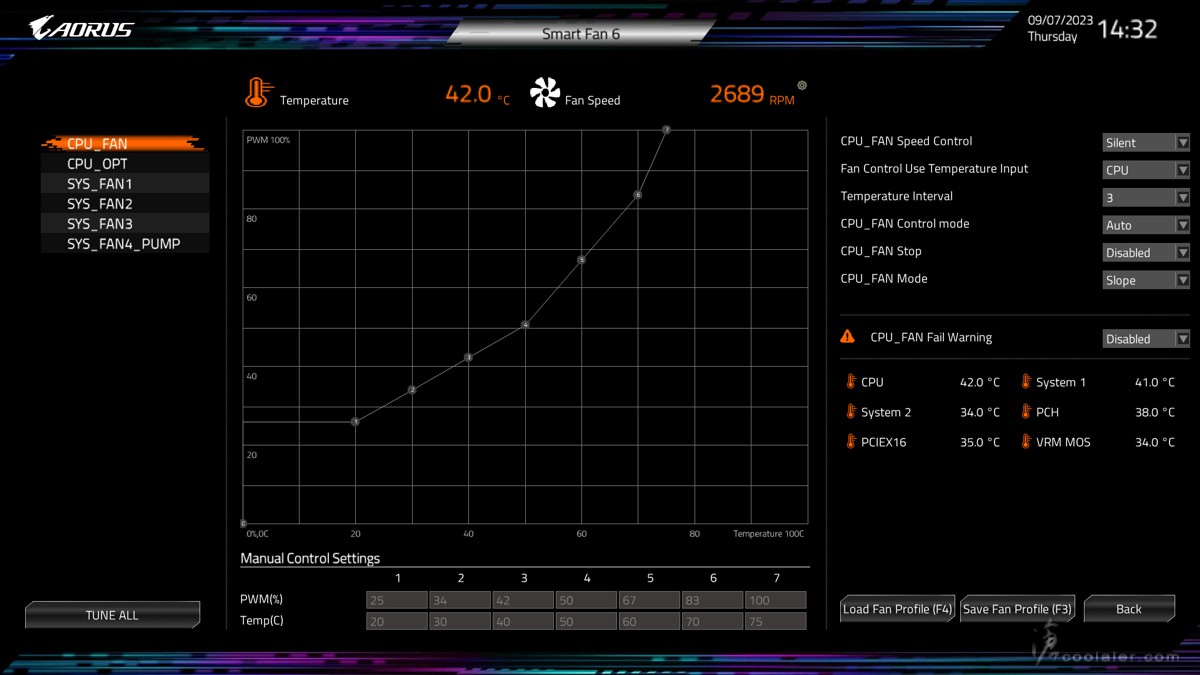
Smart Fan 6 ,可調整風扇轉速對應溫度曲線。
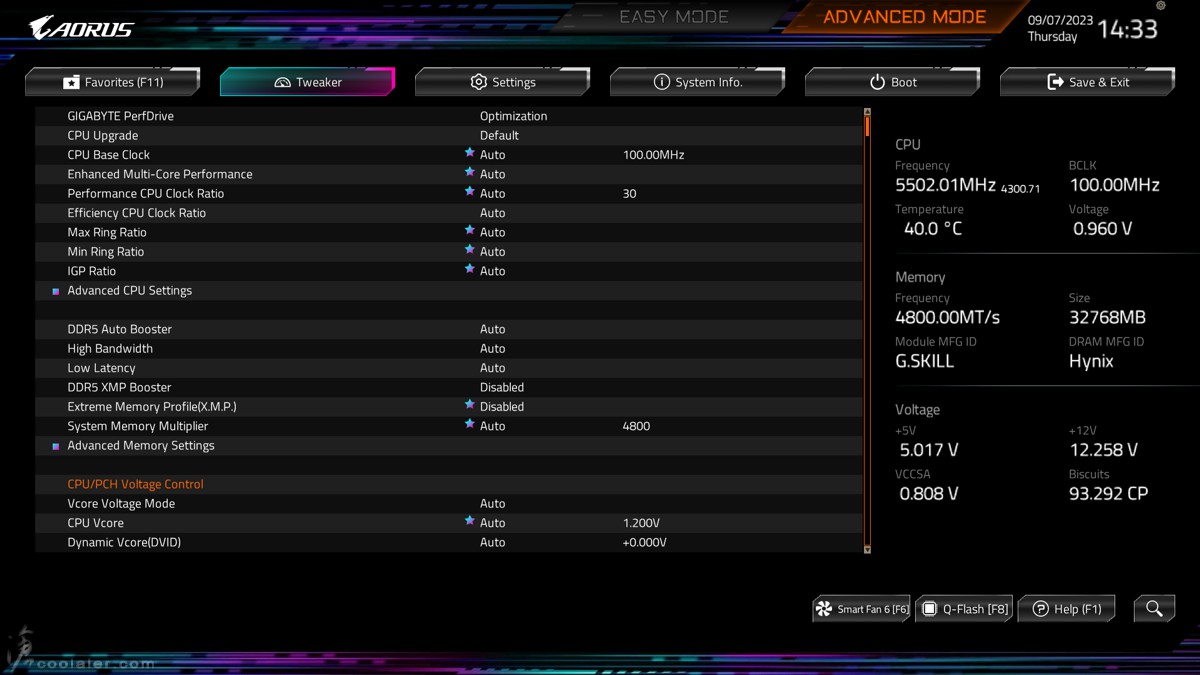
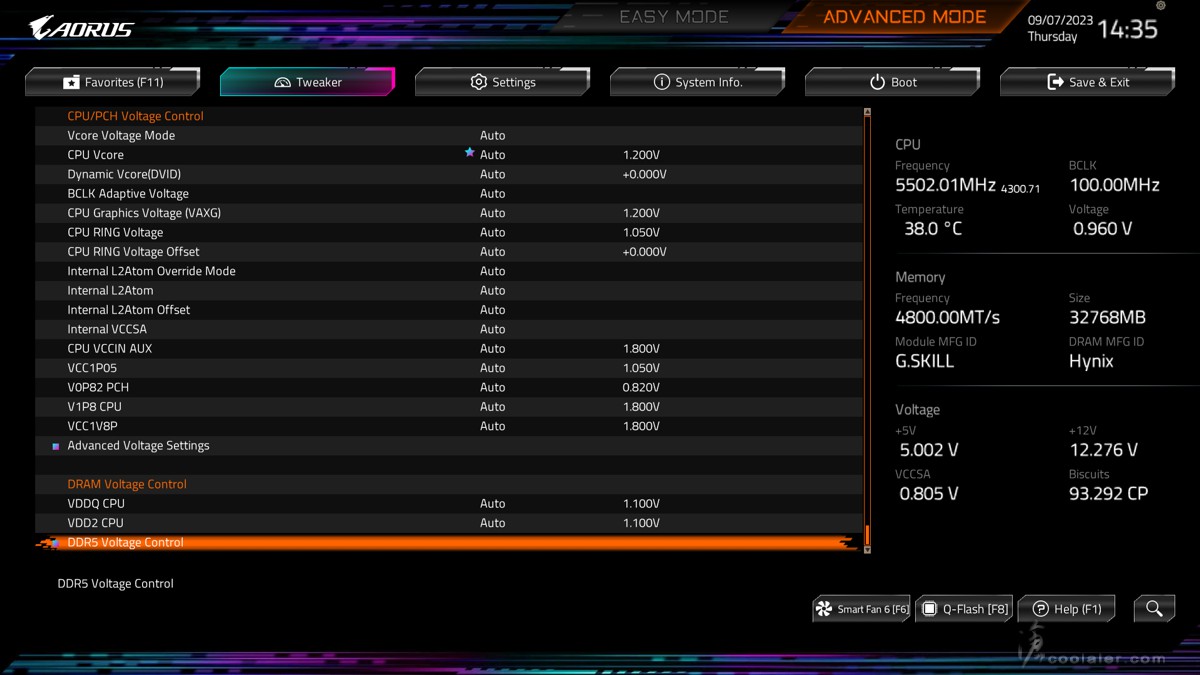
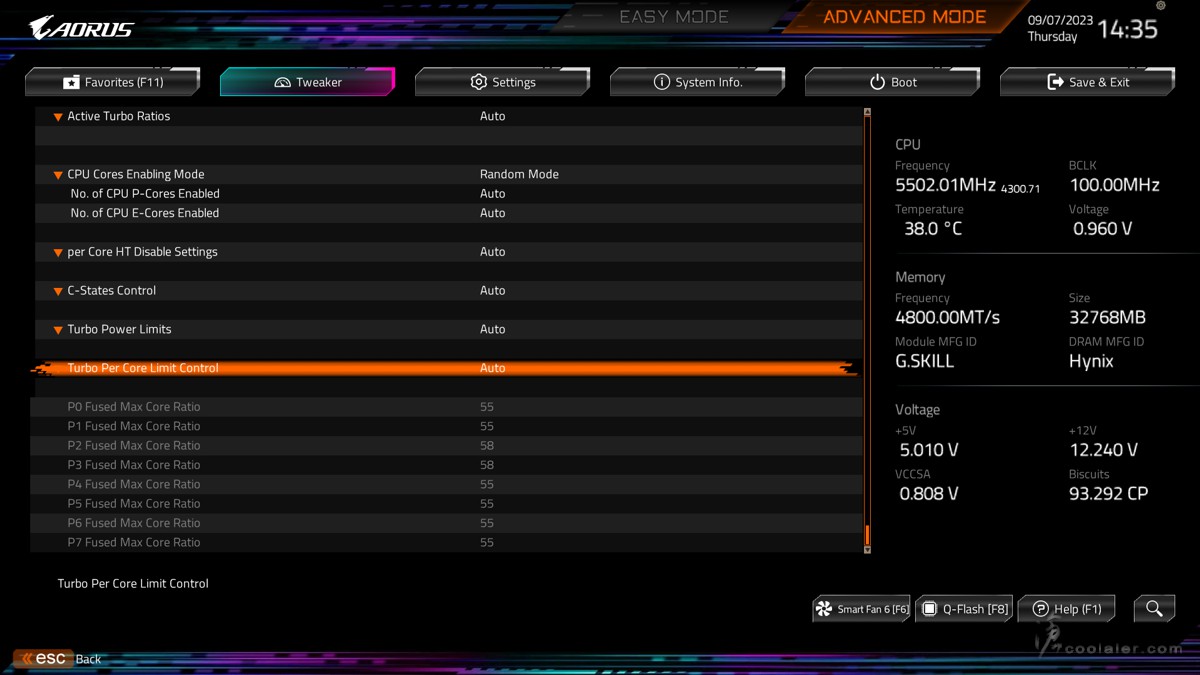
進階模式,在介面風格上也有點不一樣,還有行與行之間也可刻意用了灰底來區隔,避免看到眼花。超頻選項與之前是差不多的,很完整,可直接調用 GIGABYTE PerfDrive 讓玩家輕鬆在效能、功耗及溫度取得平衡,也支援手動調整, CPU 倍頻、外頻、記憶體設定、CPU 設定、電壓等。
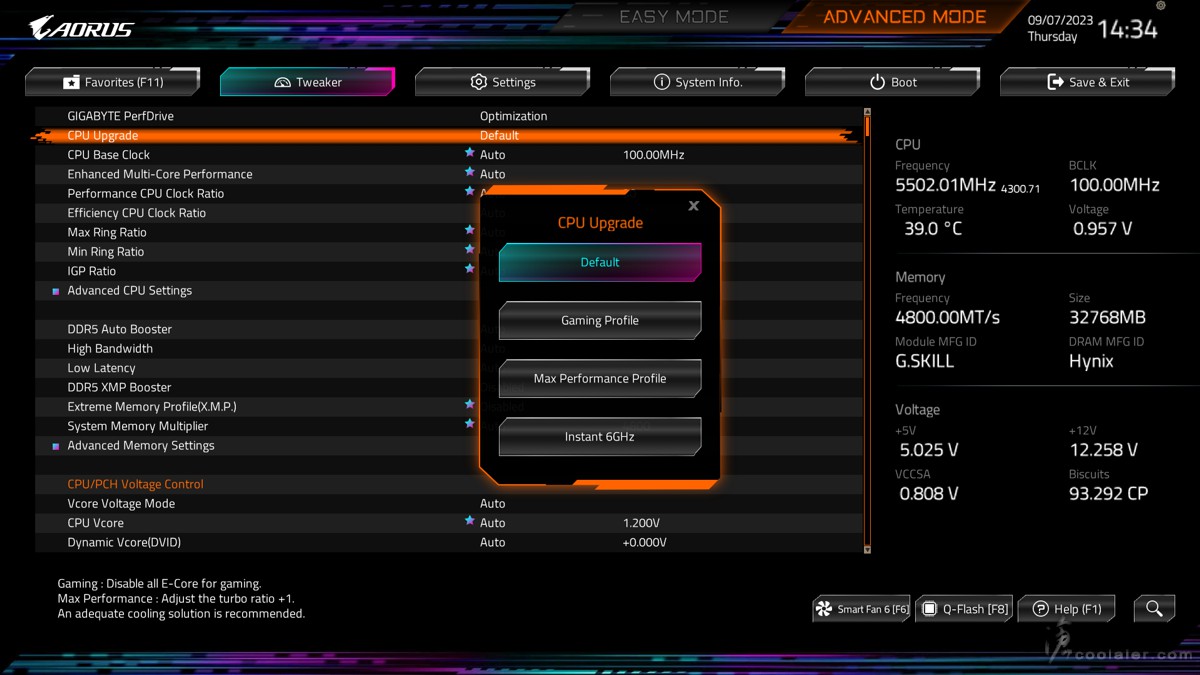
CPU Upgrade 選項。
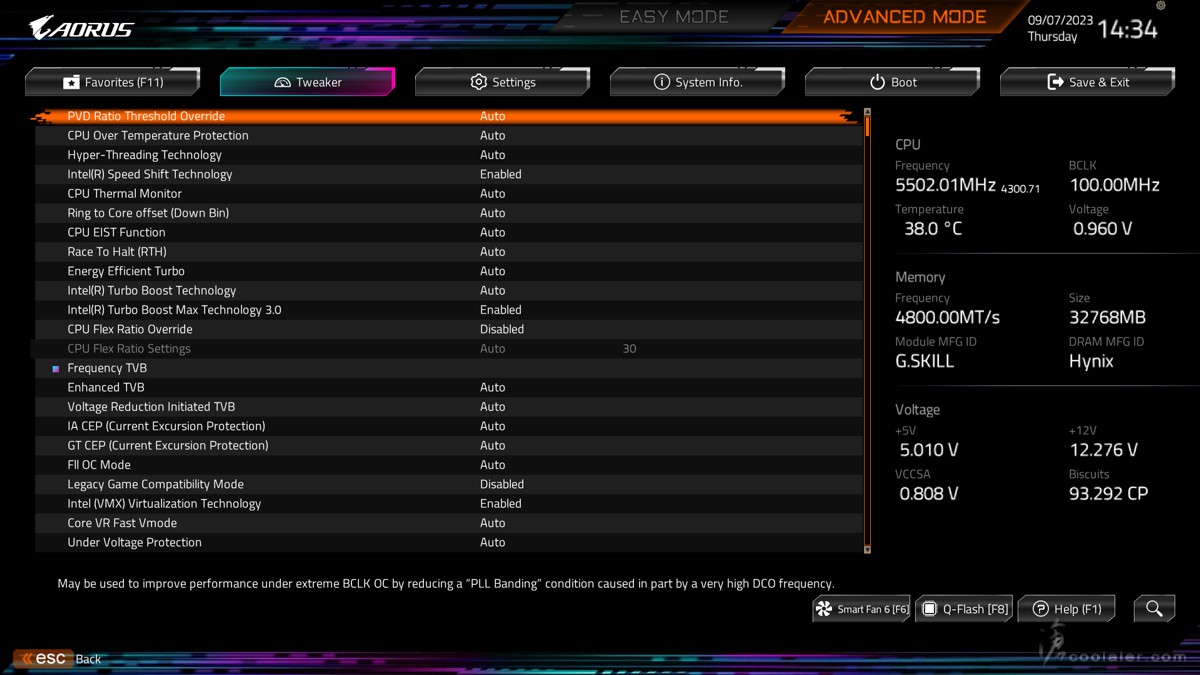
CPU 進階選項。
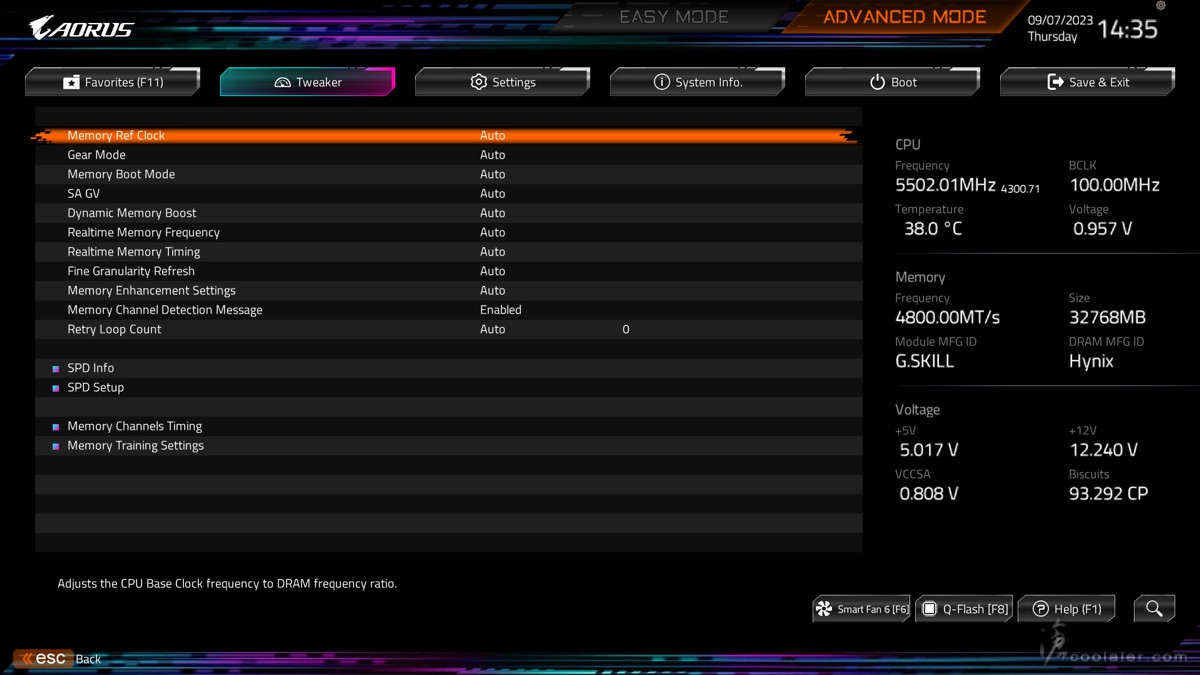
記憶體選項。
測試平台
CPU: Intel Core i9-13900K
CPU Cooler: MSI MEG CORELIQUID S360
RAM: GSKILL Trident Z5 RGB DDR5-6800 16GBx2
MB: GIGABYTE Z790 AORUS ELITE X WIFI7
VGA: GIGABYTE RTX 4080 GAMING OC
SSD: GIGABYTE AORUS RAID SSD 2TB
PSU: InWin SI 1065W
OS: Windows 11
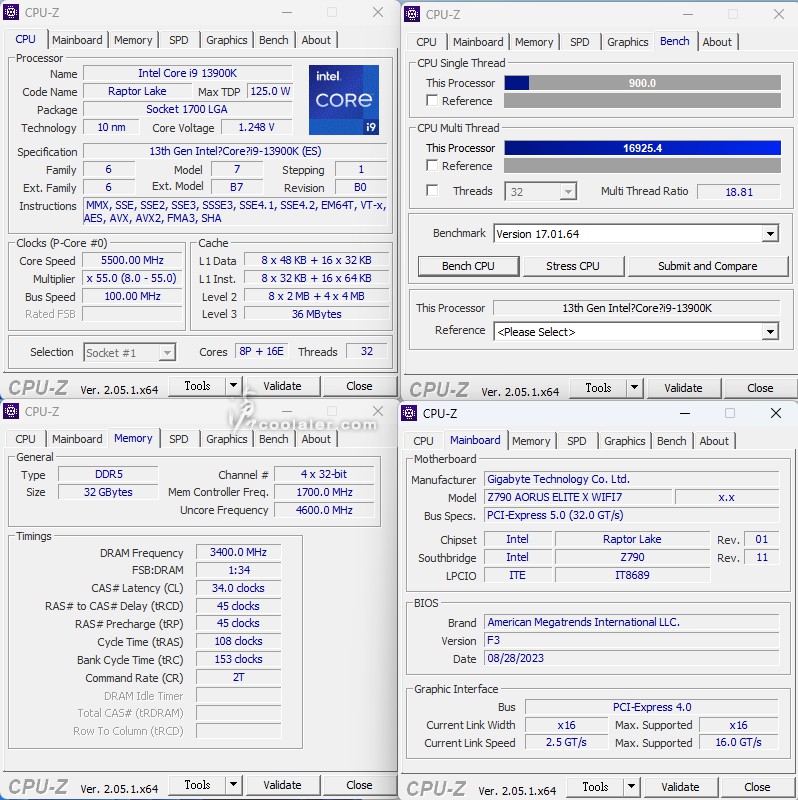
CPU-Z
CPU Single:900
CPU Multi:16925.4
SuperPI 1M:5.831s
CPUmark99:887

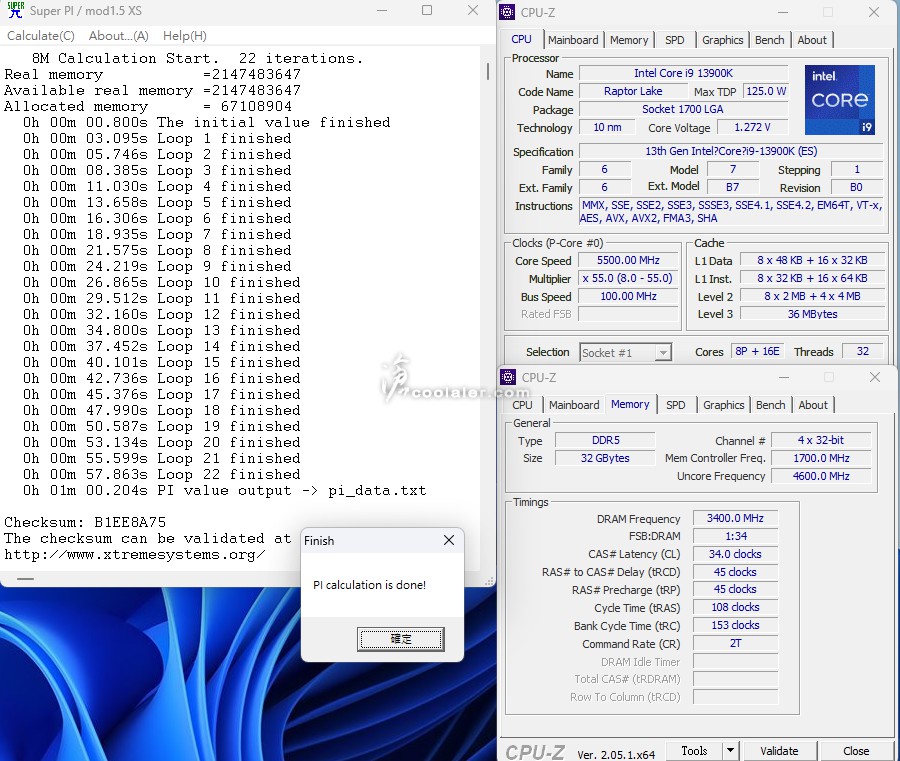
SuperPI 8M:1m00.204s
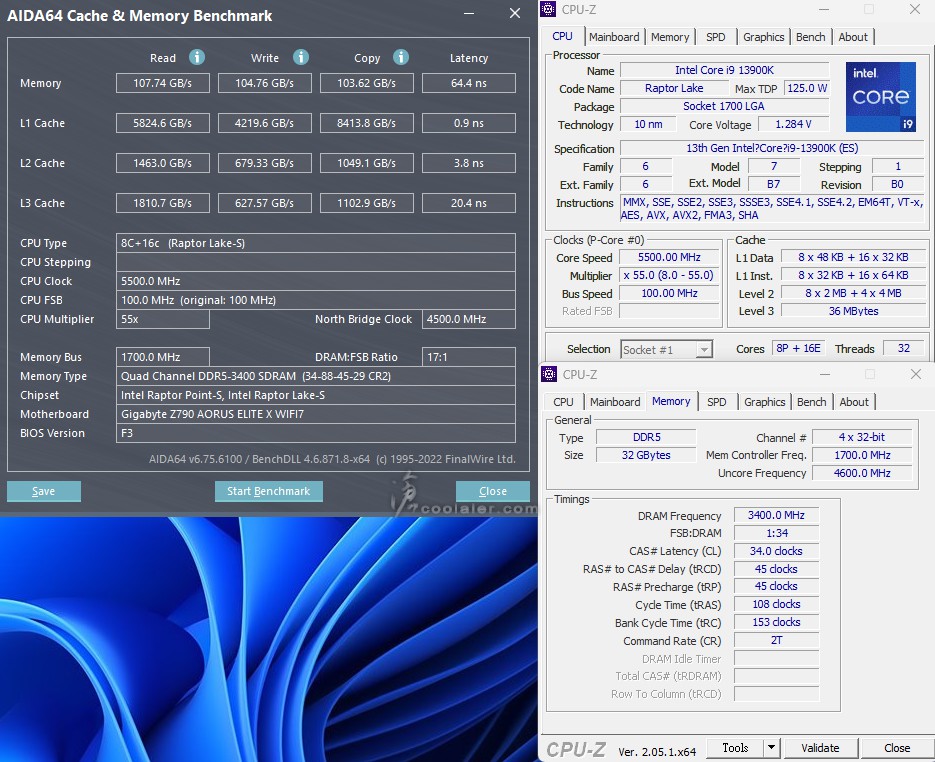
Memory Benchmark
Read:107.74 GB/s
Write:104.76 GB/s
Copy:103.62 GB/s
Latency:64.4 ns
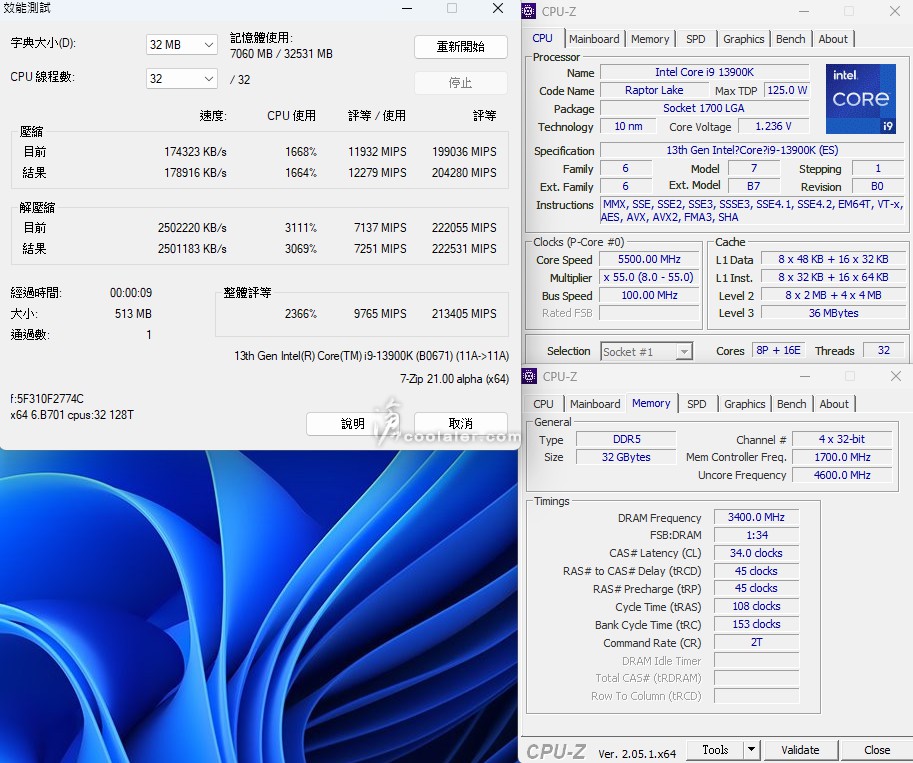
7-Zip 19.00
壓縮:204280 MIPS
解壓縮:222531 MIPS
整體評等:213405 MIPS
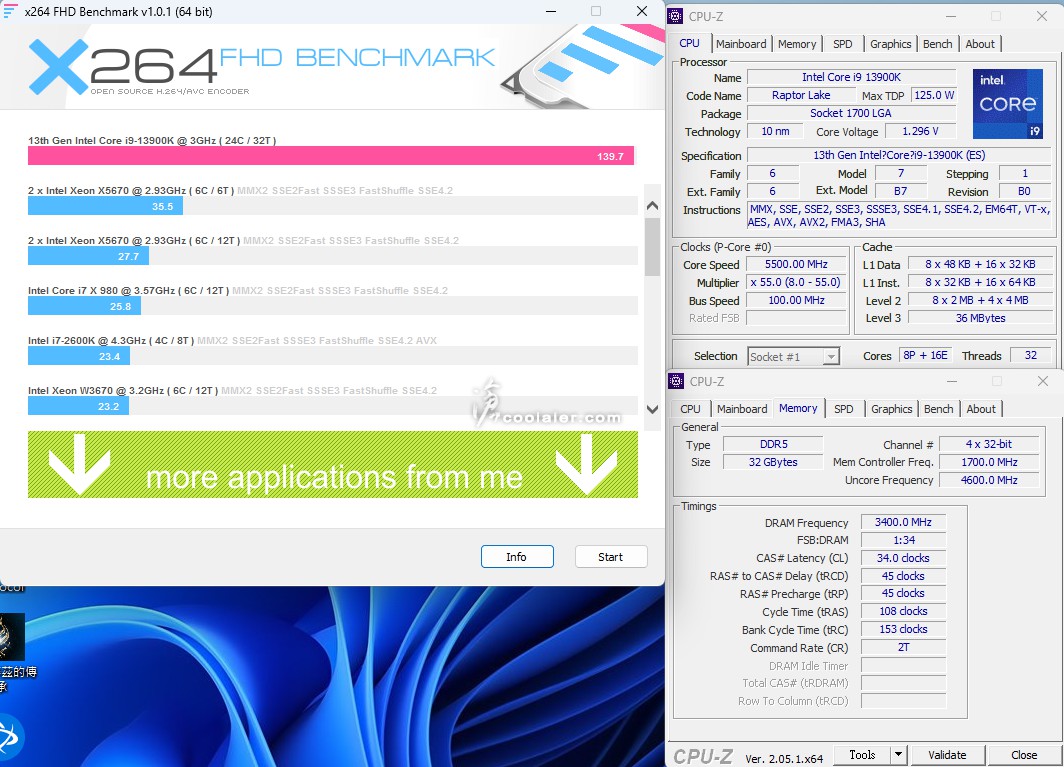
x264 FHD Benchmark:139.7
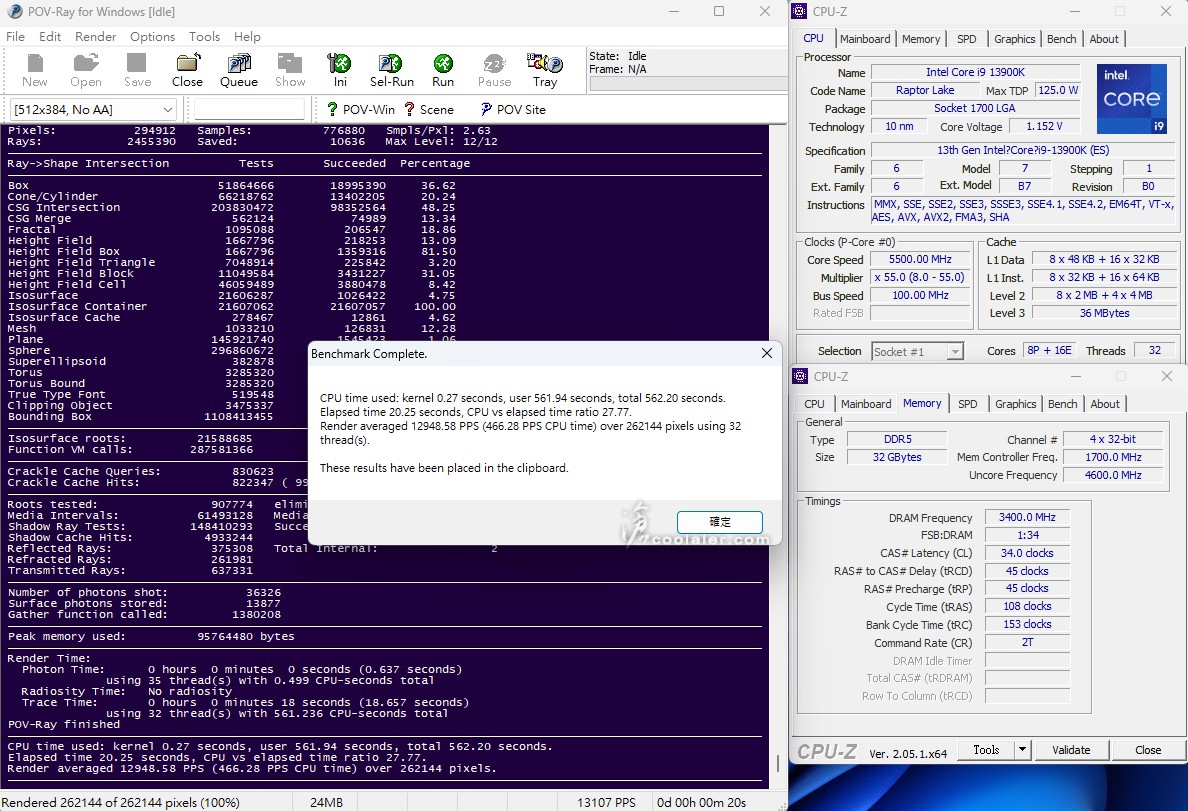
POV-Ray:20.25s
CINEBENCH R15
OpenGL:363.88 fps
CPU:6180 cb
CPU 單核心:311 cb

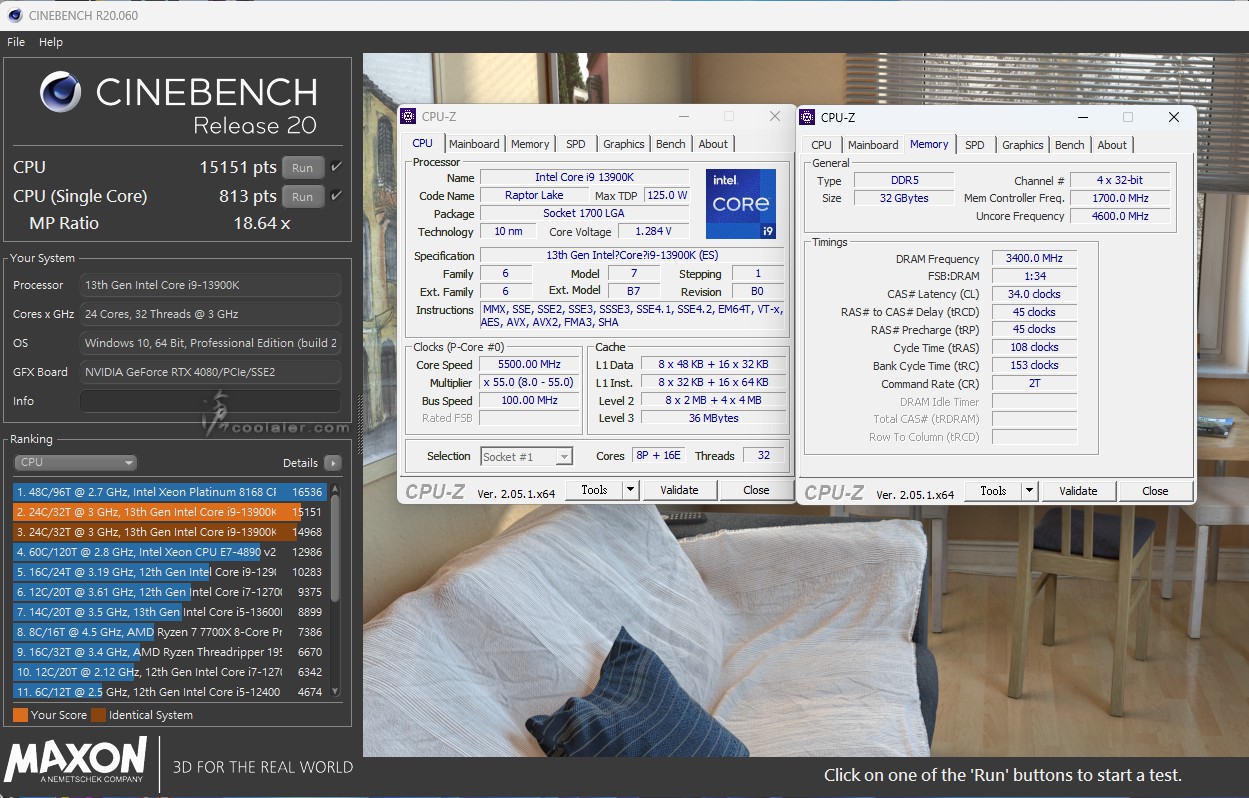
CINEBENCH R20
CPU:15151 pts
CPU 單核心:813 pts
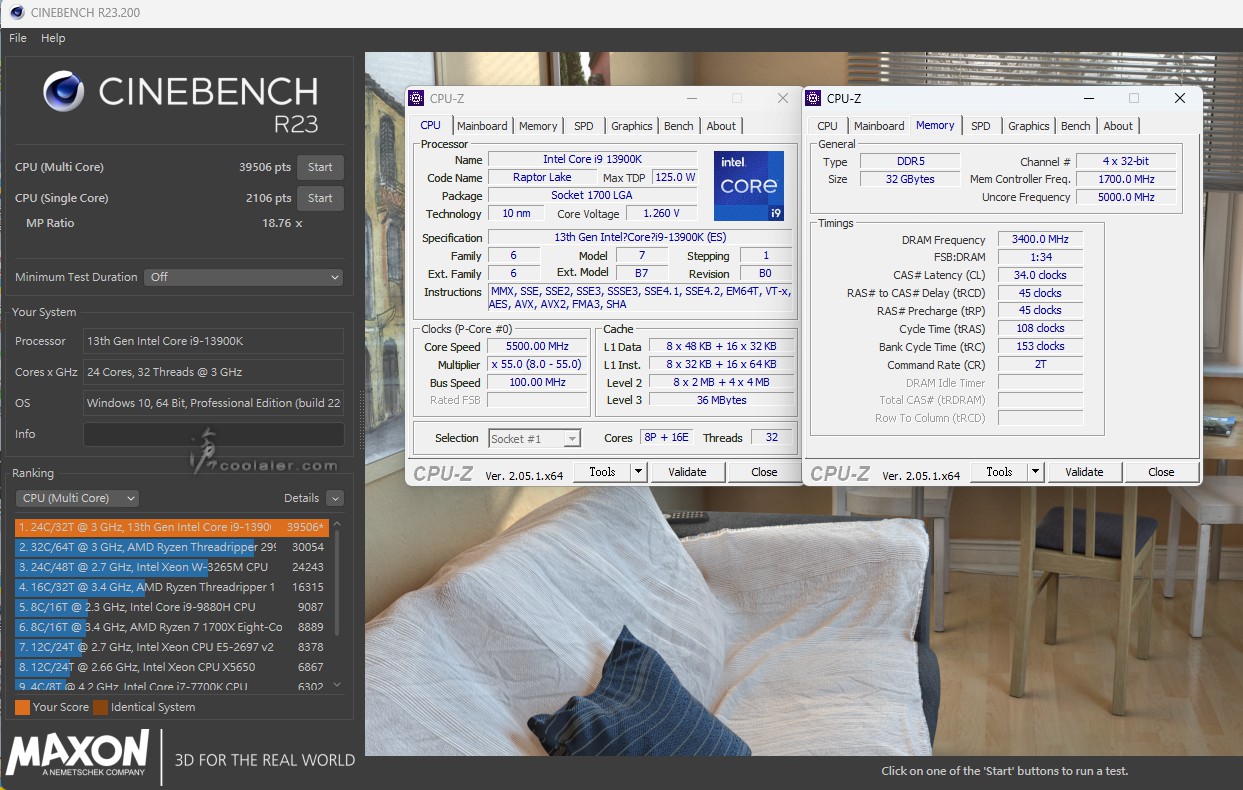
CINEBENCH R23
CPU:39506 pts
CPU 單核心:2106 pts
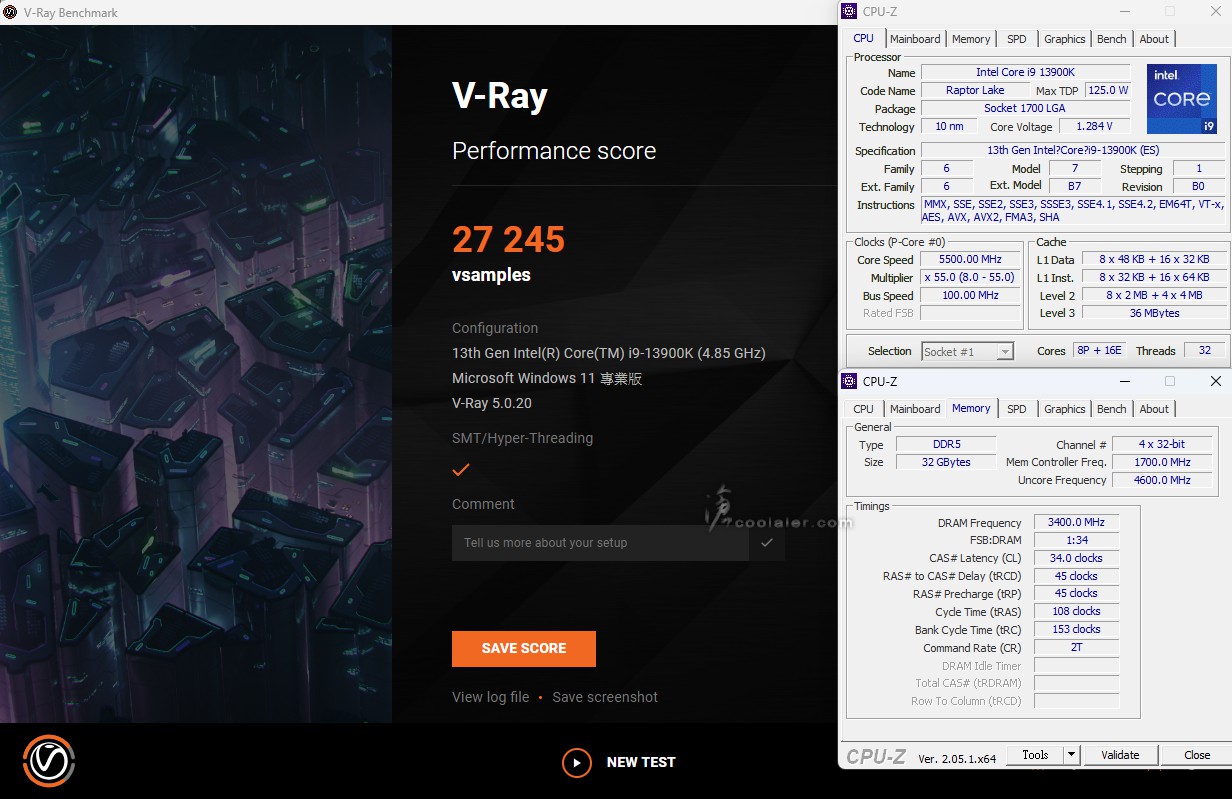
V-Ray:27245
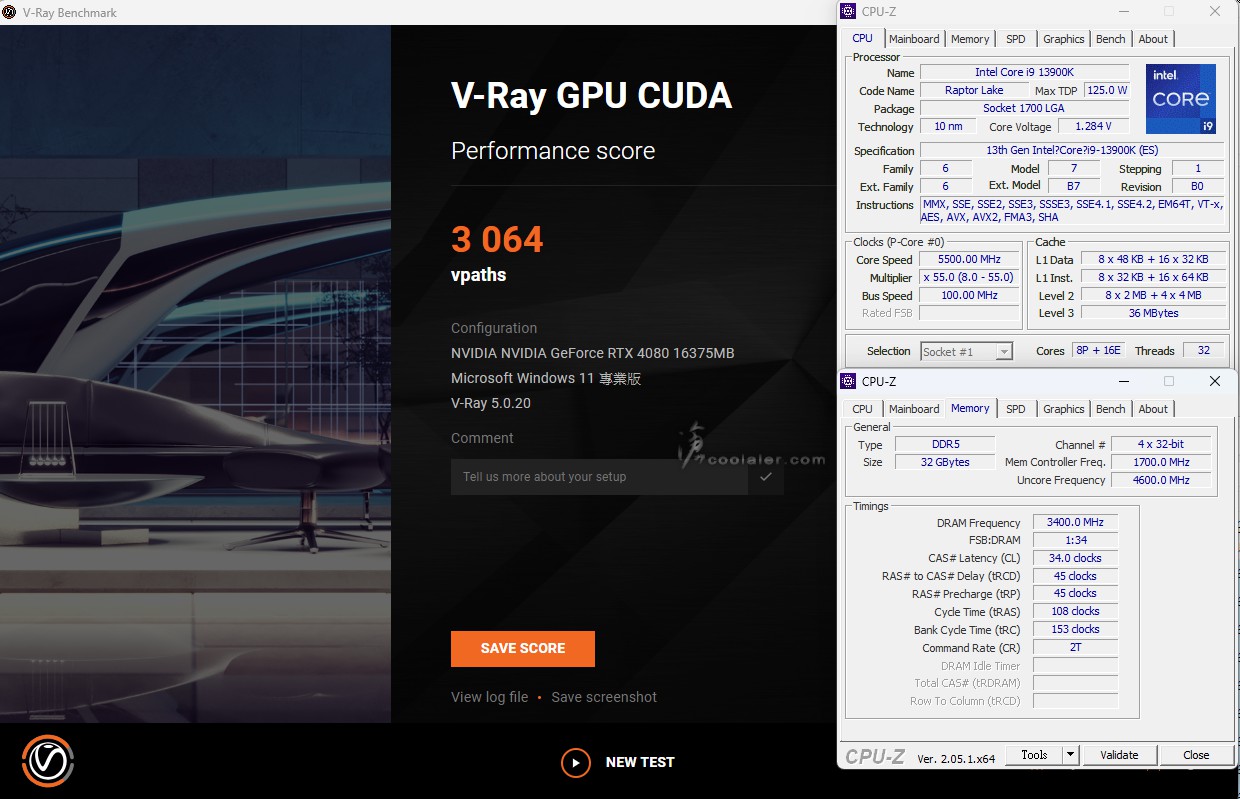
V-Ray GPU CUDA:3064
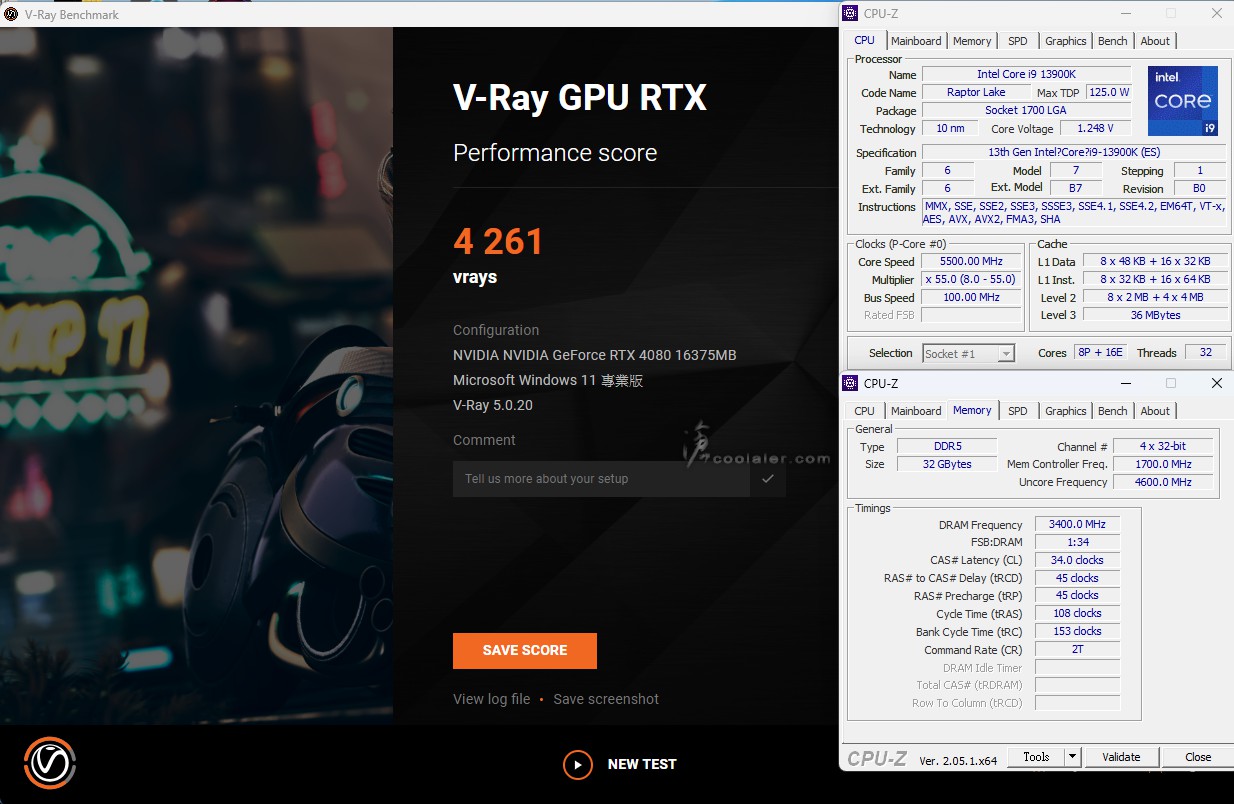
V-Ray GPU RTX:4261
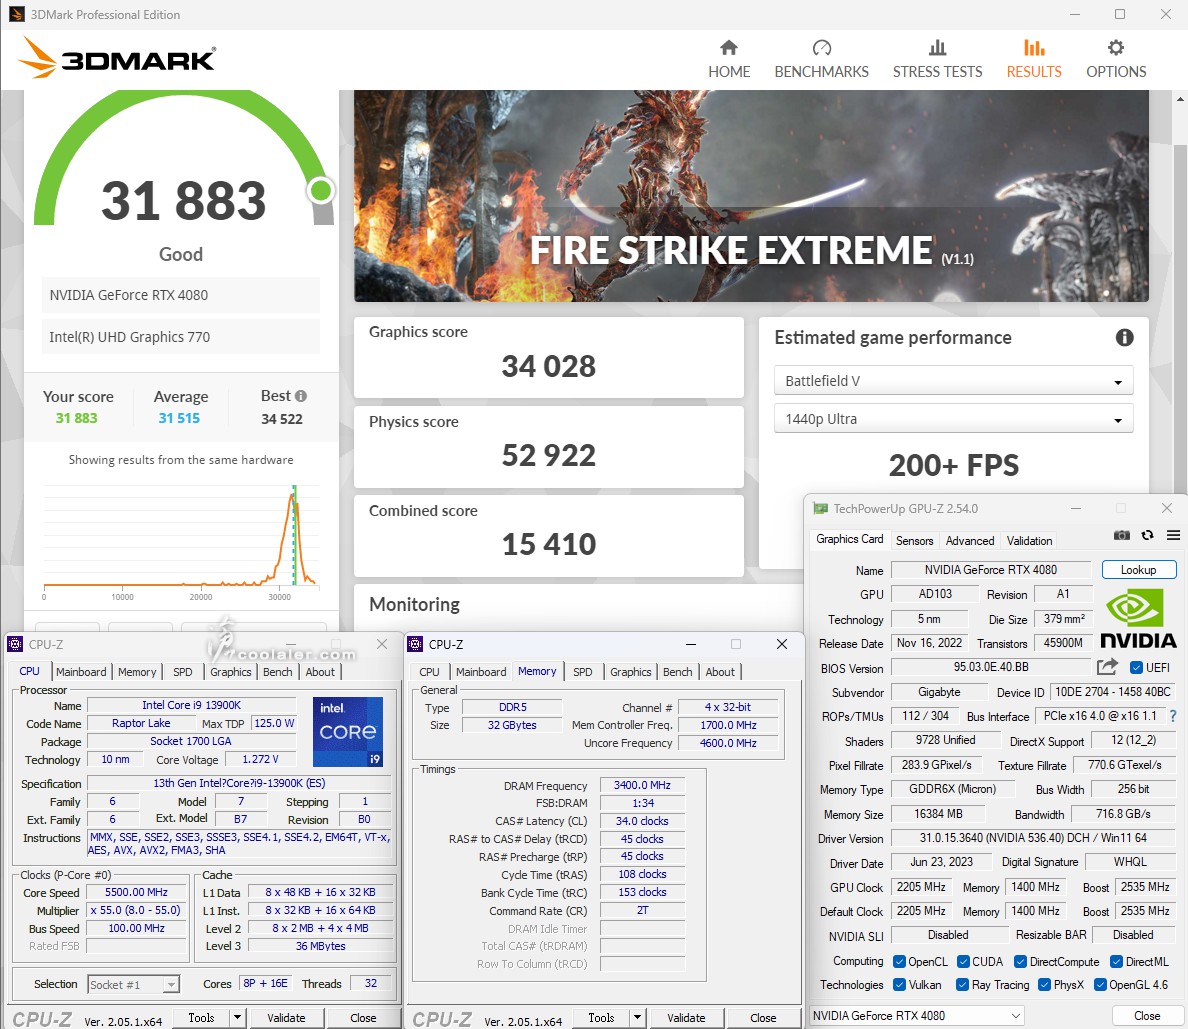
3DMark Fire Strike Extreme:31883
Graphics score:34028
Physics score:52922
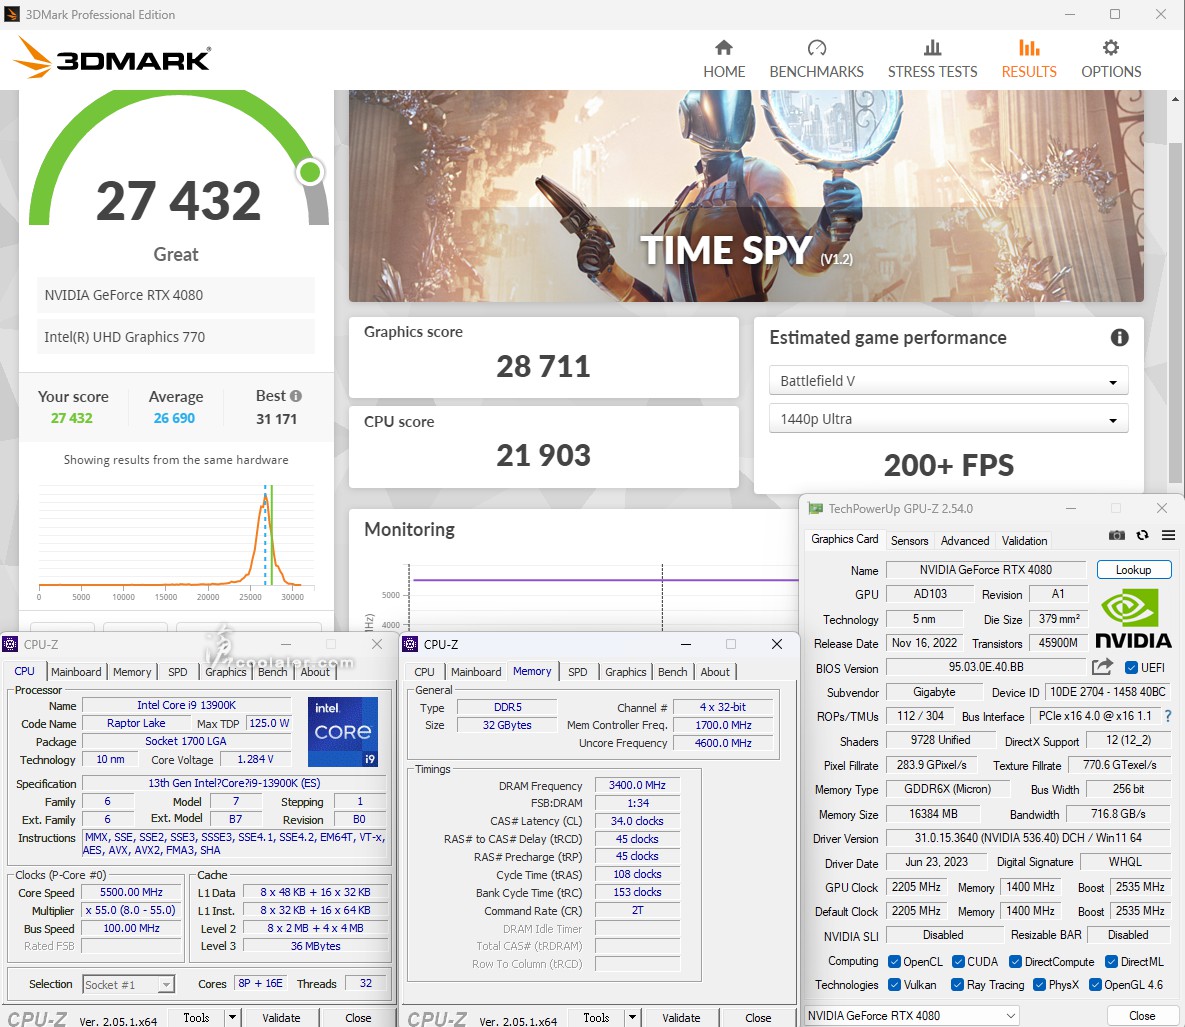
3DMark Time Spy:27432
Graphics score:28711
CPU score:21903
小結
搭配 Core i9-13900K 的測試應該大家都看膩了,在 Z790 AORUS ELITE X WIFI7 上面一樣能發揮上既有的效能,其實主要影響較大的還是 CPU 散熱器的問題。技嘉新的 X 系列在供電散熱相對應於之前版本有更好的解熱能力,DDR5 也能支援到更高 8266+MHz 的時脈速度,另外 M.2 散熱片、安裝也都用上了便利的無螺絲設計,PCIe 顯卡插槽則是升級了耐受力更高的金屬裝甲以承受越來越像磚頭的旗艦顯卡,部分型號也添加了更高速的無線網路 WI-FI 7 供選擇,這個應該也是這次各廠 Z790 更新的重點之一。
GIGABYTE 在 Z790 晶片組的部分則是更新推出了 " X " 世代,與舊版相比在型號上就是多了 X 字樣以利區隔。新的 X 世代主機板特別在 DDR5 記憶體效能上、BIOS 改良和創新的硬體功能進行加強,為新一代處理器做好預備。目前已經推出的包括 AORUS XTREME X、MASTER X、ELITE X、PRO X 等,未來也會有 B760 晶片組更新。
入手開箱的是 Z790 AORUS ELITE X WIFI7 。ELITE X 有三種,在於無線網路的差異,包括沒有支援無線功能的 ELITE X 、支援 WIFI 6E 的 ELITE X AX 、支援 WIFI 7 的 ELITE X WIFI7。
主要特色,採用 16+1+2 相數位供電、DIY 友善設計、PCIe UD Slot X 插槽強化、WI-FI 7 無線網路等。
配件有說明書、無線天線、M.2 導熱墊、2條 SATA、G-Connector 前置快速接頭。
Z790 AORUS ELITE X WIFI7 外觀上與之前的 ELITE 也有明顯的差異,不過整體的線條元素、老鷹標、AORUS 字樣都還是有的。
採用標準的 ATX 尺寸,整體黑灰色低調路線。X 系列在硬體、規格上也有明顯差異性,如 DDR5 可以支援達到 8266+MHz,M.2 散熱片改採無螺絲設計,並且 AORUS X 全系列都用上了 8mm 熱導管,並且應對旗艦重量級顯卡,針對了 PCIe 顯卡插槽進行耐受力強化,PCB 也都有8層板(以上)的設計。
Z790 AORUS ELITE X WIFI7 採用 VRM Thermal Armor Advanced 散熱設計,有著大面積的散熱鰭片,上方斜切紋隱約可見老鷹標。
側邊可以看到複合式剖溝,盡可能的增加散熱面積。
採用16+1+2相數位 VRM 供電設計。在元件上面也貼上了 7 W/mK 導熱墊與散熱器接觸加強導熱。
另一側可以看到散熱片採用 8mm 的熱導管貫穿強化散熱。
CPU 供電為8+8pin。
DDR5 在 X 系列最高可支援到 8266+MHz。容量最高可以擴充到 192GB。
1個 USB 3.2 Gen 2 Type-C、1組 USB 3.2 Gen 1。在 Type-C 接口下面有1組簡易的 Debug 燈。
6個 SATA。在 SATA 右側則有1個 CMOS 鍵用來快速重置 BIOS。
晶片組散熱片間接延伸到擴充卡槽中間 M.2 安裝位上。
主板下側邊有 Q-Flash Plus 按鈕,支援無硬體刷 BIOS 功能。另外在電池旁邊則有一顆重置鍵。
3個 PCIe x16 插槽,第一根為 PCIe 5.0 x16,其餘兩個為 PCIe 4.0 x4 規格。
第一個 M.2 插槽為 PCIe 4.0 x4 規格,也對應了比較高級的 M.2 Thermal Guard L 散熱片。
側邊可看到是有比較大的散熱面積。
在 PCIe x16 插槽的後方的拆卸卡榫做了 PCIe EZ-Latch 加高設計,可使拆卸更容易。
第一根 PCIe x16 插槽針對了現在旗艦顯卡越來越重的對應設計,原本採用加固金屬板,而 X 系列則用上了一體式無接縫的金屬裝甲,可承受50公斤,相比一般設計要高出10倍,另外在前端內側也採用了膠條配置,避免刮傷顯卡。
在 M.2 的散熱片上面則改用了無螺絲卡榫 M.2 EZ-Latch Click 設計。簡單一扳就可以拆下散熱片,也不用擔心螺絲噴飛找不到的問題。
4個 M.2 都是 PCIe 4.0 x4 規格,皆有應散熱片,並且有導熱墊。第一個 M.2 的底部也有導熱墊,這部分在配件上還貼心的多附了一張可替換。另外在 M.2 安裝也是免螺絲的 EZ-Latch Plus 設計。
音效採隔離區域設計,使用 Realtek ALC1220-VB 晶片並搭配 WIMA 音效電容。
後方 IO 埠,4個USB 2.0、WI-FI 7 無線天線埠、2個 USB 3.2 Gen 2、1個 DP、1個 HDMI、3個 USB 3.2 Gen 1、1個 USB 3.2 Gen 2×2 Type-C、1個 RJ-45(Intel 2.5GbE)、2個音源輸出入、S/PDIF 光纖輸出。
背部可以看到 PCIe 顯卡插槽的金屬裝甲底部還有一片金屬板強化。
BIOS 簡介
X 系列的 BIOS 介面有著不同的設計,在 EASY MODE 上面除了原本的系統資訊顯示、快速調整之外,還多了 Quick Access 區塊,這邊技嘉把最常用的 BIOS 選項從進階模式移植到簡易模式之中,讓使用者更為直覺且快速的操作。
Smart Fan 6 ,可調整風扇轉速對應溫度曲線。
進階模式,在介面風格上也有點不一樣,還有行與行之間也可刻意用了灰底來區隔,避免看到眼花。超頻選項與之前是差不多的,很完整,可直接調用 GIGABYTE PerfDrive 讓玩家輕鬆在效能、功耗及溫度取得平衡,也支援手動調整, CPU 倍頻、外頻、記憶體設定、CPU 設定、電壓等。
CPU Upgrade 選項。
CPU 進階選項。
記憶體選項。
測試平台
CPU: Intel Core i9-13900K
CPU Cooler: MSI MEG CORELIQUID S360
RAM: GSKILL Trident Z5 RGB DDR5-6800 16GBx2
MB: GIGABYTE Z790 AORUS ELITE X WIFI7
VGA: GIGABYTE RTX 4080 GAMING OC
SSD: GIGABYTE AORUS RAID SSD 2TB
PSU: InWin SI 1065W
OS: Windows 11
CPU-Z
CPU Single:900
CPU Multi:16925.4
SuperPI 1M:5.831s
CPUmark99:887
SuperPI 8M:1m00.204s
Memory Benchmark
Read:107.74 GB/s
Write:104.76 GB/s
Copy:103.62 GB/s
Latency:64.4 ns
7-Zip 19.00
壓縮:204280 MIPS
解壓縮:222531 MIPS
整體評等:213405 MIPS
x264 FHD Benchmark:139.7
POV-Ray:20.25s
CINEBENCH R15
OpenGL:363.88 fps
CPU:6180 cb
CPU 單核心:311 cb
CINEBENCH R20
CPU:15151 pts
CPU 單核心:813 pts
CINEBENCH R23
CPU:39506 pts
CPU 單核心:2106 pts
V-Ray:27245
V-Ray GPU CUDA:3064
V-Ray GPU RTX:4261
3DMark Fire Strike Extreme:31883
Graphics score:34028
Physics score:52922
3DMark Time Spy:27432
Graphics score:28711
CPU score:21903
小結
搭配 Core i9-13900K 的測試應該大家都看膩了,在 Z790 AORUS ELITE X WIFI7 上面一樣能發揮上既有的效能,其實主要影響較大的還是 CPU 散熱器的問題。技嘉新的 X 系列在供電散熱相對應於之前版本有更好的解熱能力,DDR5 也能支援到更高 8266+MHz 的時脈速度,另外 M.2 散熱片、安裝也都用上了便利的無螺絲設計,PCIe 顯卡插槽則是升級了耐受力更高的金屬裝甲以承受越來越像磚頭的旗艦顯卡,部分型號也添加了更高速的無線網路 WI-FI 7 供選擇,這個應該也是這次各廠 Z790 更新的重點之一。