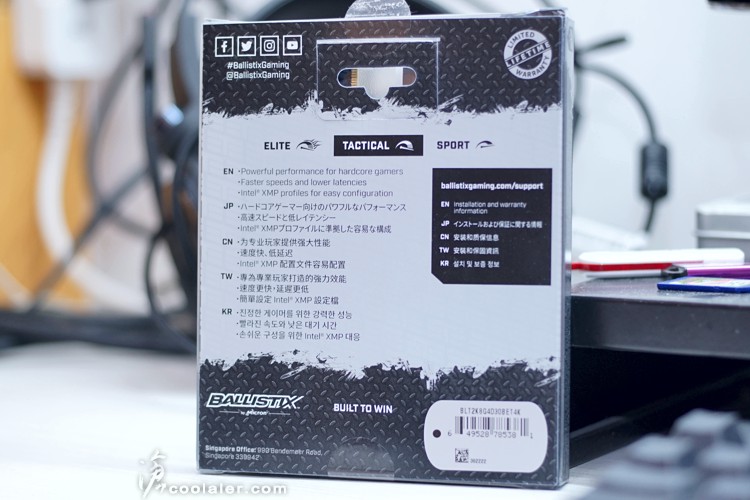
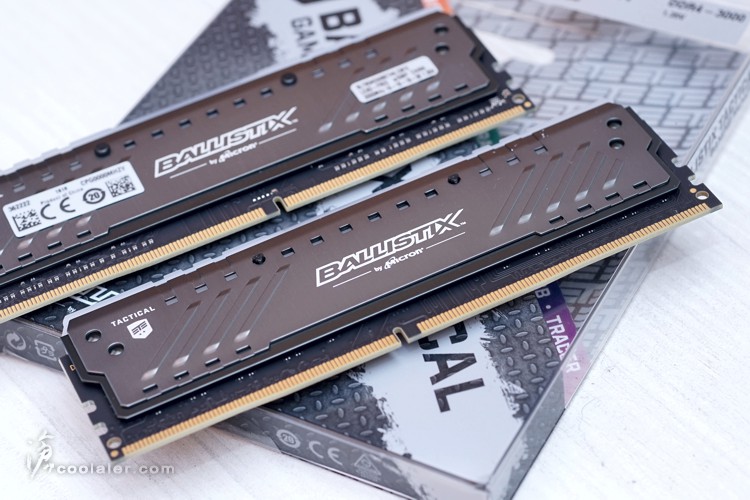
Ballistix 是美光 Crucial 下的電競品牌,所推出的記憶體不同於 Crucial 的風格,簡單說 Crucial 的記憶體大多是裝機版,而 Ballistix 是專為遊戲與超頻效能所設計,所以 Ballistix 系列大多附上了比較有電競風格的散熱片,而最近因應 RGB 風潮,也推出了相關應用產品 Ballistix Tactical Tracer RGB DDR4 系列。
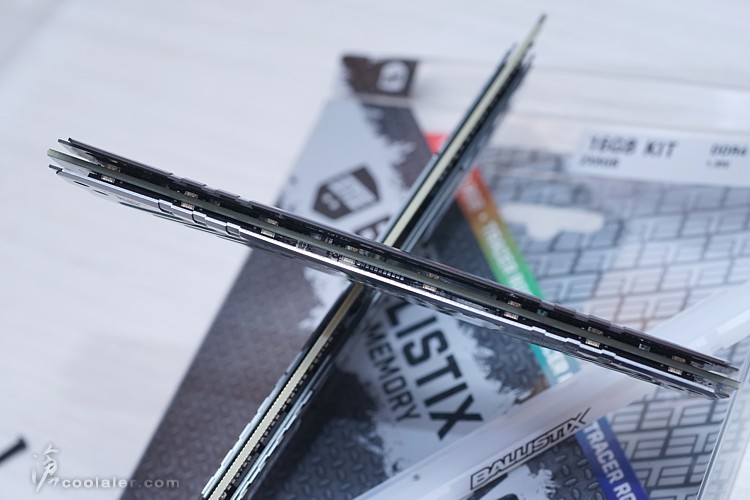
Ballistix Tactical Tracer RGB DDR4 系列目前提供2666MHz以及3000MHz兩種時脈,時序皆為16-18-18-38,2666MHz電壓1.2V,3000MHz電壓1.35V,容量的部分為單條8GB以及16GB,都有雙通道兩支與四通道四支包裝,入手的這款為 DDR4 3000 8GBx2 包裝。
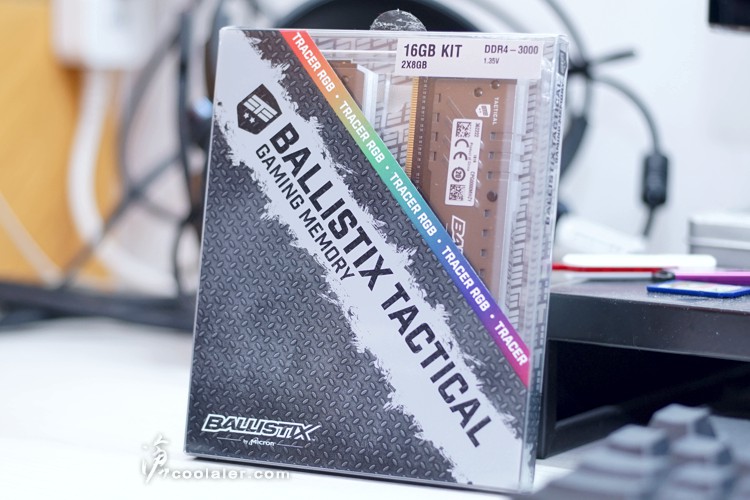
Ballistix 記憶體分為三大系列,Sport 是屬於標準桌機以及筆電記憶體, Tactical 如上提供中高等級的遊戲記憶體,最高的是 Elite 提供更高的時脈以及更好的時序。
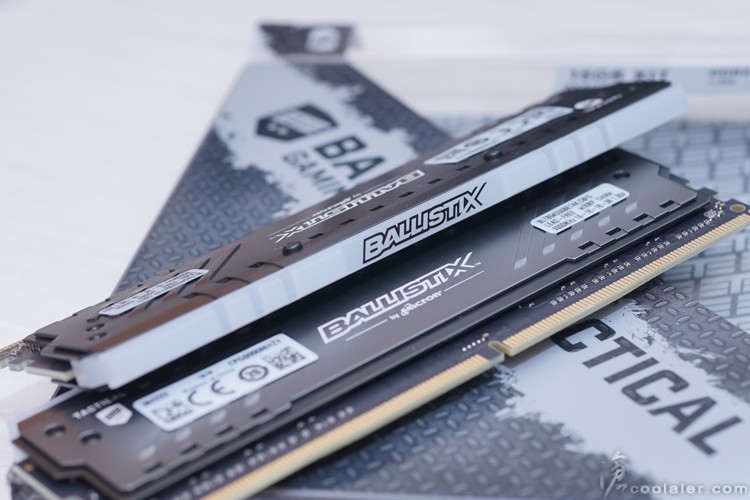
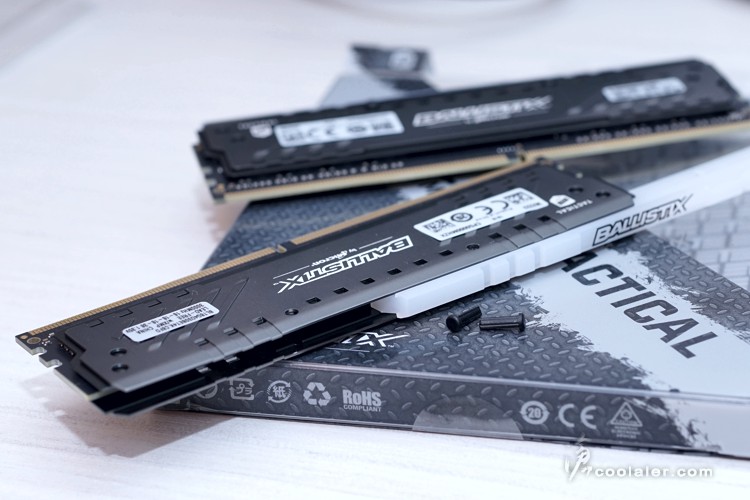
Ballistix Tactical Tracer RGB 的散熱片還算中規中矩,採用槍灰外觀,有假兩層外觀設計,RGB的部分在頂部,整體高度並不會太高,應該 CPU 散熱器干擾較小。

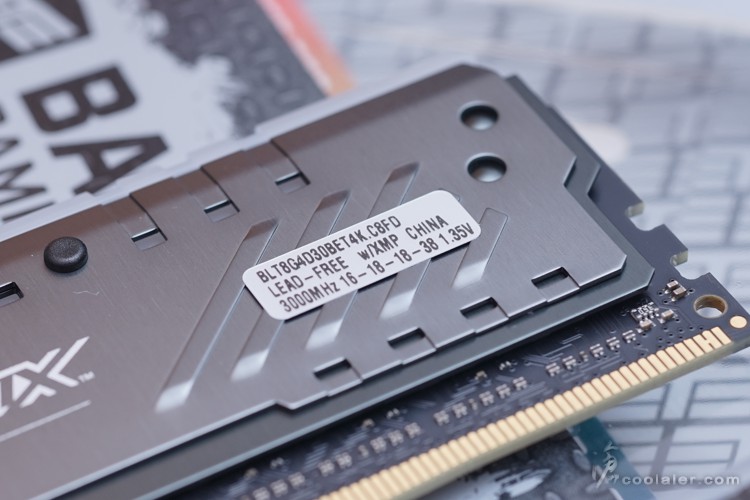
型號標籤,3000MHz 16-18-18-38 1.35V。
兩面外觀相同。
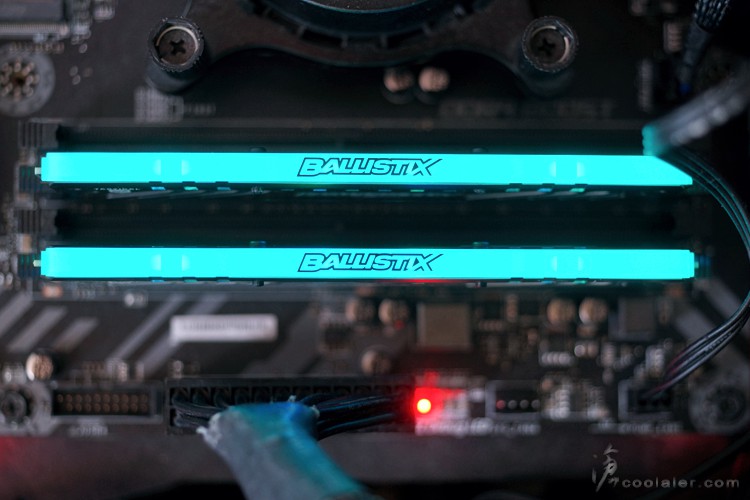
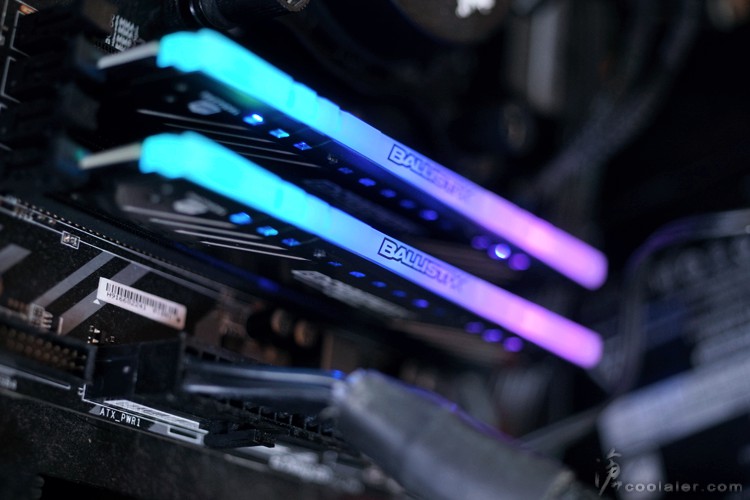
頂部採用導光條,上面有 BALLISTIX 品牌字樣。
而這個導光條是可以拆卸,散熱片側邊有兩個鉚釘扣。
拉起來之後就可以將導光條拆下。主要這部分是支援3D列印,玩家可以到官方網站下載基本圖檔,並自行添加一些形狀或字樣,可以參考官網介紹: https://ballistixgaming.com/downloa…stix-tactical-tracer-rgb-ddr4-light-bars.html
內部有8組LED,共16顆,可以個別設定燈效顏色。
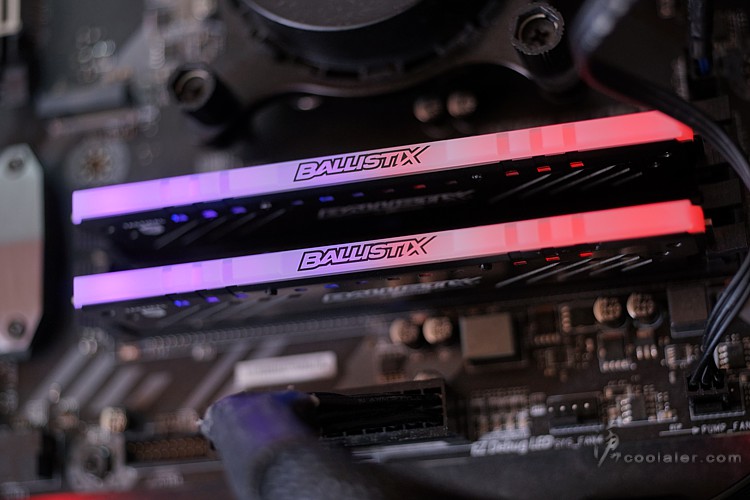
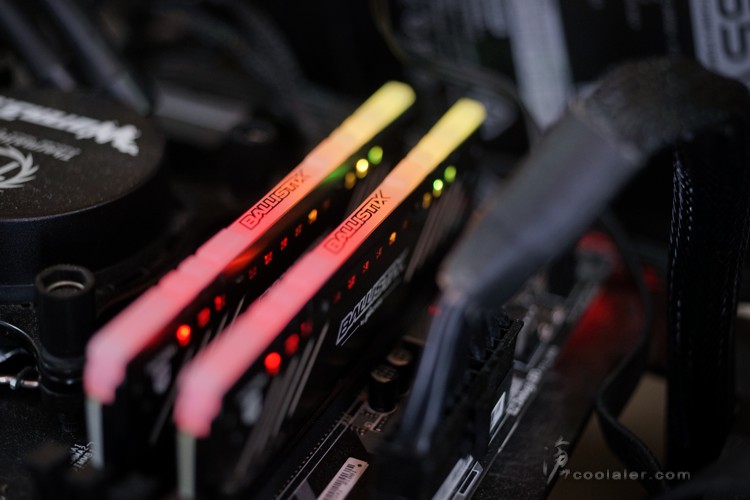
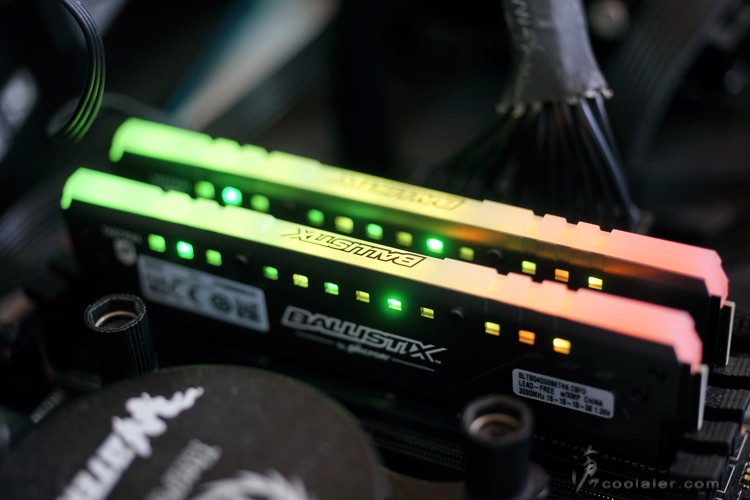
測試之前先來幾張燈效圖。
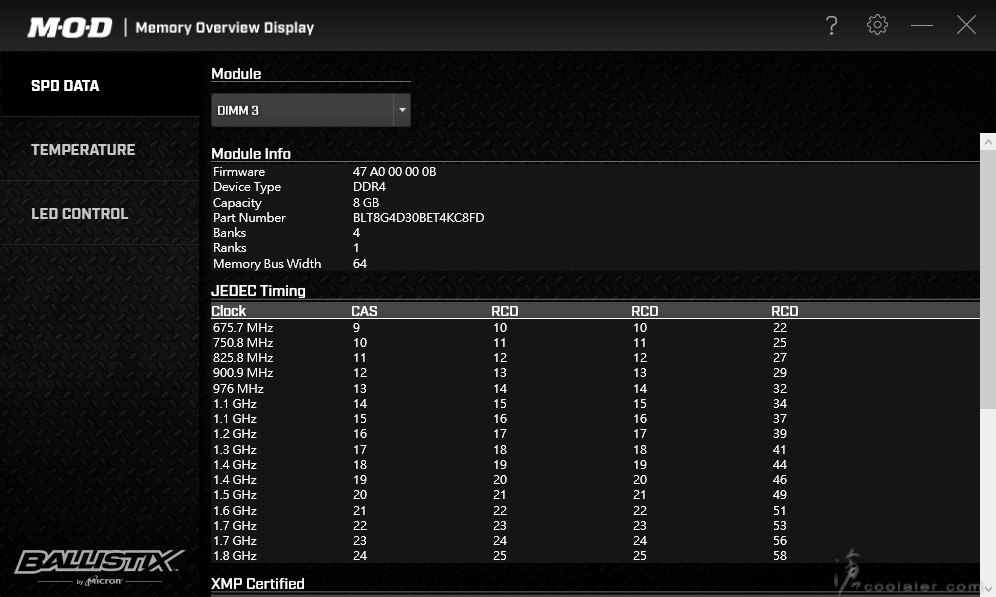
Ballistix Tactical Tracer RGB 記憶體可以支援軟體控制,官方命名為 Memory Overview Display,簡稱 M.O.D,除了顯示記憶體資訊之外,還可以用來調整燈效。
顯示記憶體溫度。

調整燈效,燈效選項算是相當完整,可以選擇模組、燈效、燈效速度、亮度、個別調整燈效區域、顏色等。
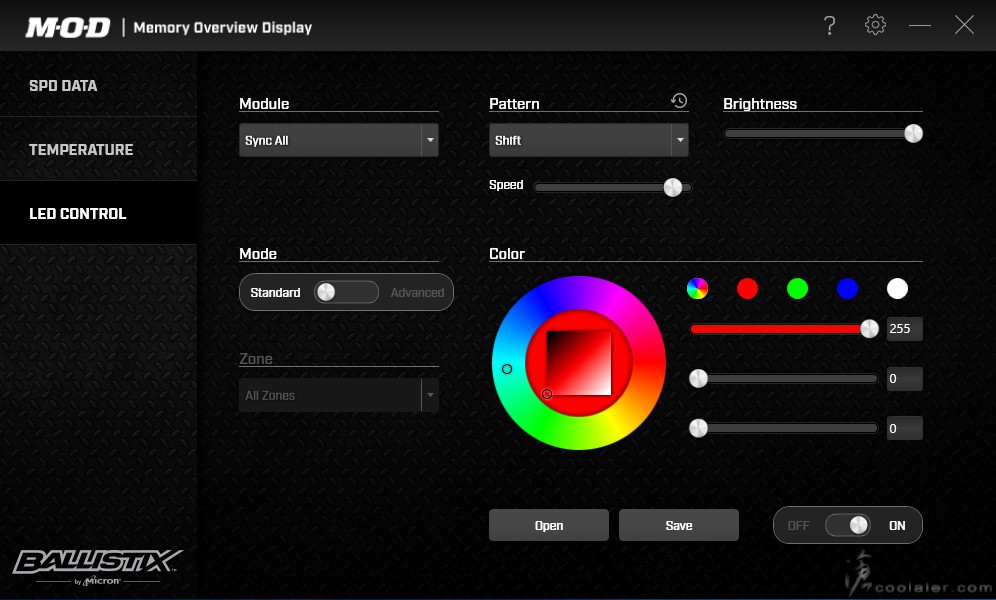
8組區域可以個別設定你想要的顏色,也可以直接不使用導光條來獲得最大亮度,不過個人覺得透過光條有渲染漸層效果會比較好看。

測試平台
CPU: Intel Core i7-8700K @ MSI Game Boost
CPU Cooler: Tt Water 3.0 Extreme
RAM: Micron Crucial DDR4 3000 8GB x2
MB: MSI Z370 Tomahawk
VGA: MSI GT 1030
HDD: OCZ Vertex 3.20 240GB、Seagate 2TB
PSU: IN WIN SI 1065W
OS: Windows 10 64bit
測試平台 Core i7-8700K 讀取 Game Boost 模式,Boost 最高大概會到4.8GHz,記憶體直接讀取 XMP。
Memory Benchmark
Read:43410 MB/s
Write:44541 MB/s
Copy:38908 MB/s
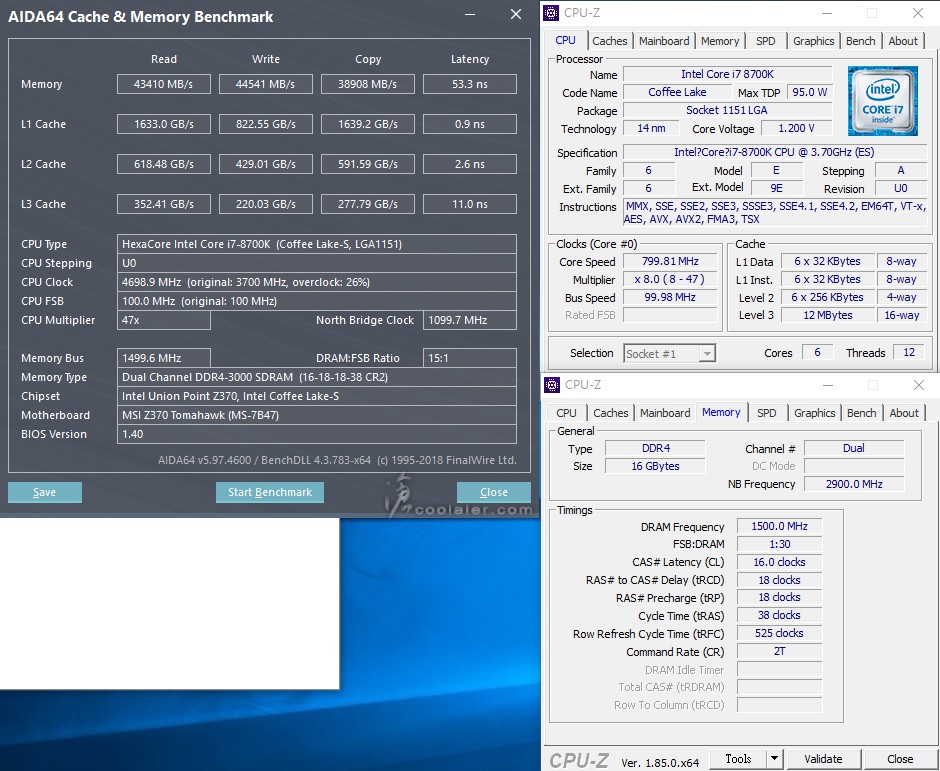
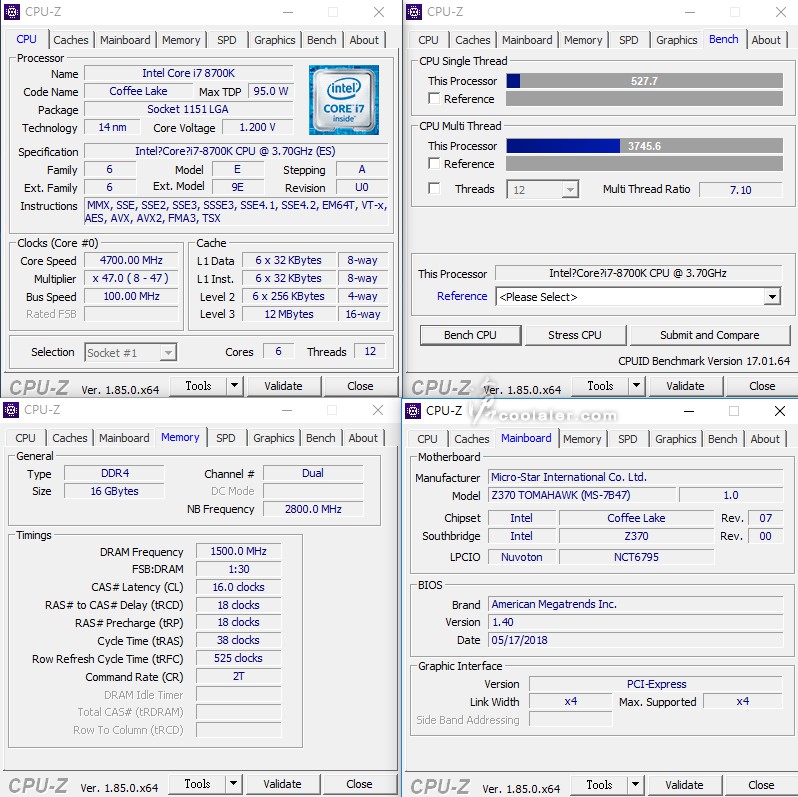
CPU-Z
Single Thread:527.7
Multi Thread:3745.6
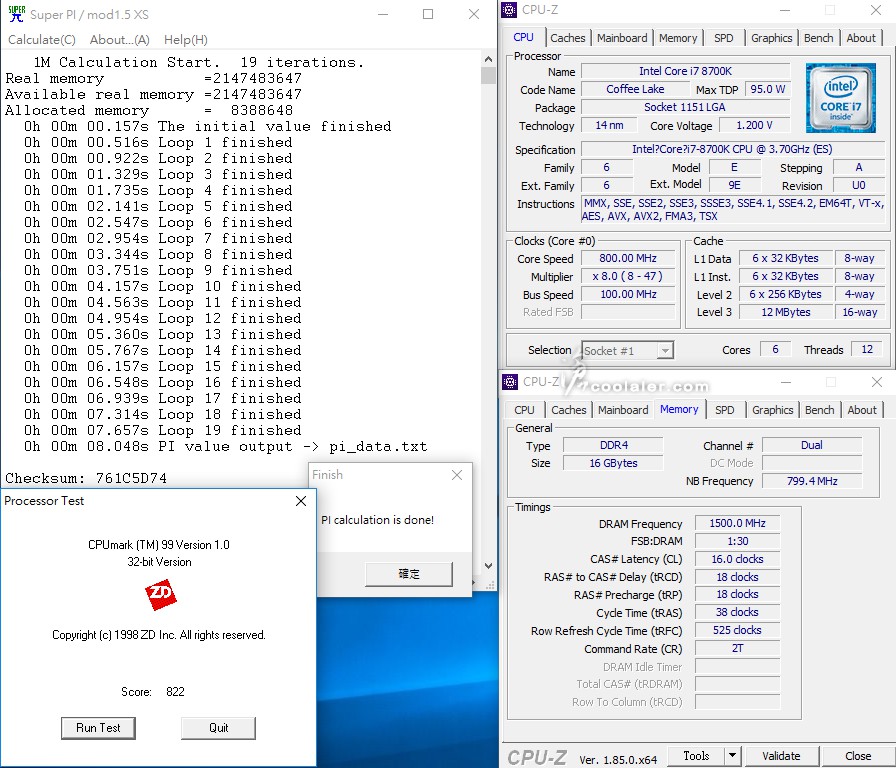
SuperPI 1M & CPUmark99
SuperPI 1M :8.048s
CPUmark99:822
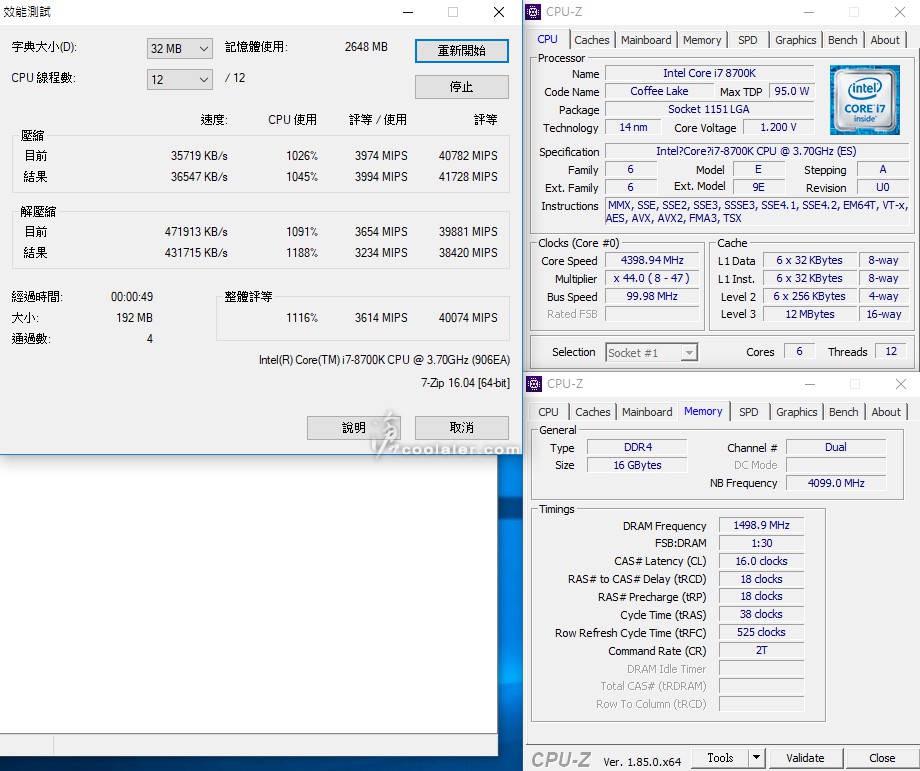
7-Zip:3614 / 40074 MIPS
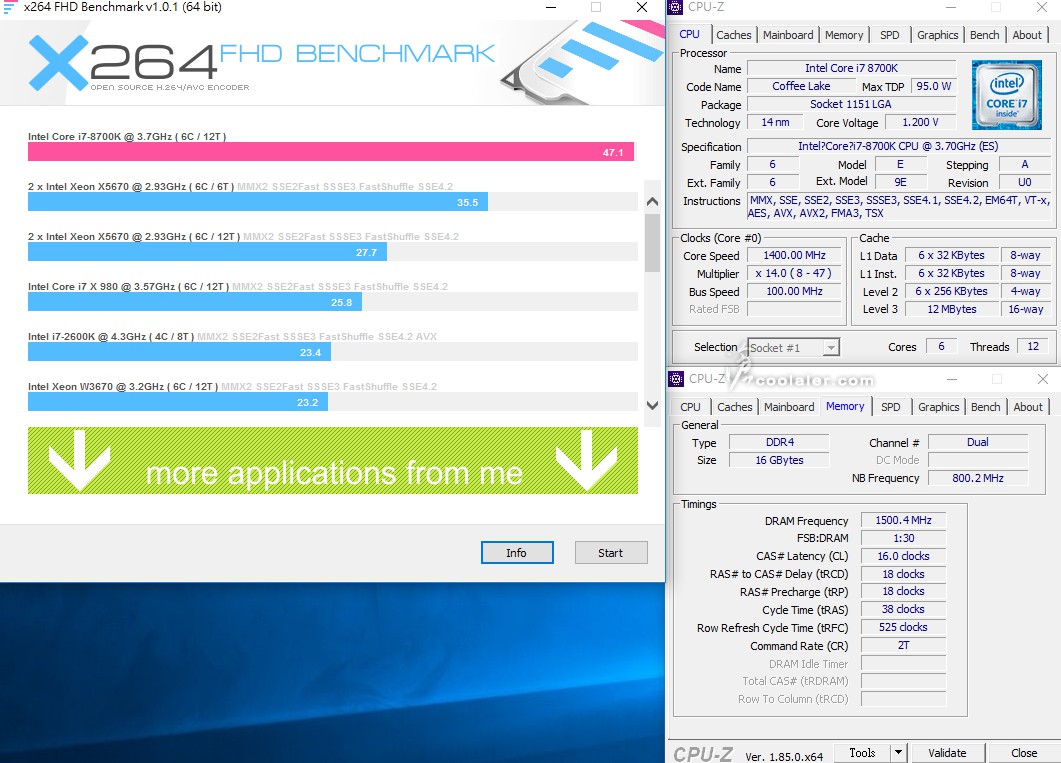
x264 FHD Benchmark:47.1
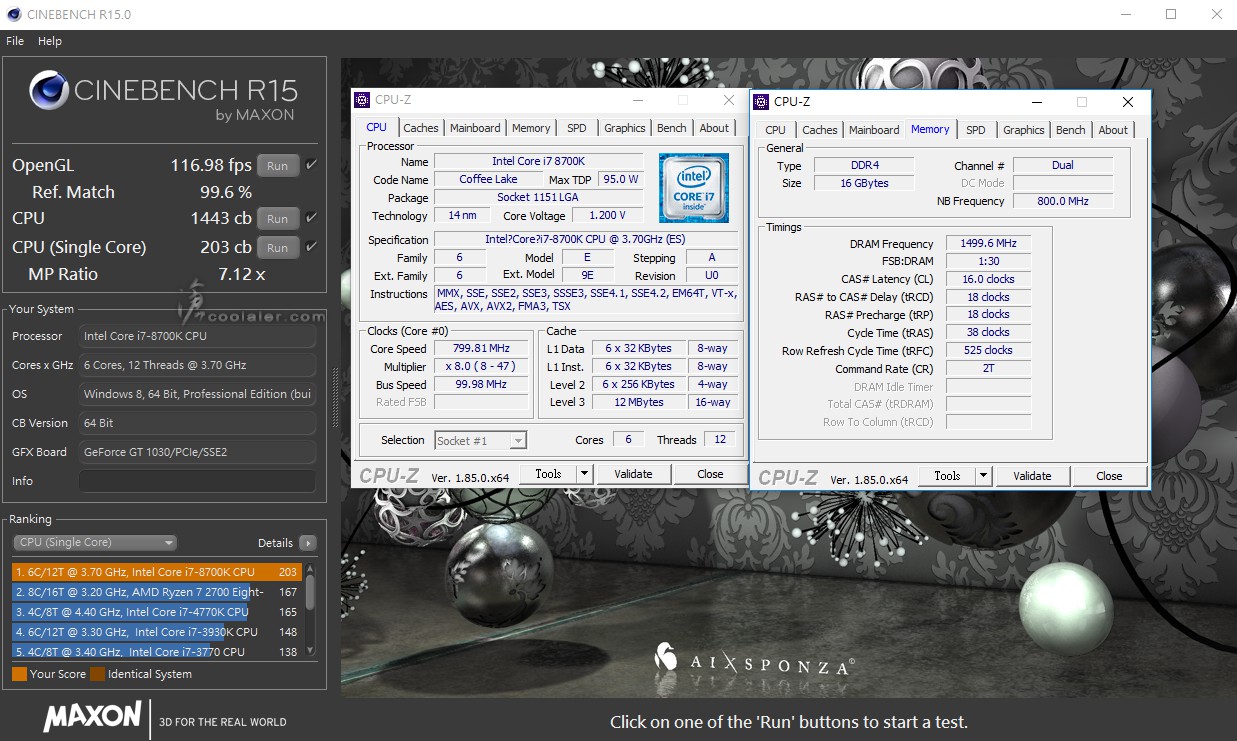
CINEBENCH R15
OpenGL:116.98 fps
CPU:1443 cb
CPU(單核心):203 cb
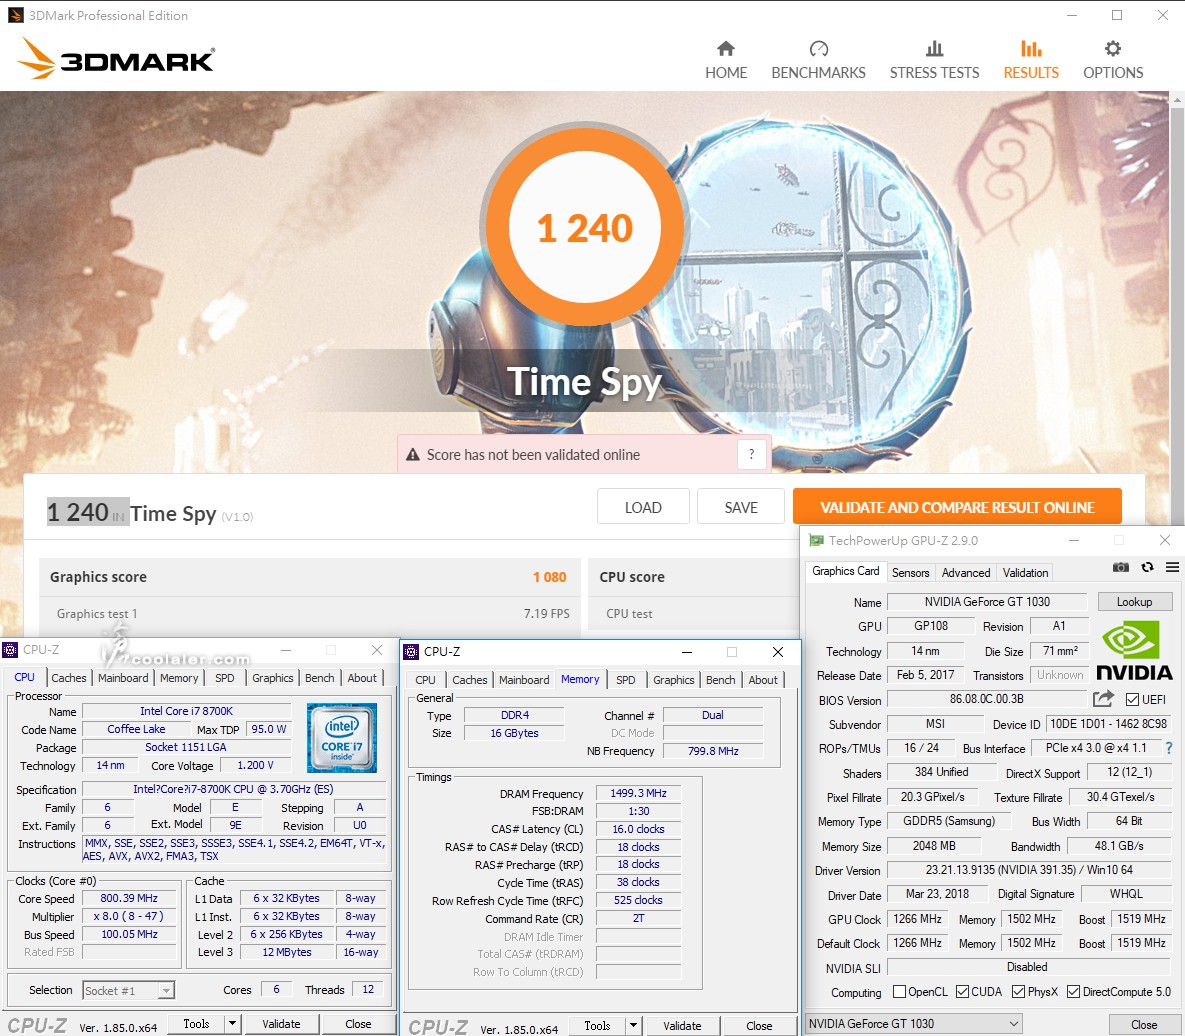
3DMark Time Spy:1240
Graphics:1080
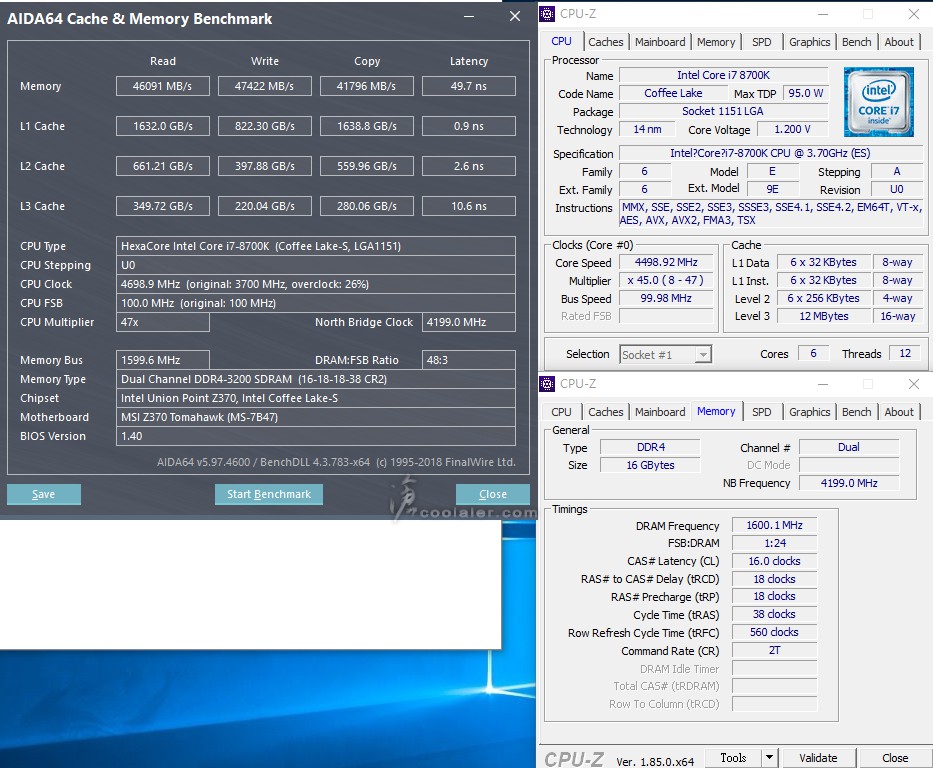
接著直接用 MSI 板子上的 Memory Try It! 套用 DDR4 3200MHz 看看。
DDR4 3200MHz 16-18-18-38 記憶體頻寬。
Read:46091 MB/s
Write:47422 MB/s
Copy:41796 MB/s
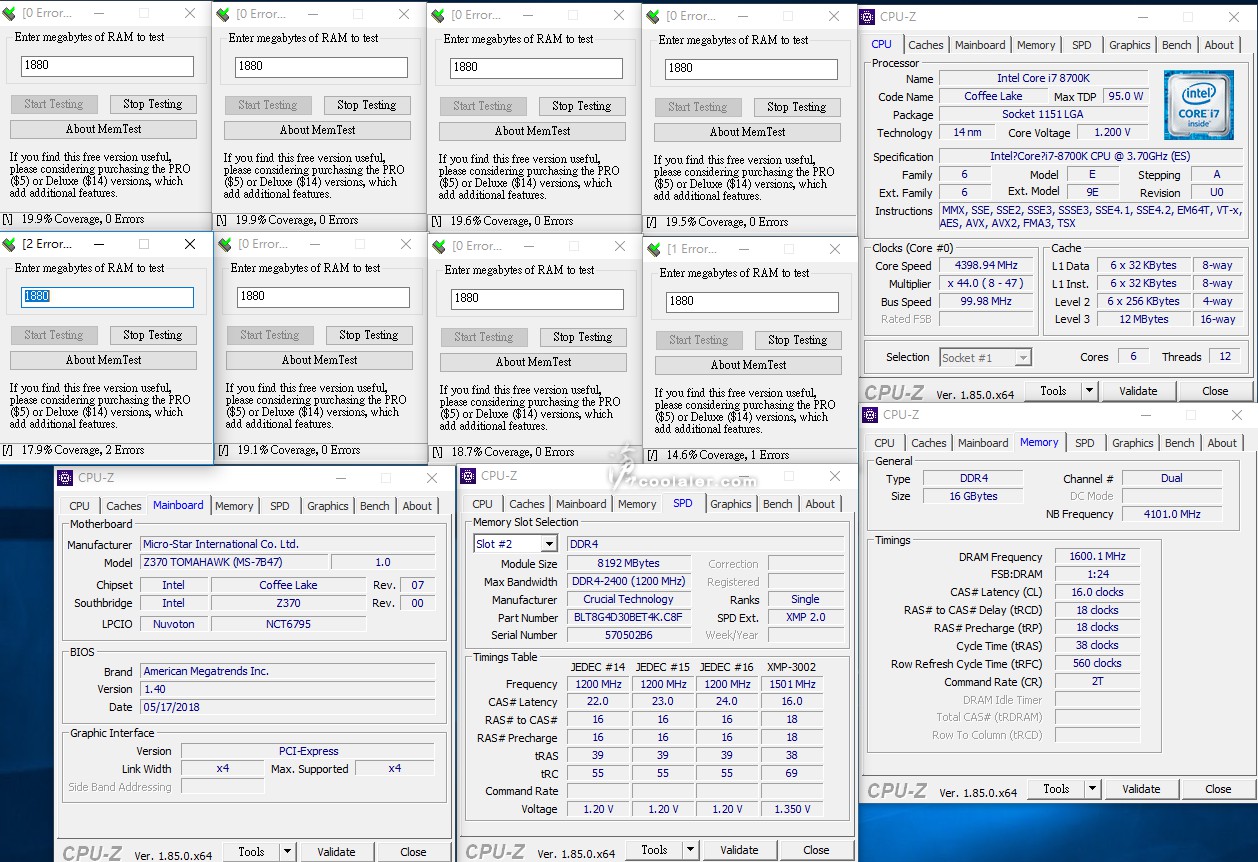
不過呢…燒機有部分錯誤無法過測。
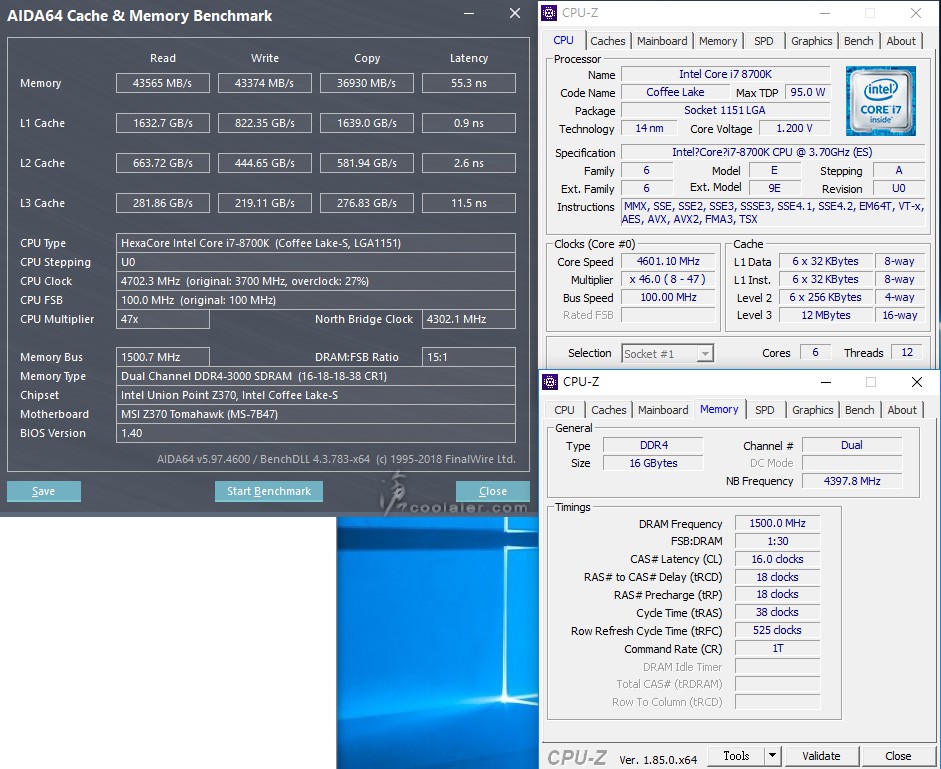
退而求其次,同樣的 DDR4 3000MHz,同參數16-18-18-38,但是CR 2T 改為 1T。
Read:43565 MB/s
Write:43374 MB/s
Copy:36930 MB/s
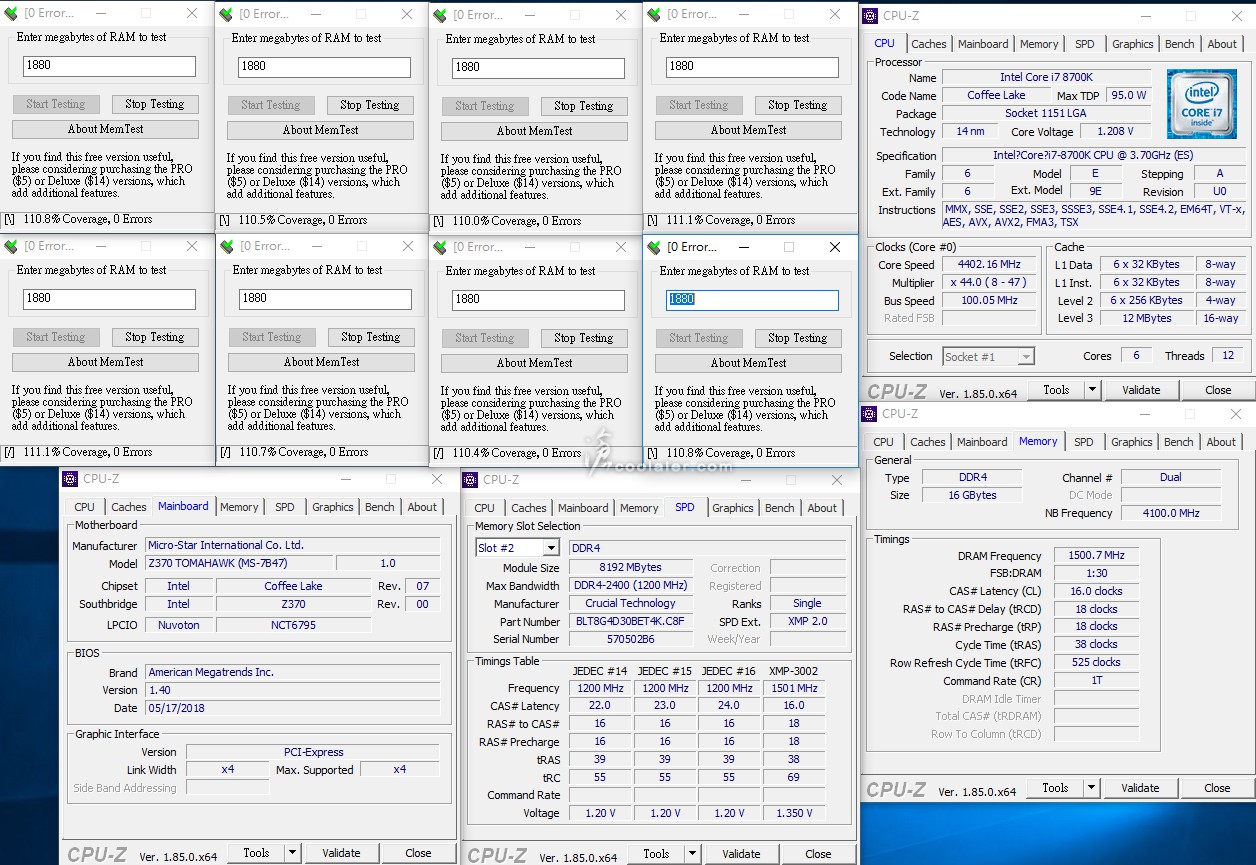
燒機110%無誤過測。
小結
Ballistix Tactical Tracer RGB 系列可以支援目前最夯的 RGB 燈效,除了透過自家的 M.O.D 軟體來調整燈效之外,也能夠與主機板同步,如 ASUS Aura、MSI Mystic Light、GIGABYTE RGB Fusion 等,對於燈控玩家來說是相當便利,另外效能的部分 DDR4 3000MHz 算是比較通俗的規格,較可惜的是沒有太多額外的超頻空間,畢竟一些設定較高時脈的記憶體大部分都已經先挑過,或者是顆粒上的限制,不過原本預設的Command Rate 2T是比較寬鬆,經測試手動設為1T是沒問題可以通過燒機測試的。
Ballistix Tactical Tracer RGB DDR4 系列目前提供2666MHz以及3000MHz兩種時脈,時序皆為16-18-18-38,2666MHz電壓1.2V,3000MHz電壓1.35V,容量的部分為單條8GB以及16GB,都有雙通道兩支與四通道四支包裝,入手的這款為 DDR4 3000 8GBx2 包裝。
Ballistix 記憶體分為三大系列,Sport 是屬於標準桌機以及筆電記憶體, Tactical 如上提供中高等級的遊戲記憶體,最高的是 Elite 提供更高的時脈以及更好的時序。
Ballistix Tactical Tracer RGB 的散熱片還算中規中矩,採用槍灰外觀,有假兩層外觀設計,RGB的部分在頂部,整體高度並不會太高,應該 CPU 散熱器干擾較小。
型號標籤,3000MHz 16-18-18-38 1.35V。
兩面外觀相同。
頂部採用導光條,上面有 BALLISTIX 品牌字樣。
而這個導光條是可以拆卸,散熱片側邊有兩個鉚釘扣。
拉起來之後就可以將導光條拆下。主要這部分是支援3D列印,玩家可以到官方網站下載基本圖檔,並自行添加一些形狀或字樣,可以參考官網介紹: https://ballistixgaming.com/downloa…stix-tactical-tracer-rgb-ddr4-light-bars.html
內部有8組LED,共16顆,可以個別設定燈效顏色。
測試之前先來幾張燈效圖。
Ballistix Tactical Tracer RGB 記憶體可以支援軟體控制,官方命名為 Memory Overview Display,簡稱 M.O.D,除了顯示記憶體資訊之外,還可以用來調整燈效。
顯示記憶體溫度。
調整燈效,燈效選項算是相當完整,可以選擇模組、燈效、燈效速度、亮度、個別調整燈效區域、顏色等。
8組區域可以個別設定你想要的顏色,也可以直接不使用導光條來獲得最大亮度,不過個人覺得透過光條有渲染漸層效果會比較好看。
測試平台
CPU: Intel Core i7-8700K @ MSI Game Boost
CPU Cooler: Tt Water 3.0 Extreme
RAM: Micron Crucial DDR4 3000 8GB x2
MB: MSI Z370 Tomahawk
VGA: MSI GT 1030
HDD: OCZ Vertex 3.20 240GB、Seagate 2TB
PSU: IN WIN SI 1065W
OS: Windows 10 64bit
測試平台 Core i7-8700K 讀取 Game Boost 模式,Boost 最高大概會到4.8GHz,記憶體直接讀取 XMP。
Memory Benchmark
Read:43410 MB/s
Write:44541 MB/s
Copy:38908 MB/s
CPU-Z
Single Thread:527.7
Multi Thread:3745.6
SuperPI 1M & CPUmark99
SuperPI 1M :8.048s
CPUmark99:822
7-Zip:3614 / 40074 MIPS
x264 FHD Benchmark:47.1
CINEBENCH R15
OpenGL:116.98 fps
CPU:1443 cb
CPU(單核心):203 cb
3DMark Time Spy:1240
Graphics:1080
接著直接用 MSI 板子上的 Memory Try It! 套用 DDR4 3200MHz 看看。
DDR4 3200MHz 16-18-18-38 記憶體頻寬。
Read:46091 MB/s
Write:47422 MB/s
Copy:41796 MB/s
不過呢…燒機有部分錯誤無法過測。
退而求其次,同樣的 DDR4 3000MHz,同參數16-18-18-38,但是CR 2T 改為 1T。
Read:43565 MB/s
Write:43374 MB/s
Copy:36930 MB/s
燒機110%無誤過測。
小結
Ballistix Tactical Tracer RGB 系列可以支援目前最夯的 RGB 燈效,除了透過自家的 M.O.D 軟體來調整燈效之外,也能夠與主機板同步,如 ASUS Aura、MSI Mystic Light、GIGABYTE RGB Fusion 等,對於燈控玩家來說是相當便利,另外效能的部分 DDR4 3000MHz 算是比較通俗的規格,較可惜的是沒有太多額外的超頻空間,畢竟一些設定較高時脈的記憶體大部分都已經先挑過,或者是顆粒上的限制,不過原本預設的Command Rate 2T是比較寬鬆,經測試手動設為1T是沒問題可以通過燒機測試的。