AMD Ryzen Threadripper 雖然發布已經有約半年,不過 AMD HEDT 高階旗艦平台並不會那麼快更新,今年應該都還是以 Threadripper 為主。AMD Ryzen Threadripper 目前並沒有 Intel Core X 系列規格橫跨那麼廣泛,有三個型號,16C32T 的 1950X、12C24T 的 1920X 以及 8C16T 的 1900X,售價分別為999美元、799美元、549美元,最近有調降消息,但似乎只有 1900X 從549美元降至449美元。
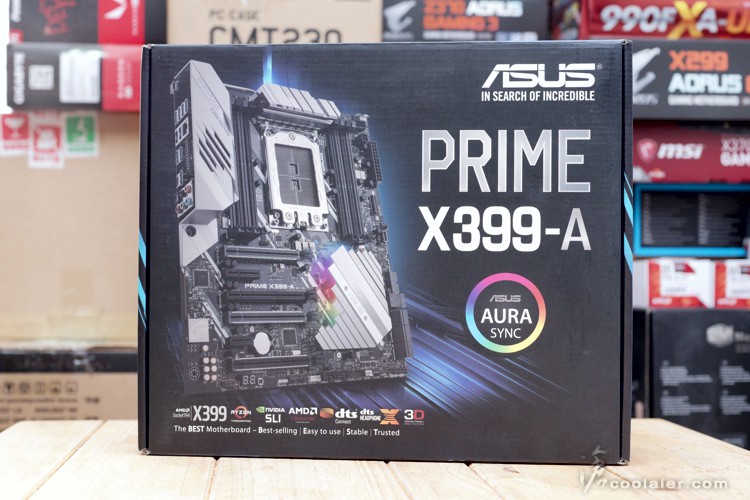
最近入手的是最高階的 AMD Threadripper 1950X,主機板是 ASUS PRIME X399-A。
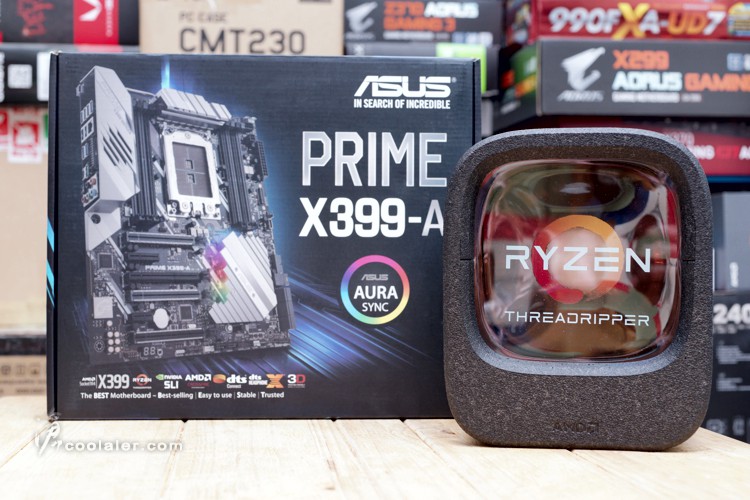
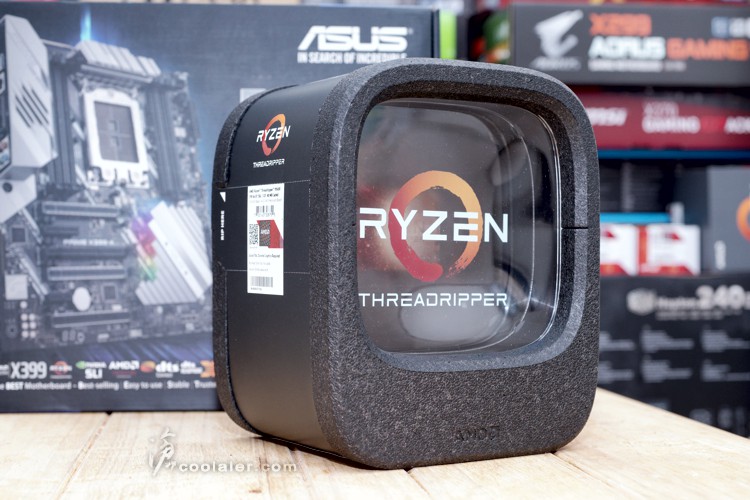
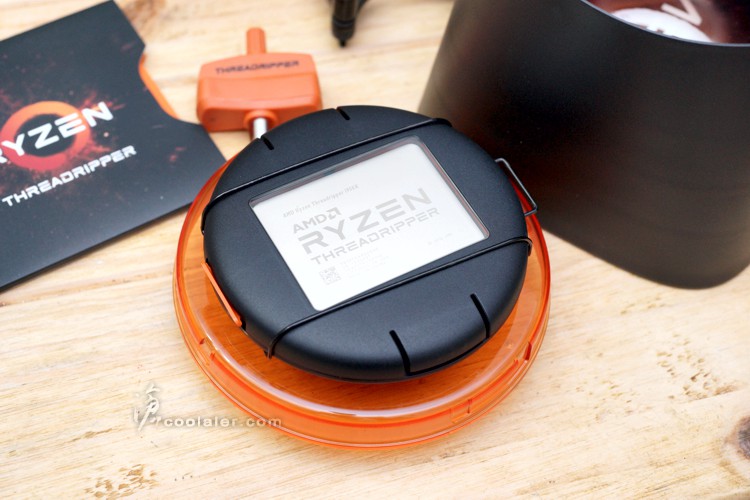
AMD Threadripper 1950X 外盒設計相當特別,整體質感很好,即便裡面沒有CPU,拿來當擺飾也很適合。
Threadripper 1950X 為16核心32執行緒,預設時脈3.4GHz,Boost 4.0GHz,64條 PCI-E 通道,支援 DDR4 四通道記憶體,不鎖倍頻。
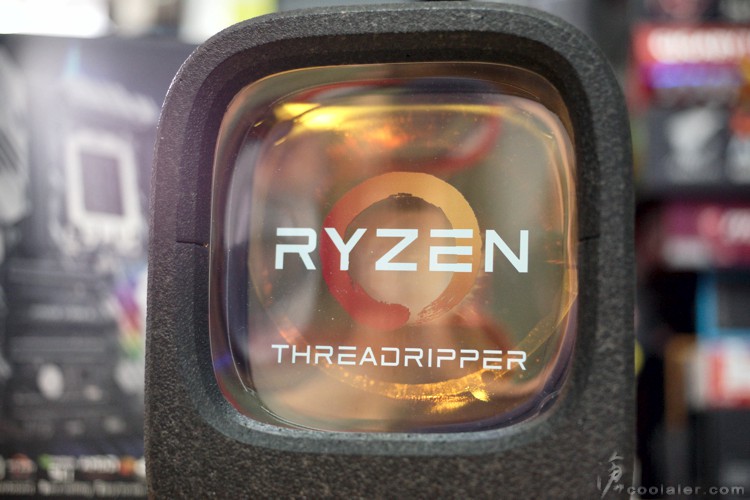
魔眼設計,從後面打光的話可以看到類似瞳孔的效果。
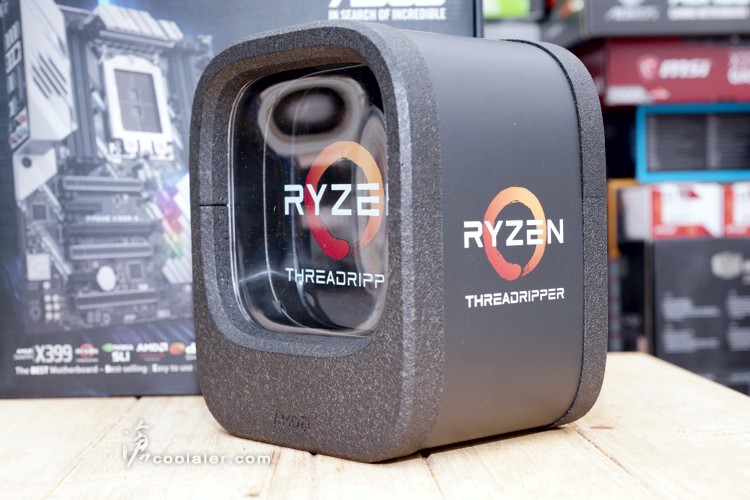
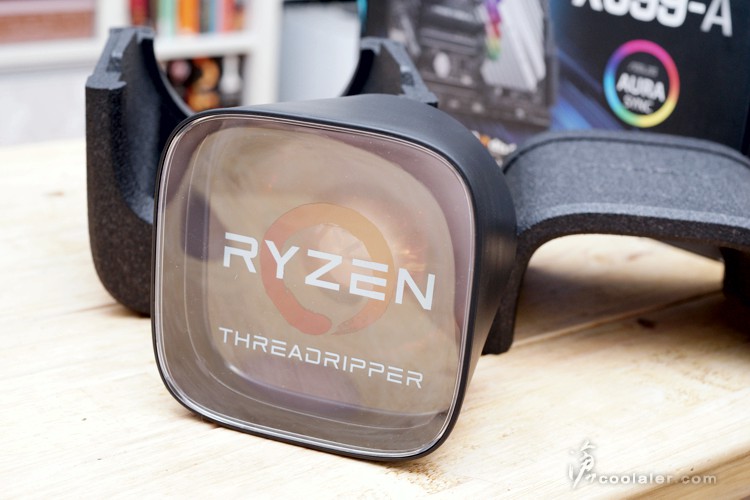
從外面可以看到裡面的 CPU 本體。
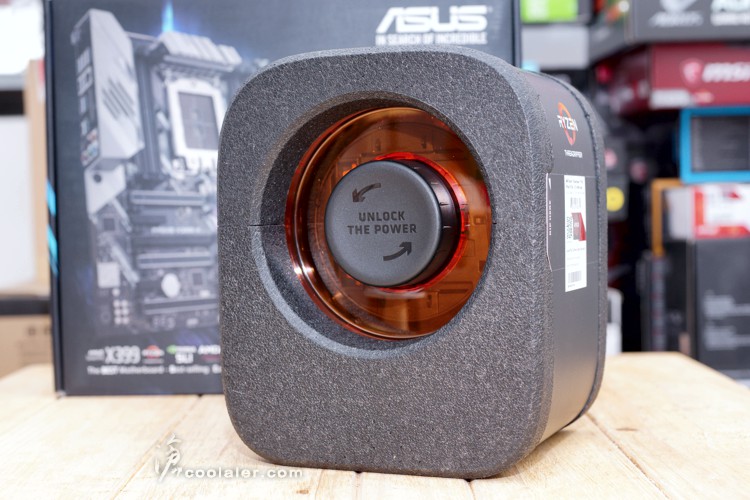
後面有個旋鈕設計,上面還寫著 Unlock The Power,轉開解放 AMD Threadripper 的力量。
外盒上下分離之後就可以取出內盒。
外盒下方有放置說明書以及工具。
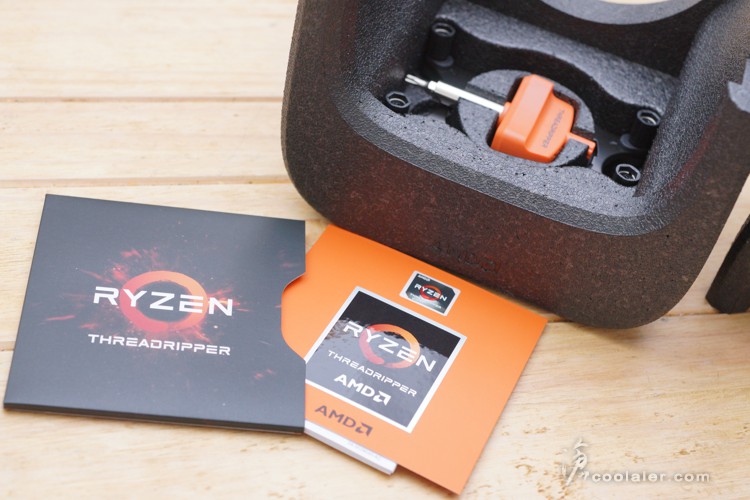
工具有一把星型螺絲起子,用來安裝CPU用,另外還有一個TR4的水冷散熱器轉接座,不過並不是任何水冷都能透過這來安裝。
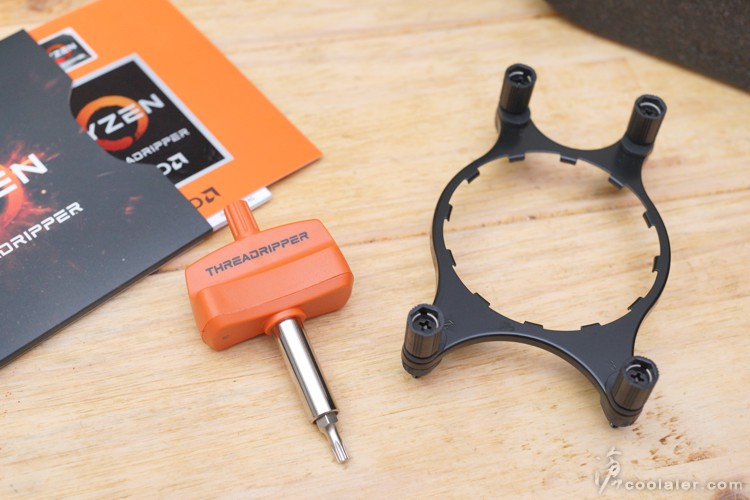
包裝真的是很搞剛。
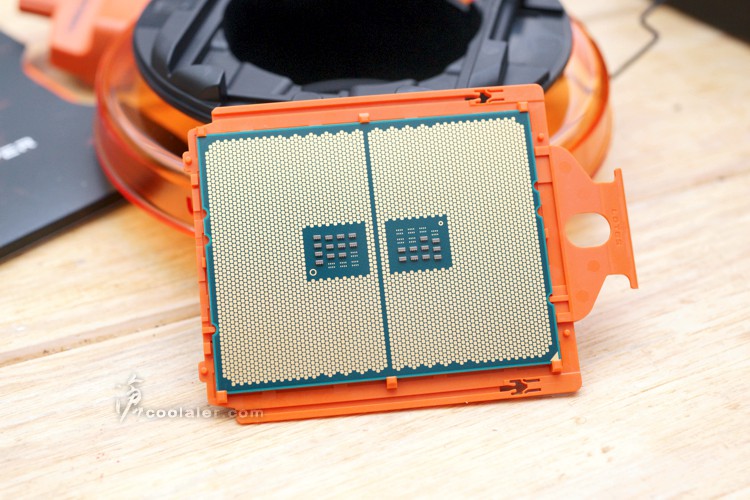
CPU 本體有一個附掛的支架,這個支架不需要移除。

畢竟有4094個接點,安裝需要有更方便的做法來避免撞歪針腳之類才行。
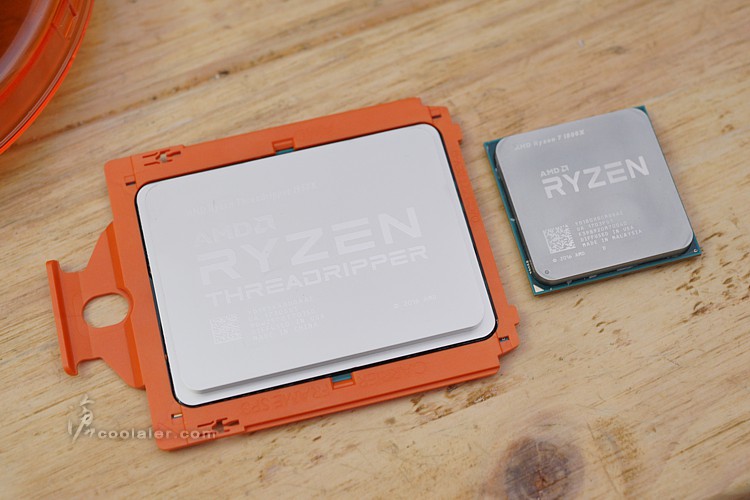
Ryzen Threadripper 很大一顆,右邊是 Ryzen。
接下來看看主機板的部分,ASUS PRIME X399-A 在 ASUS X399 系列中是屬於較陽春的,不過既然是在 X399 上就有一定的支援與規格,當然售價也是XD。
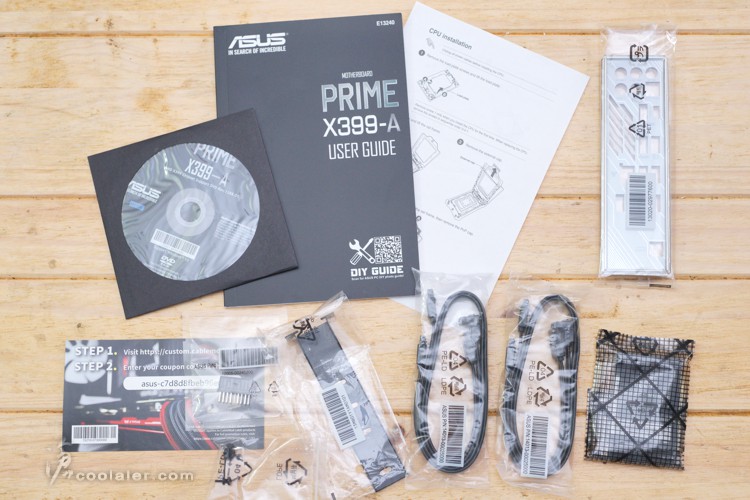
配件有軟體光碟、說明書、CPU安裝說明、檔板、Q-Connect 連接座、直立M.2支架、4條SATA線、SLI橋接器。
主機板採用 E-ATX 規格,要注意一下搭配的機殼,整體為黑色搭配銀色,中規中矩。
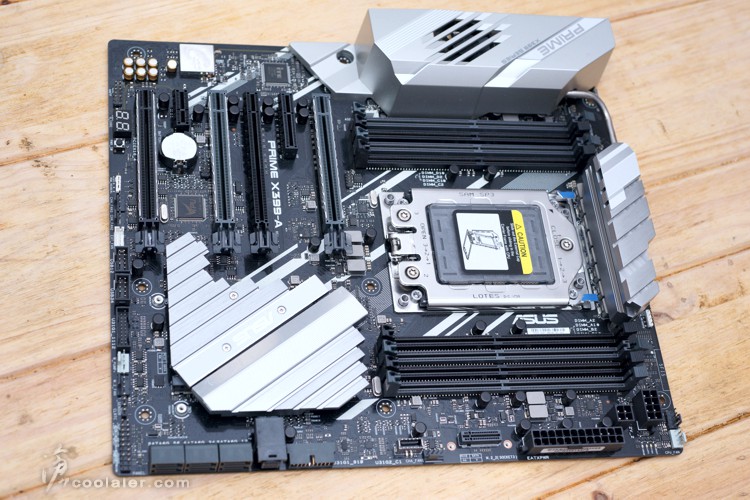
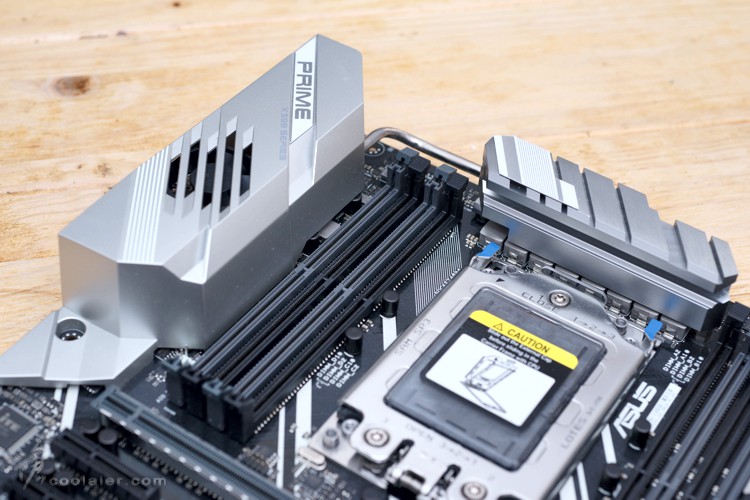
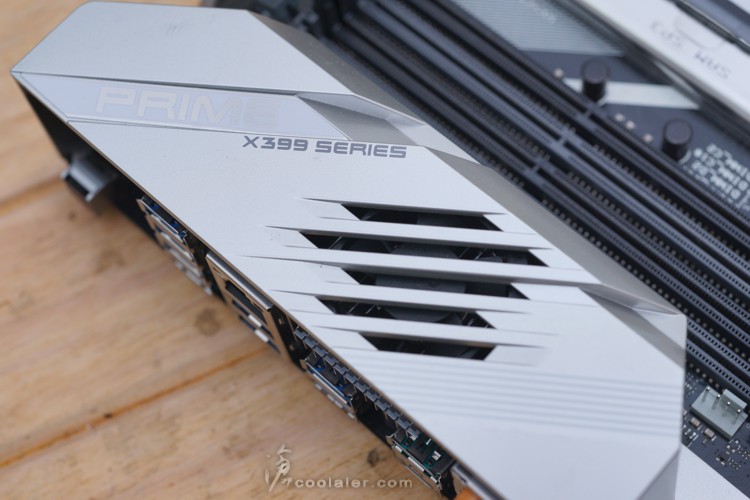
在後方IO埠上方有遮罩設計,下方供電部分有散熱片以及一顆小風扇。
供電有小風扇主動散熱。
CPU側邊的供電也有散熱片。
有熱導管連接至IO埠下方給風扇散熱。

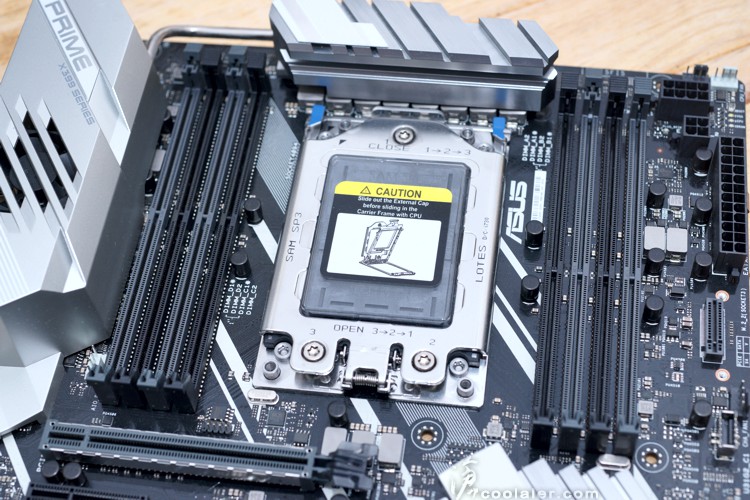
8根 DDR4 記憶體插槽,支援四通道,最高可擴充128GB,DDR4 3600(OC)。
CPU供電在主供電旁,有8pin+4pin。

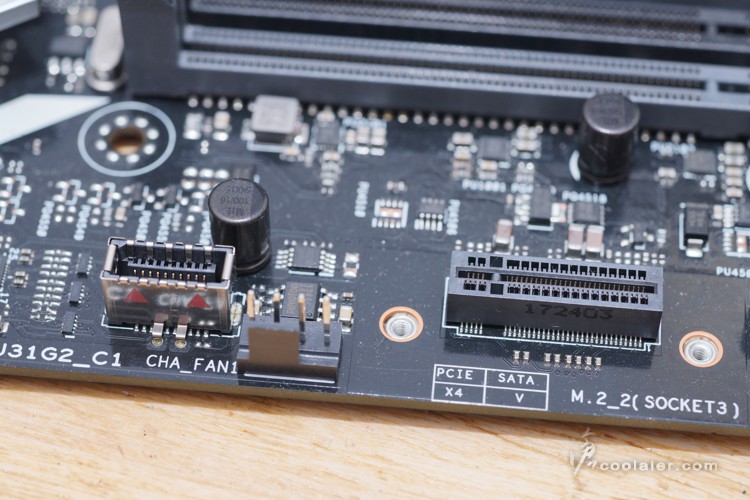
M.2 有一個插槽是採直立式,可以透過支撐架來安裝固定。
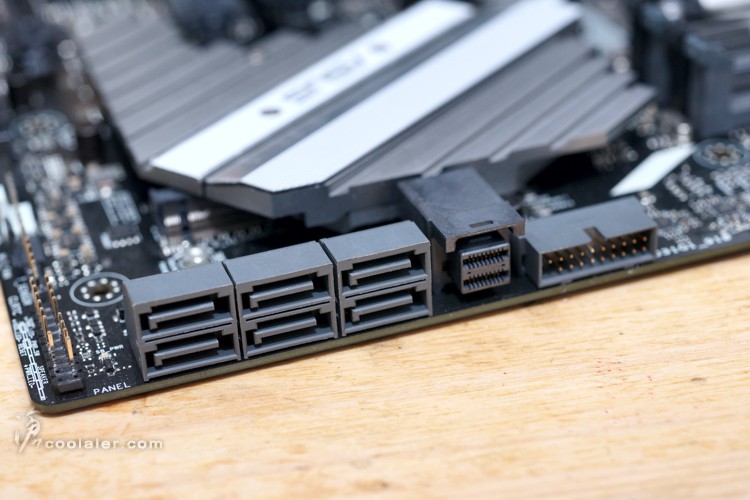
6個SATA、1個U.2。
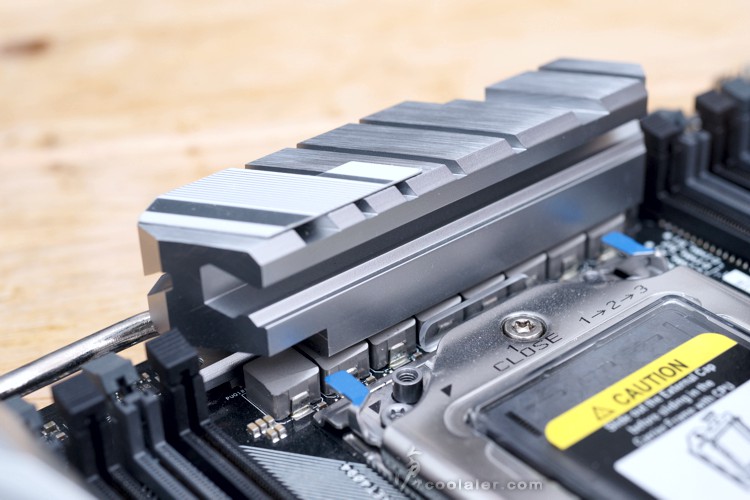
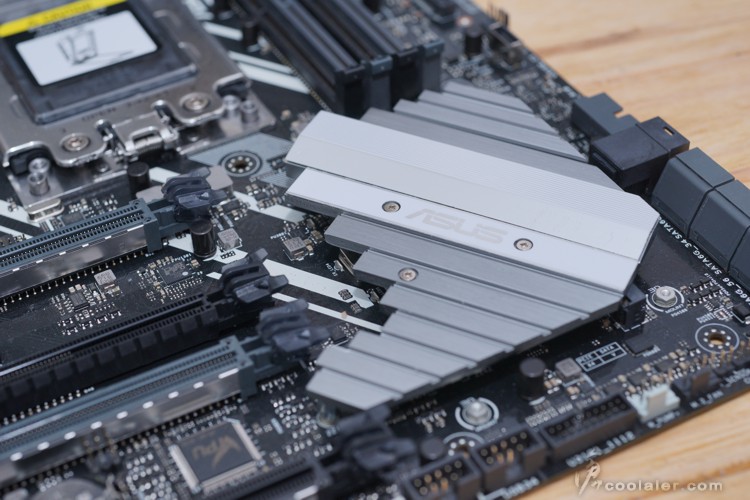
晶片組上方的散熱片。
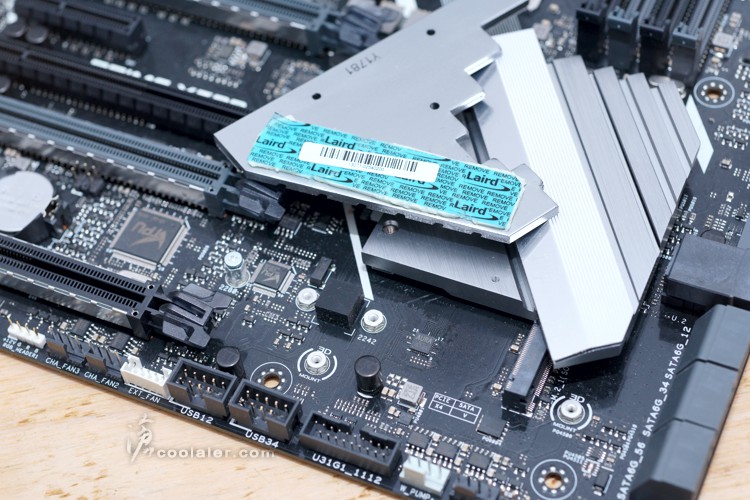
散熱片一側可以拆下,下方是 M.2 插槽,散熱片上有導熱膠,可以輔助下方的 M.2 硬碟散熱,使用時記得拆膠膜。
4根PCI-E x16、1根PCI-E x4、1根PCI-E x1。
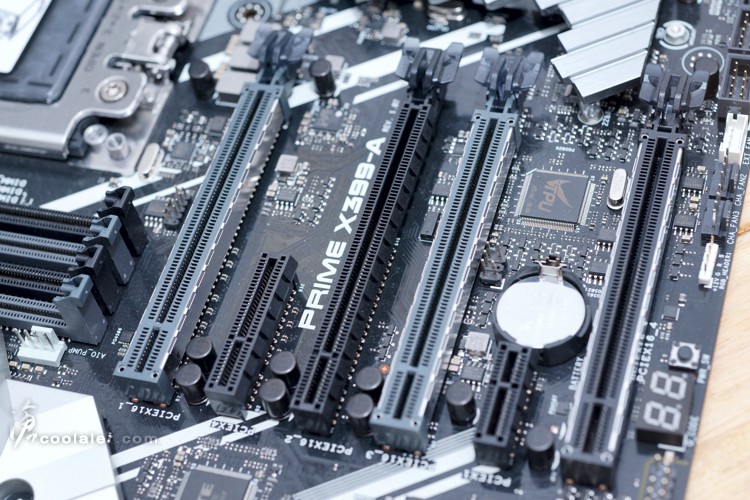
x16的部分側邊有金屬強化護甲。

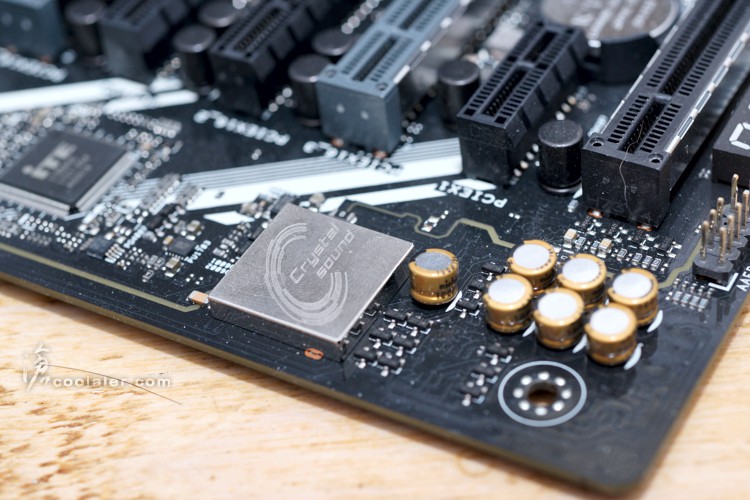
音效採用 Realtek S1220A 晶片搭載 Crystal Sound 3 技術,有獨立區域,採用 Nichicon 電容。
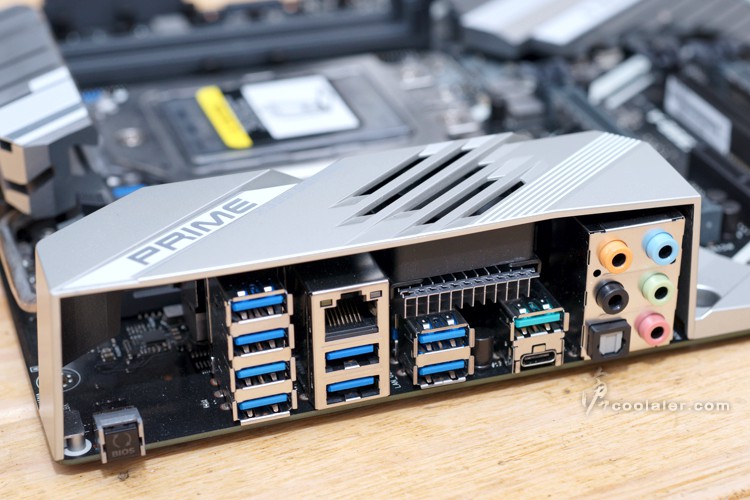
背後IO埠, BIOS Flashback 鍵、8個USB 3.1 Gen1、1個RJ45、1個USB 3.1 Gen2 Type-A、1個USB 3.1 Gen2 Type-A、5個音源輸出入、S/PDIF。
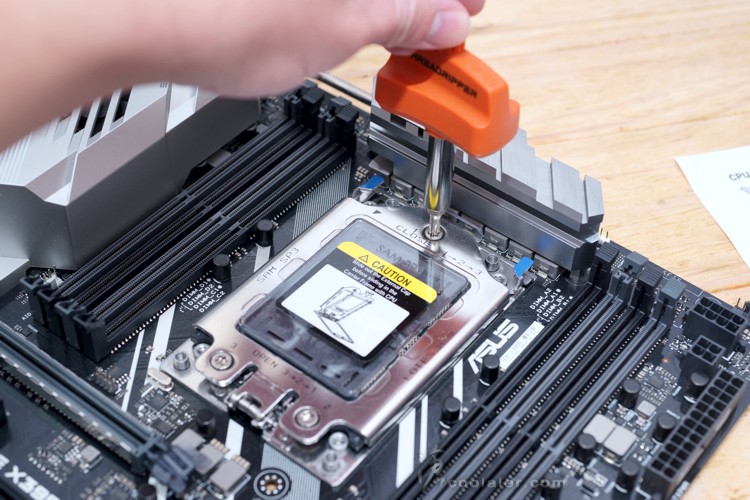
安裝CPU,使用附屬的星形螺絲起子轉開護板。
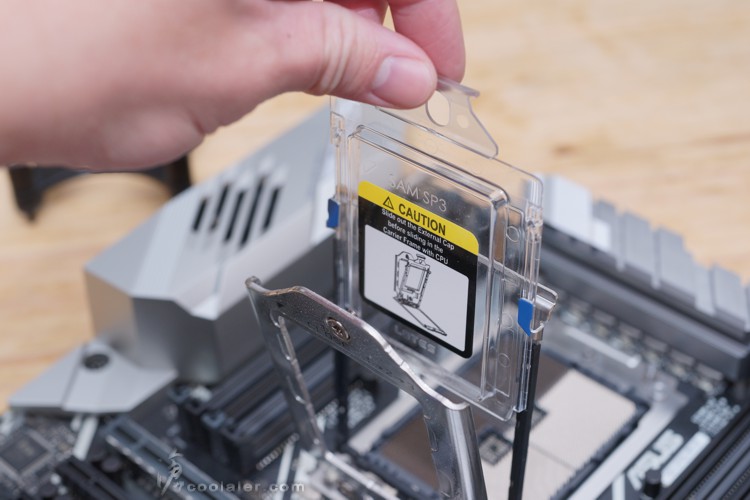
移除CPU上方的保護蓋。
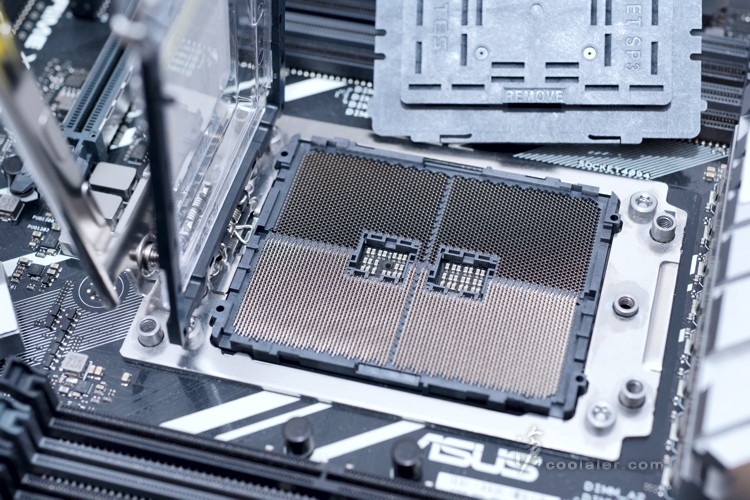
移除護板下的塑膠片,從上方抽出。
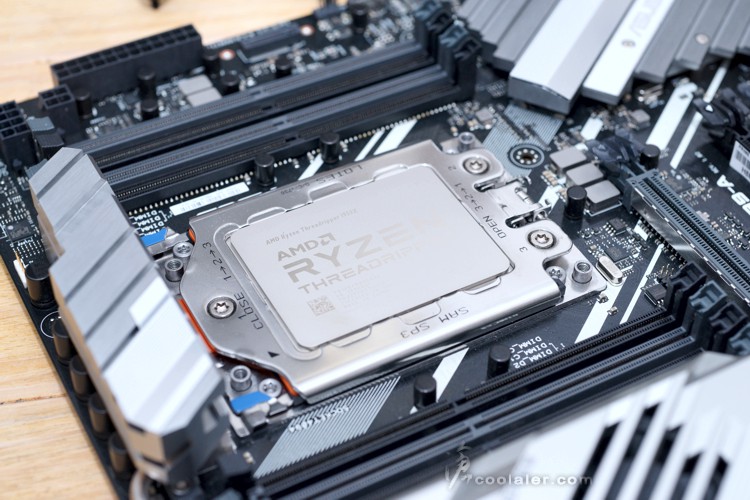
置換成CPU放入。
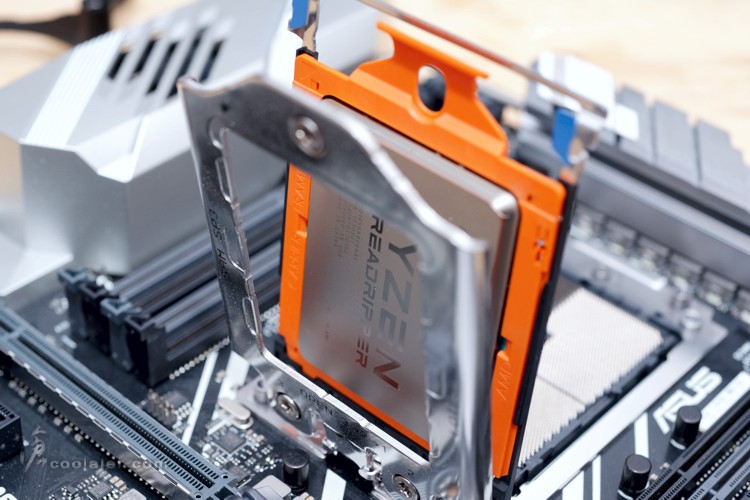
將CPU小心翼翼地放在針腳上。
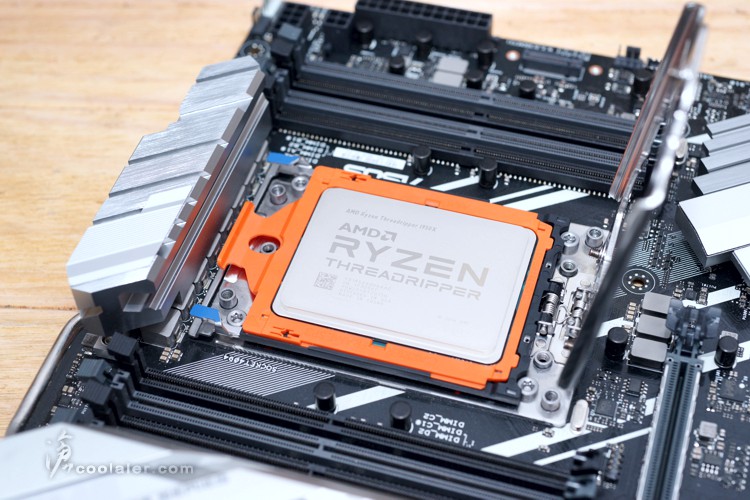
蓋上護蓋,並鎖緊螺絲即可。
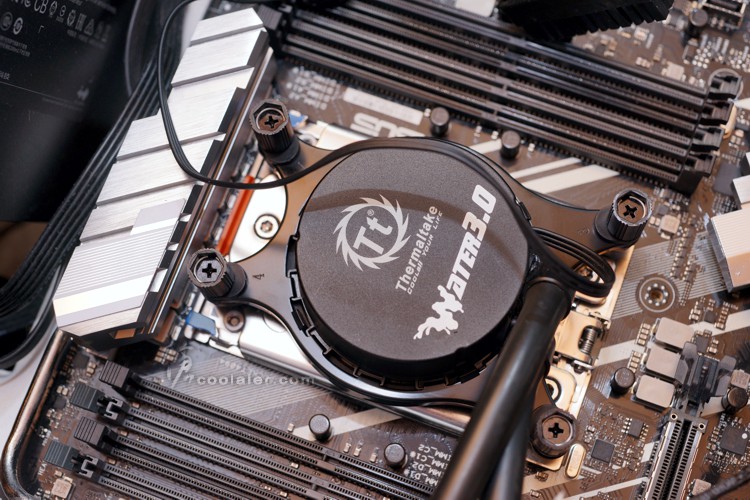
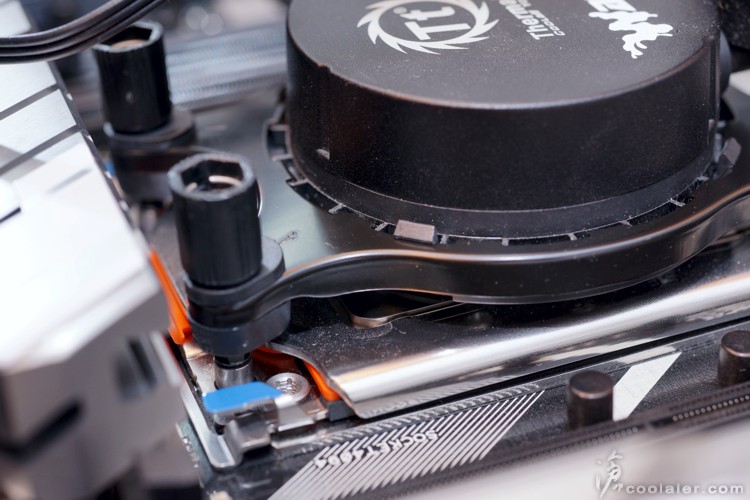
部分一體式水冷可以換上 AMD 附的安裝架直上,如 Tt 的 Water 3.0。
CPU 真的是很大一顆,大部分的散熱器應該都無法全覆蓋到整顆。
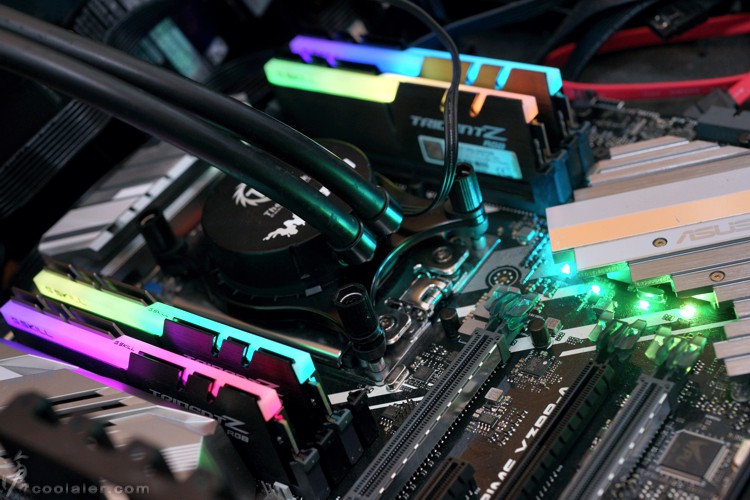
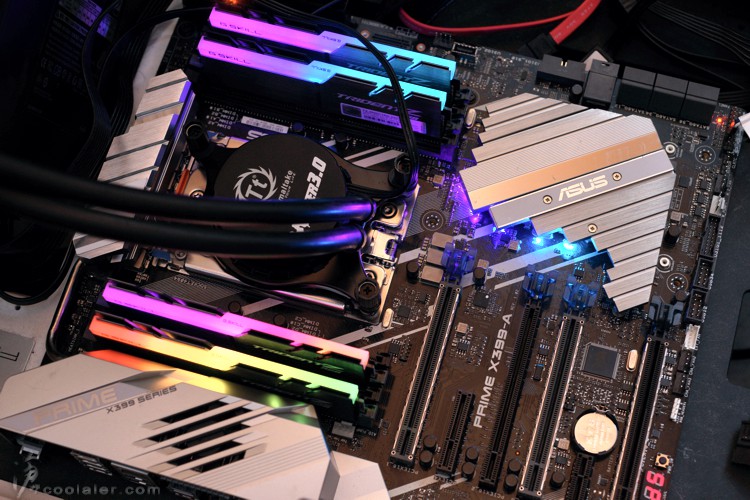
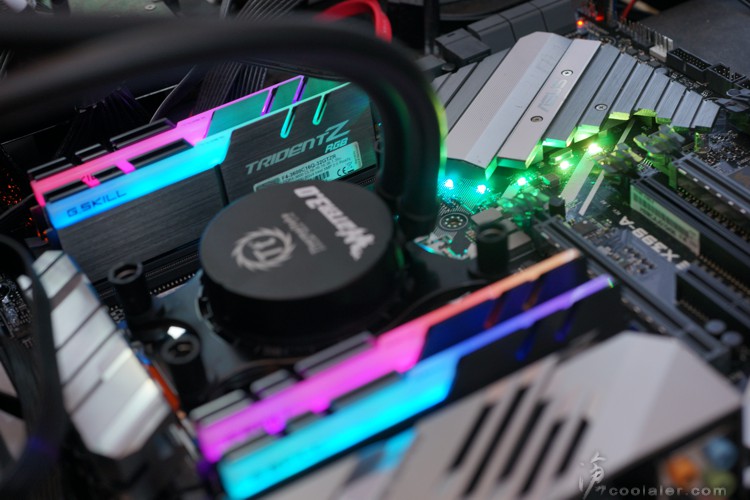
測試之前來幾張燈效圖。
主機板 BIOS 簡介
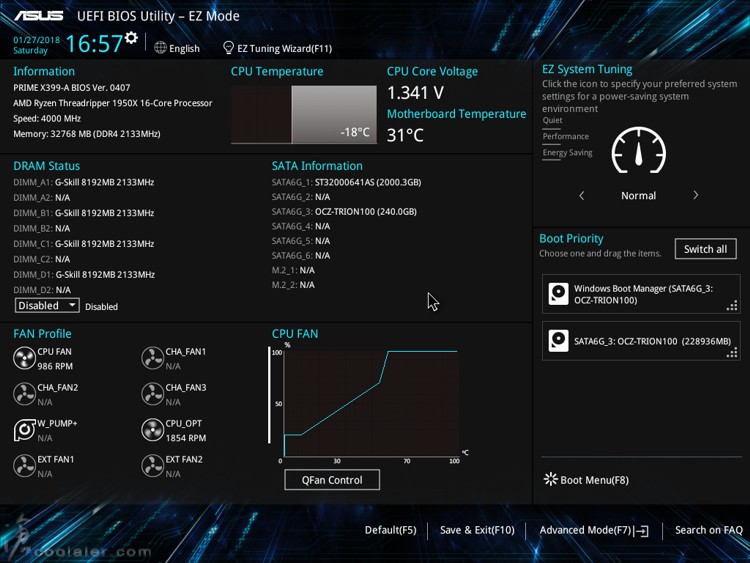
EZ Mode,簡易模式下可以看到系統平台資訊,可使用 EZ Tuning 來調整效能、調整風扇控制、開機選項等。
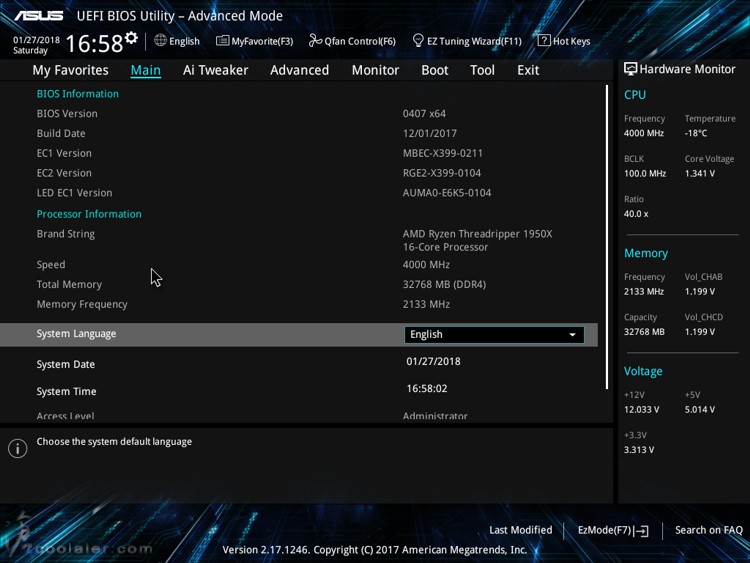
Advanced Mode,進階模式有更多的選項可以調整,如超頻、細項設定、監控、開機、工具等。
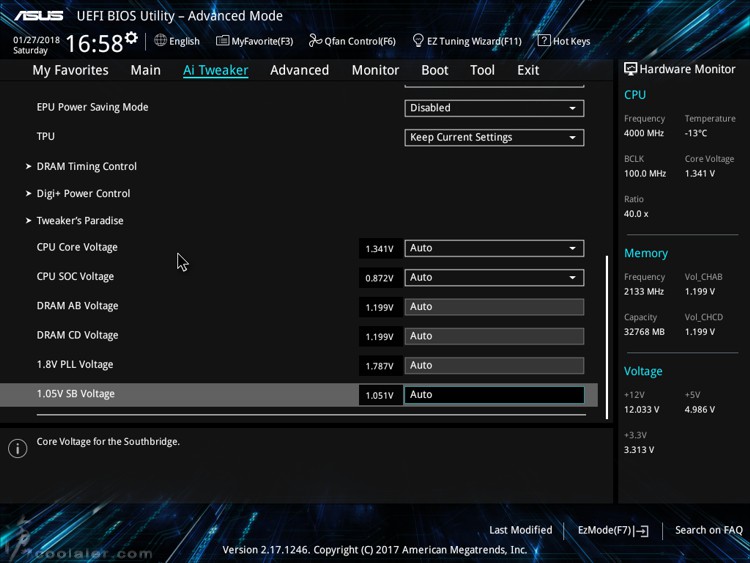
Ai Tweaker,超頻選單選項相當完整,可以調整倍頻、外頻、記憶體參數、處理器功能、電壓等。

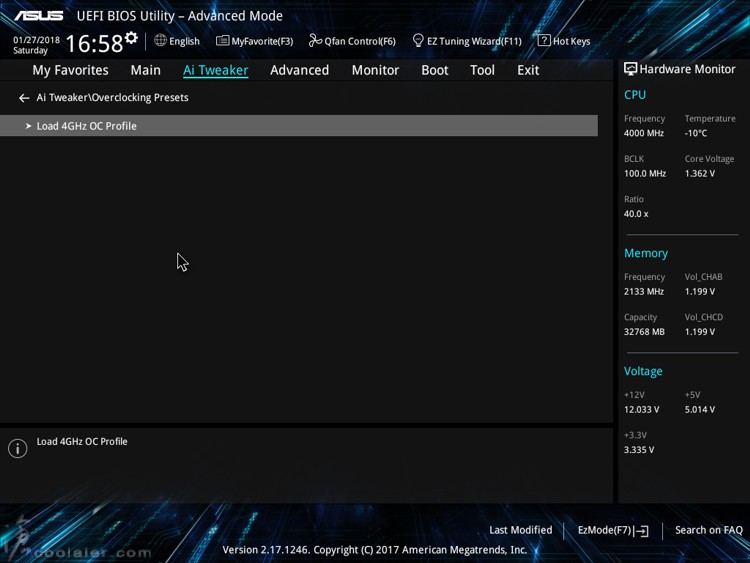
CPU 超頻有4GHz的選項可以直接讀取套用,不用再設定其他東西,不過直接套用後有點奇怪,可以看到溫度的部分變成負的,未套用之前是正常。如果直接調整倍頻40也會是正常。
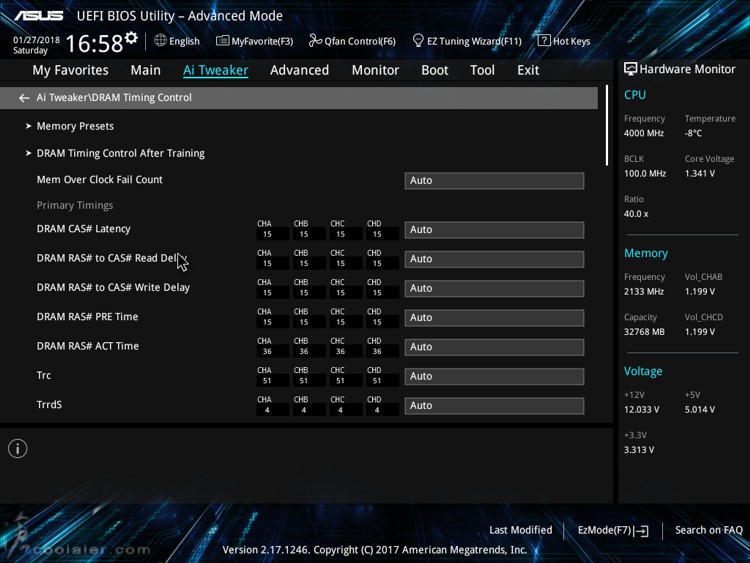
記憶體有完整的參數可以調整。
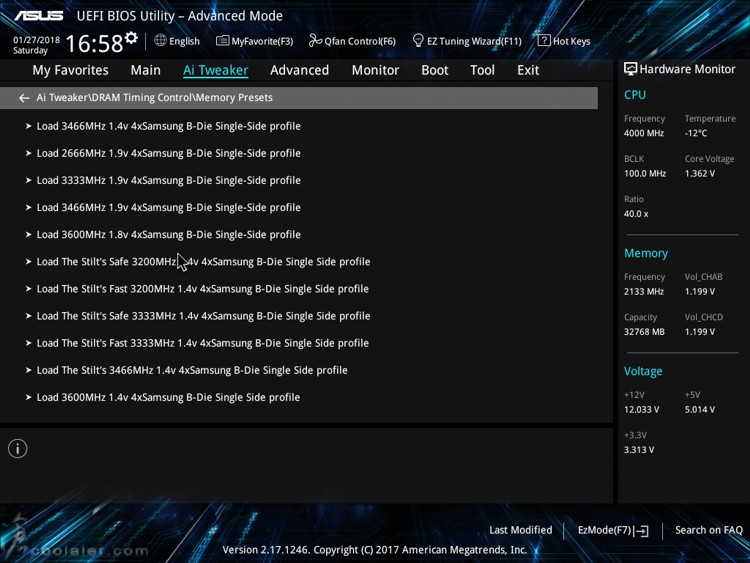
也可以直接套用既有的時脈與參數,不過要確定記憶體規格是否一樣。
測試平台
CPU: AMD Ryzen Threadripper 1950X
CPU Cooler: Tt Water 3.0 Extreme S
RAM: GSKILL DDR4 3200 8GBx4
MB: ASUS X399 Prime-A
VGA: GIGABYTE Vega 64 GAMING OC 8G
HDD: OCZ Vertex 3.20 240GB、Seagate 2TB
PSU: IN WIN SI 1050W
OS: Windows 10 64bit
預設值測試
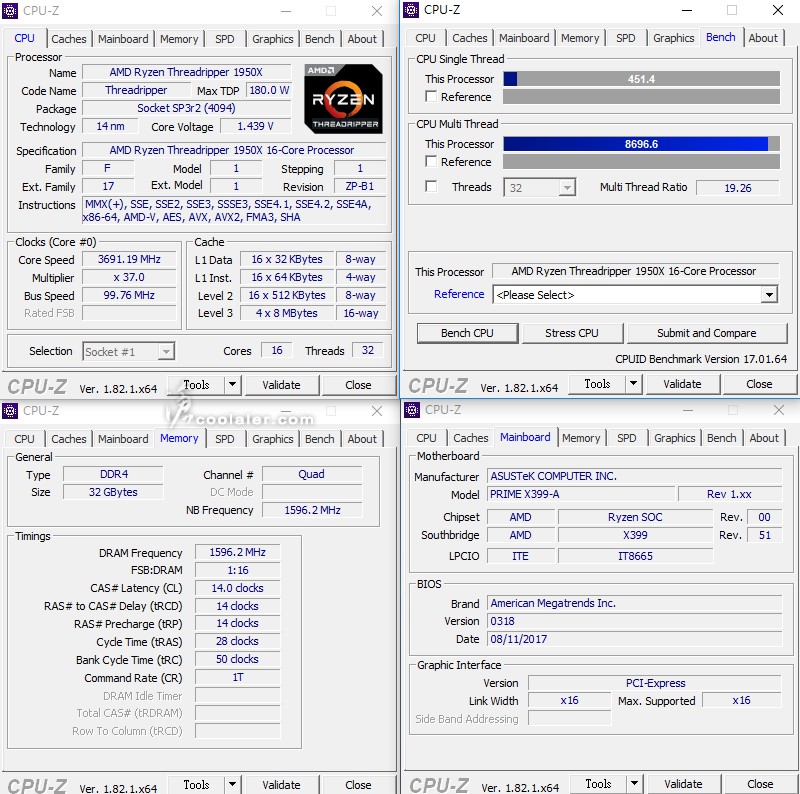
CPU-Z
CPU Single:451.4
CPU Multi:8696.6
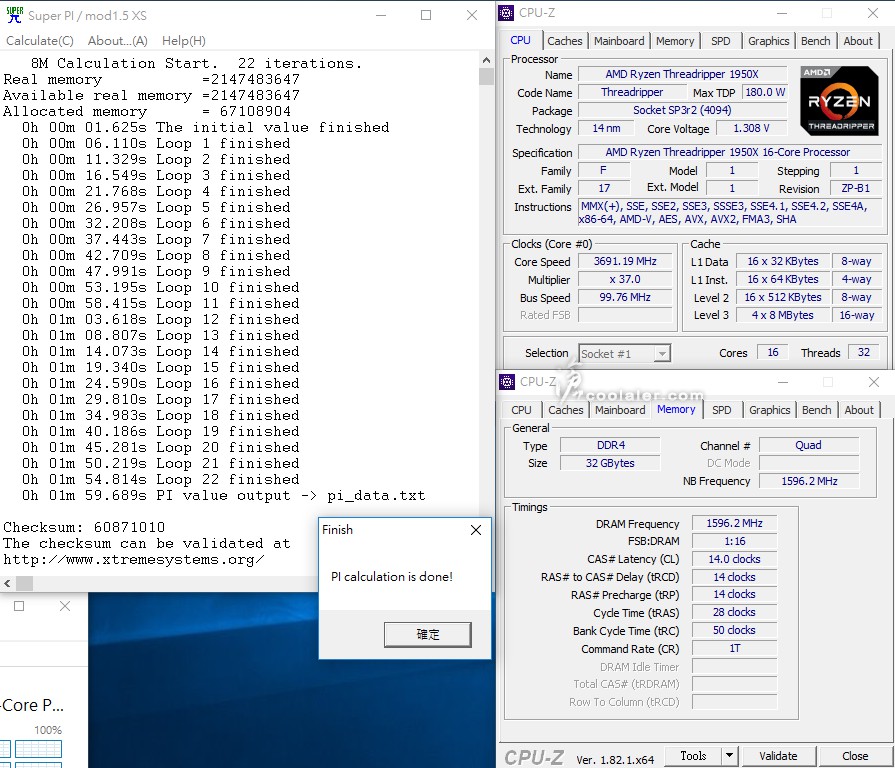
SuperPI 1M & CPUmark99
SuperPI 1M :10.704s
CPUmark99:598

SuperPI 8M:1m59.689s
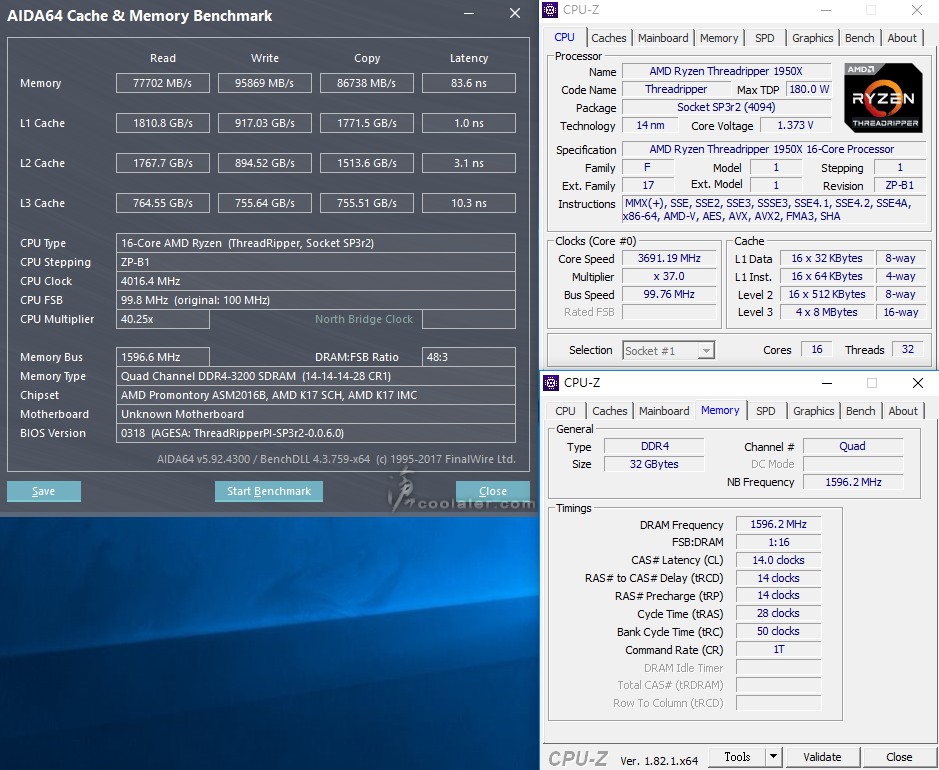
Memory Benchmark
Read:77702MB/s
Write:95869MB/s
Copy:86738MB/s
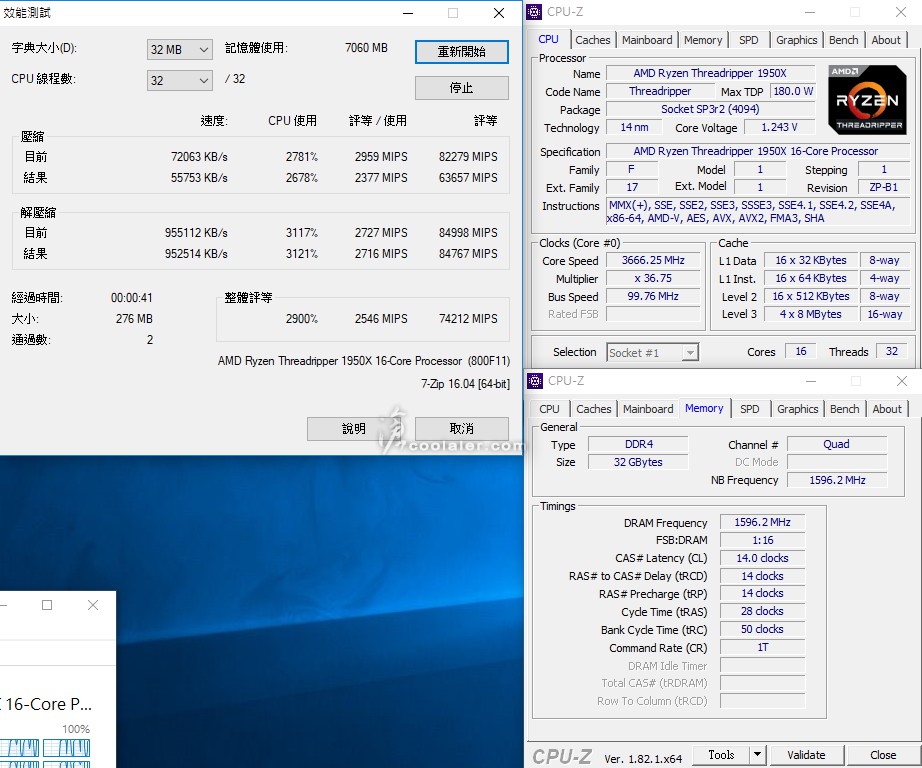
7-Zip:74212 MIPS
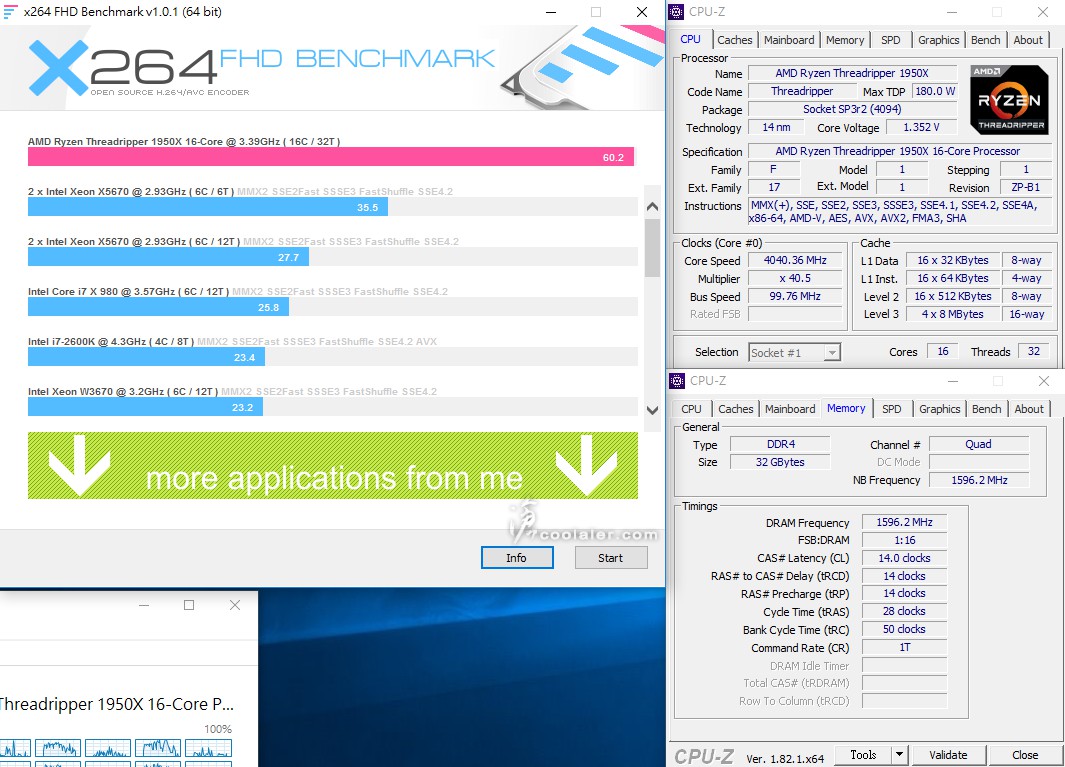
x264 FHD Benchmark:60.2
CINEBENCH R10
1 CPU:8299
x CPU:70196
OpenGL:13238
R10 在多 CPU 項目的使用約只有50%而已。

CINEBENCH R11.5
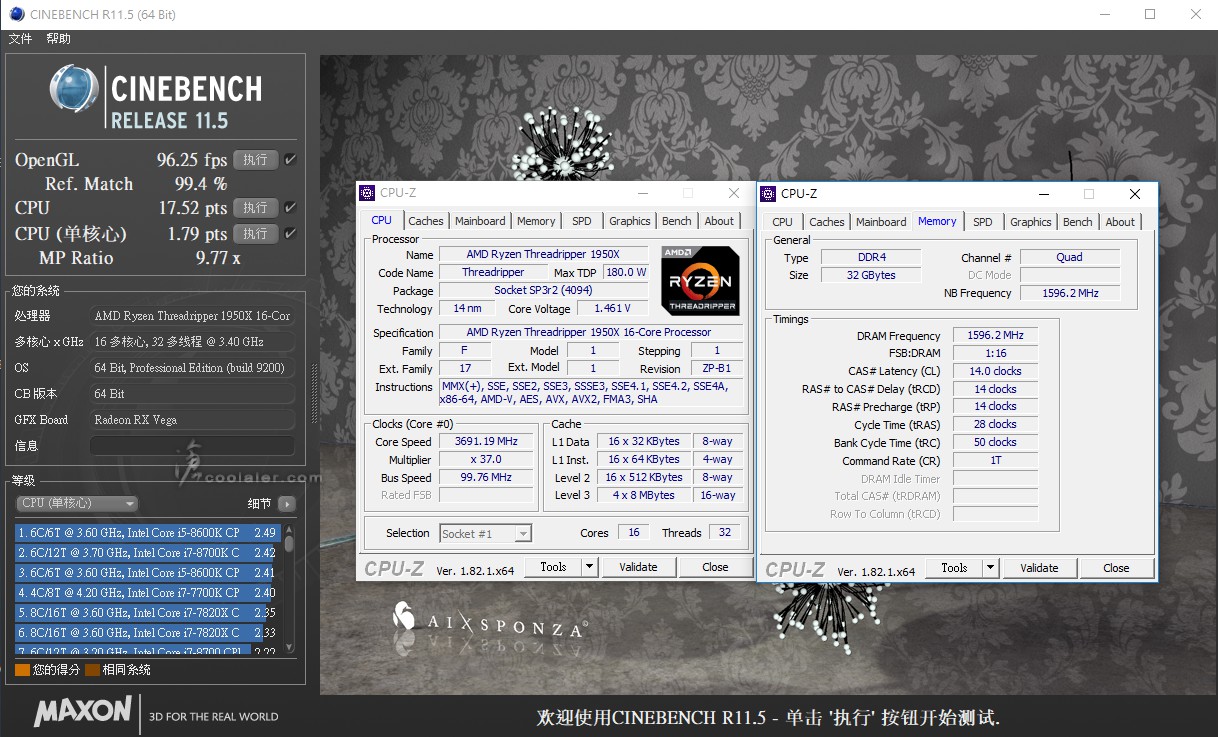
OpenGL:96.25 fps
CPU:17.52 pts
CPU(單核心):1.79 pts
R11.5 在多 CPU 項目最後收尾的時候會掉到10~15%使用率。
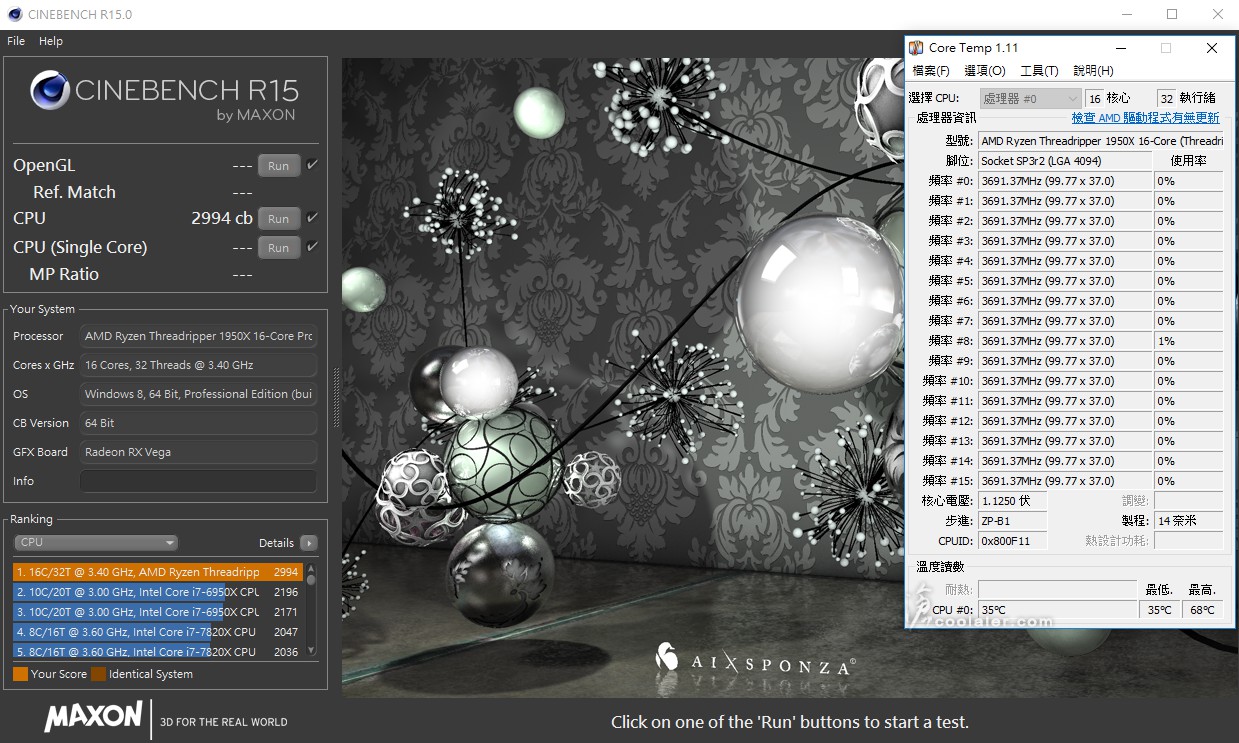
CINEBENCH R15
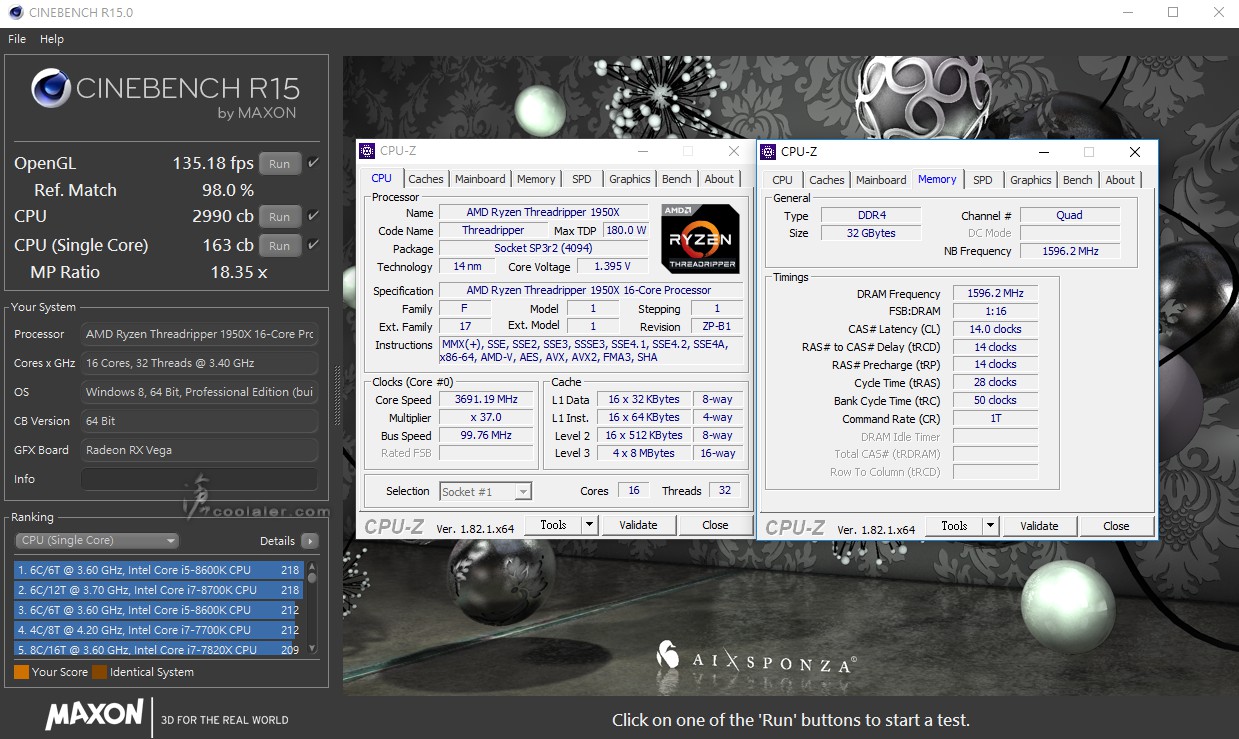
OpenGL:135.18 fps
CPU:2990 cb
CPU(單核心):163 cb
R15 項目正常,多 CPU 項目可以達100%。
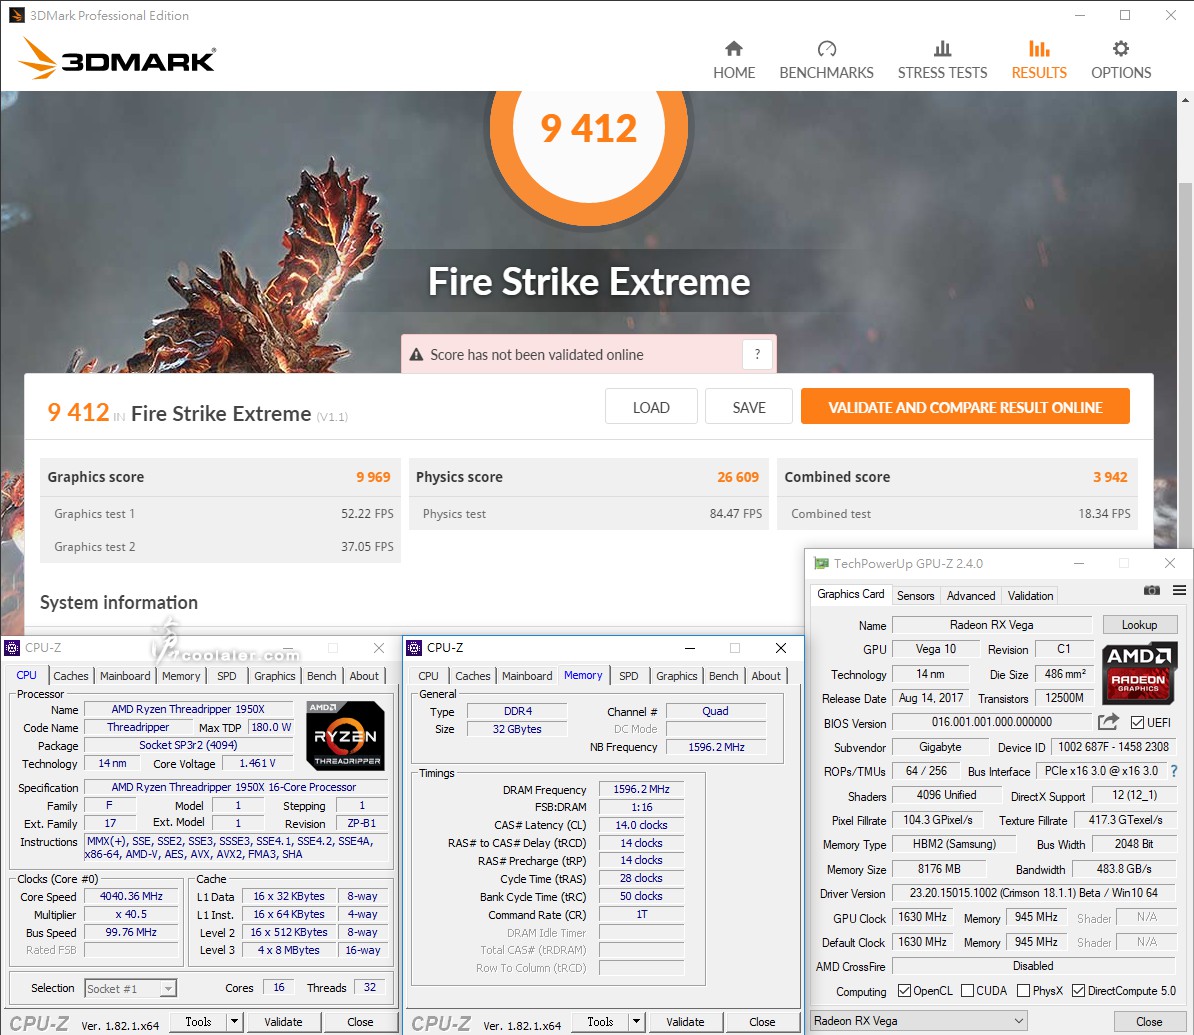
3DMark Fire Strike Extreme:9412
Graphics:9969
Physics:26609
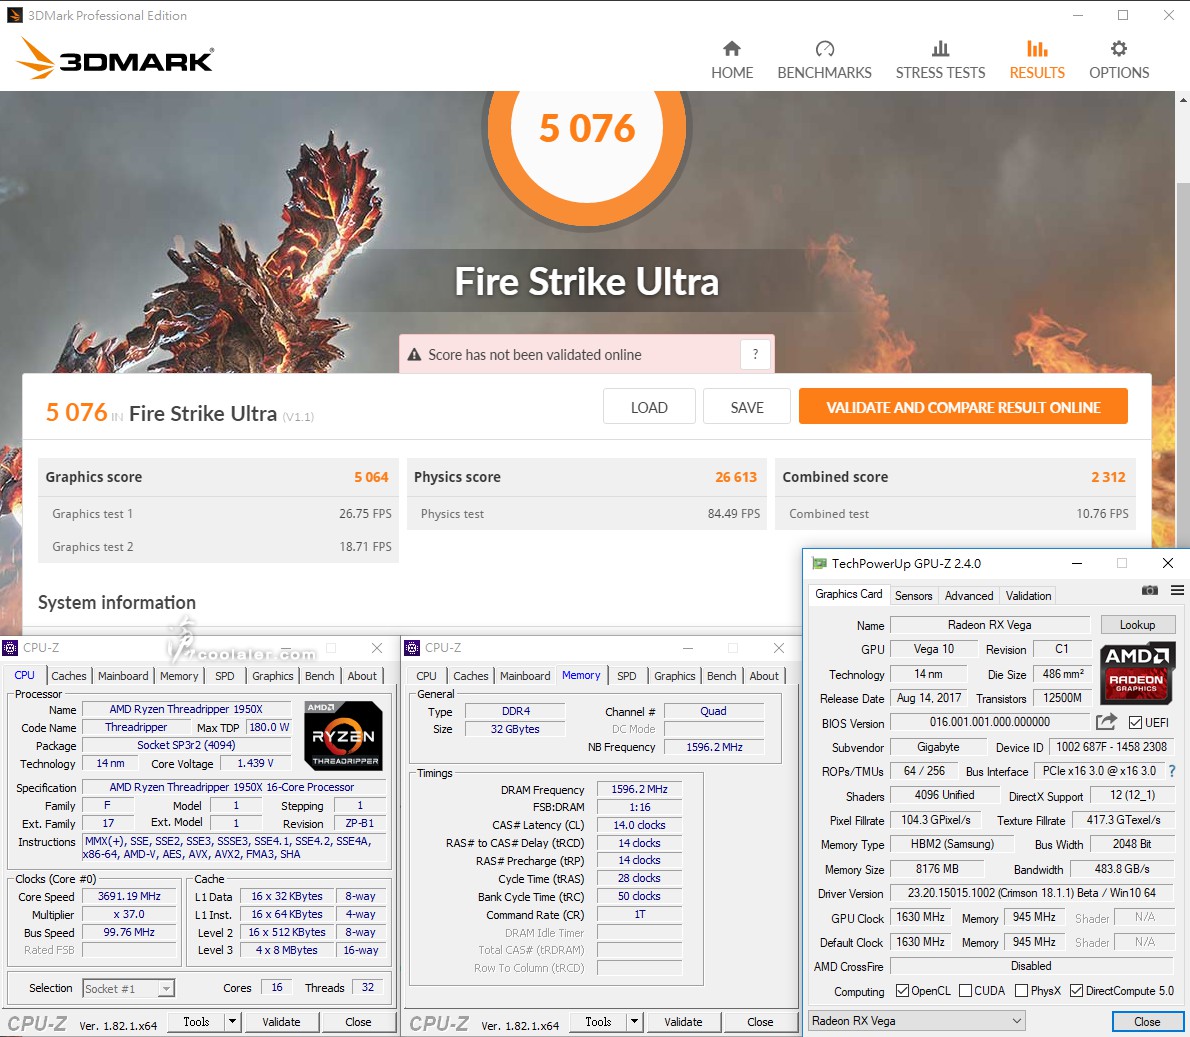
3DMark Fire Strike Ultra:5076
Graphics:5064
Physics:26613
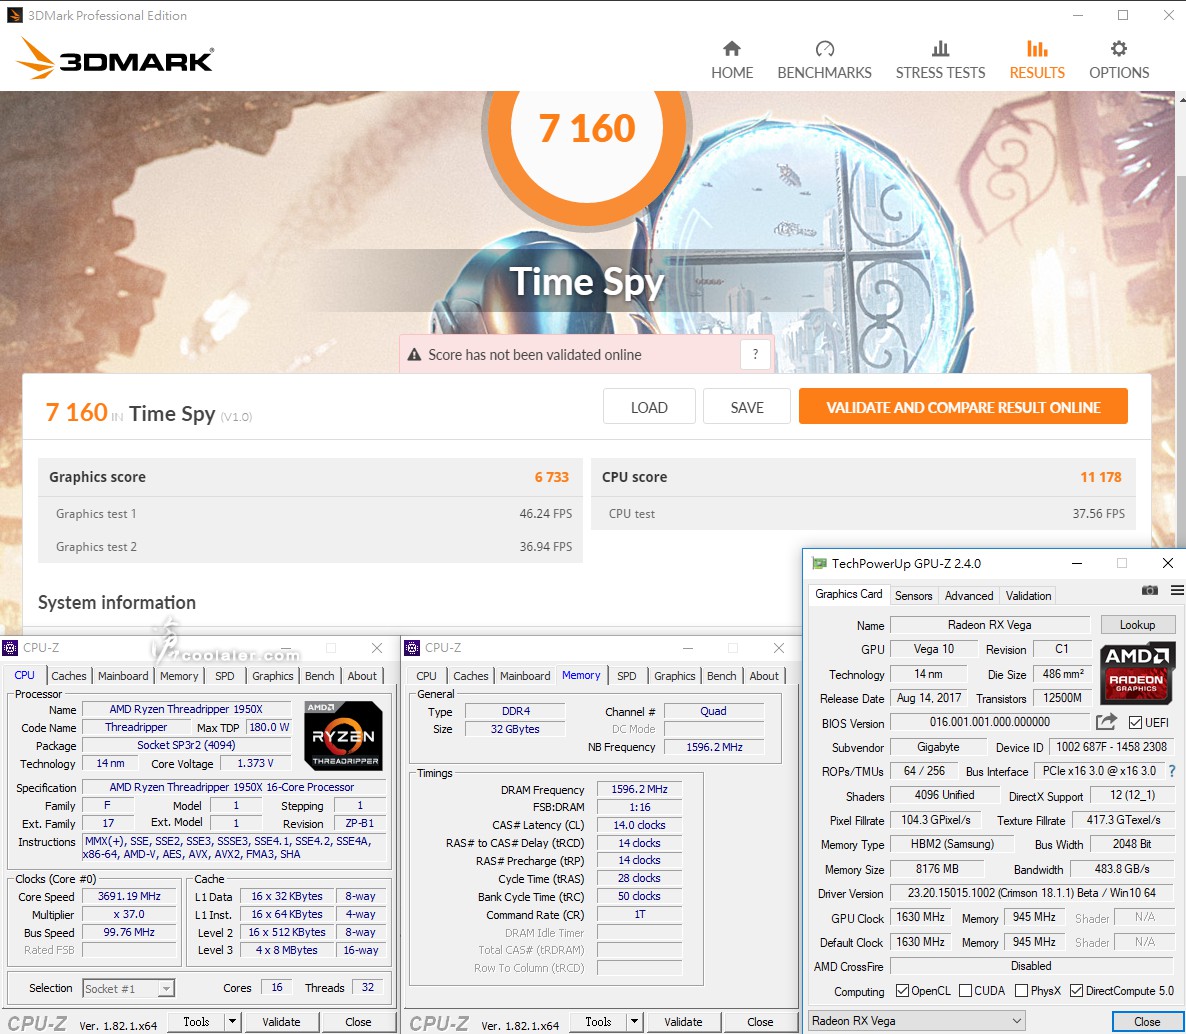
3DMark Time Spy:7160
Graphics:6733
CPU:11178
溫度待機時35度,執行 R15 滿載時最高68度。
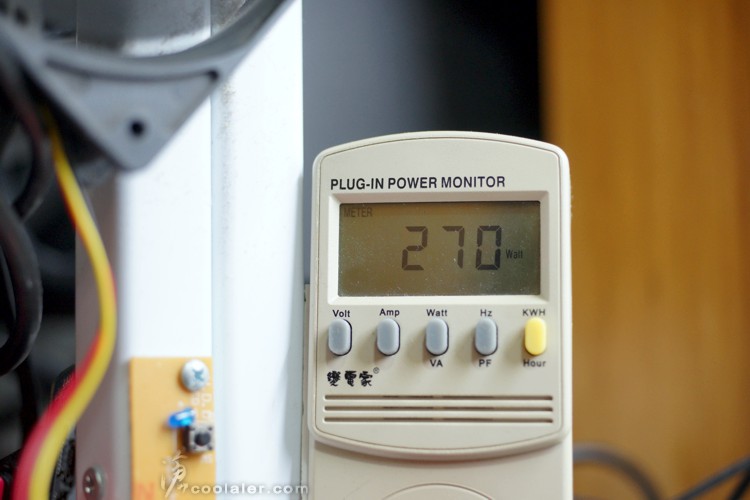
功耗的部分待機時全機84W
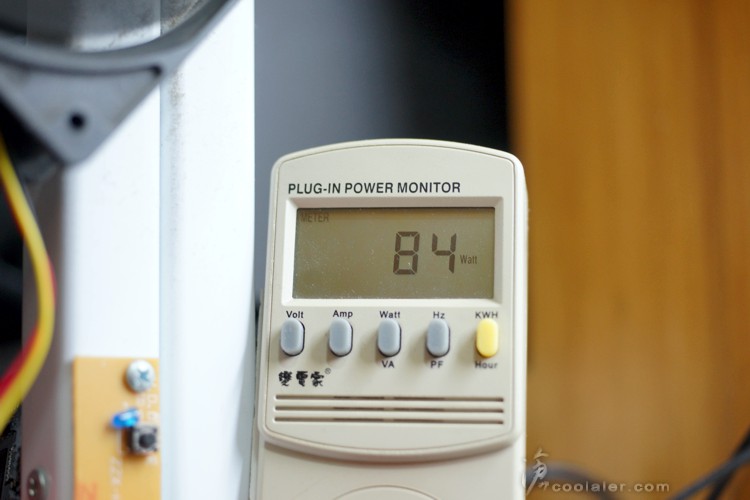
執行 R15 時最高270W。
超頻4GHz
AMD Ryzen Threadripper 1950X 在 Boost 時可以達到4GHz,不過多核心高負載時並沒有那麼高,所以超頻至4GHz是讓所有核心在高負載、滿載時也可以達到4GHz,設定僅調整倍頻40,電壓auto,其餘未變更,您也可以使用 ASUS BIOS 預設4GHz的選項,但溫度有點奇怪就是,另外記憶體的部分因為並不是 For Ryzen Threadripper 專用,而是 X299 平台,所以超頻後有點問題,所以4GHz的部分降了一些頻率,從原本3200MHz降至3066MHz。
下方括弧後面為預設值成績。
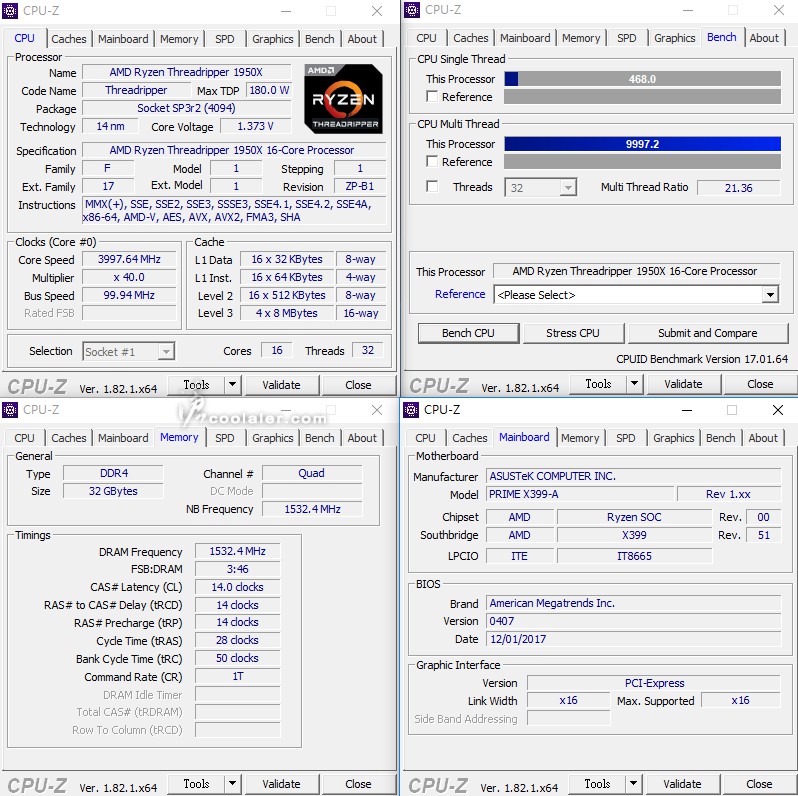
CPU-Z
CPU Single:468(451.4)+3.7%
CPU Multi:9997.2(8696.6)+15%
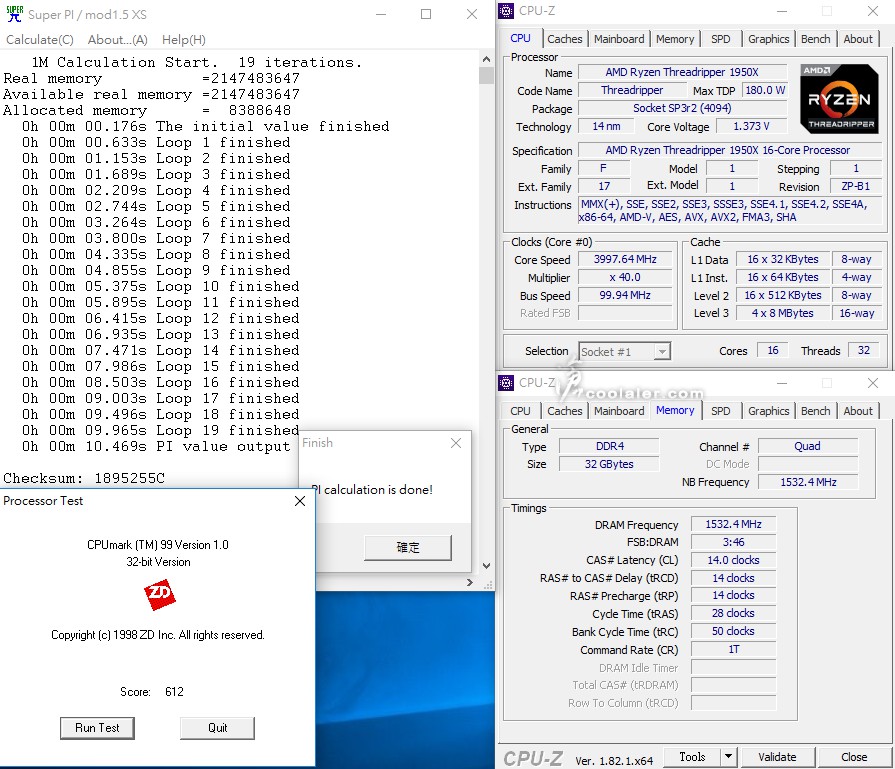
SuperPI 1M & CPUmark99
SuperPI 1M :10.469s(10.704s)+2.2%
CPUmark99:612(598)+2.3%
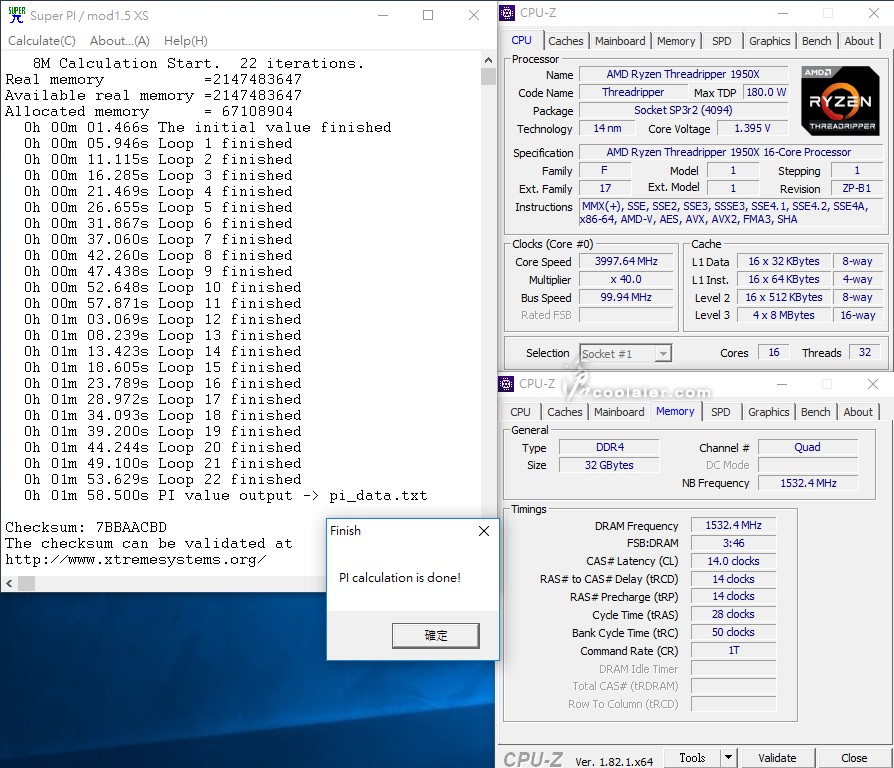
SuperPI 8M:1m58.500s(1m59.689s)+1%
Memory Benchmark
Read:74259MB/s(77702MB/s)
Write:92030MB/s(95869MB/s)
Copy:82524MB/s(86738MB/s)
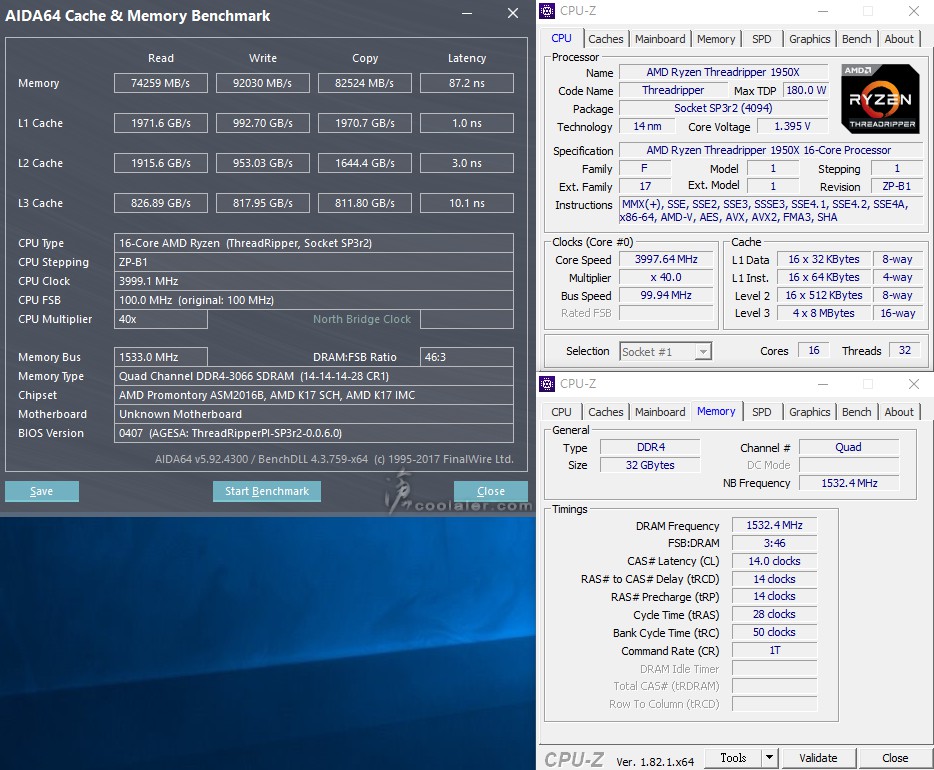
7-Zip:79006 MIPS(74212 MIPS)+6.5%
x264 FHD Benchmark:66(60.2)+9.6%

CINEBENCH R10
1 CPU:8422(8299)+1.5%
x CPU:82988(70196)+18.2%
OpenGL:14010(13238)
R10 在多 CPU 項目的使用約只有50%而已。
CINEBENCH R11.5
OpenGL:101.87 fps(96.25 fps)
CPU:17.94 pts(17.52 pts)+2.4%
CPU 單核心:1.82 pts(1.79 pts)+1.7%
R11.5 在多 CPU 項目最後收尾的時候會掉到10~15%使用率。
可以看到執行時為100%,但收尾時 CPU 使用率會降到10~15%。

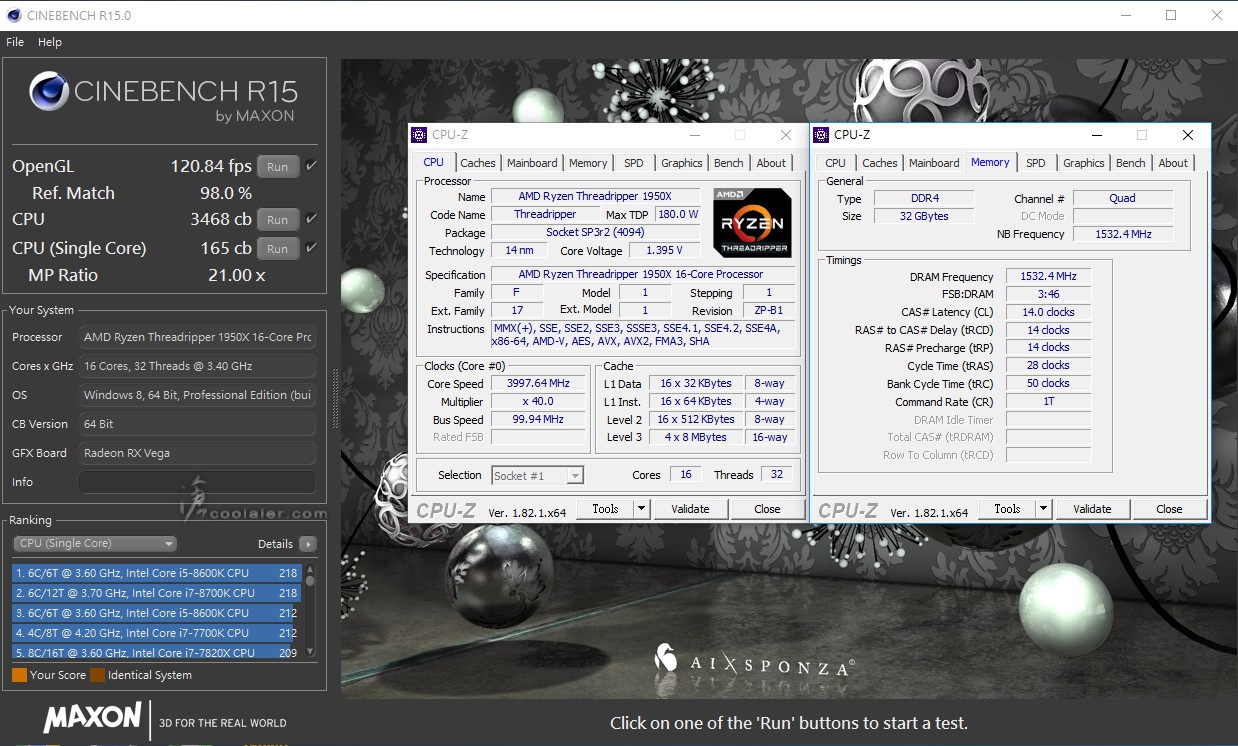
CINEBENCH R15
OpenGL:120.84 fps(135.18 fps)
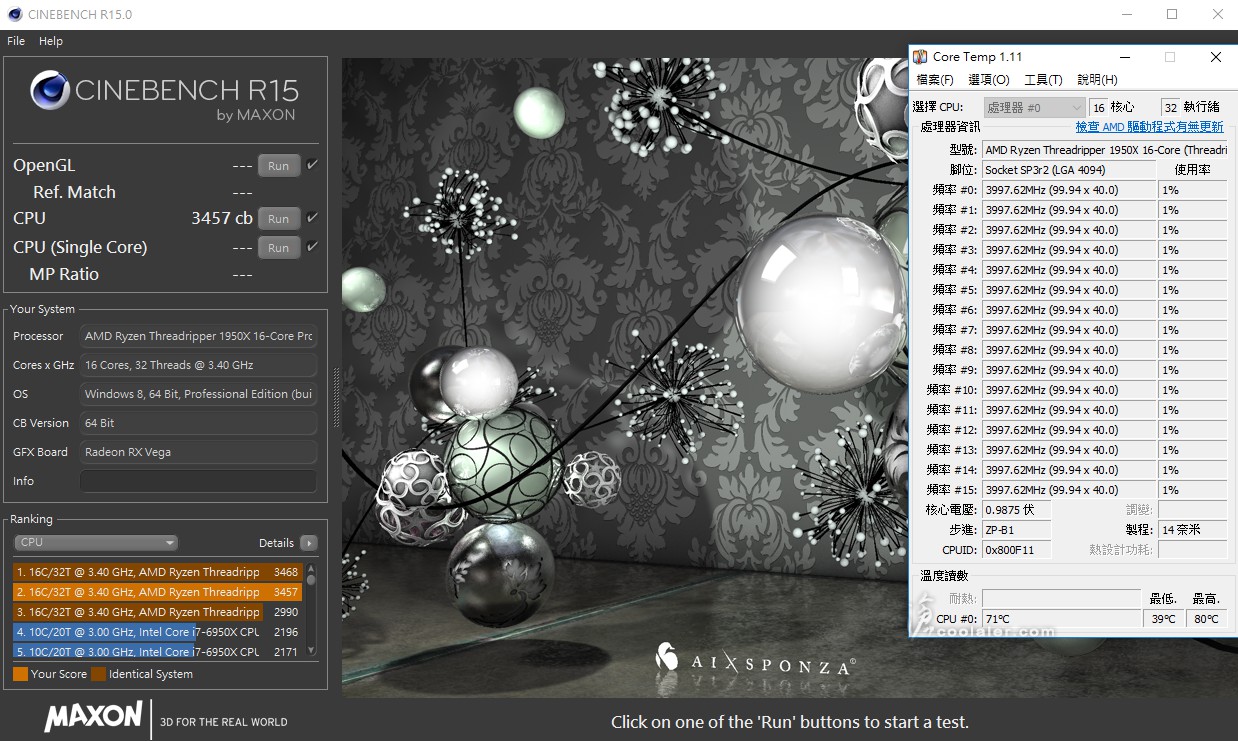
CPU:3468 cb(2990 cb)+16%
CPU 單核心:165 cb(163 cb)+1.2%
R15 項目正常,多 CPU 項目可以達100%。
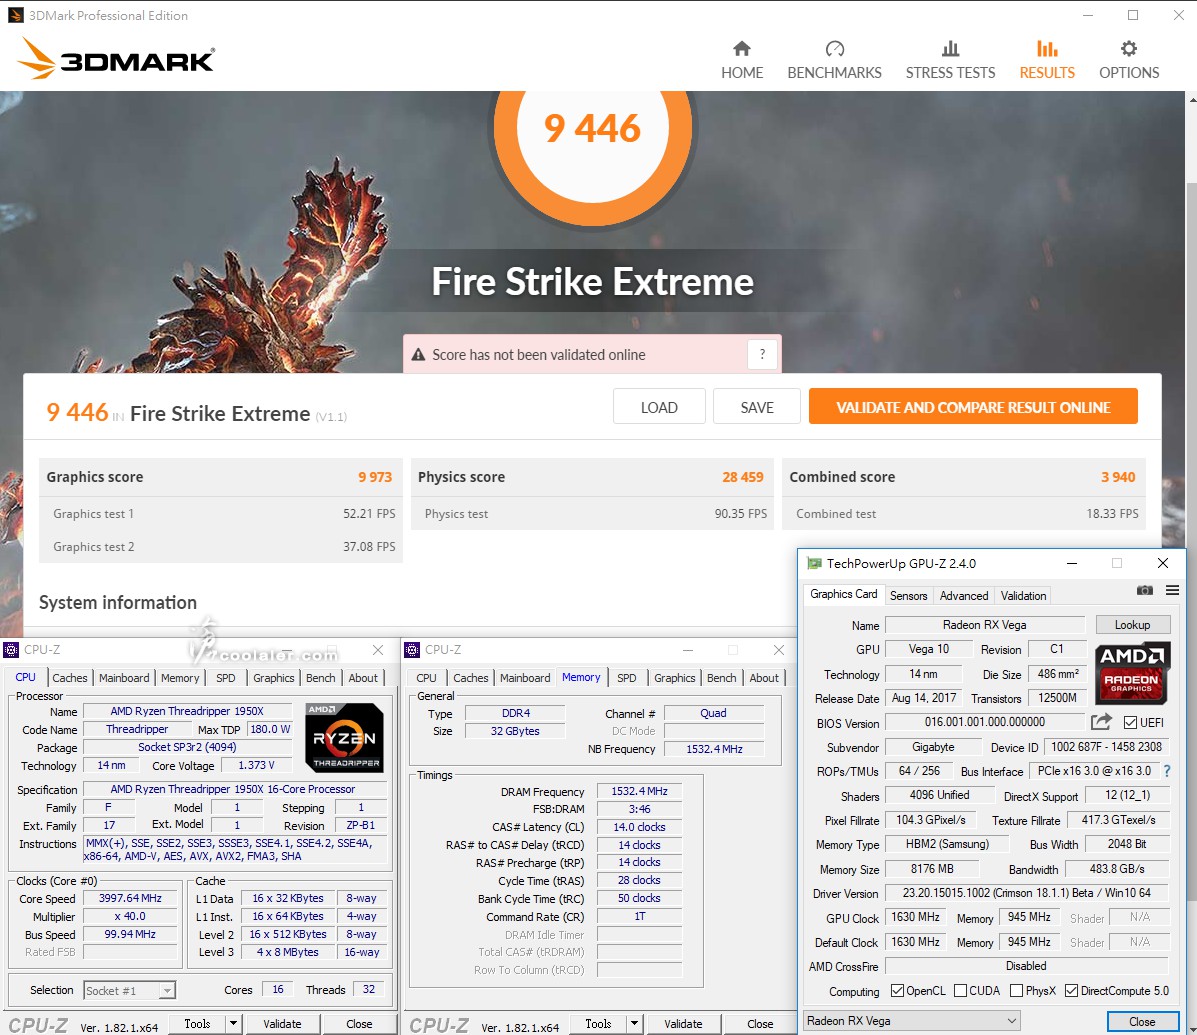
3DMark Fire Strike Extreme:9446(9412)
Graphics:9973(9969)
Physics:28459(26609)+7%
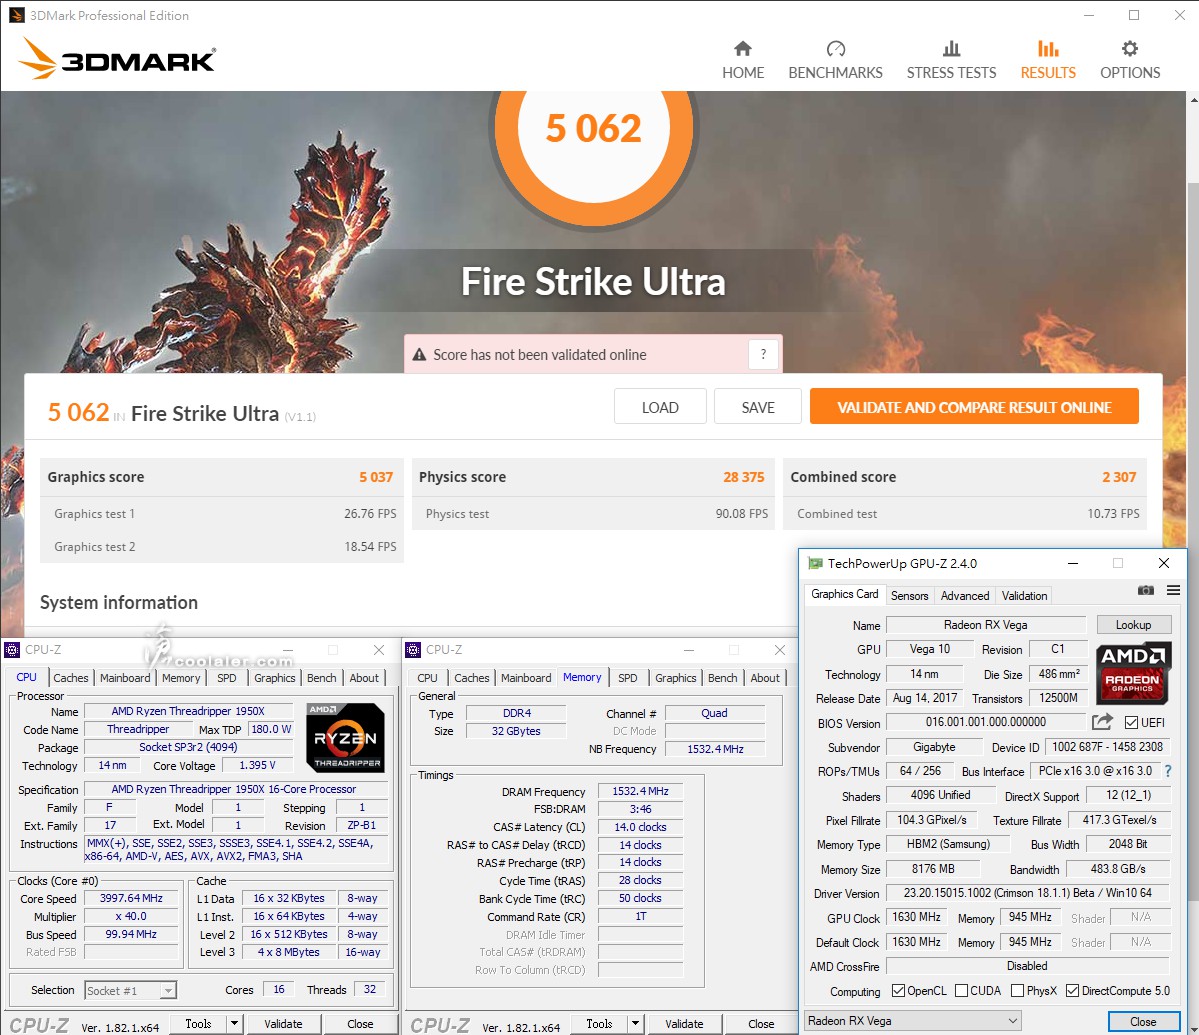
3DMark Fire Strike Ultra:5062(5076)
Graphics:5037(5064)
Physics:28375(26613)+6.6%
3DMark Time Spy:7180(7160)
Graphics:6726(6733)
CPU:11633(11178)+4.1%

溫度待機時39度(35度),執行 R15 滿載時最高80度(68度)。
功耗的部分待機時全機125W(84W)。

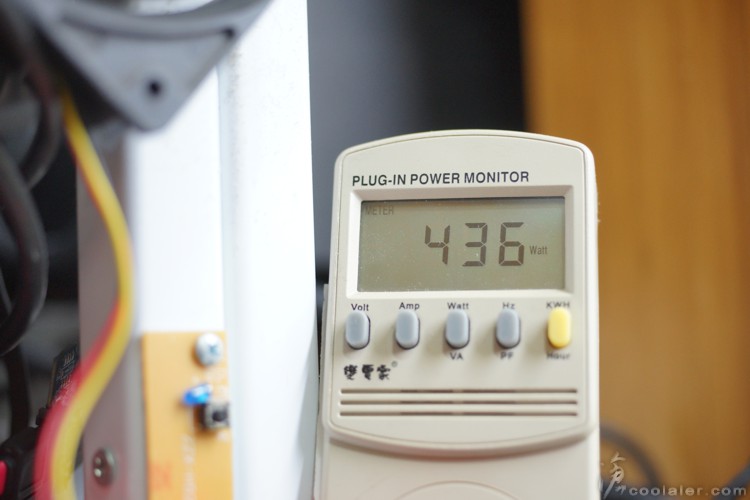
執行 R15 時最高436W(270W)。
小結
效能上,AMD Threadripper 單核心效率其實與 Ryzen 差不多,因為核心架構相同,但多核心效率驚人,畢竟16個核心32執行緒,從測試軟體來看,如果是滿載應用的話可以達到單核18倍以上,不過有些多工測試軟體已經餵不飽1950X,無法達到100%,如x264、R10等,至於溫度與功耗的部分還算是理想,在不超頻下待機35度,84W,滿載68度,270W,另外超頻4GHz雖然輕鬆容易,也帶來了多工的部分有15%以上的效能提升,但隨之而來的溫度以及功耗提升也很明顯就是了。
去年下半 AMD Ryzen 趕上了 HEDT,也迫使了 Intel 不得不多擠點牙膏,甚至也調降了價格,看看 6950X 的售價以及短命的週期就能知道,不然現在10C20T可能都還要5萬。只能說有競爭對於消費者而言都是好事,玩家也多了選擇,而不是只能買單某家產品。
最近入手的是最高階的 AMD Threadripper 1950X,主機板是 ASUS PRIME X399-A。
AMD Threadripper 1950X 外盒設計相當特別,整體質感很好,即便裡面沒有CPU,拿來當擺飾也很適合。
Threadripper 1950X 為16核心32執行緒,預設時脈3.4GHz,Boost 4.0GHz,64條 PCI-E 通道,支援 DDR4 四通道記憶體,不鎖倍頻。
魔眼設計,從後面打光的話可以看到類似瞳孔的效果。
從外面可以看到裡面的 CPU 本體。
後面有個旋鈕設計,上面還寫著 Unlock The Power,轉開解放 AMD Threadripper 的力量。
外盒上下分離之後就可以取出內盒。
外盒下方有放置說明書以及工具。
工具有一把星型螺絲起子,用來安裝CPU用,另外還有一個TR4的水冷散熱器轉接座,不過並不是任何水冷都能透過這來安裝。
包裝真的是很搞剛。
CPU 本體有一個附掛的支架,這個支架不需要移除。
畢竟有4094個接點,安裝需要有更方便的做法來避免撞歪針腳之類才行。
Ryzen Threadripper 很大一顆,右邊是 Ryzen。
接下來看看主機板的部分,ASUS PRIME X399-A 在 ASUS X399 系列中是屬於較陽春的,不過既然是在 X399 上就有一定的支援與規格,當然售價也是XD。
配件有軟體光碟、說明書、CPU安裝說明、檔板、Q-Connect 連接座、直立M.2支架、4條SATA線、SLI橋接器。
主機板採用 E-ATX 規格,要注意一下搭配的機殼,整體為黑色搭配銀色,中規中矩。
在後方IO埠上方有遮罩設計,下方供電部分有散熱片以及一顆小風扇。
供電有小風扇主動散熱。
CPU側邊的供電也有散熱片。
有熱導管連接至IO埠下方給風扇散熱。
8根 DDR4 記憶體插槽,支援四通道,最高可擴充128GB,DDR4 3600(OC)。
CPU供電在主供電旁,有8pin+4pin。
M.2 有一個插槽是採直立式,可以透過支撐架來安裝固定。
6個SATA、1個U.2。
晶片組上方的散熱片。
散熱片一側可以拆下,下方是 M.2 插槽,散熱片上有導熱膠,可以輔助下方的 M.2 硬碟散熱,使用時記得拆膠膜。
4根PCI-E x16、1根PCI-E x4、1根PCI-E x1。
x16的部分側邊有金屬強化護甲。
音效採用 Realtek S1220A 晶片搭載 Crystal Sound 3 技術,有獨立區域,採用 Nichicon 電容。
背後IO埠, BIOS Flashback 鍵、8個USB 3.1 Gen1、1個RJ45、1個USB 3.1 Gen2 Type-A、1個USB 3.1 Gen2 Type-A、5個音源輸出入、S/PDIF。
安裝CPU,使用附屬的星形螺絲起子轉開護板。
移除CPU上方的保護蓋。
移除護板下的塑膠片,從上方抽出。
置換成CPU放入。
將CPU小心翼翼地放在針腳上。
蓋上護蓋,並鎖緊螺絲即可。
部分一體式水冷可以換上 AMD 附的安裝架直上,如 Tt 的 Water 3.0。
CPU 真的是很大一顆,大部分的散熱器應該都無法全覆蓋到整顆。
測試之前來幾張燈效圖。
主機板 BIOS 簡介
EZ Mode,簡易模式下可以看到系統平台資訊,可使用 EZ Tuning 來調整效能、調整風扇控制、開機選項等。
Advanced Mode,進階模式有更多的選項可以調整,如超頻、細項設定、監控、開機、工具等。
Ai Tweaker,超頻選單選項相當完整,可以調整倍頻、外頻、記憶體參數、處理器功能、電壓等。
CPU 超頻有4GHz的選項可以直接讀取套用,不用再設定其他東西,不過直接套用後有點奇怪,可以看到溫度的部分變成負的,未套用之前是正常。如果直接調整倍頻40也會是正常。
記憶體有完整的參數可以調整。
也可以直接套用既有的時脈與參數,不過要確定記憶體規格是否一樣。
測試平台
CPU: AMD Ryzen Threadripper 1950X
CPU Cooler: Tt Water 3.0 Extreme S
RAM: GSKILL DDR4 3200 8GBx4
MB: ASUS X399 Prime-A
VGA: GIGABYTE Vega 64 GAMING OC 8G
HDD: OCZ Vertex 3.20 240GB、Seagate 2TB
PSU: IN WIN SI 1050W
OS: Windows 10 64bit
預設值測試
CPU-Z
CPU Single:451.4
CPU Multi:8696.6
SuperPI 1M & CPUmark99
SuperPI 1M :10.704s
CPUmark99:598
SuperPI 8M:1m59.689s
Memory Benchmark
Read:77702MB/s
Write:95869MB/s
Copy:86738MB/s
7-Zip:74212 MIPS
x264 FHD Benchmark:60.2
CINEBENCH R10
1 CPU:8299
x CPU:70196
OpenGL:13238
R10 在多 CPU 項目的使用約只有50%而已。
CINEBENCH R11.5
OpenGL:96.25 fps
CPU:17.52 pts
CPU(單核心):1.79 pts
R11.5 在多 CPU 項目最後收尾的時候會掉到10~15%使用率。
CINEBENCH R15
OpenGL:135.18 fps
CPU:2990 cb
CPU(單核心):163 cb
R15 項目正常,多 CPU 項目可以達100%。
3DMark Fire Strike Extreme:9412
Graphics:9969
Physics:26609
3DMark Fire Strike Ultra:5076
Graphics:5064
Physics:26613
3DMark Time Spy:7160
Graphics:6733
CPU:11178
溫度待機時35度,執行 R15 滿載時最高68度。
功耗的部分待機時全機84W
執行 R15 時最高270W。
超頻4GHz
AMD Ryzen Threadripper 1950X 在 Boost 時可以達到4GHz,不過多核心高負載時並沒有那麼高,所以超頻至4GHz是讓所有核心在高負載、滿載時也可以達到4GHz,設定僅調整倍頻40,電壓auto,其餘未變更,您也可以使用 ASUS BIOS 預設4GHz的選項,但溫度有點奇怪就是,另外記憶體的部分因為並不是 For Ryzen Threadripper 專用,而是 X299 平台,所以超頻後有點問題,所以4GHz的部分降了一些頻率,從原本3200MHz降至3066MHz。
下方括弧後面為預設值成績。
CPU-Z
CPU Single:468(451.4)+3.7%
CPU Multi:9997.2(8696.6)+15%
SuperPI 1M & CPUmark99
SuperPI 1M :10.469s(10.704s)+2.2%
CPUmark99:612(598)+2.3%
SuperPI 8M:1m58.500s(1m59.689s)+1%
Memory Benchmark
Read:74259MB/s(77702MB/s)
Write:92030MB/s(95869MB/s)
Copy:82524MB/s(86738MB/s)
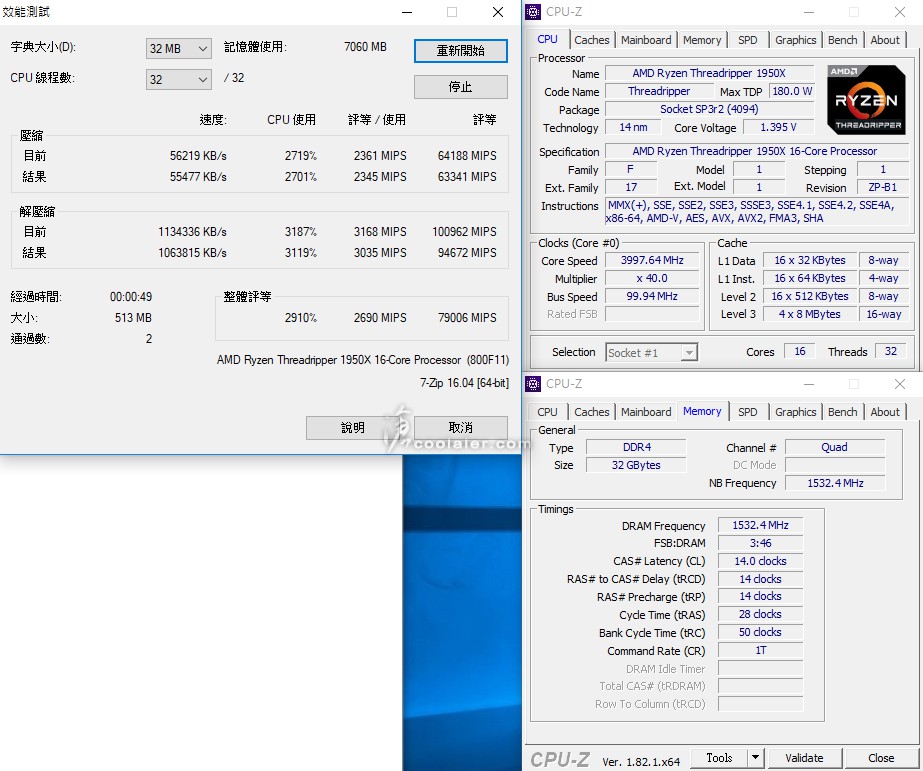
7-Zip:79006 MIPS(74212 MIPS)+6.5%
x264 FHD Benchmark:66(60.2)+9.6%
CINEBENCH R10
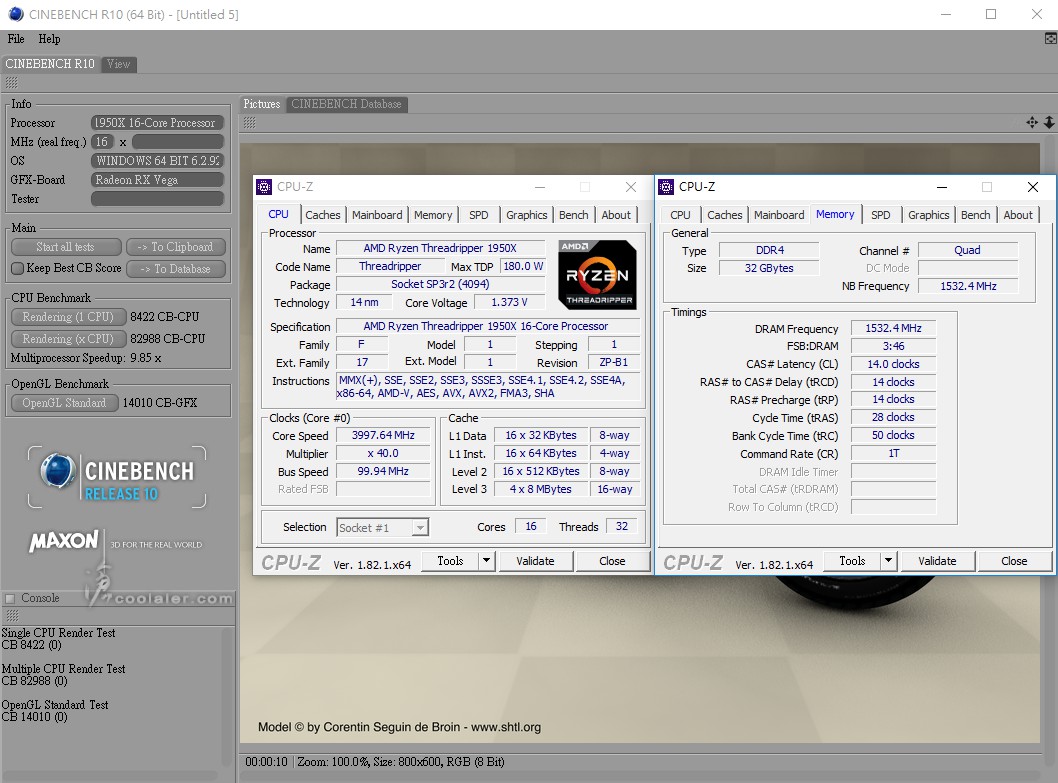
1 CPU:8422(8299)+1.5%
x CPU:82988(70196)+18.2%
OpenGL:14010(13238)
R10 在多 CPU 項目的使用約只有50%而已。
CINEBENCH R11.5
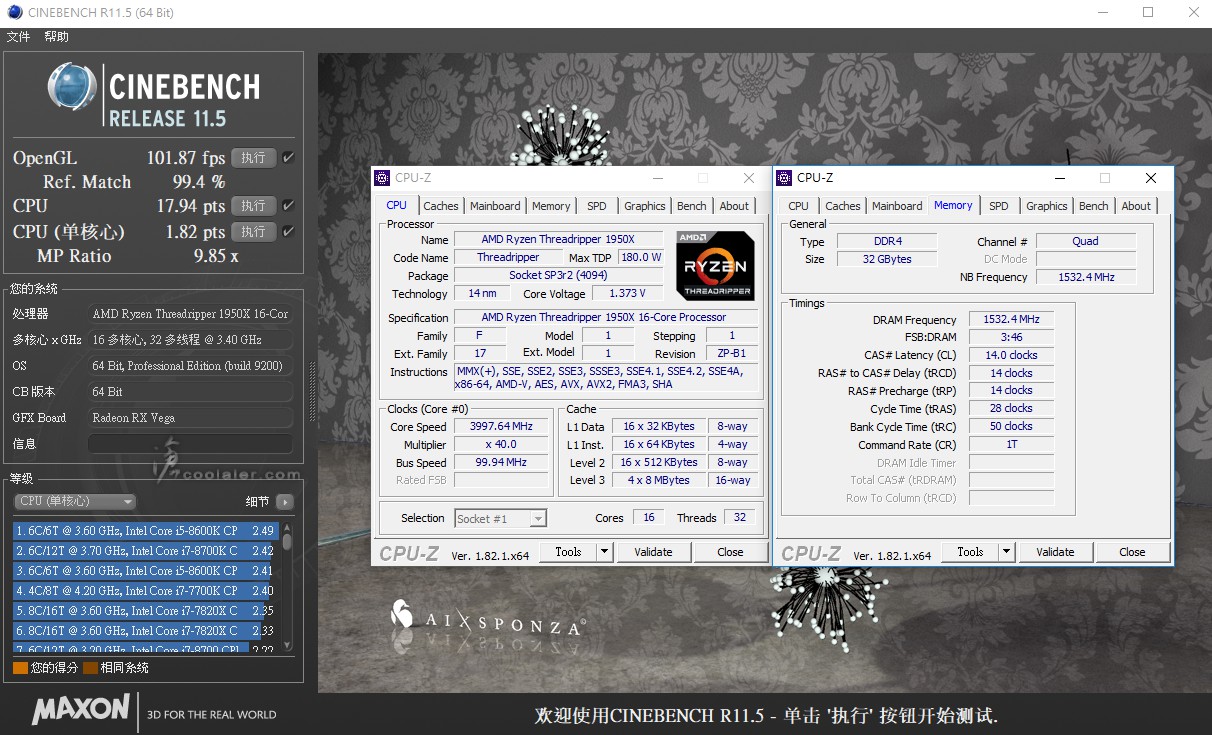
OpenGL:101.87 fps(96.25 fps)
CPU:17.94 pts(17.52 pts)+2.4%
CPU 單核心:1.82 pts(1.79 pts)+1.7%
R11.5 在多 CPU 項目最後收尾的時候會掉到10~15%使用率。
可以看到執行時為100%,但收尾時 CPU 使用率會降到10~15%。
CINEBENCH R15
OpenGL:120.84 fps(135.18 fps)
CPU:3468 cb(2990 cb)+16%
CPU 單核心:165 cb(163 cb)+1.2%
R15 項目正常,多 CPU 項目可以達100%。
3DMark Fire Strike Extreme:9446(9412)
Graphics:9973(9969)
Physics:28459(26609)+7%
3DMark Fire Strike Ultra:5062(5076)
Graphics:5037(5064)
Physics:28375(26613)+6.6%
3DMark Time Spy:7180(7160)
Graphics:6726(6733)
CPU:11633(11178)+4.1%
溫度待機時39度(35度),執行 R15 滿載時最高80度(68度)。
功耗的部分待機時全機125W(84W)。
執行 R15 時最高436W(270W)。
小結
效能上,AMD Threadripper 單核心效率其實與 Ryzen 差不多,因為核心架構相同,但多核心效率驚人,畢竟16個核心32執行緒,從測試軟體來看,如果是滿載應用的話可以達到單核18倍以上,不過有些多工測試軟體已經餵不飽1950X,無法達到100%,如x264、R10等,至於溫度與功耗的部分還算是理想,在不超頻下待機35度,84W,滿載68度,270W,另外超頻4GHz雖然輕鬆容易,也帶來了多工的部分有15%以上的效能提升,但隨之而來的溫度以及功耗提升也很明顯就是了。
去年下半 AMD Ryzen 趕上了 HEDT,也迫使了 Intel 不得不多擠點牙膏,甚至也調降了價格,看看 6950X 的售價以及短命的週期就能知道,不然現在10C20T可能都還要5萬。只能說有競爭對於消費者而言都是好事,玩家也多了選擇,而不是只能買單某家產品。