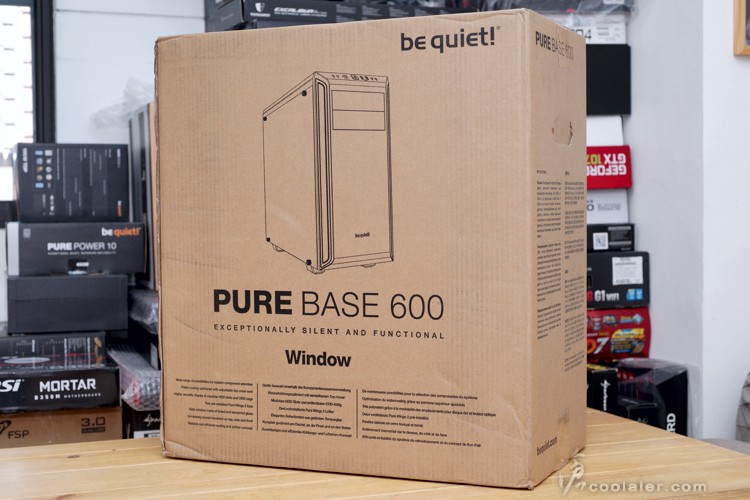
be quiet! 最近發布了新款機殼 Pure Base 600 Window,也就是先前所推出的 Pure Base 600 透側版,而這個透側並不隨便,是採用整片的4mm的鋼化玻璃,現在也越來越多廠商使用玻璃做為透側,玻璃的好處就是不容易刮花阿,筆者先前曾經在還沒組裝好整台主機時就已經把壓克力透側給刮花,實在也不知道該說啥好,畢竟壓克力實在很容易花,擦拭都得小心灰塵,免得出現細紋,玻璃就比較沒關係,且質感相對好很多。
be quiet! Pure Base 600 Window
外箱後面有架構分解以及規格說明,下方會詳細介紹。
be quiet! Pure Base 600 Window 架構其實與 Pure Base 600 相同,僅差在4mm厚的鋼化玻璃側板。
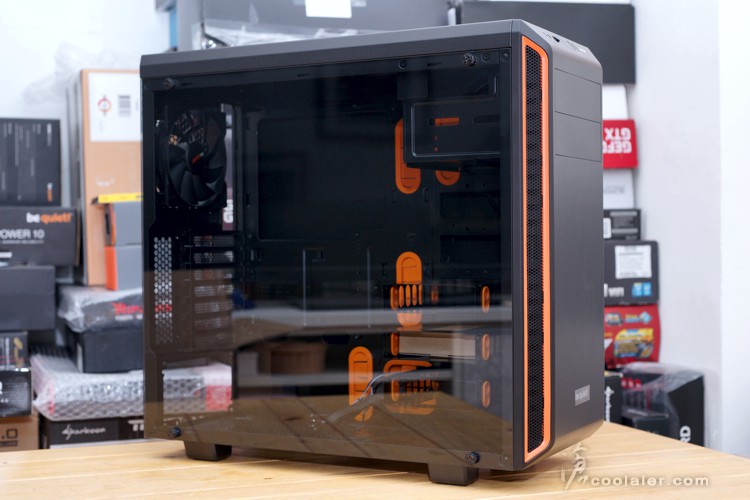
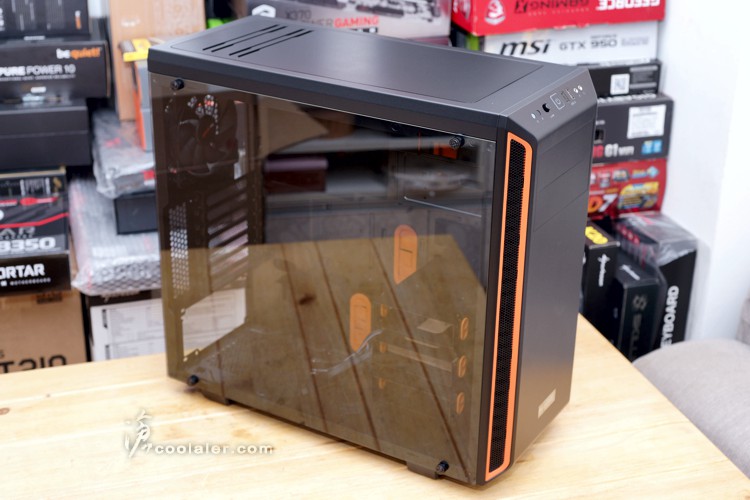
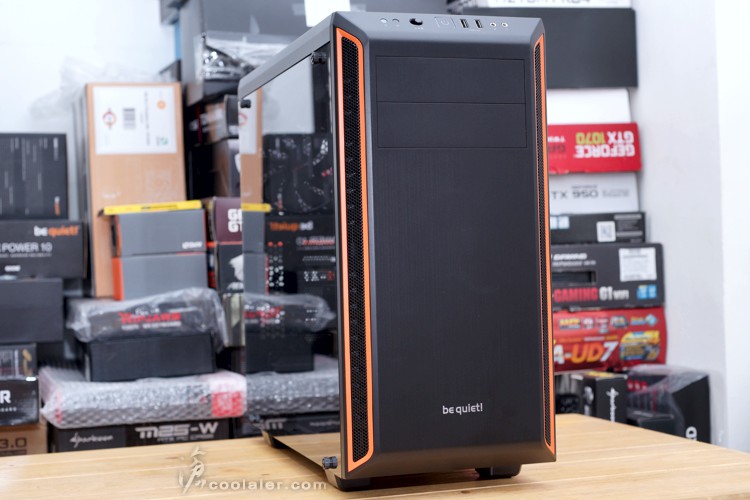
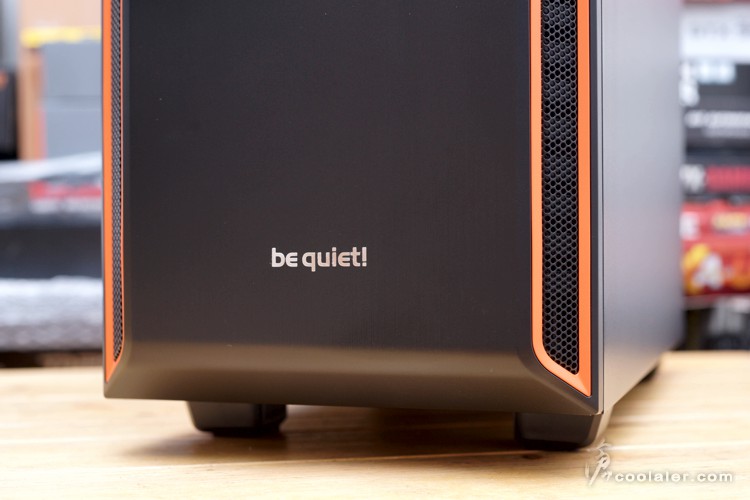
整體外形算是相當素雅,因為兼具隔塵靜音的關係,可以看到孔洞的部分是相當少。另外 Pure Base 600 Window 也有顏色之別,入手這款是橘色,可以看到面板側邊以及內部走線孔有橘色綴飾,另外也有更為低調的黑色。
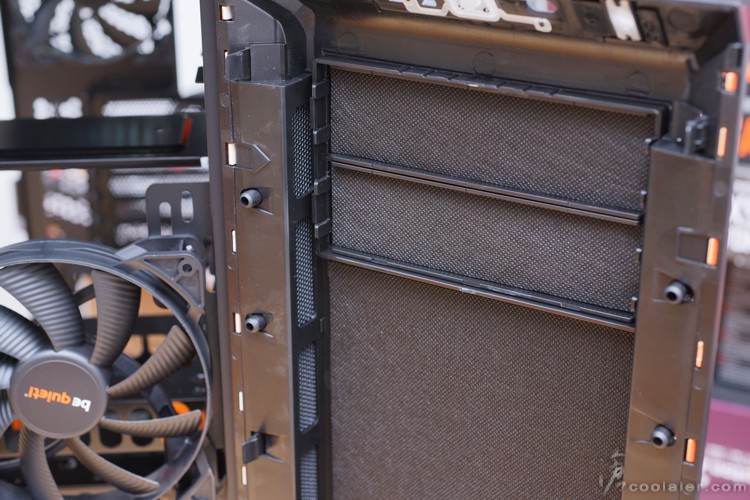
前面板最主要的氣孔在兩側位置。
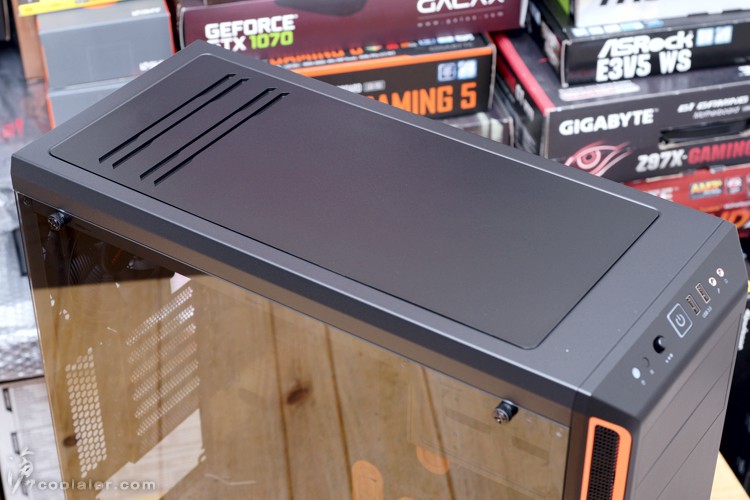
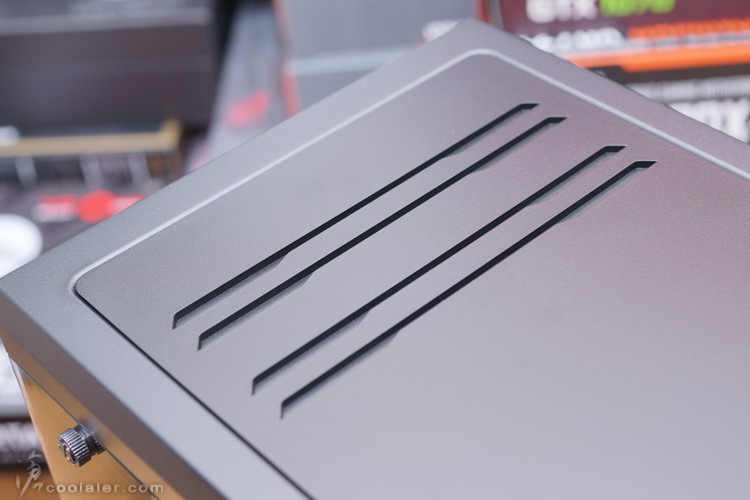
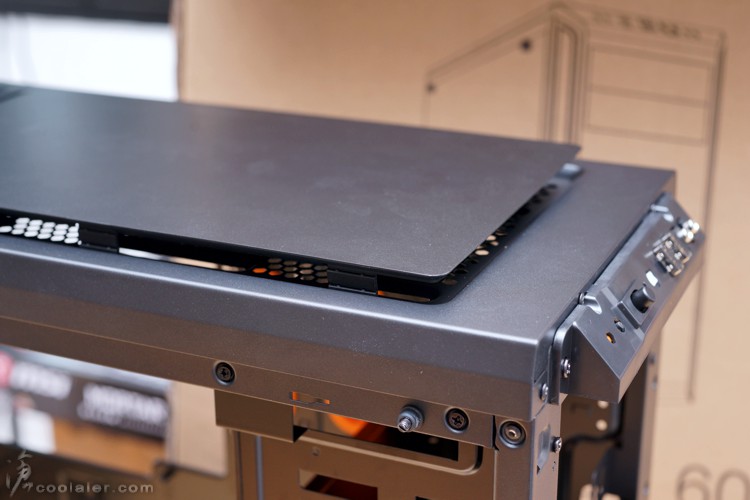
頂部後側的位置有開孔,其實頂蓋是可以調整高度增加進氣,下方介紹。
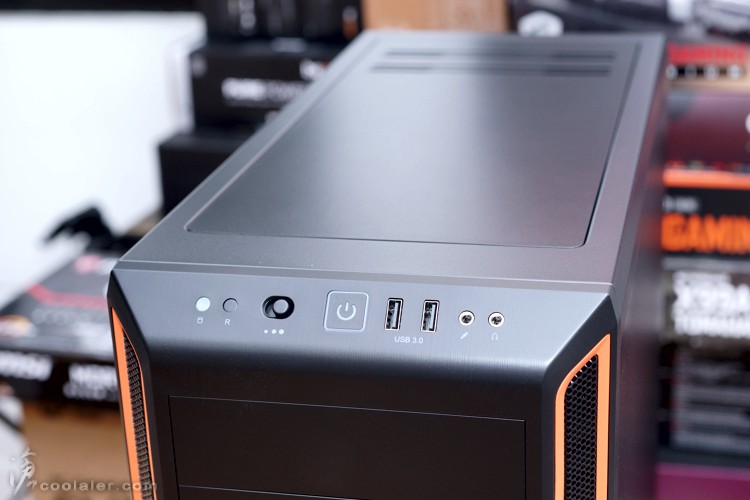
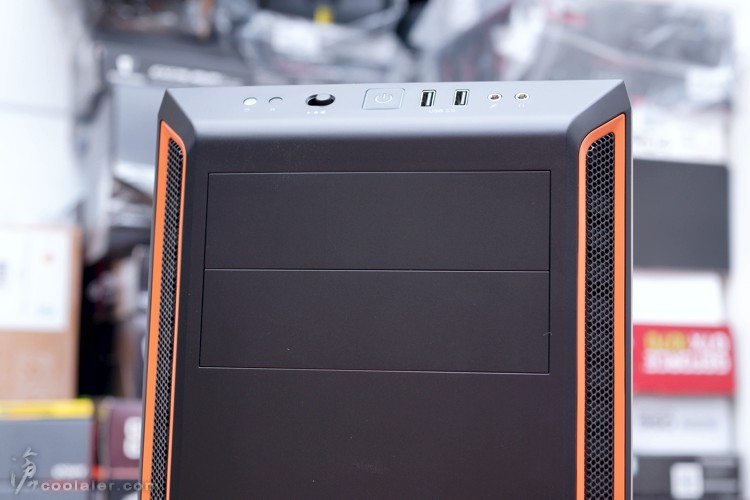
IO埠在面板上斜切的位置,左至右,硬碟燈、重置鍵、三段轉速控制、電源(燈)、2個USB3.0、耳麥孔。
面板氣孔是在左右兩側斜切邊的位置,正面則無任何網孔,相當樸素。
右側側板是平整。
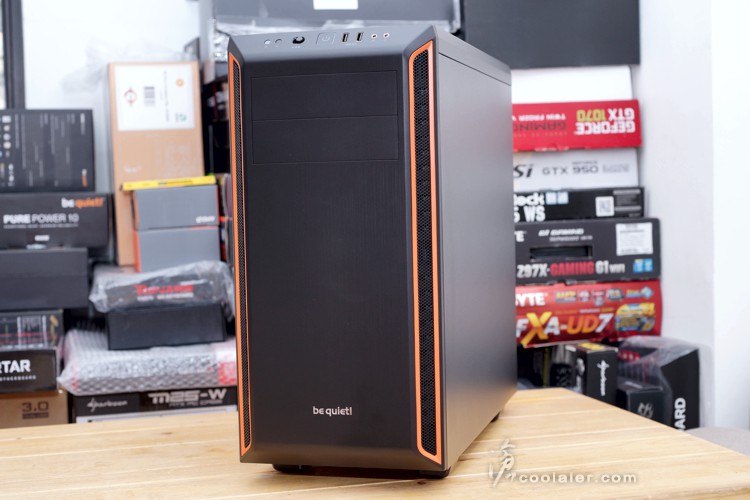
可以支援2個5.25吋裝置,話說現在不少機殼都選擇把5.25吋拿掉,主要是5.25吋算是已經變成少用的裝置,再來就是少了開孔外觀會比較一致性,不過 Pure Base 600 Window 這檔板其實也不是很明顯,並不會有突兀感。
面板底部有 be quiet! 的金屬Logo。
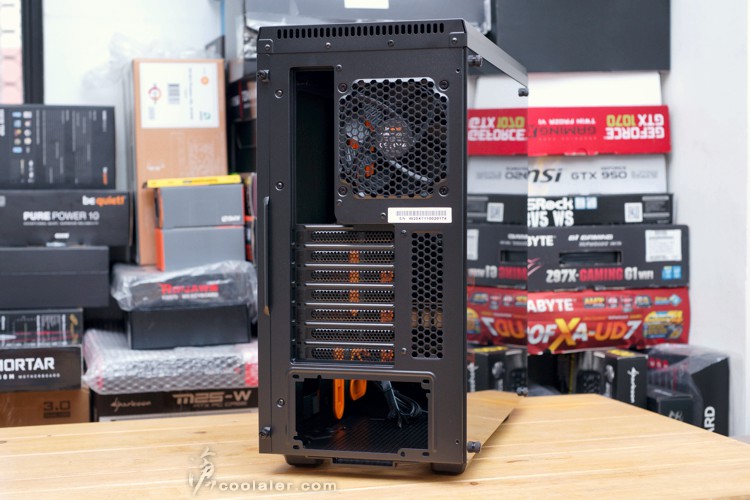
後側,頂部後方、檔板與檔板側邊都有通風孔。
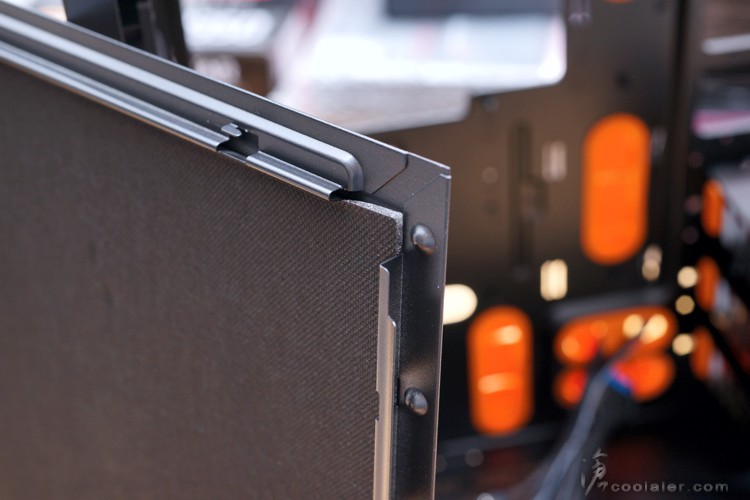
4mm的鋼化玻璃。
因為是兼具靜音,另一側側板是有貼上吸音材質。
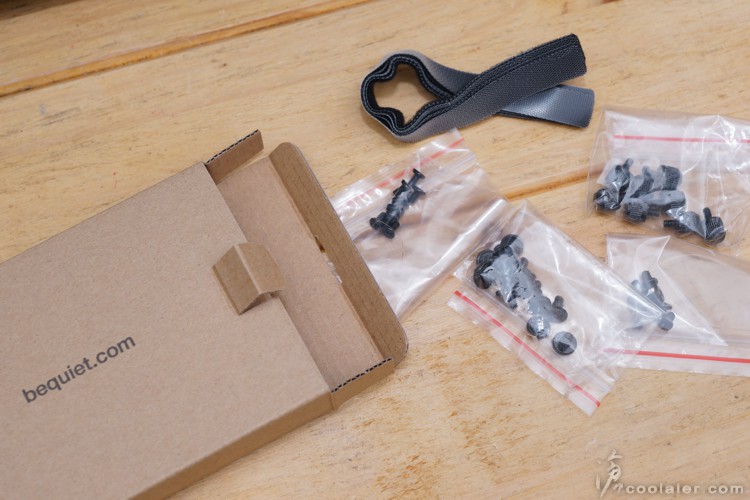
配件,除了該有的螺絲之外,還有幾條整線用的魔鬼氈束帶。
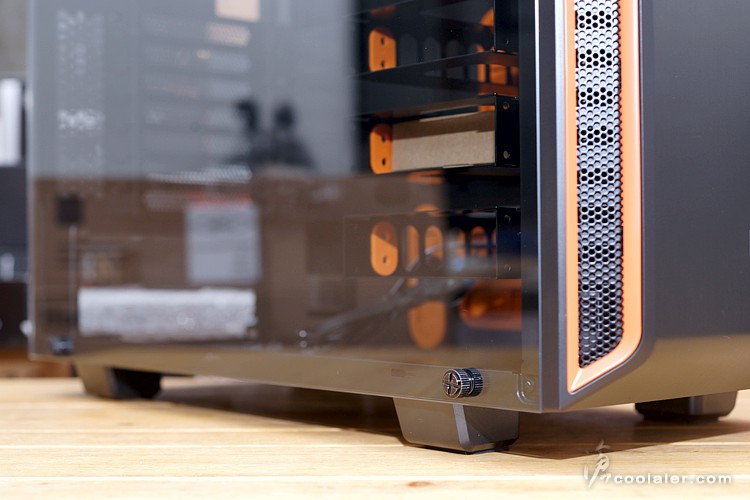
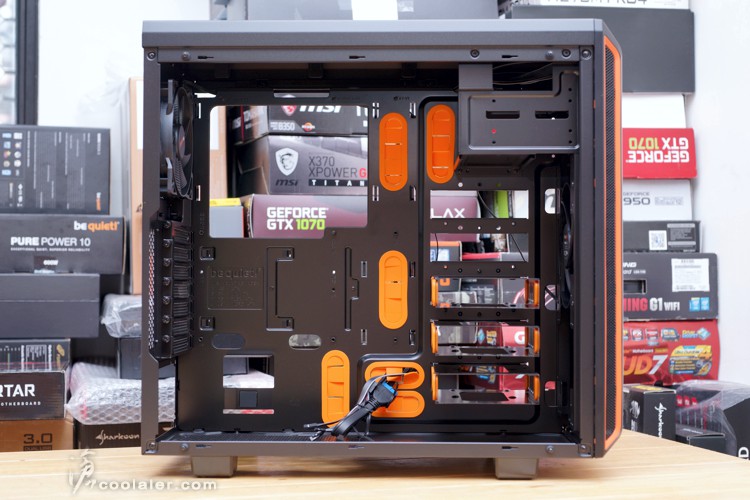
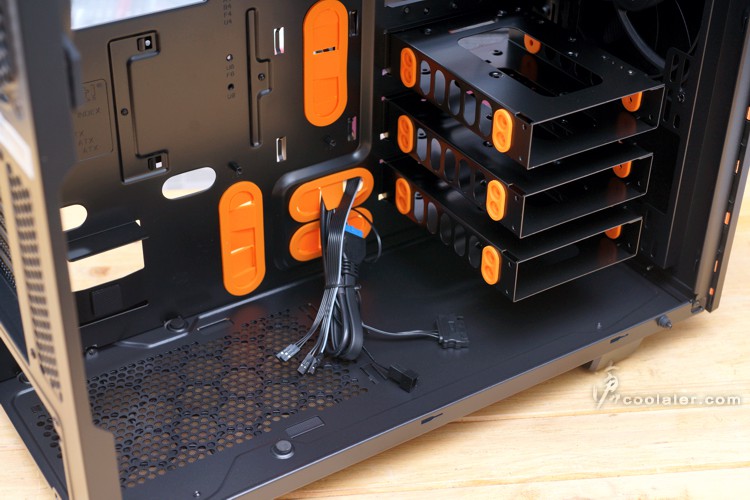
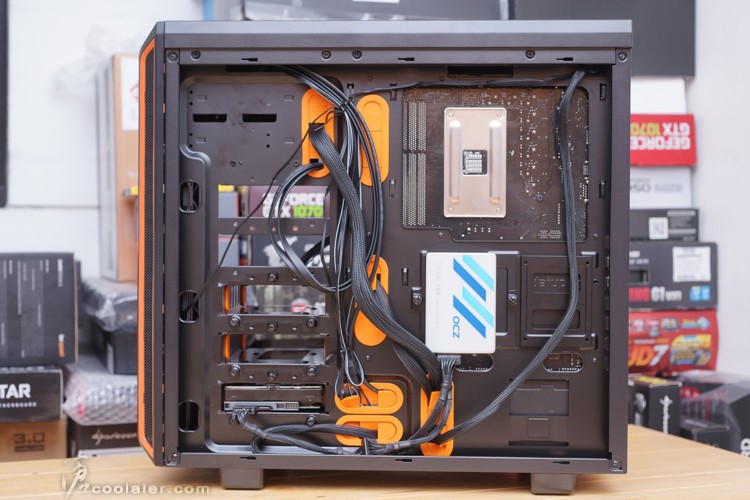
內部整體黑化,走線孔以及硬碟側邊防震墊有襯上了橘色的橡膠套。
安裝底板背部,硬碟拆卸安裝是從這一側。

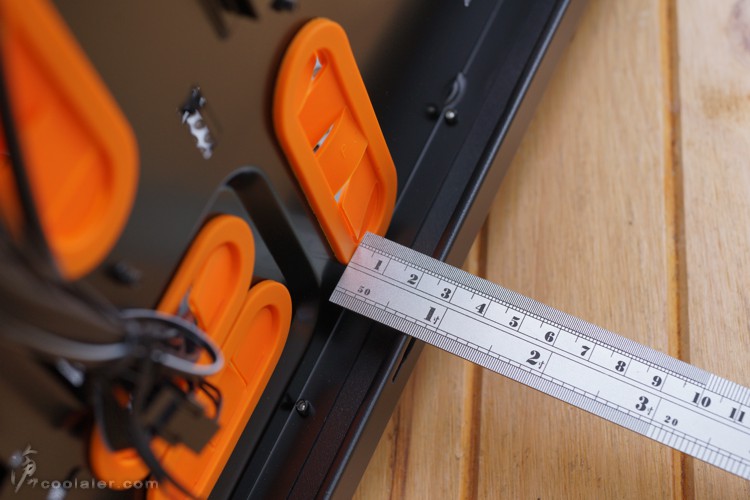
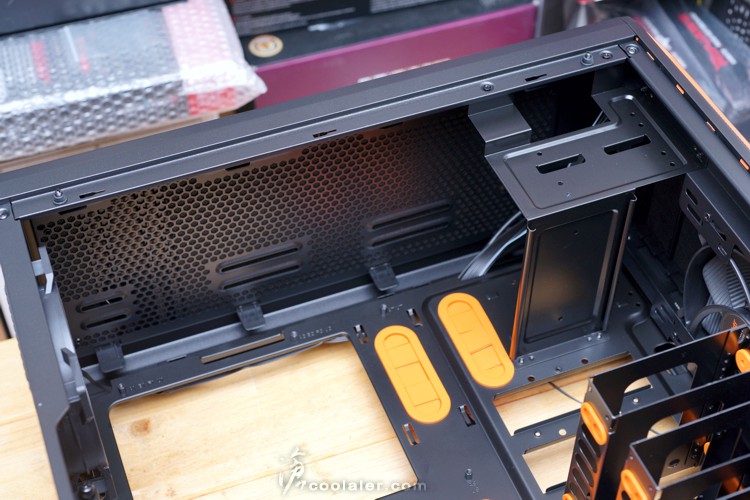
走線空間大約超過2公分,算是相當寬敞。
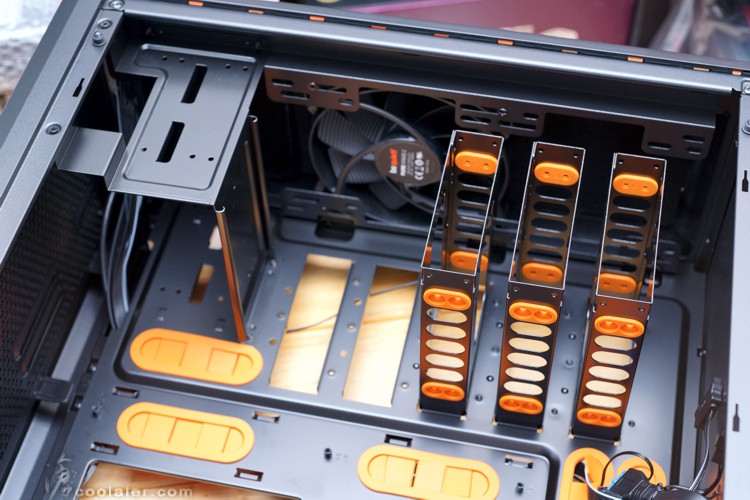
底板後側上有兩個2.5吋支架,這部分可以拆下,從底部螺絲固定2.5吋裝置。
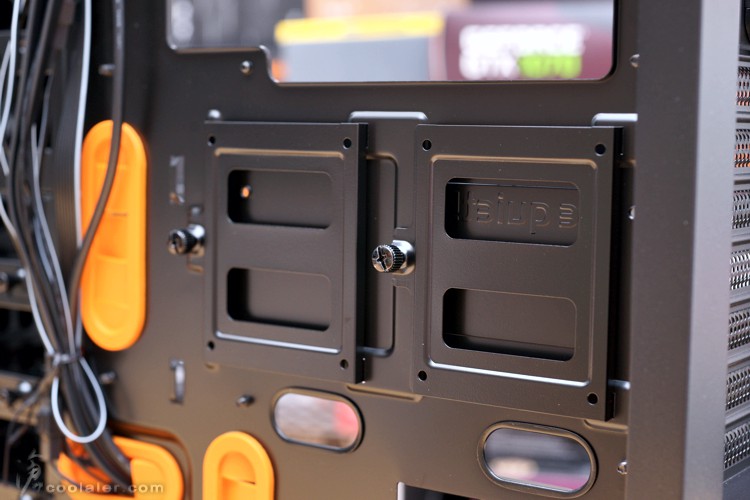
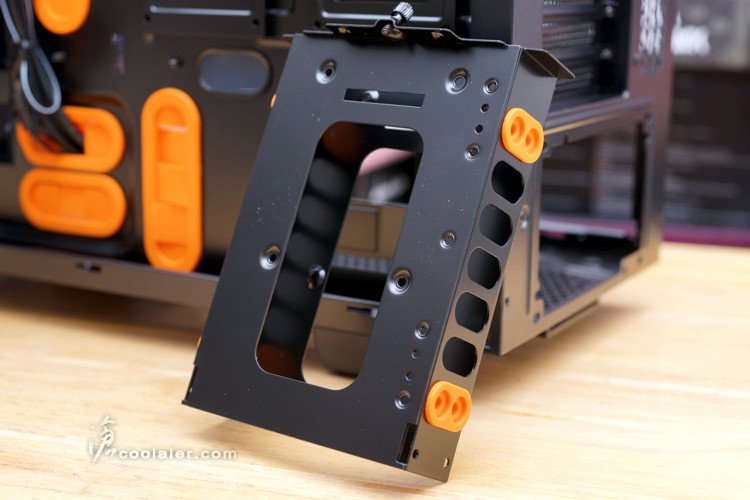
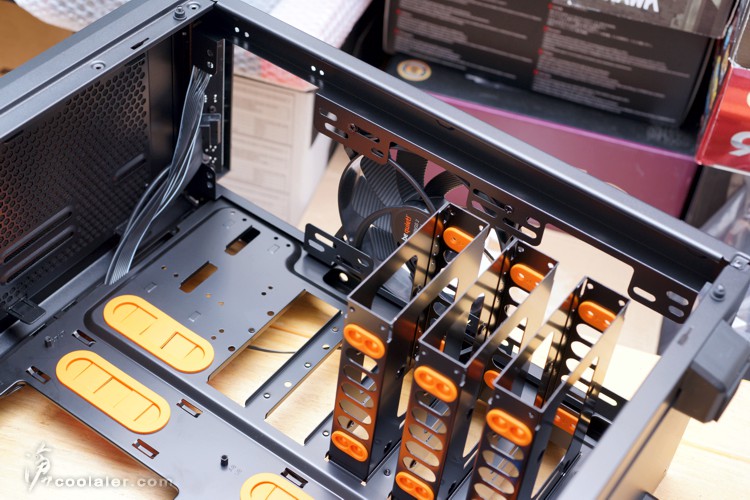
3.5吋有3個,採用托盤支架安裝,托盤上下有三顆手轉螺絲固定。這部分有5個槽,所以托盤可以依需求空間應用變更位置。
托盤側邊有橡膠墊,可以防止機械硬碟可能的共振音。另外這支架內部除了3.5吋裝置也可以安裝2顆2.5吋,從底部螺絲固定。
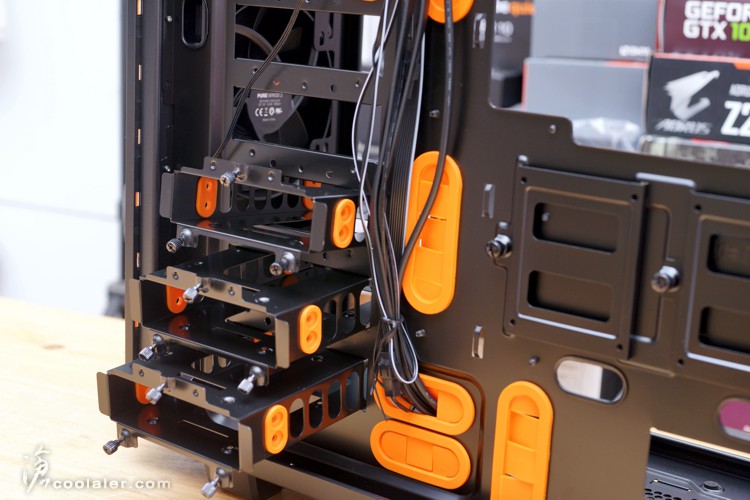
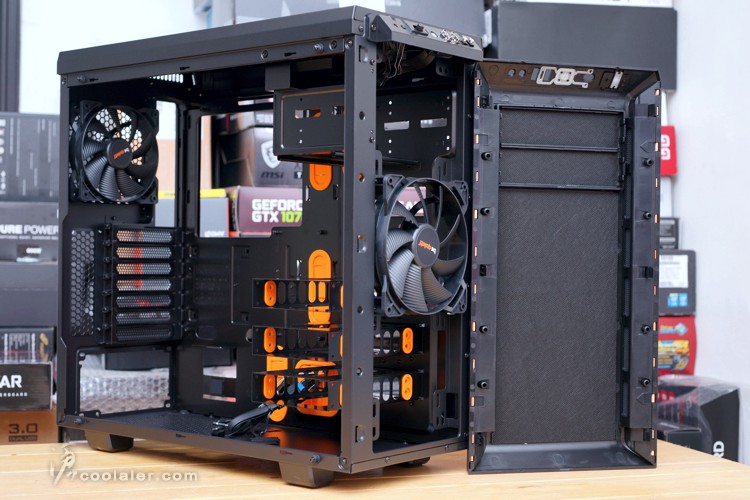
頂部可支援3顆12或2顆14公分風扇,最大亦可支援到36公分水冷排。
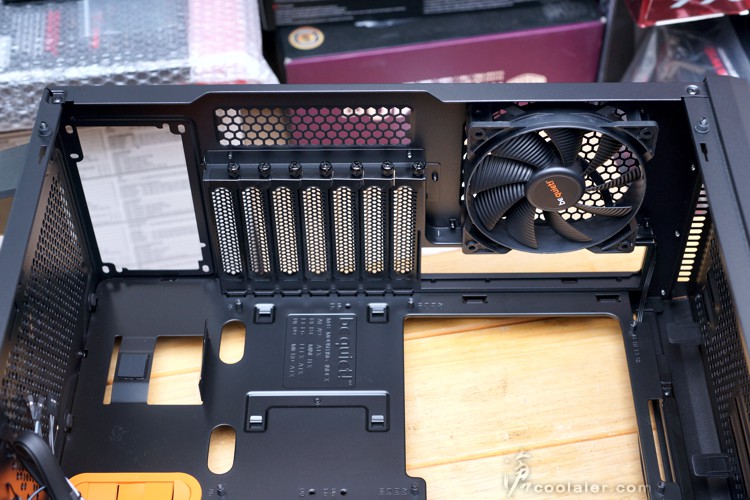
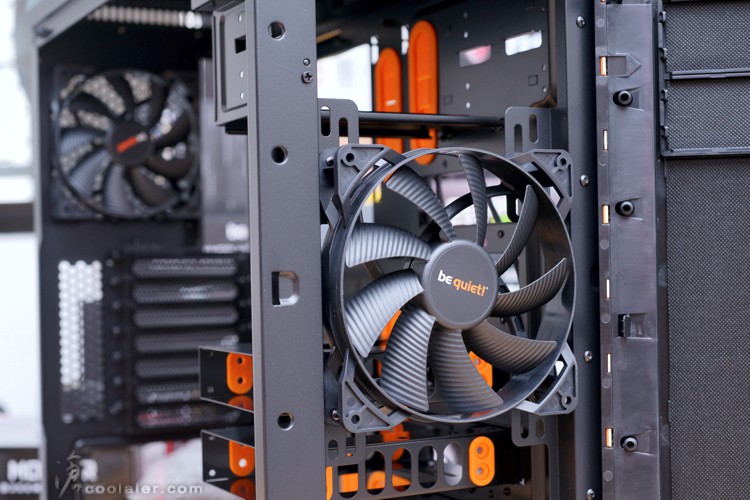
後側預裝1顆12公分 be quiet! Pure Wings 2 風扇,擴充卡槽有7個,採手轉螺絲固定,擋板是可以重複使用。
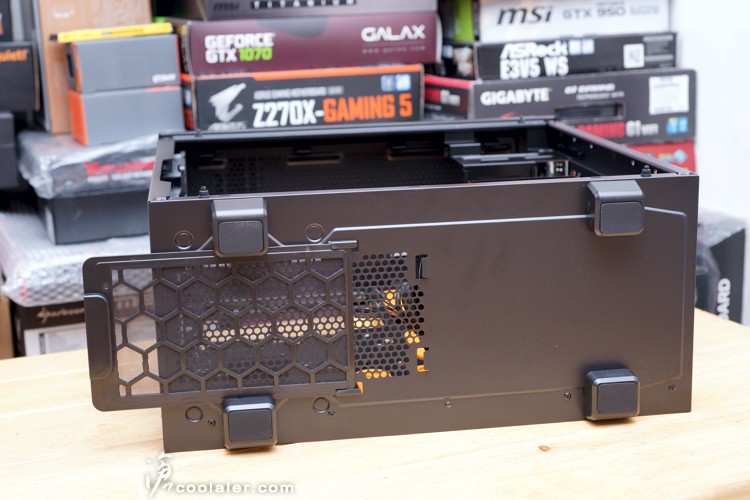
電源底部有通風孔洞,外側有濾網。
3.5吋硬碟架有3個,槽有5個,可依需求置換位置,如不想擋到顯卡,可以往上移。
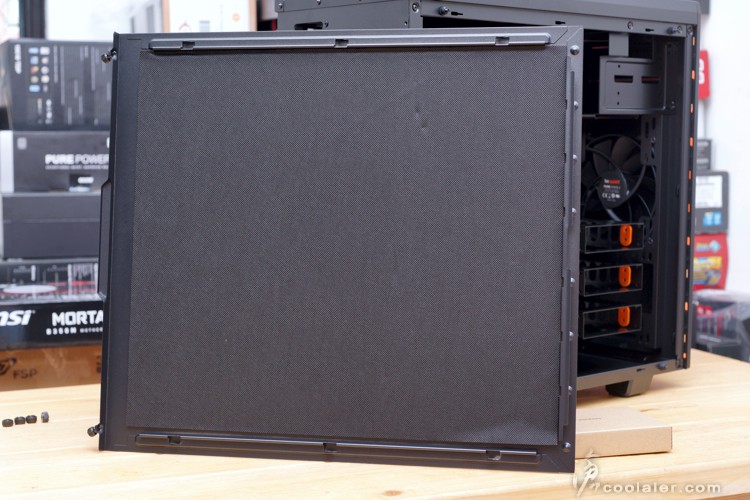
面板的部分可以拆卸,內側有卡扣,外扳即可拆卸。
面板內側連同5.25吋檔板都有鋪上吸音材質。
前面預裝1顆14公分 be quiet! Pure Wings 2 風扇,這部分可以安裝2顆14公分或2顆12公分風扇,亦可支援36公分水冷排(需拆5.25吋支架)。
前面若需要裝36公分冷排可以將5.25吋支架移除。支架側邊與面板為螺絲固定。
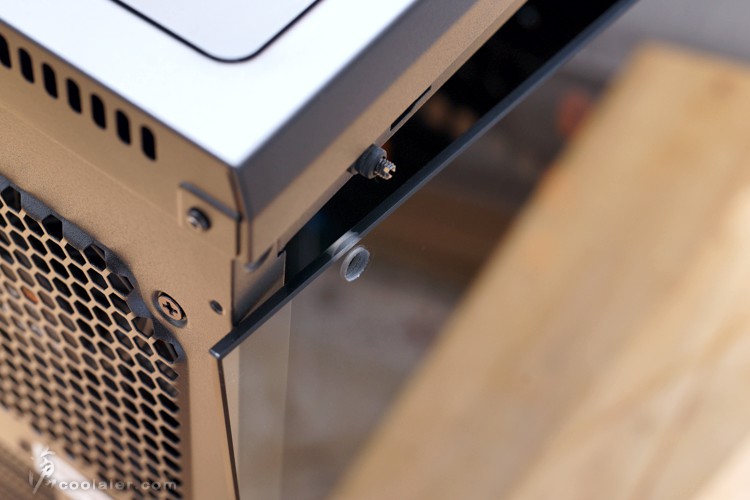
頂部的上蓋是可以拆卸,與面板一樣使用卡扣固定,不過這部分拆卸有點不是太方便就是。上蓋內側也鋪有吸音材質。
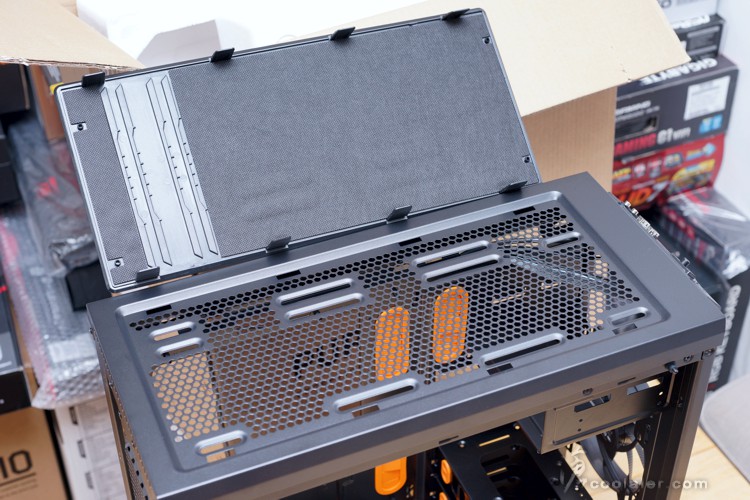
另外這個上蓋是另有機關,卡扣是可以三段調整高低。
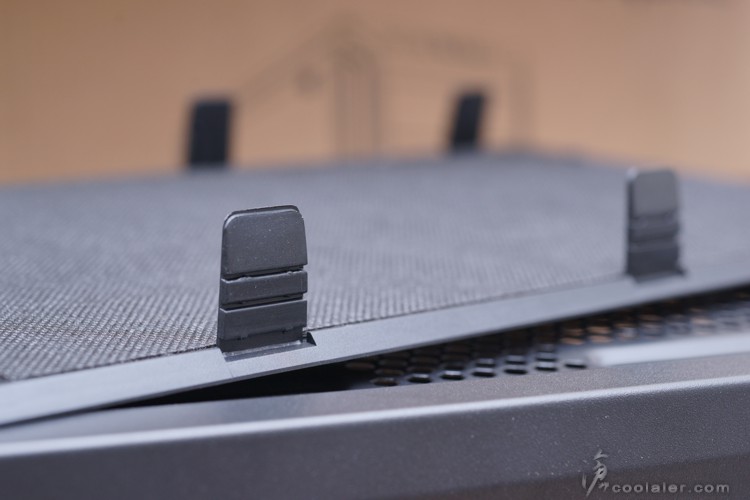
這樣應該就很清楚了,如果上部有安裝風扇,需要比較多的近排氣量,就可以稍微打開上蓋。
底部有四個厚實的腳墊,電源對應的位置有抽取式的濾網模組,方便清潔。
最後來實際試裝一下
走線孔是沒什麼問題,不過礙於空間的關係,若使用標準的ATX主機板,會有兩個孔被壓在下面,至於直接從側邊拉出也不是不行,但就是得先把線拉出,再裝上主機板,PCI-E 這種比較不粗的應該可以,但24pin的電源線可能就不方便。
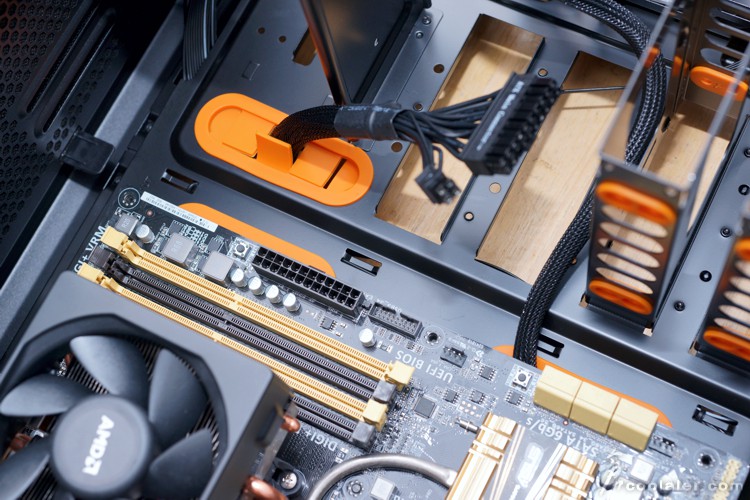
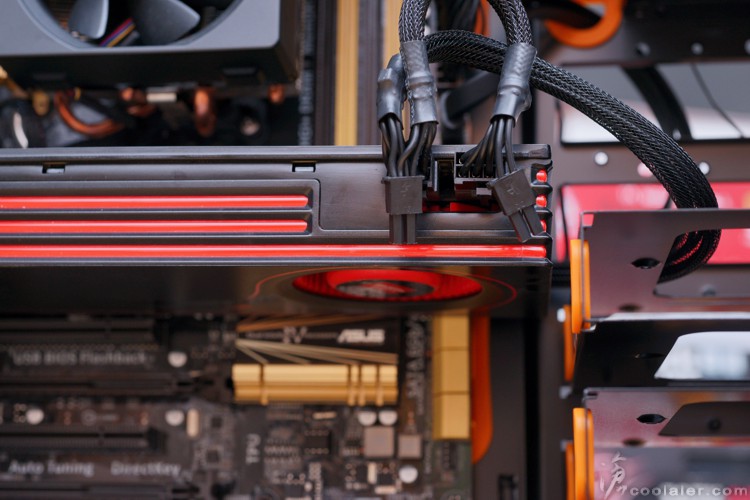
CPU 8pin從上方穿出沒問題,預留的空間很夠。

2.5吋安裝需先拆下支架,從底部螺絲固定。
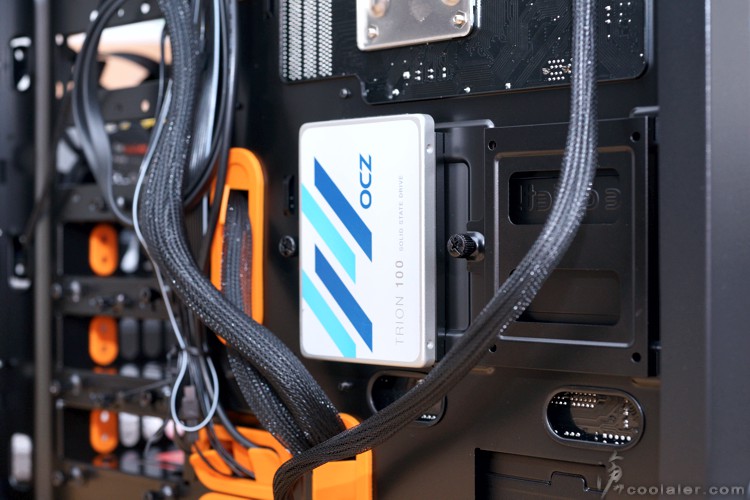
2.5吋除了那兩個背板之外,也可以選擇安裝在3.5吋擴充槽內。一個槽支援2個,最多可以安裝到8個2.5吋。

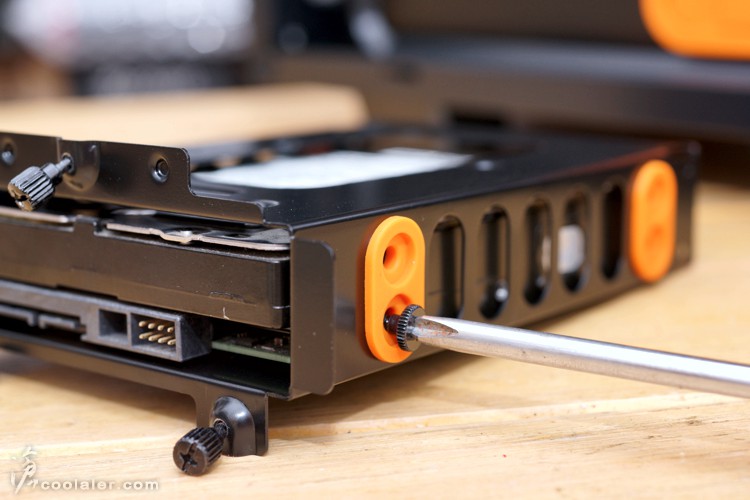
3.5吋安裝側邊螺絲固定。
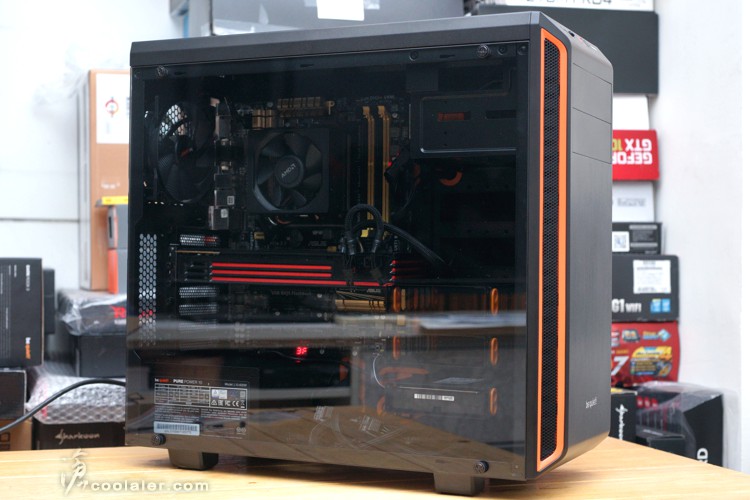
整體空間還算寬敞,安裝順手。CPU散熱器高度支援16.5公分,顯卡則是28公分,拆硬碟架為42.5公分。
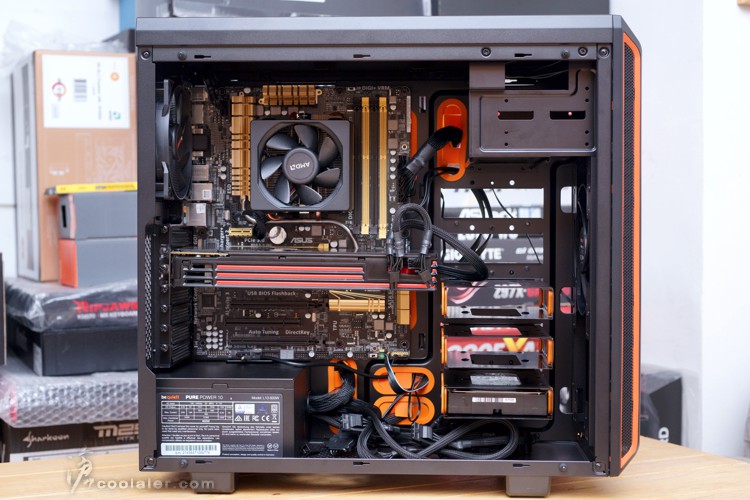
標準長卡 HD 6950,接近28公分,還不用拆硬碟架,如果需要給顯卡更多空間,可以把硬碟架往上移。
走背線沒問題,2公分空間很足夠,甚至可以不用整線。
玻璃透側帶點燻黑,內部很適合一些RGB燈效產品。
小結
be quiet! Pure Base 600 Window 外觀中規中矩,如果嫌部分橘色仍高調的可以選黑色版本,雖然不是以極度 Silent 為主,但仍有靜音隔塵效果,整體孔洞並不多,內部也有大面積的吸音材質,至於視覺也有兼顧到,側板4mm的鋼化玻璃,對於燈效的展示是很適合的。
散熱的部分也不馬虎,出廠預裝2顆前14後12公分自家的 Pure Wings 2 風扇,一般中階使用應該沒有甚麼問題,另外最大也能夠支援到36公分冷排,頂部可以半開的上蓋算是相當不錯且實用的設計,要靜音要散熱取向可依需求調整,只是若要調整得從內部會比較麻煩一點。
擴充性的部分,前置2個USB3.0是有點少了些,如果能加2個USB2.0更好,風扇轉速控制器可以對應三顆風扇,且有三段轉速調整,效能或靜音可以操之在手,雖然說預裝的風扇高轉在機殼內本來就沒有明顯的聲音。另外硬碟的部分,3.5吋只有3個感覺是少了點,對於升級沿用或農場需求大的玩家來說可能會稍嫌不足。至於這個不足的部分,be quiet! 表示,真的有需要升級的玩家也可直接跟他們聯繫,如果他們有多的零組件(如硬碟架),be quiet! 可以免費提供給消費者,讓玩家可以有更好的升級空間與應用。這也算是非常貼心的售後服務!
be quiet! Pure Base 600 Window
外箱後面有架構分解以及規格說明,下方會詳細介紹。
be quiet! Pure Base 600 Window 架構其實與 Pure Base 600 相同,僅差在4mm厚的鋼化玻璃側板。
整體外形算是相當素雅,因為兼具隔塵靜音的關係,可以看到孔洞的部分是相當少。另外 Pure Base 600 Window 也有顏色之別,入手這款是橘色,可以看到面板側邊以及內部走線孔有橘色綴飾,另外也有更為低調的黑色。
前面板最主要的氣孔在兩側位置。
頂部後側的位置有開孔,其實頂蓋是可以調整高度增加進氣,下方介紹。
IO埠在面板上斜切的位置,左至右,硬碟燈、重置鍵、三段轉速控制、電源(燈)、2個USB3.0、耳麥孔。
面板氣孔是在左右兩側斜切邊的位置,正面則無任何網孔,相當樸素。
右側側板是平整。
可以支援2個5.25吋裝置,話說現在不少機殼都選擇把5.25吋拿掉,主要是5.25吋算是已經變成少用的裝置,再來就是少了開孔外觀會比較一致性,不過 Pure Base 600 Window 這檔板其實也不是很明顯,並不會有突兀感。
面板底部有 be quiet! 的金屬Logo。
後側,頂部後方、檔板與檔板側邊都有通風孔。
4mm的鋼化玻璃。
因為是兼具靜音,另一側側板是有貼上吸音材質。
配件,除了該有的螺絲之外,還有幾條整線用的魔鬼氈束帶。
內部整體黑化,走線孔以及硬碟側邊防震墊有襯上了橘色的橡膠套。
安裝底板背部,硬碟拆卸安裝是從這一側。
走線空間大約超過2公分,算是相當寬敞。
底板後側上有兩個2.5吋支架,這部分可以拆下,從底部螺絲固定2.5吋裝置。
3.5吋有3個,採用托盤支架安裝,托盤上下有三顆手轉螺絲固定。這部分有5個槽,所以托盤可以依需求空間應用變更位置。
托盤側邊有橡膠墊,可以防止機械硬碟可能的共振音。另外這支架內部除了3.5吋裝置也可以安裝2顆2.5吋,從底部螺絲固定。
頂部可支援3顆12或2顆14公分風扇,最大亦可支援到36公分水冷排。
後側預裝1顆12公分 be quiet! Pure Wings 2 風扇,擴充卡槽有7個,採手轉螺絲固定,擋板是可以重複使用。
電源底部有通風孔洞,外側有濾網。
3.5吋硬碟架有3個,槽有5個,可依需求置換位置,如不想擋到顯卡,可以往上移。
面板的部分可以拆卸,內側有卡扣,外扳即可拆卸。
面板內側連同5.25吋檔板都有鋪上吸音材質。
前面預裝1顆14公分 be quiet! Pure Wings 2 風扇,這部分可以安裝2顆14公分或2顆12公分風扇,亦可支援36公分水冷排(需拆5.25吋支架)。
前面若需要裝36公分冷排可以將5.25吋支架移除。支架側邊與面板為螺絲固定。
頂部的上蓋是可以拆卸,與面板一樣使用卡扣固定,不過這部分拆卸有點不是太方便就是。上蓋內側也鋪有吸音材質。
另外這個上蓋是另有機關,卡扣是可以三段調整高低。
這樣應該就很清楚了,如果上部有安裝風扇,需要比較多的近排氣量,就可以稍微打開上蓋。
底部有四個厚實的腳墊,電源對應的位置有抽取式的濾網模組,方便清潔。
最後來實際試裝一下
走線孔是沒什麼問題,不過礙於空間的關係,若使用標準的ATX主機板,會有兩個孔被壓在下面,至於直接從側邊拉出也不是不行,但就是得先把線拉出,再裝上主機板,PCI-E 這種比較不粗的應該可以,但24pin的電源線可能就不方便。
CPU 8pin從上方穿出沒問題,預留的空間很夠。
2.5吋安裝需先拆下支架,從底部螺絲固定。
2.5吋除了那兩個背板之外,也可以選擇安裝在3.5吋擴充槽內。一個槽支援2個,最多可以安裝到8個2.5吋。
3.5吋安裝側邊螺絲固定。
整體空間還算寬敞,安裝順手。CPU散熱器高度支援16.5公分,顯卡則是28公分,拆硬碟架為42.5公分。
標準長卡 HD 6950,接近28公分,還不用拆硬碟架,如果需要給顯卡更多空間,可以把硬碟架往上移。
走背線沒問題,2公分空間很足夠,甚至可以不用整線。
玻璃透側帶點燻黑,內部很適合一些RGB燈效產品。
小結
be quiet! Pure Base 600 Window 外觀中規中矩,如果嫌部分橘色仍高調的可以選黑色版本,雖然不是以極度 Silent 為主,但仍有靜音隔塵效果,整體孔洞並不多,內部也有大面積的吸音材質,至於視覺也有兼顧到,側板4mm的鋼化玻璃,對於燈效的展示是很適合的。
散熱的部分也不馬虎,出廠預裝2顆前14後12公分自家的 Pure Wings 2 風扇,一般中階使用應該沒有甚麼問題,另外最大也能夠支援到36公分冷排,頂部可以半開的上蓋算是相當不錯且實用的設計,要靜音要散熱取向可依需求調整,只是若要調整得從內部會比較麻煩一點。
擴充性的部分,前置2個USB3.0是有點少了些,如果能加2個USB2.0更好,風扇轉速控制器可以對應三顆風扇,且有三段轉速調整,效能或靜音可以操之在手,雖然說預裝的風扇高轉在機殼內本來就沒有明顯的聲音。另外硬碟的部分,3.5吋只有3個感覺是少了點,對於升級沿用或農場需求大的玩家來說可能會稍嫌不足。至於這個不足的部分,be quiet! 表示,真的有需要升級的玩家也可直接跟他們聯繫,如果他們有多的零組件(如硬碟架),be quiet! 可以免費提供給消費者,讓玩家可以有更好的升級空間與應用。這也算是非常貼心的售後服務!