
[FONT="楷体"]使用重裝備架設高速區域分享
圖檔流量過大無法顯示請按此:http://photo.xuite.net/aa801862/3287622
更多教學http://tw.myblog.yahoo.com/jw!bjLnQk6TSEeoUAtuK0V7
網路線材:
CAT.5(使用7條)
CAT.6(使用6條)
供電設備:
APC(ES500)
網路設備型號:
光纖數據機(合勤P-870H)
久森BRL-04R(IP分享器)
D-Link(DI-707P路由器)
D-Link(DGS-1005D集線器)
網路硬碟伺服器機型:
久森NAS-01G(硬碟容量320GB)
合勤NSA-220吐司機(硬碟容量1TB)
使用高速區域網路時必須具備以下條件:
1.電腦網路介面必須要在100/1000的網路介面(新電腦大多都有做到1000了,舊電腦就必須裝10/100/1000的網路卡才可)
2.集線器必須買100/1000的才可以
3.網路線不可使用CAT.5要使用CAT.6
4.網路硬碟大部分都有支援1000的網路介面
機器架設方法:
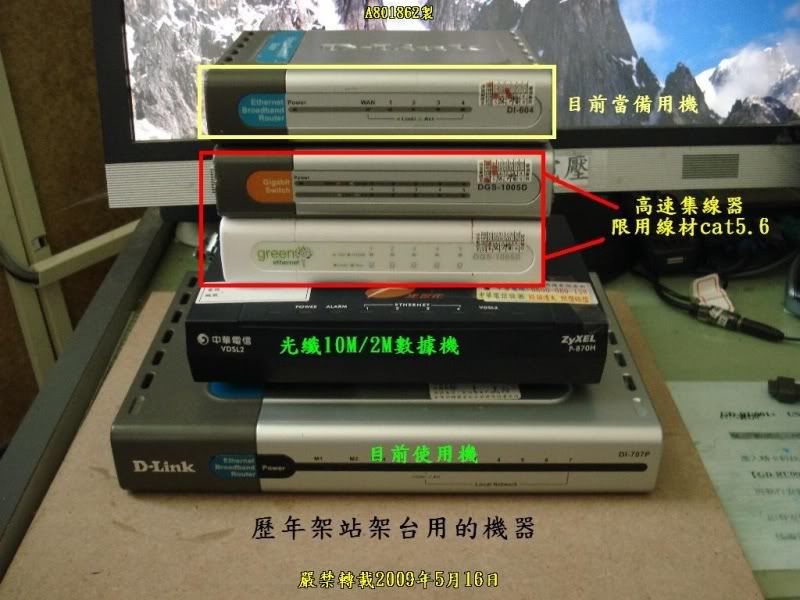
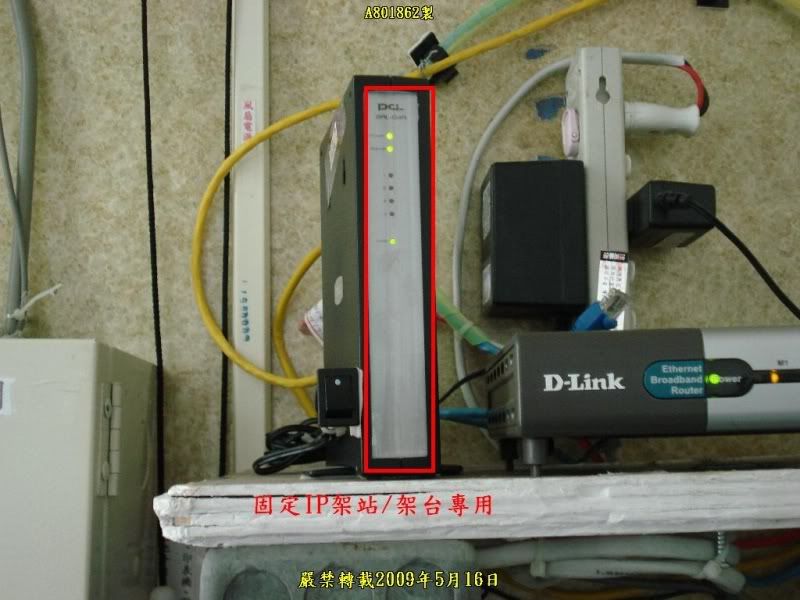
001.歷年架設站台的機器
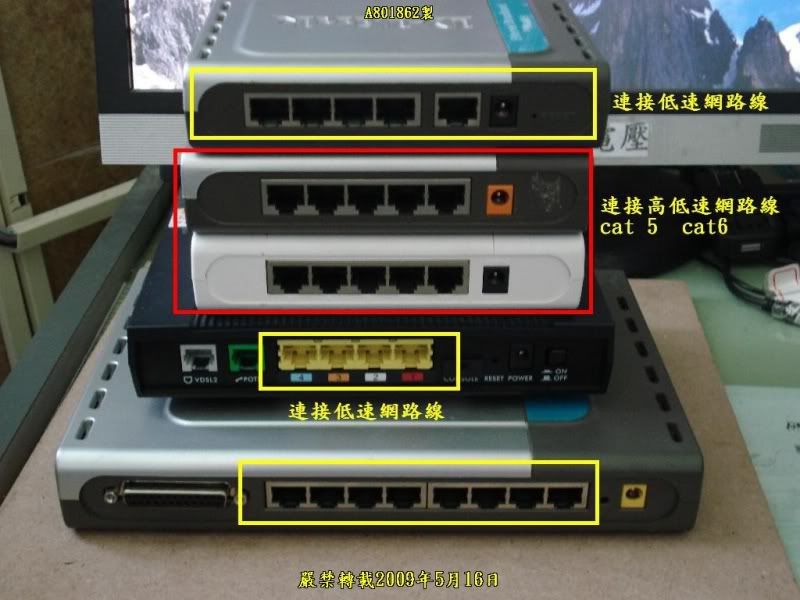
002.網路連接介面
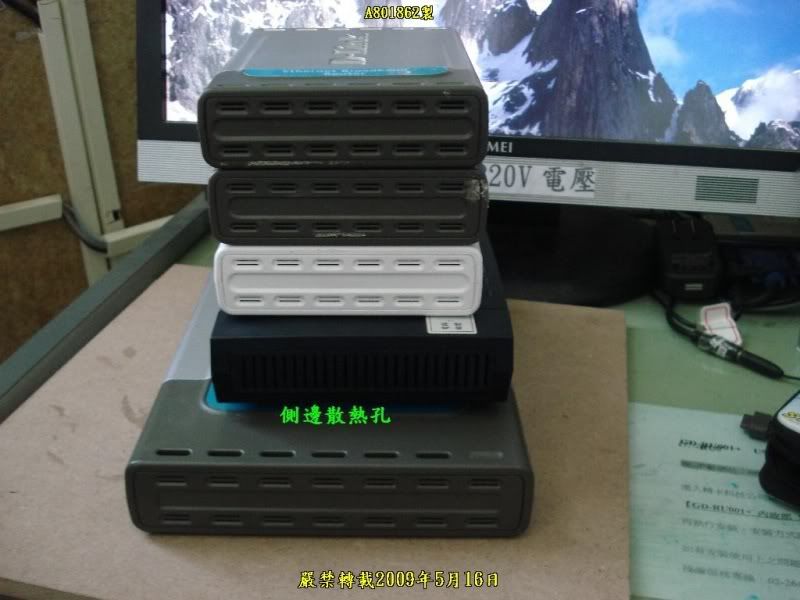
003.側邊散熱孔
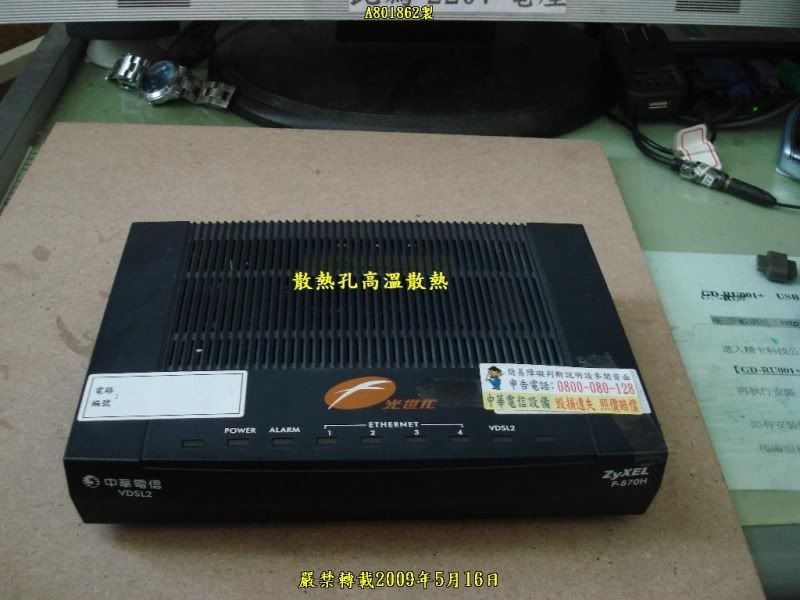
004.光纖數據機高溫散熱孔
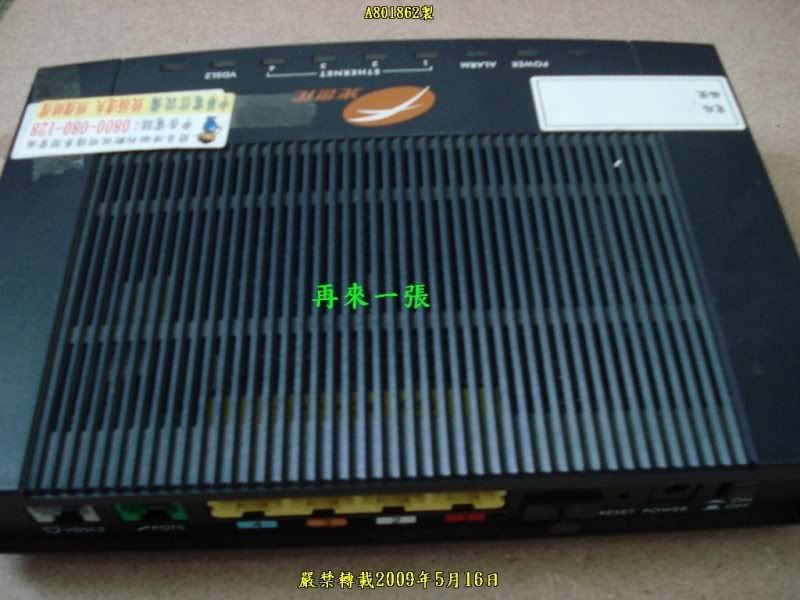
005.再來一張
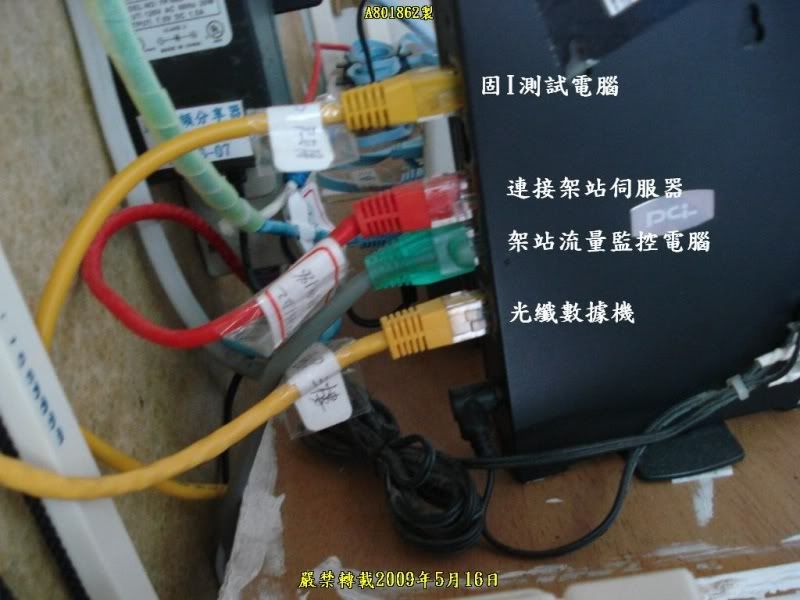
006.光纖數據機連接介面
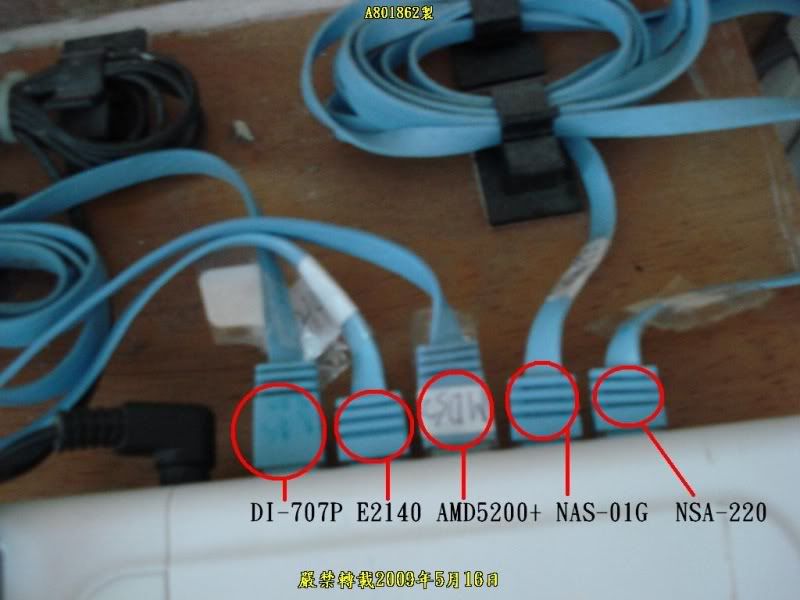
007.本人機器連接說明
008.光纖數據機側邊散熱孔
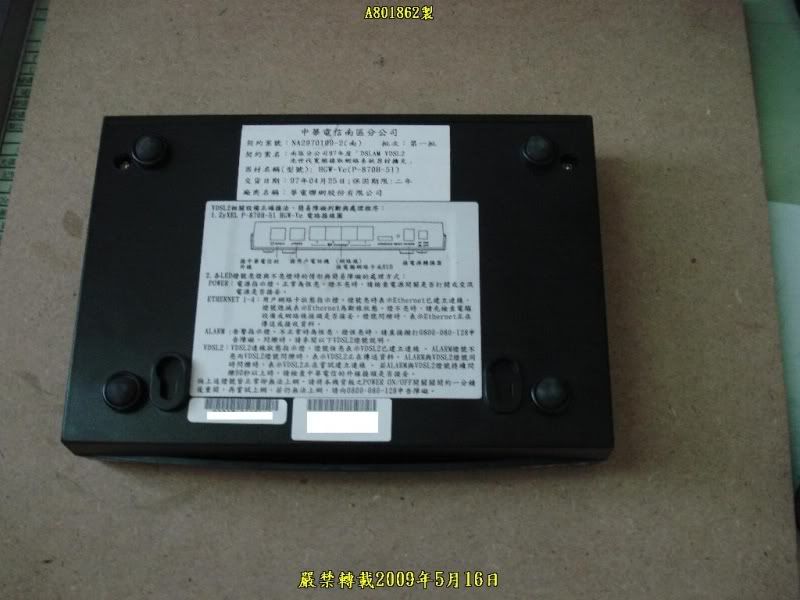
009.光纖數據機背面
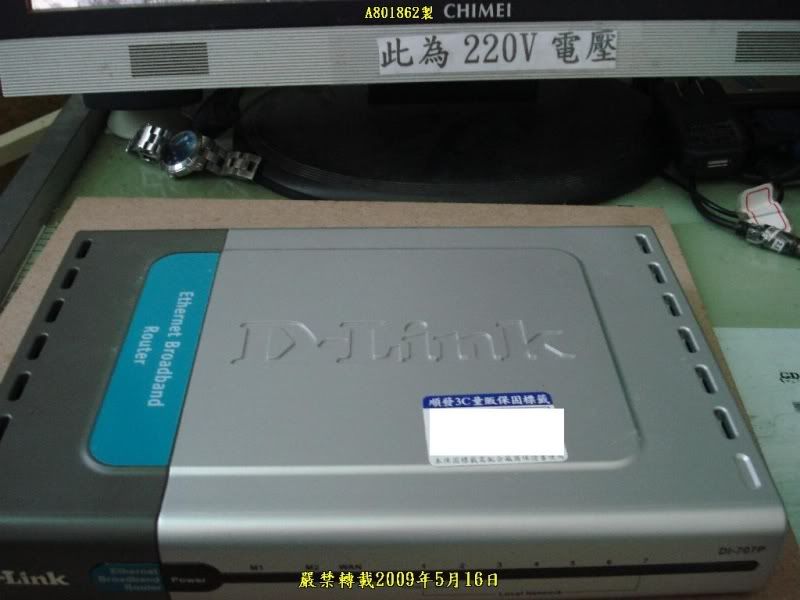
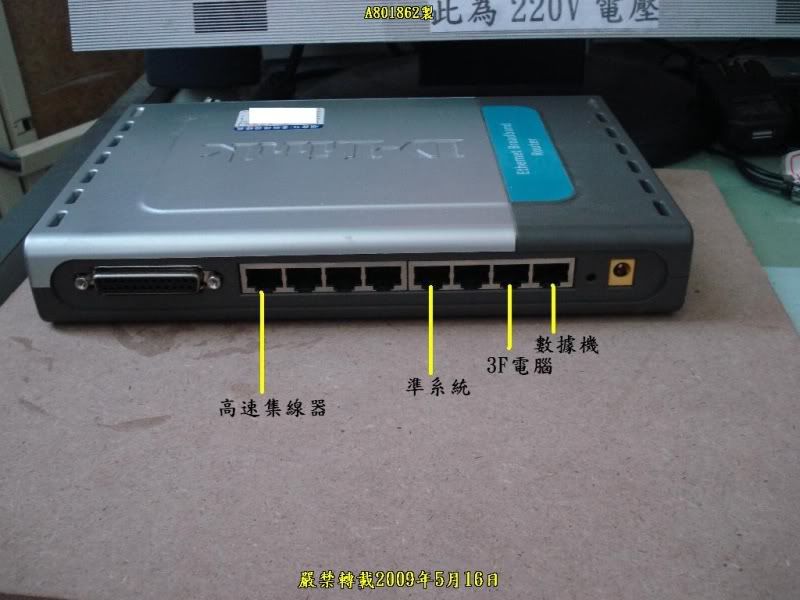
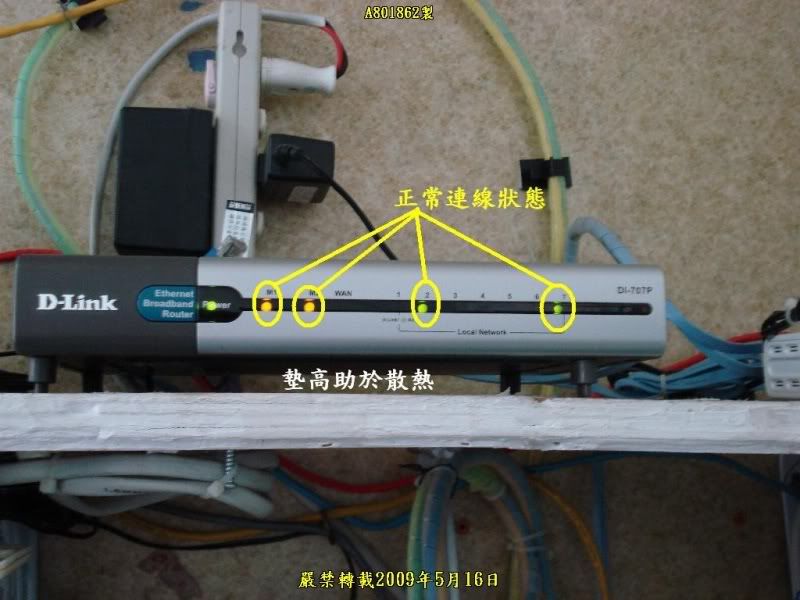
010.目前使用的DI-707P路由器
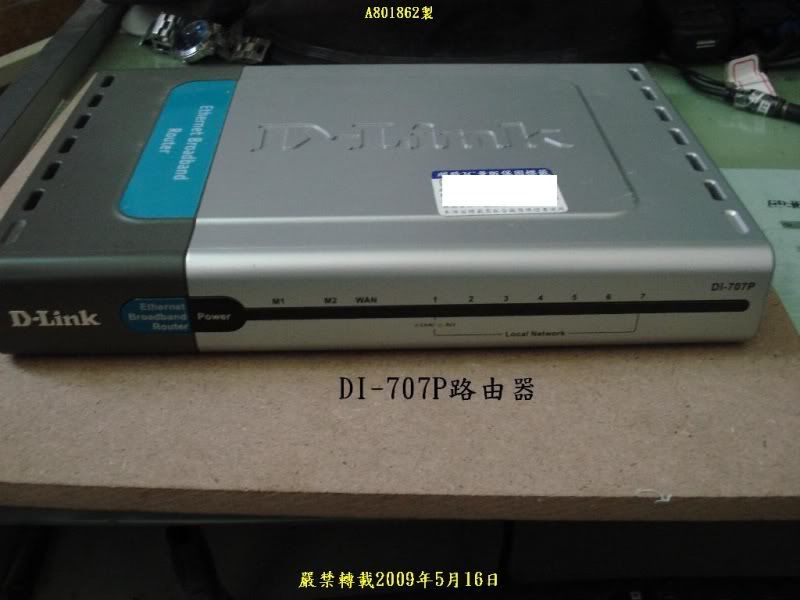
011.正面
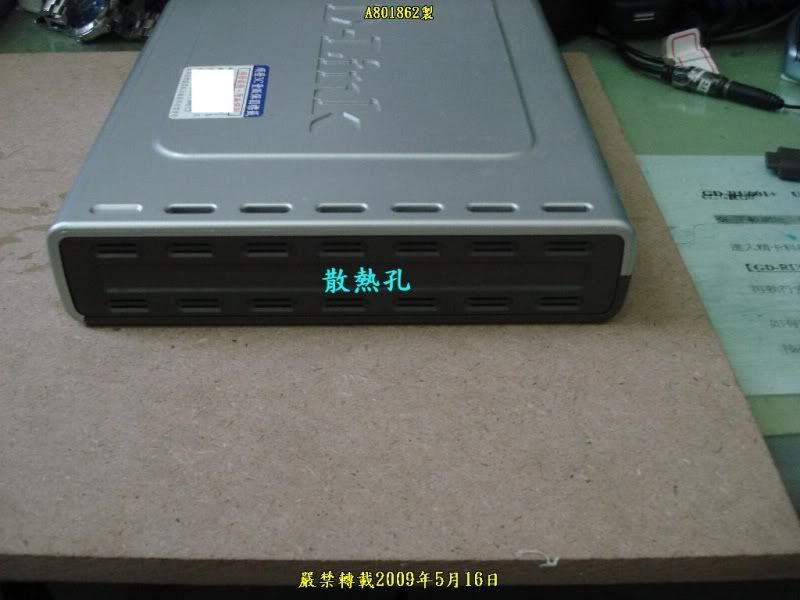
012.側邊散熱孔
013.接線端說明
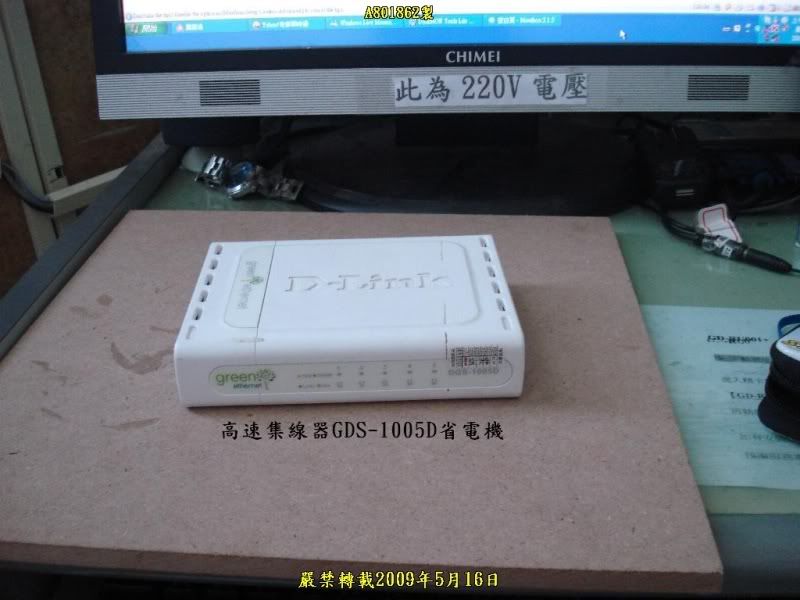
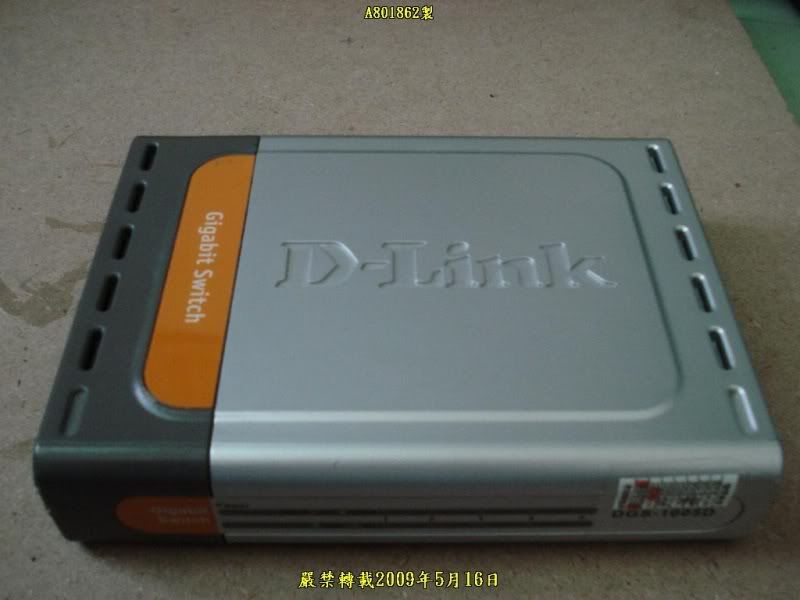
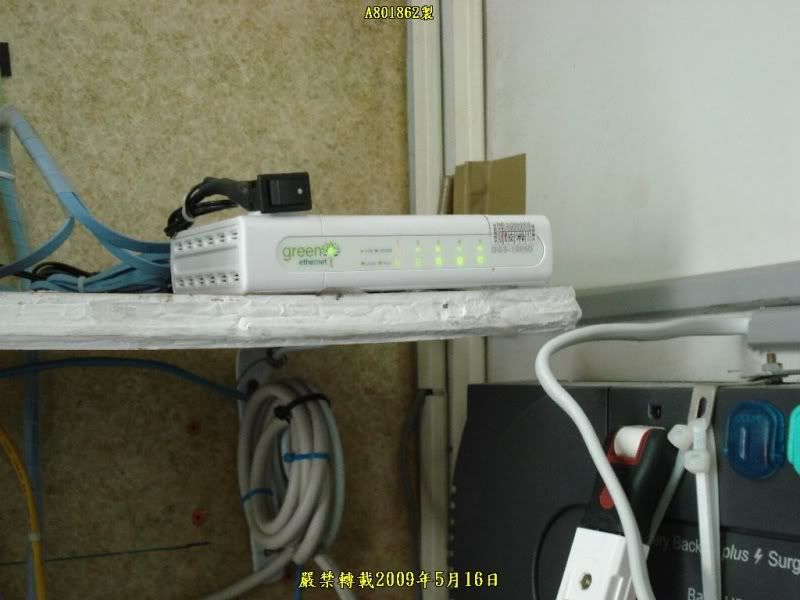
014.高速集線器DGS-1005D省電機
015.上方散熱孔
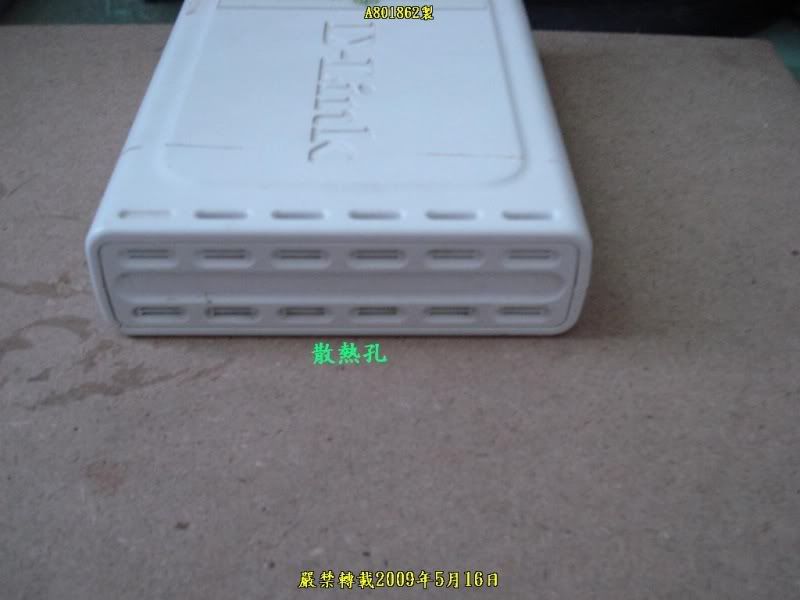
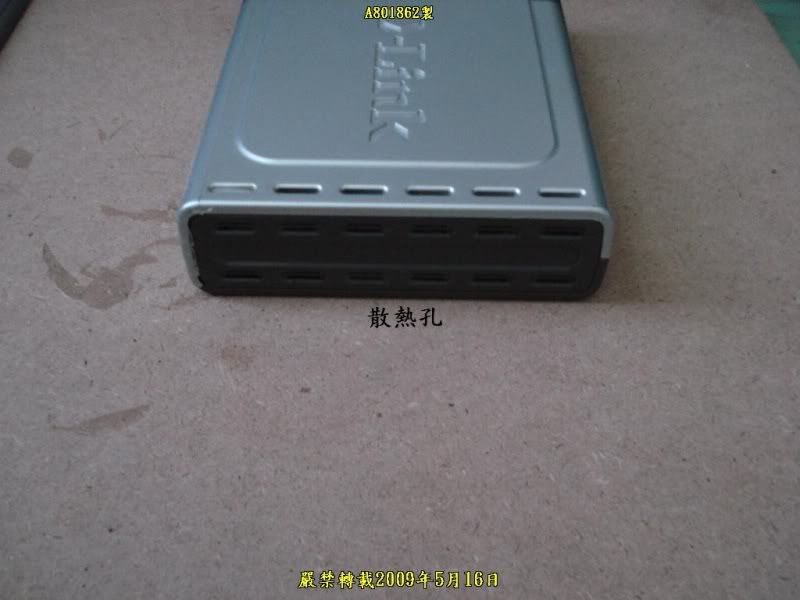
016.側邊散熱孔
017.接線端說明

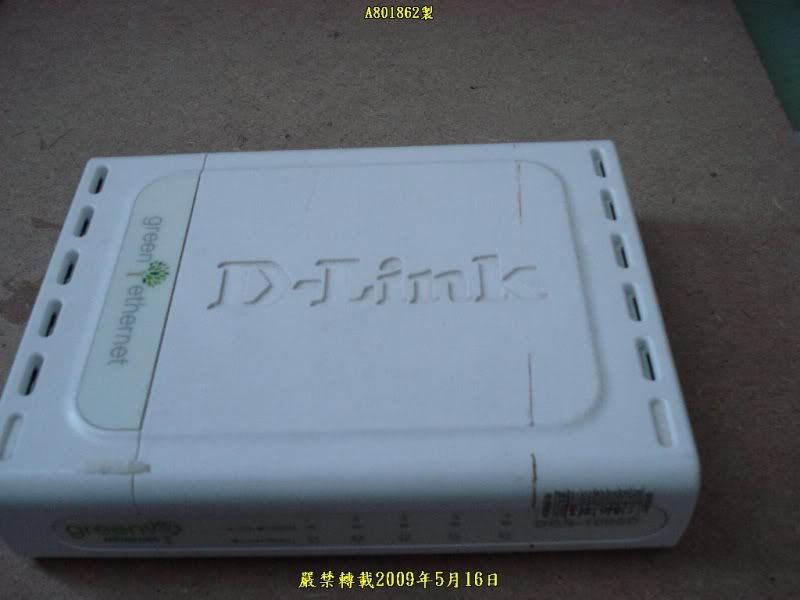
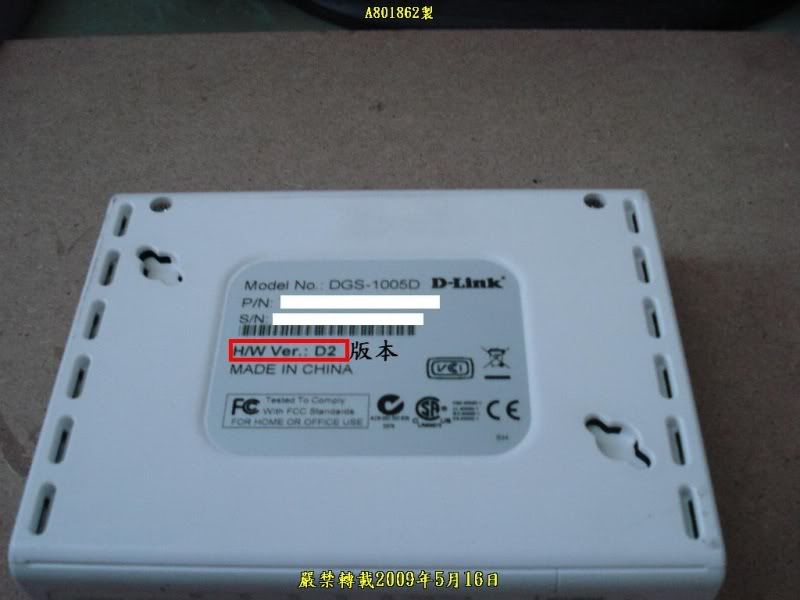
018.高速集線器DGS-1005D目前版本
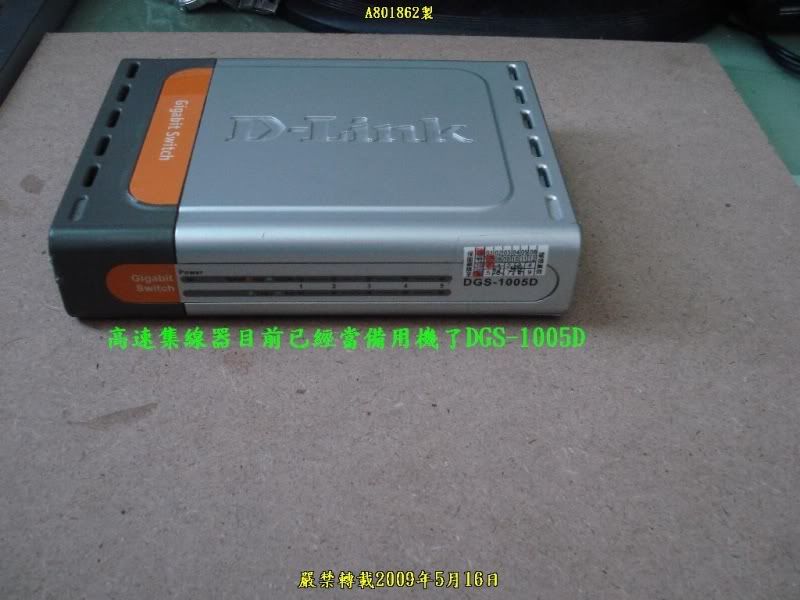
019.高速集線器DGS-1005D目前已當後備機使用
020.上方散熱孔
021.側邊散熱孔
022.接線端說明

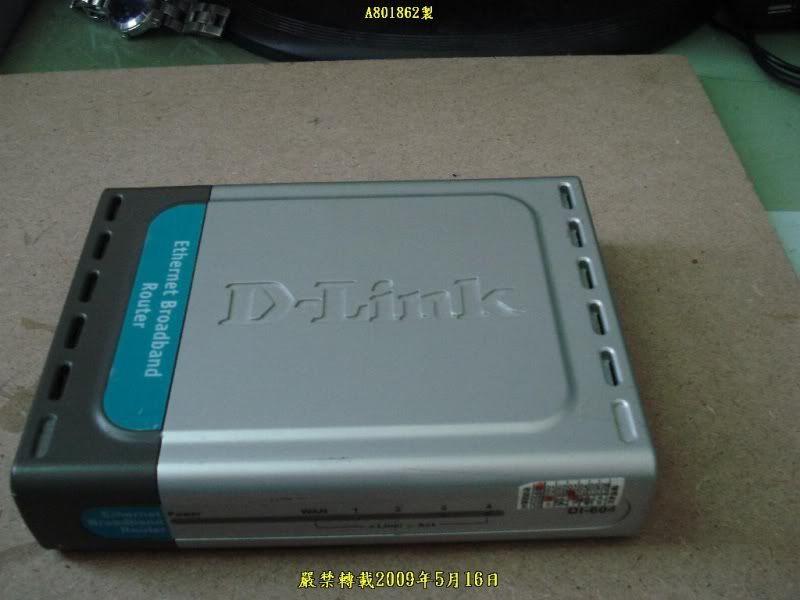
023.已退休的DI-604目前也是當後備機
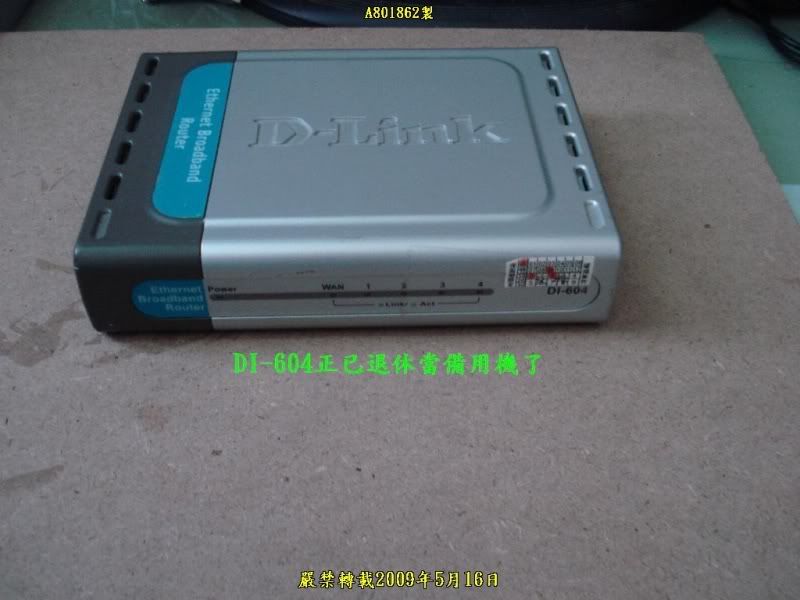
024.上方散熱孔
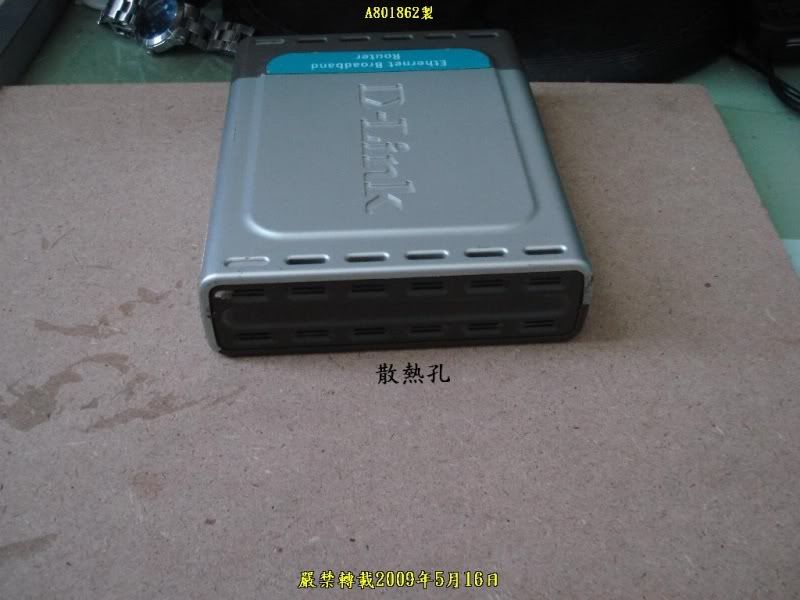
025.側邊散熱孔
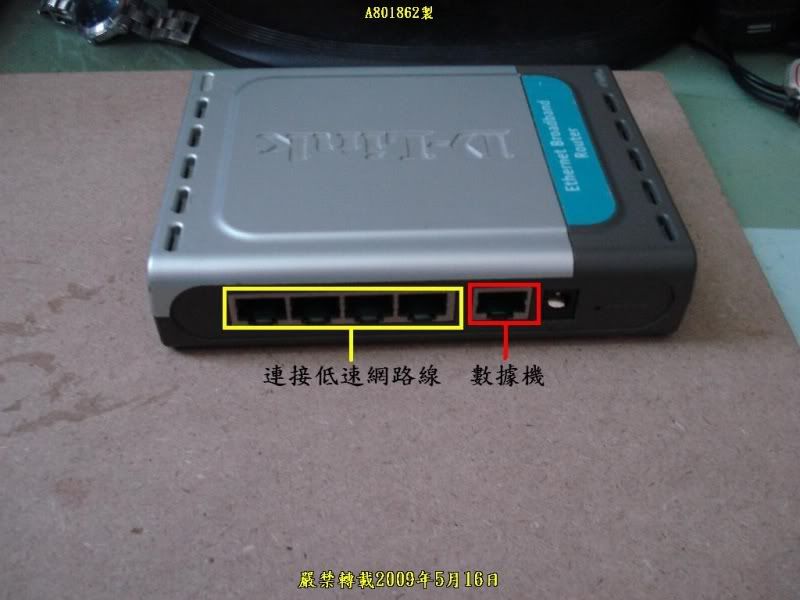
026.接線端說明
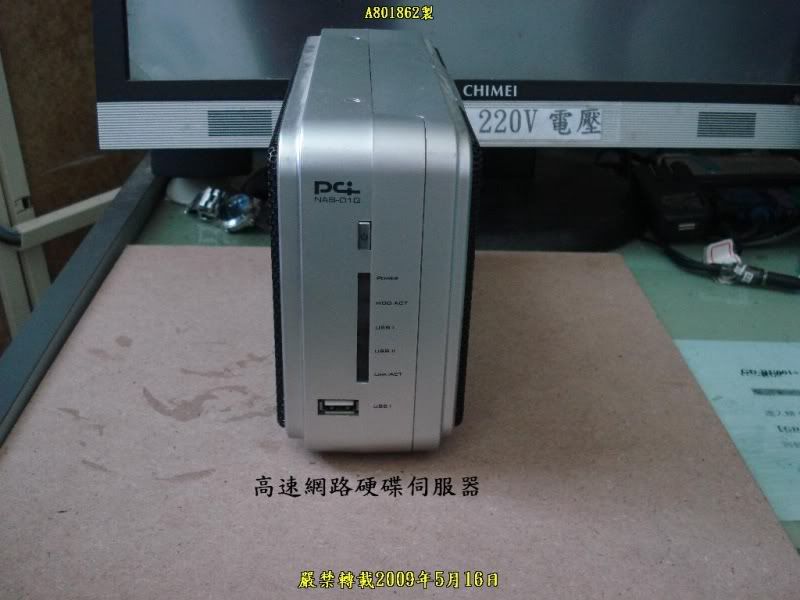
027.高速網路硬碟伺服器NAS-01G
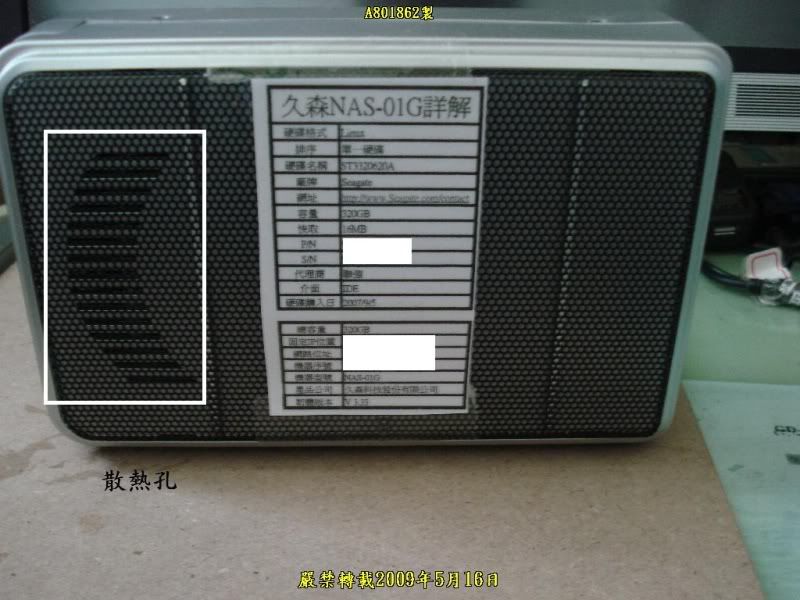
028.散熱口
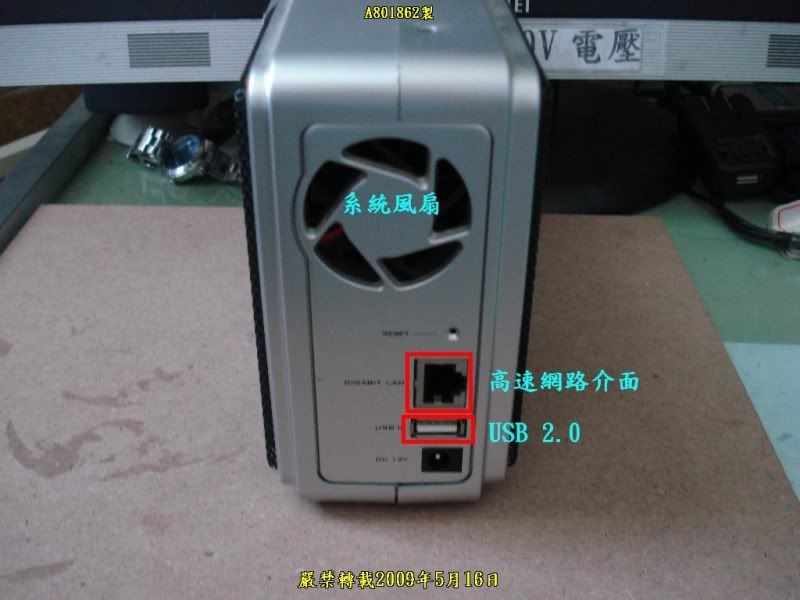
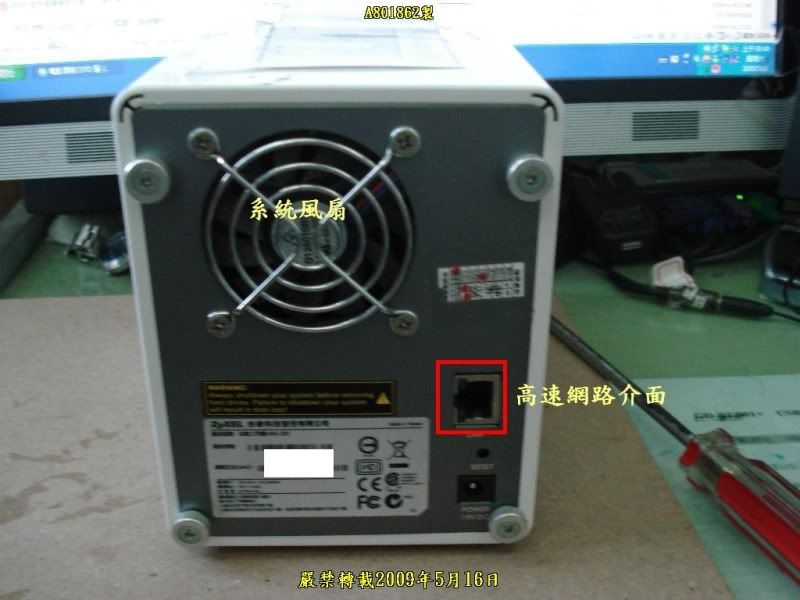
029.系統風扇與高速網路介面
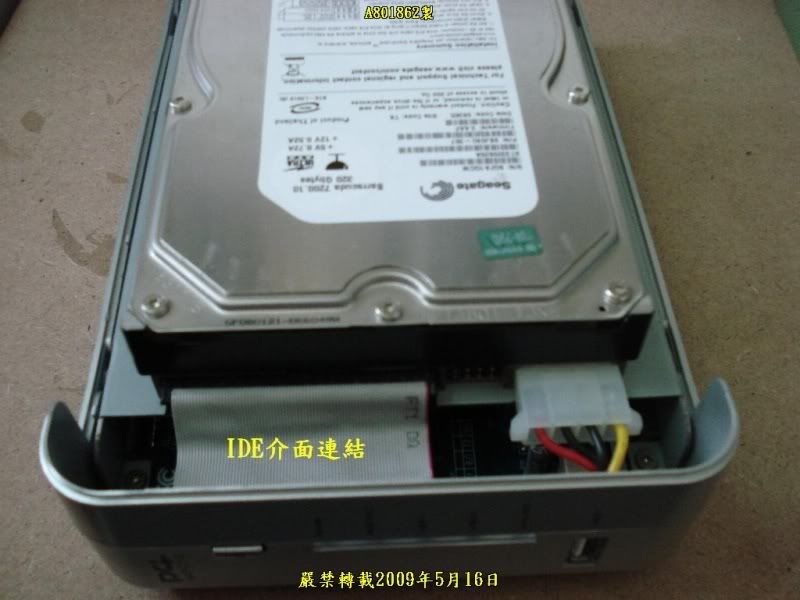
030.IDE連接介面
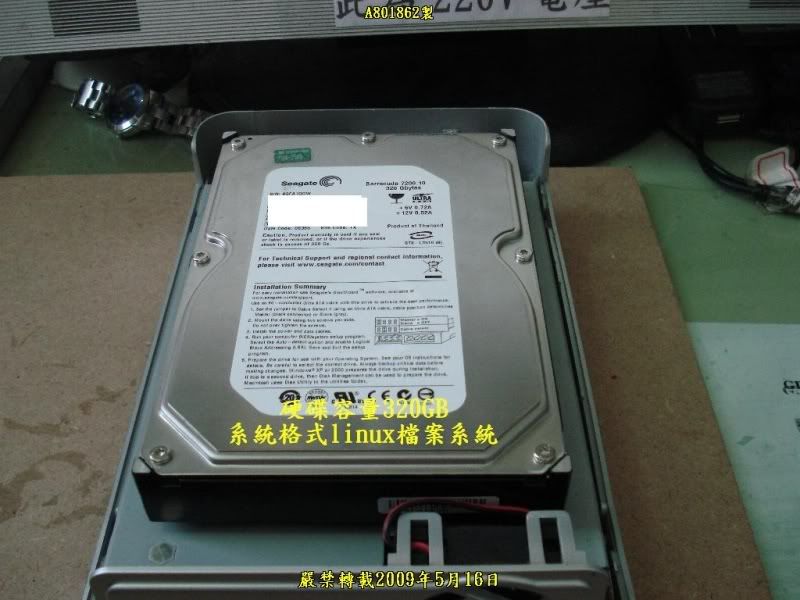
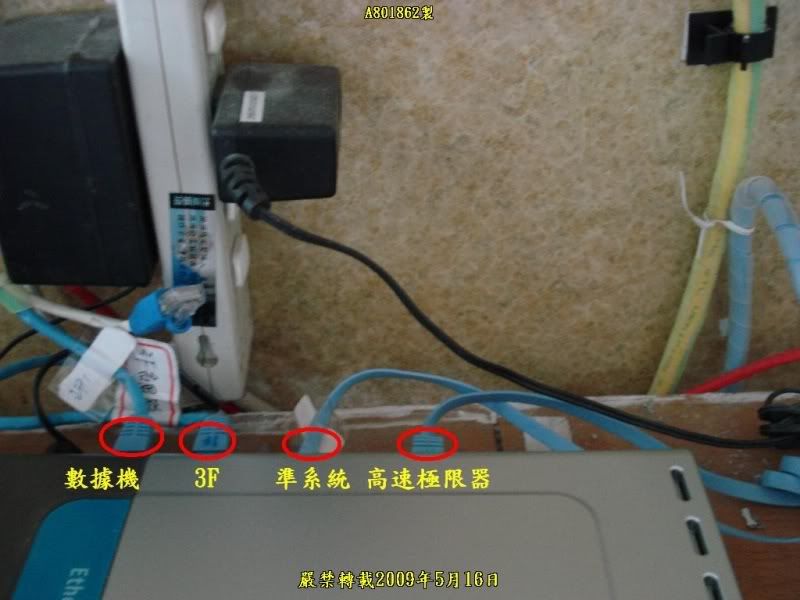
031.硬碟容量320GB採用linux系統格式
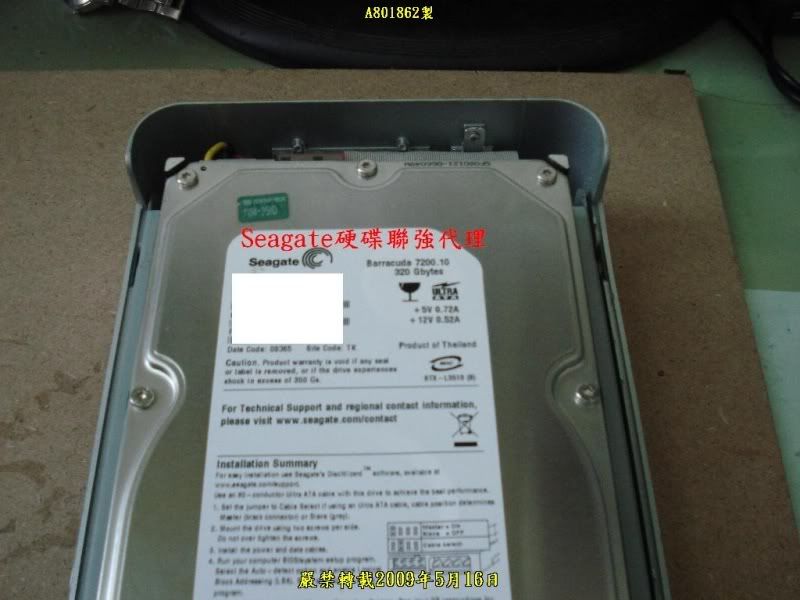
032.Seagate硬碟/聯強代理
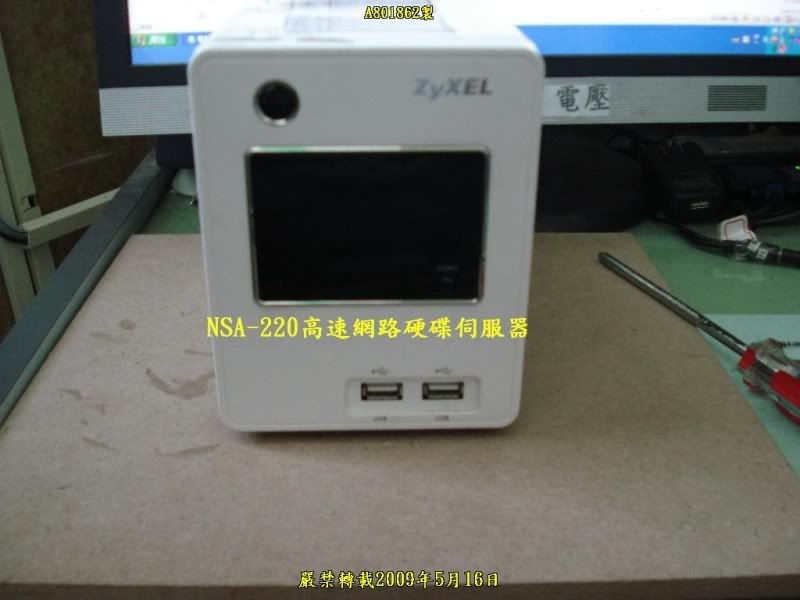
033.高速網路硬碟伺服器NSA-220
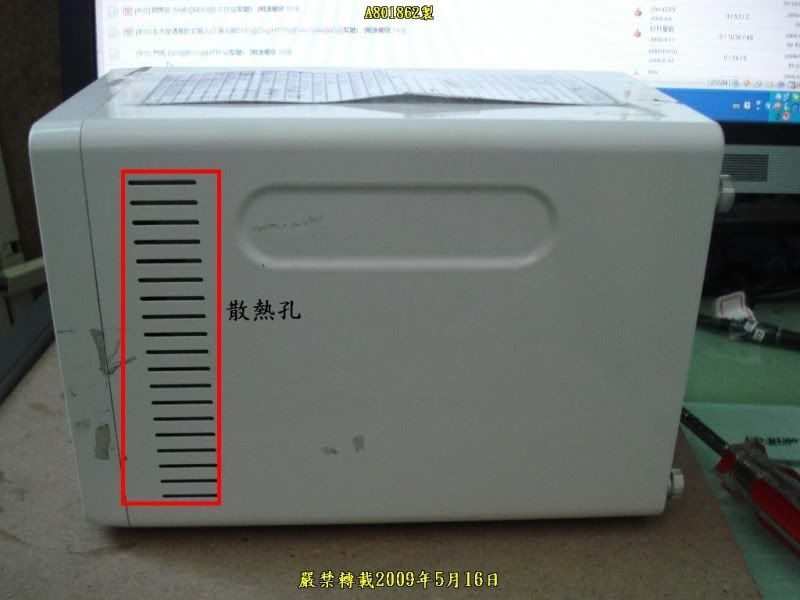
034.散熱口
035.系統風扇與高速網路介面
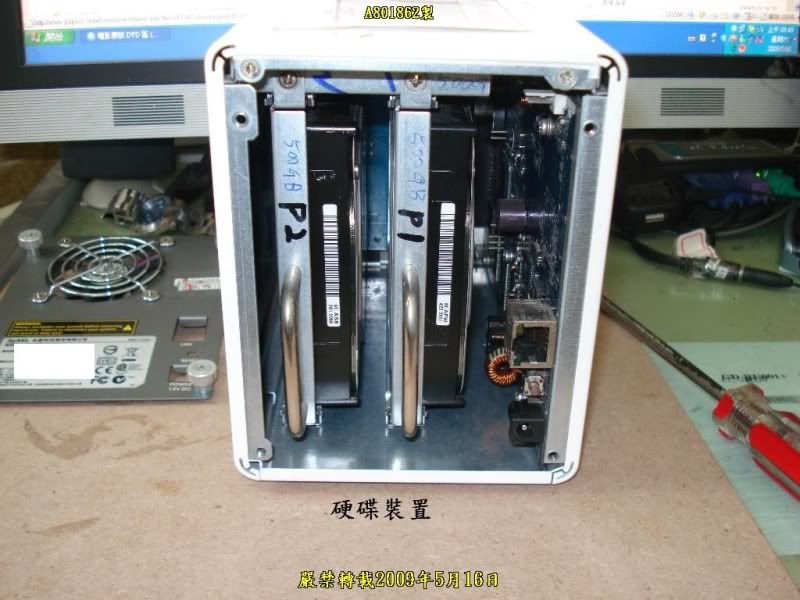
036.硬碟裝置
037.NSA-220硬碟連接介面

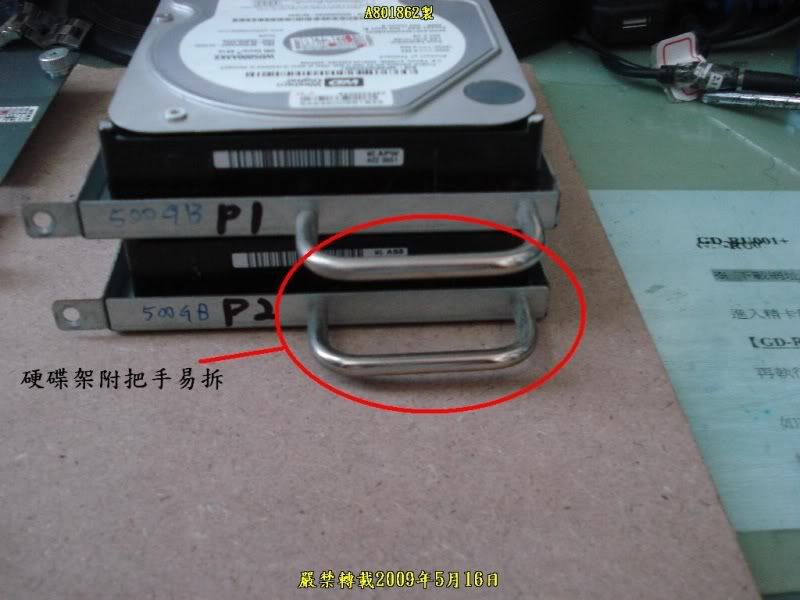
038.硬碟架附把手易拆
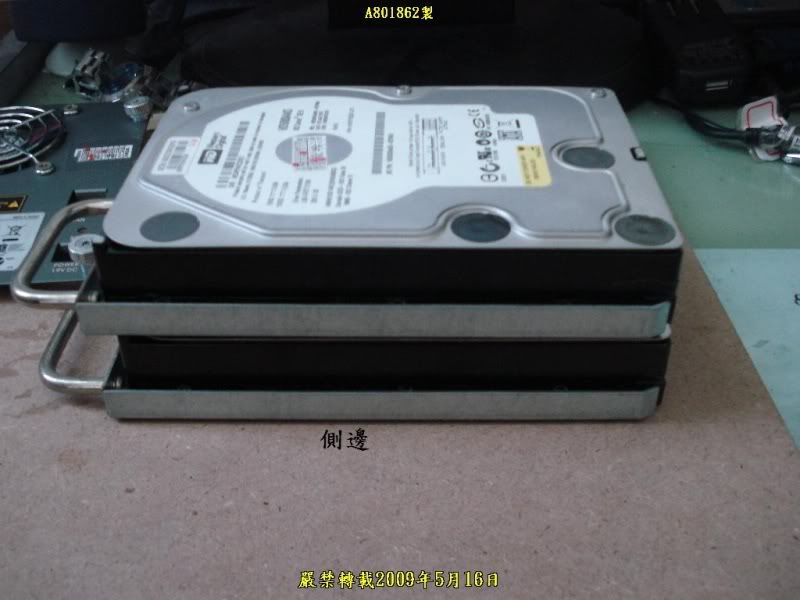
039.側邊
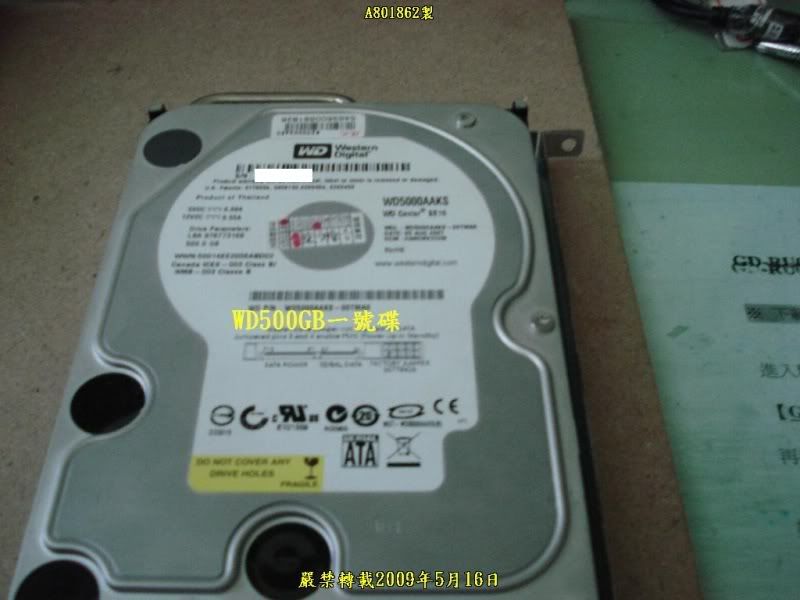
040.一號硬碟WD500GB(系統linux格式)
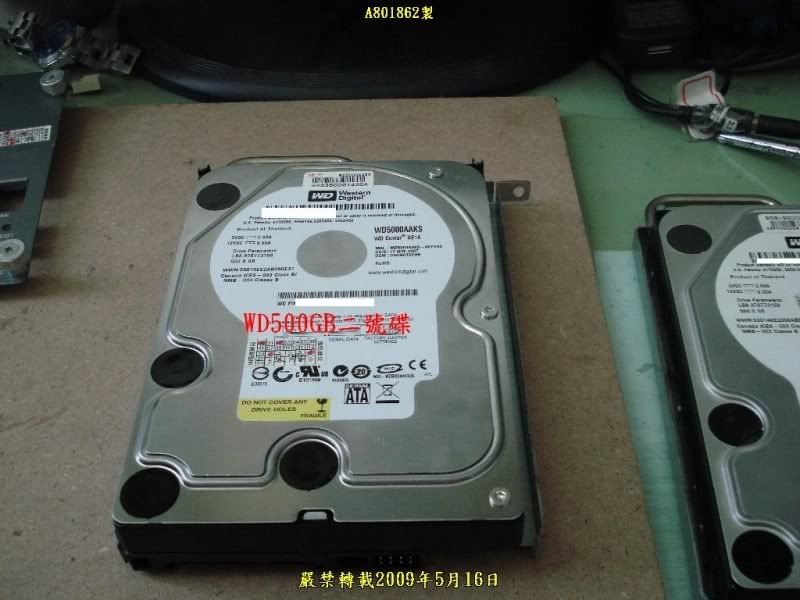
041.二號硬碟WD500GB(系統linux格式)
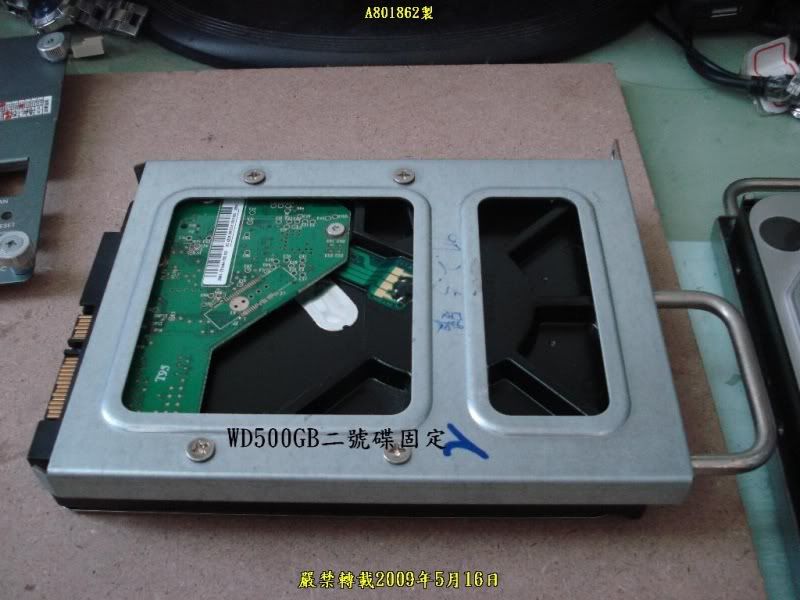
042.二號硬碟WD500GB固定架
043.一號硬碟WD500GB固定架

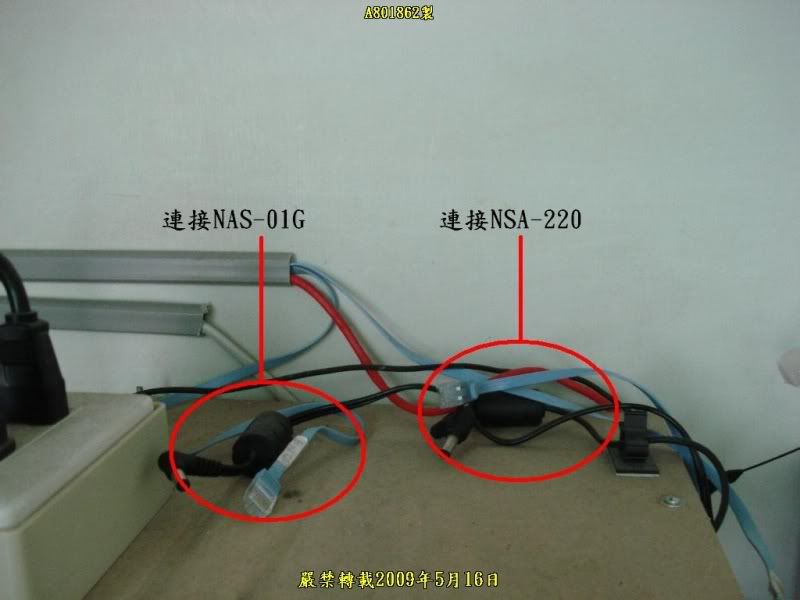
044.連接NAS-01G與NSA-220網路硬碟伺服器用的高速網路線CAT.6
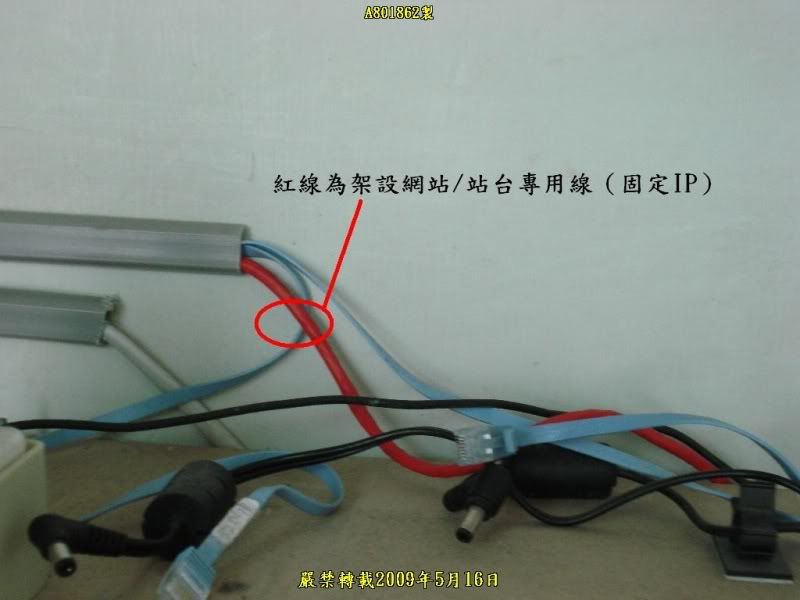
045.紅線為架站專用網路線
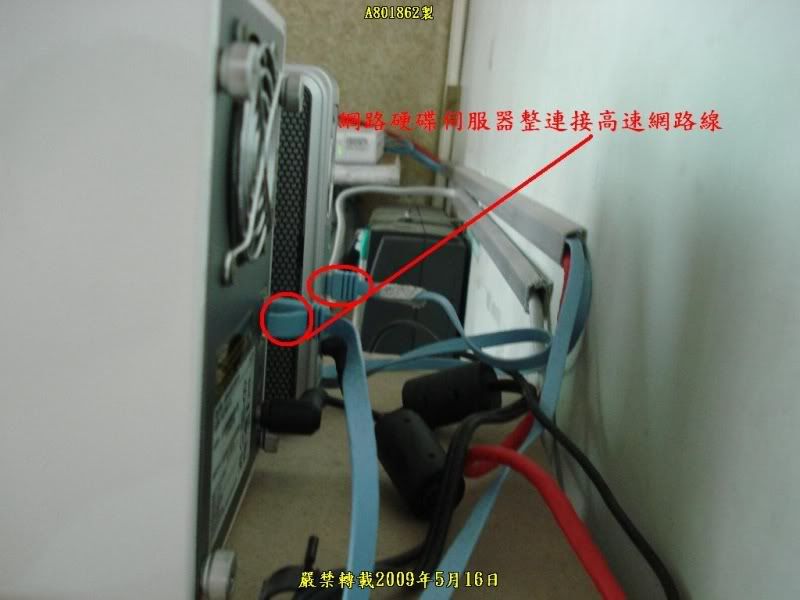
046.網路硬碟伺服器連接高速網路線
047.切換NSA-220使用固I浮I專用

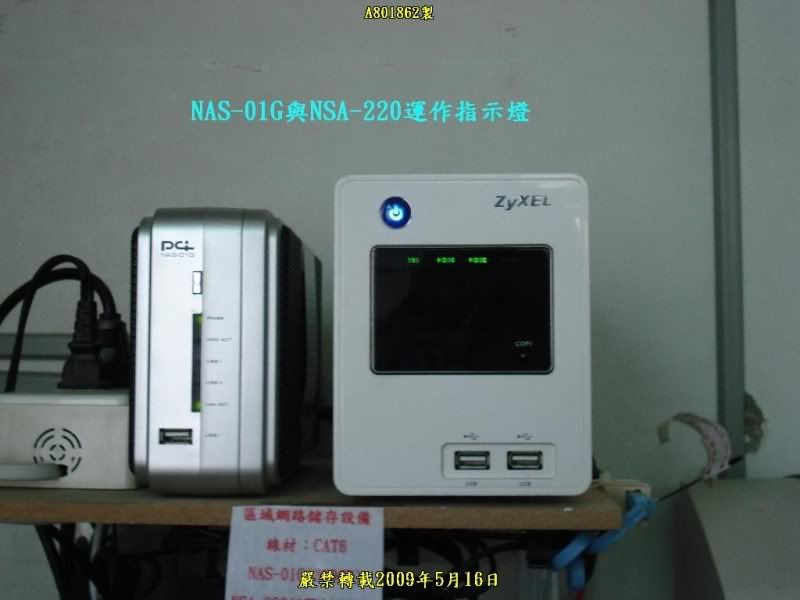
048.NAS-01G與NSA-22運作指示燈
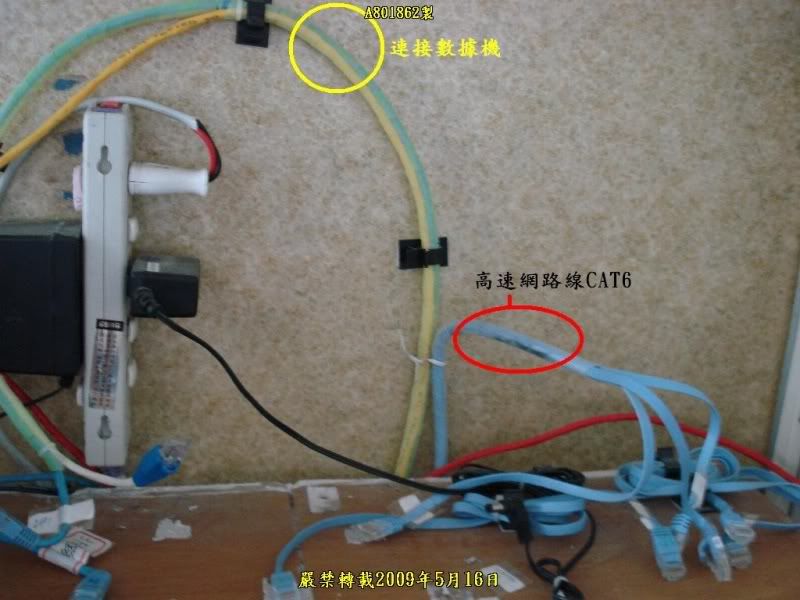
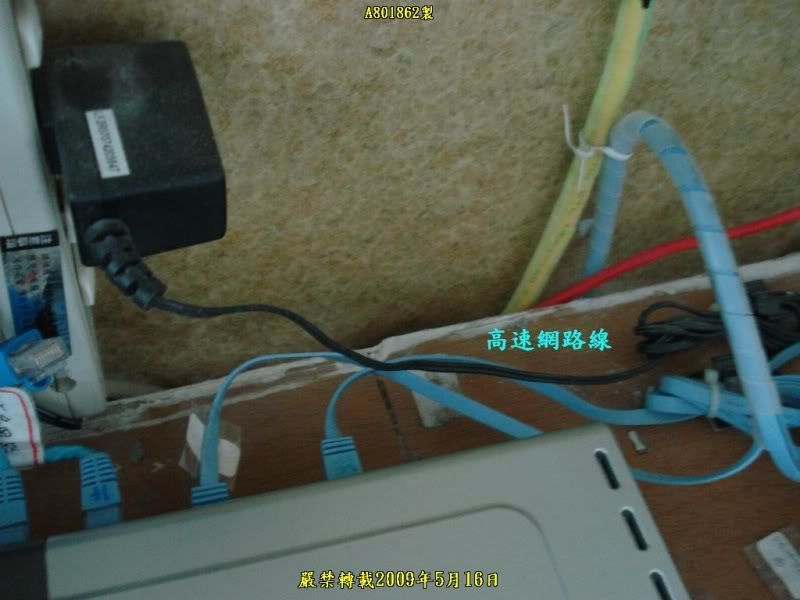
049.高速網路線CAT.6
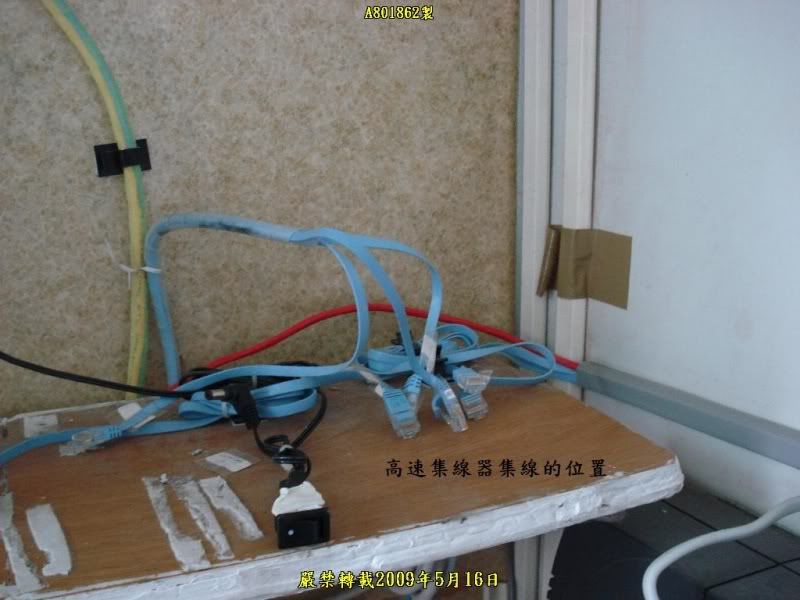
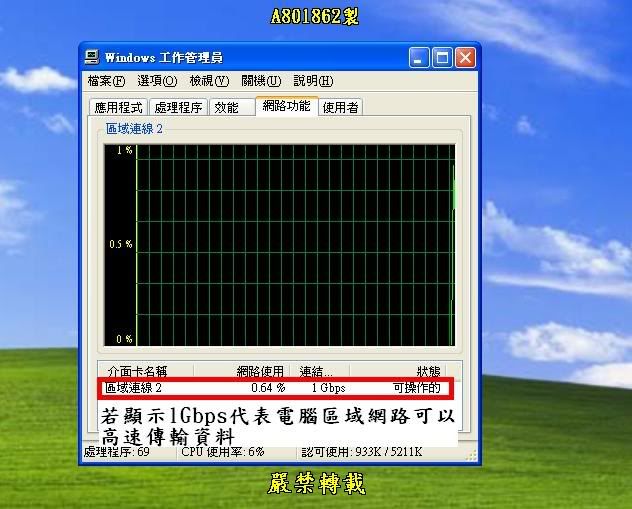
050.高速集線器放置位置
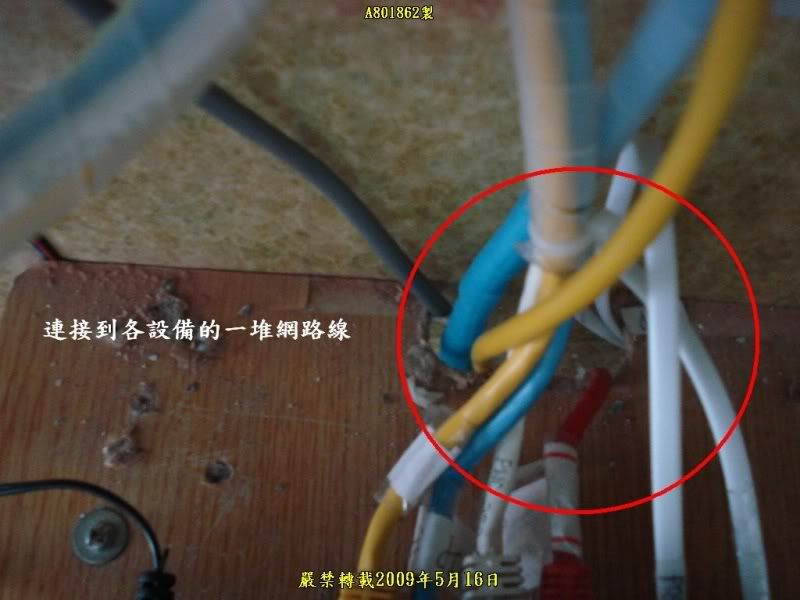
051.連接到各網路設備的一堆網路線
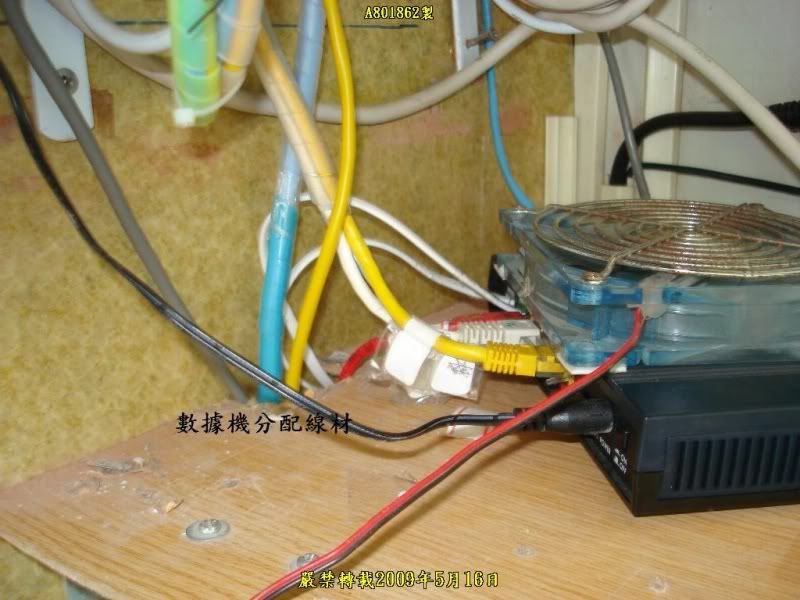
052.數據機配線
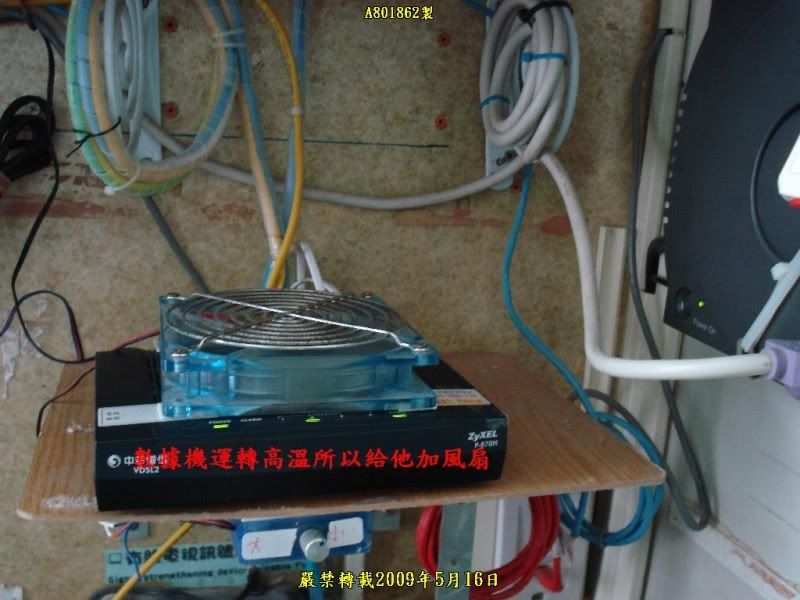
053.光纖數據機在高速下載時會引發高溫狀態
054.BRL-04R架設站台/網站專用
055.BRL-04R接線說明
056.DI-707P接線說明
057.DI-707P連接到高速集線器用的網路線
058.高速集線器DGS-1005D網路線連接

059.高速集線器DGS-1005D配線介紹
060.運作圖
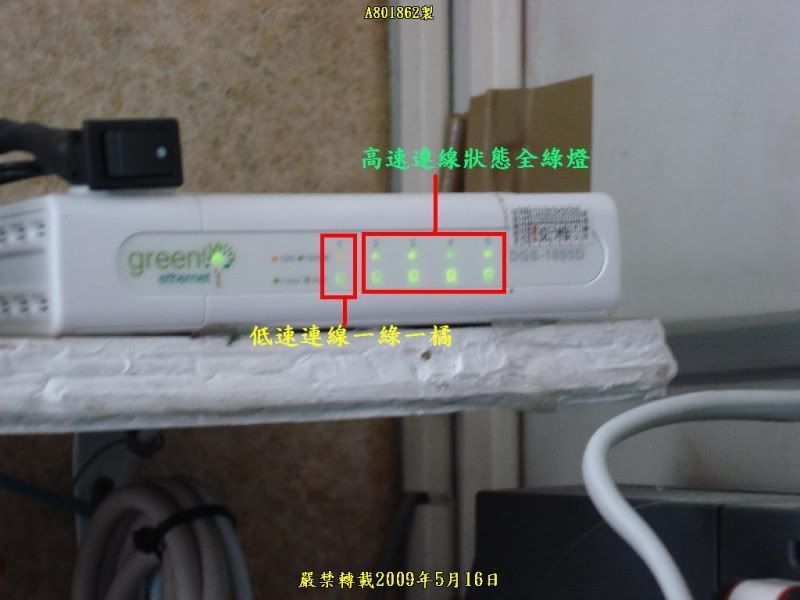
061.高速與低速燈號狀態說明
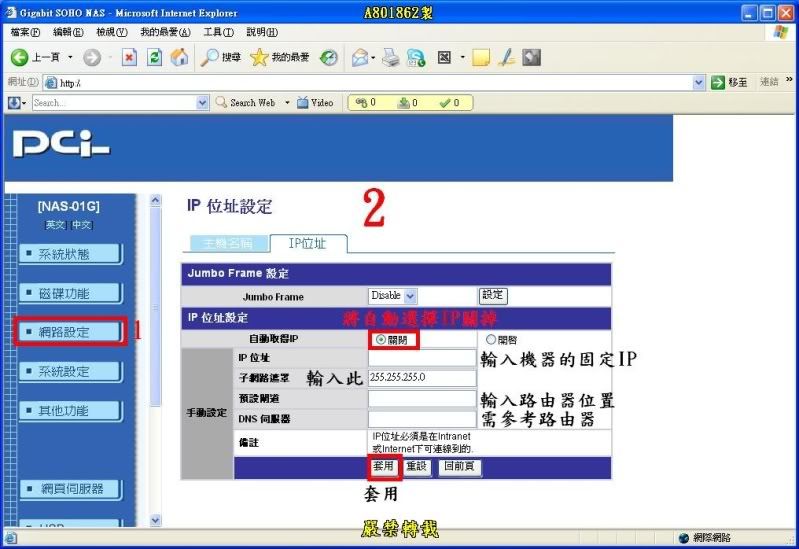
062.DI-707P正常連線狀態
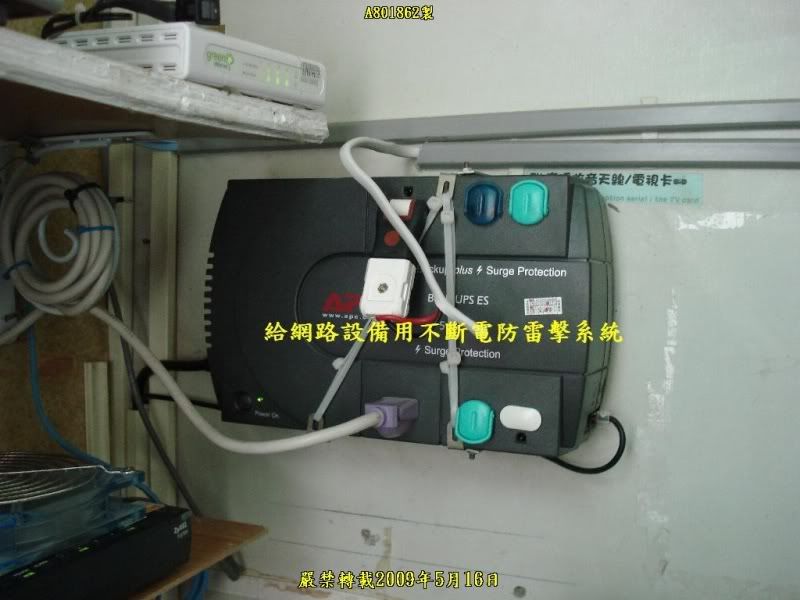
063.給網路設備用不斷電防雷擊系統
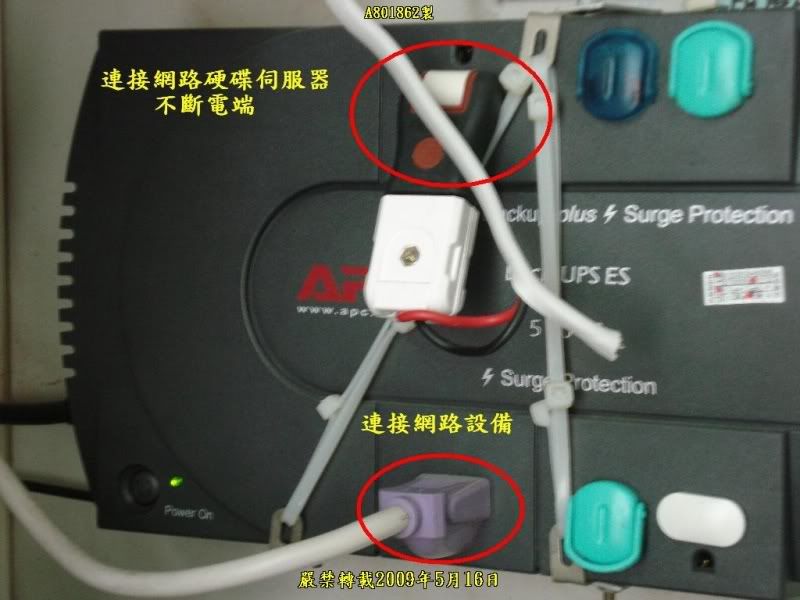
064.供電說明
系統設定方法
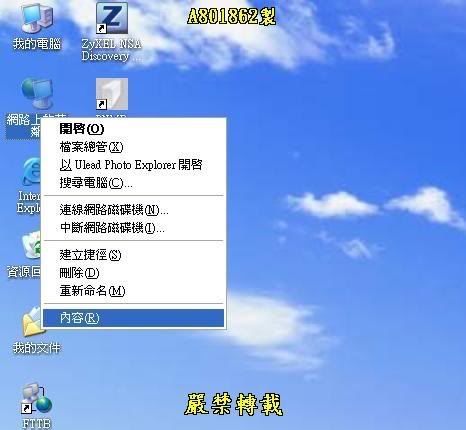
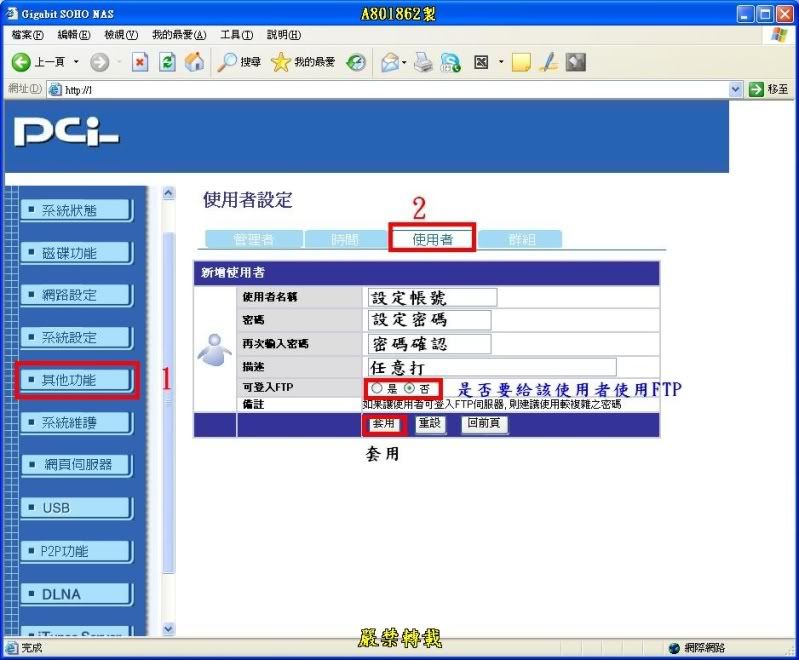
065.按網路上的芳鄰右鍵選>內容
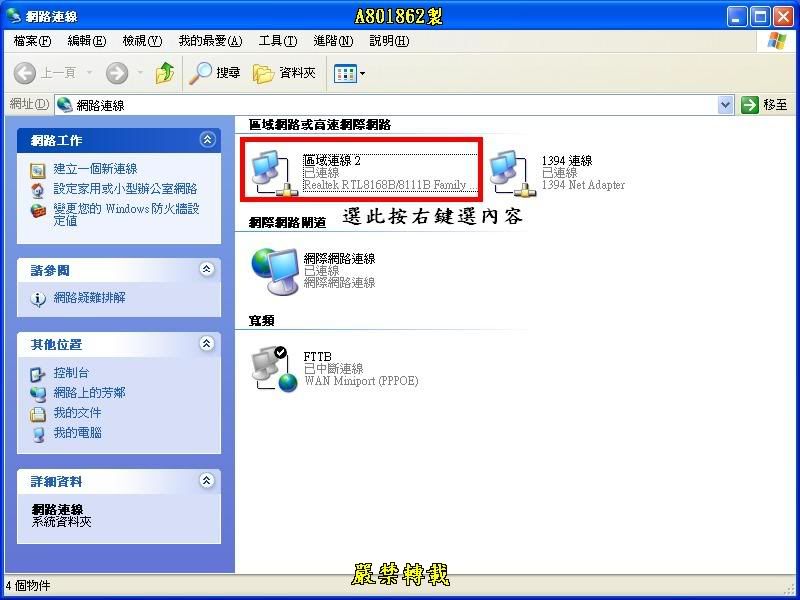
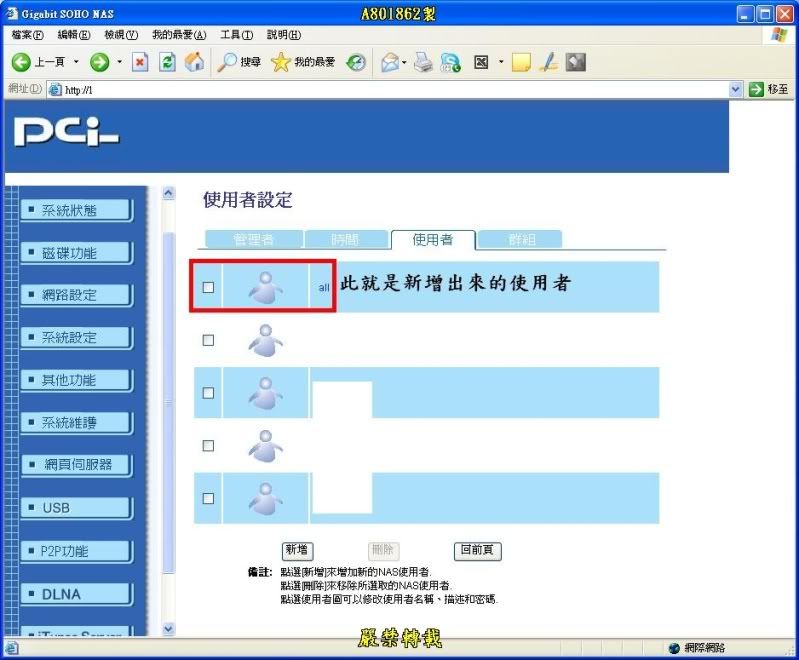
066.選擇區域連線後按右鍵>內容
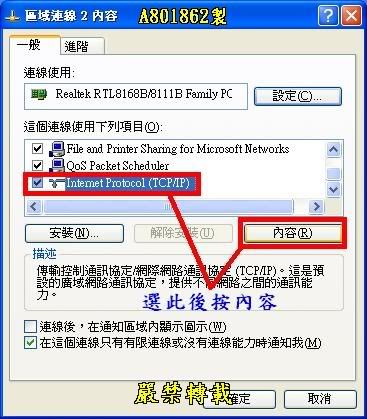
067.選擇(TCP/IP)後按內容
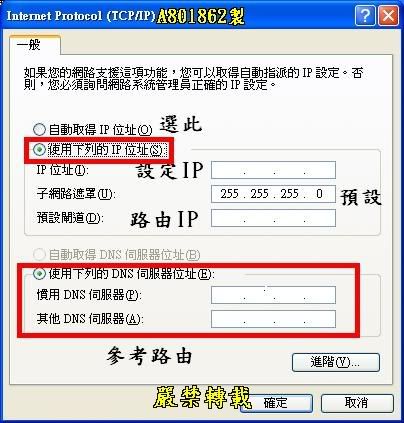
068.選擇(使用下列的IP位置)IP分配為192.168.0.1~192.168.0.255之間
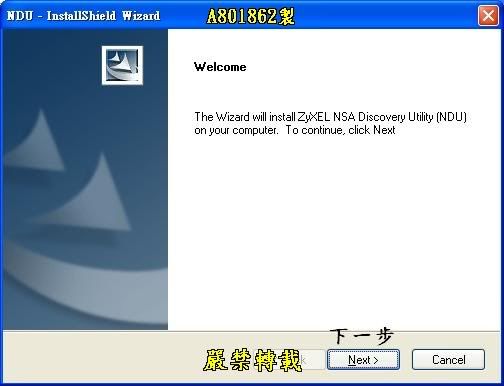
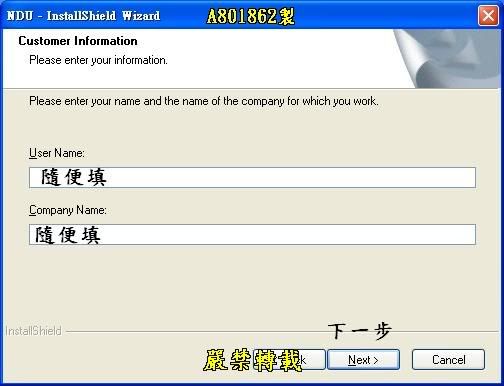
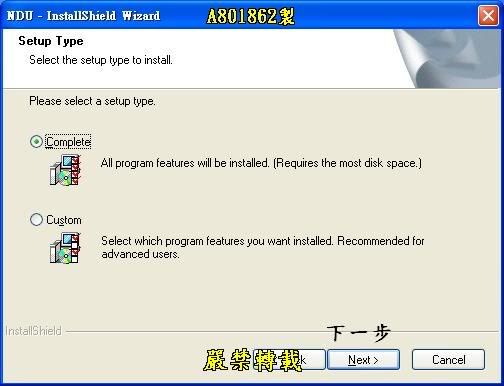
069.工作群組須跟區域網路一樣
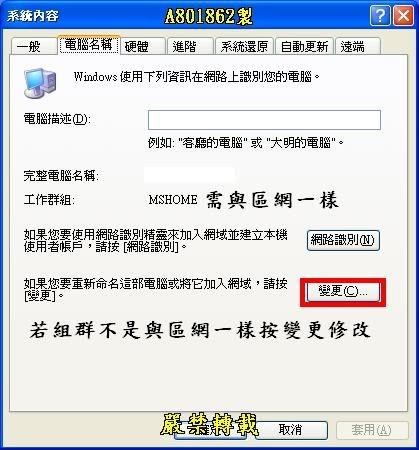
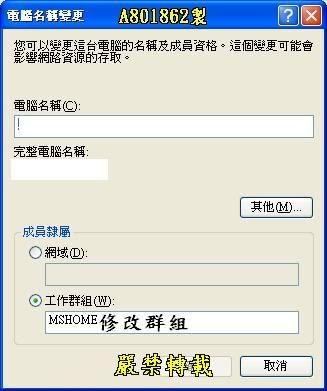
070.修改群組(修改完成後按確定重開機)
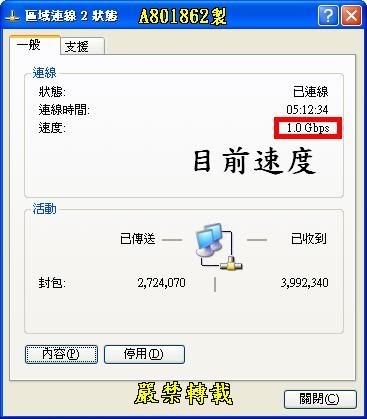
071.若電腦與集線器都是100/1000的才會出現1Gbps
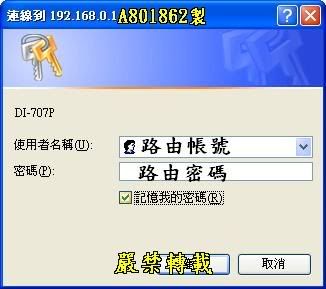
072.登入DI-707P路由器設定頁面
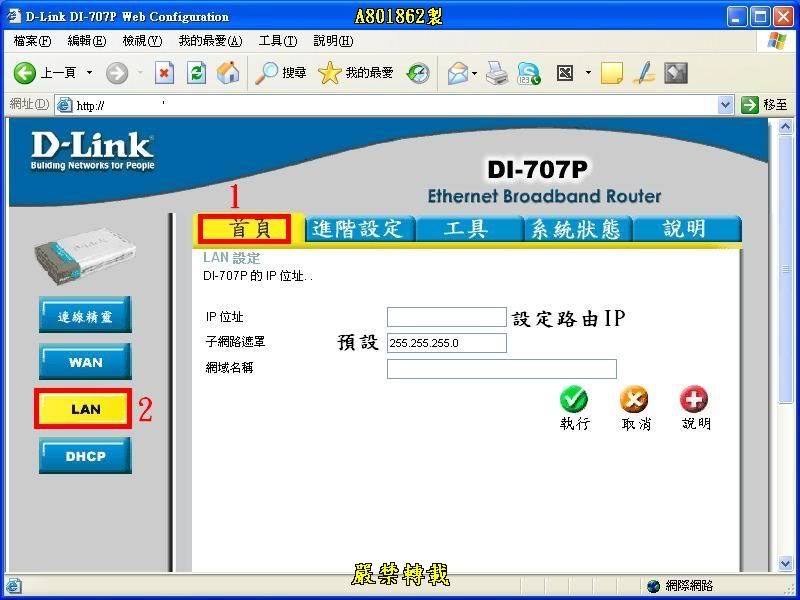
073.設定路由IP
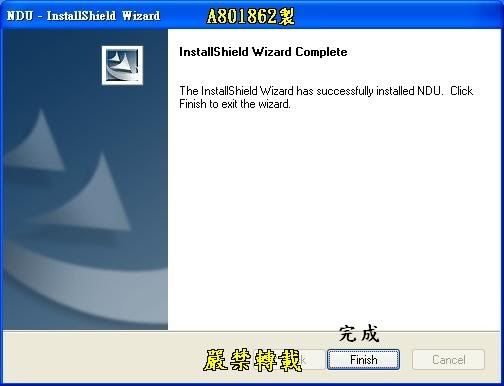
安裝探索程式及設定
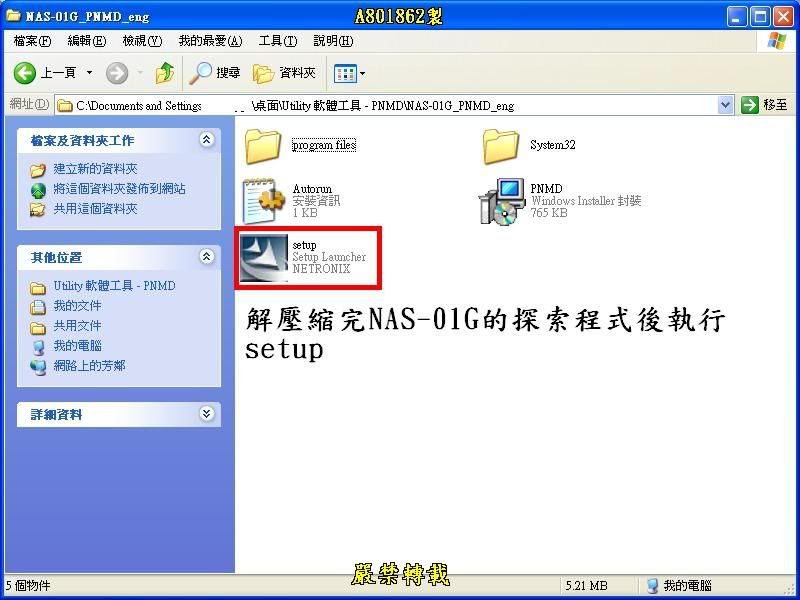
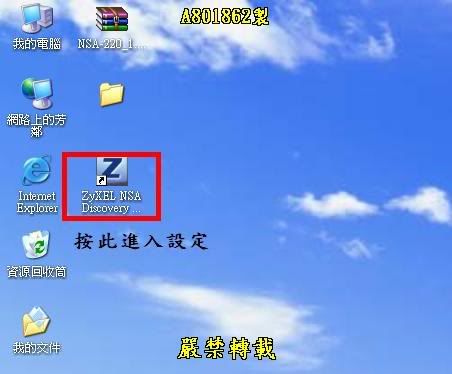
074.下載完NAS-01G探索程式後解壓縮並安裝
075.準備安裝中
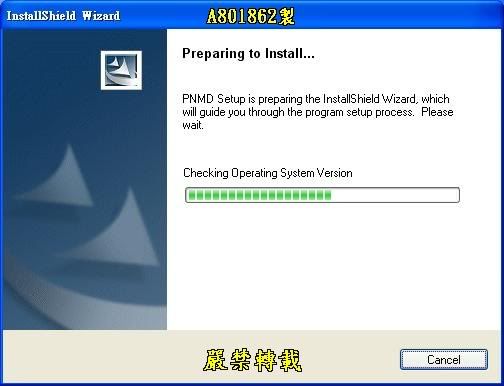
076.下一步
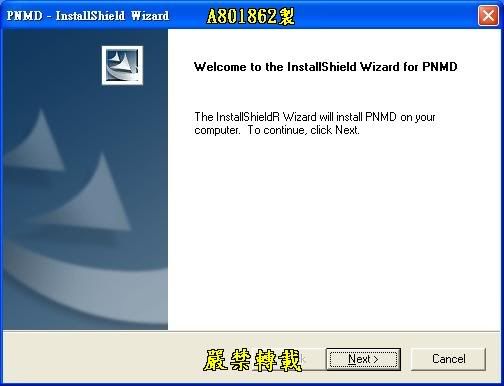
077.下一步
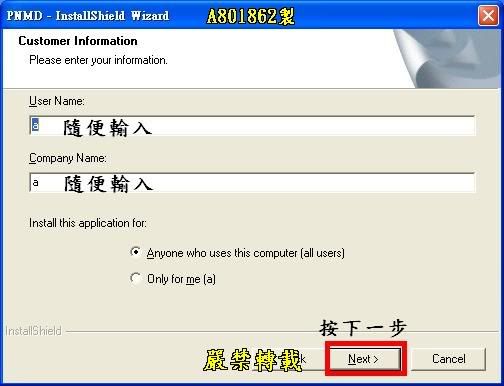
078.下一步
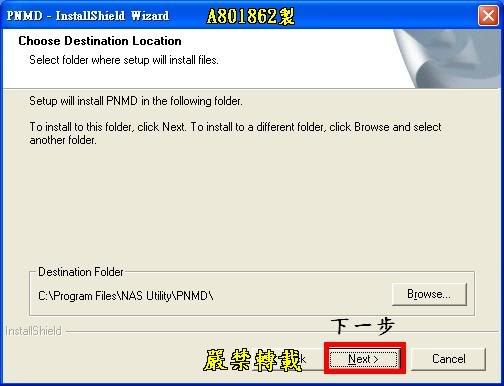
079.完成

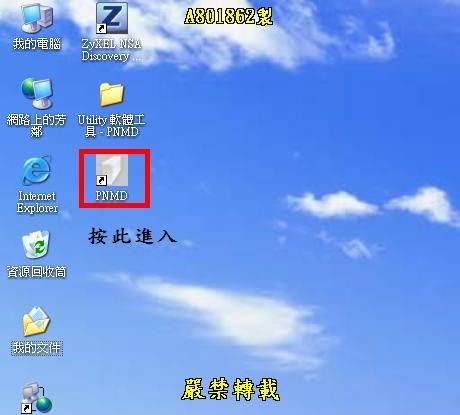
080.按桌面的PNMD圖示進入設定
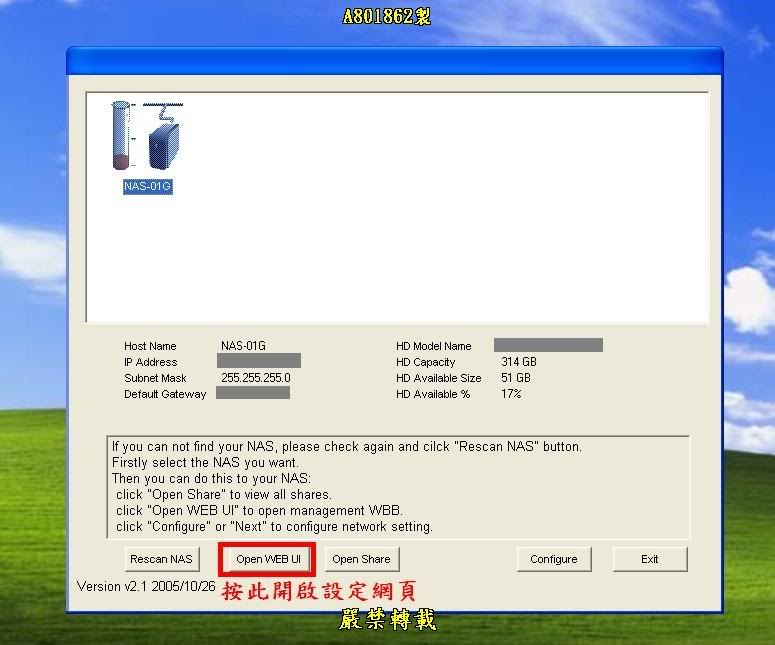
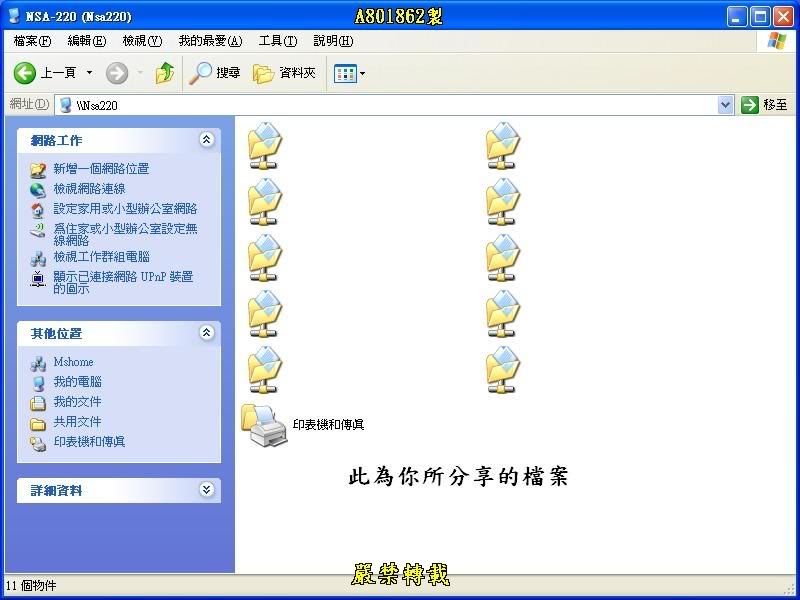
081.按照此圖開啟設定網頁
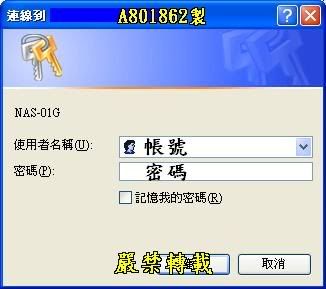
082.輸入NAS-01G帳號密碼
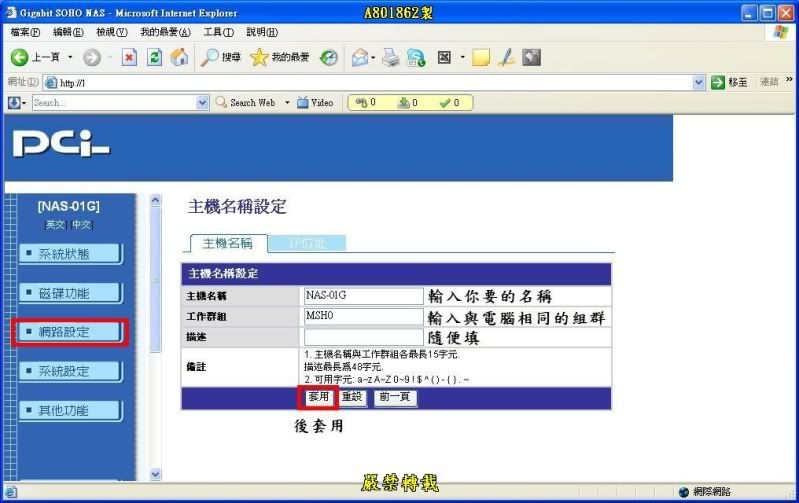
083.入設定網頁後按網路設定修改主機資料
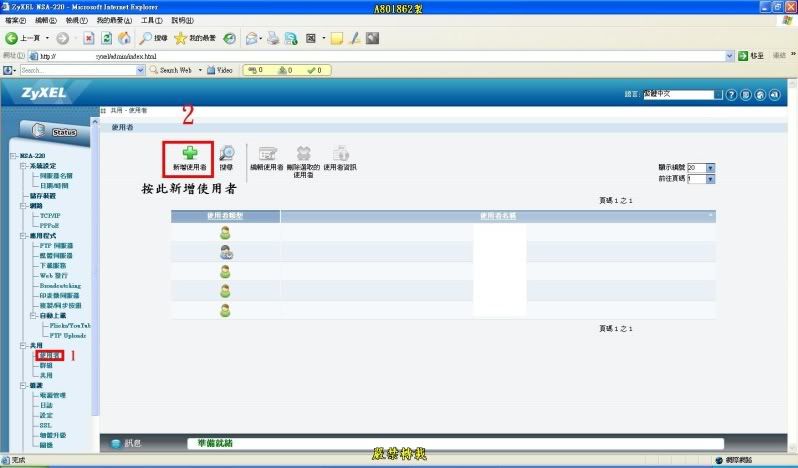
084.後按IP位置進入設定
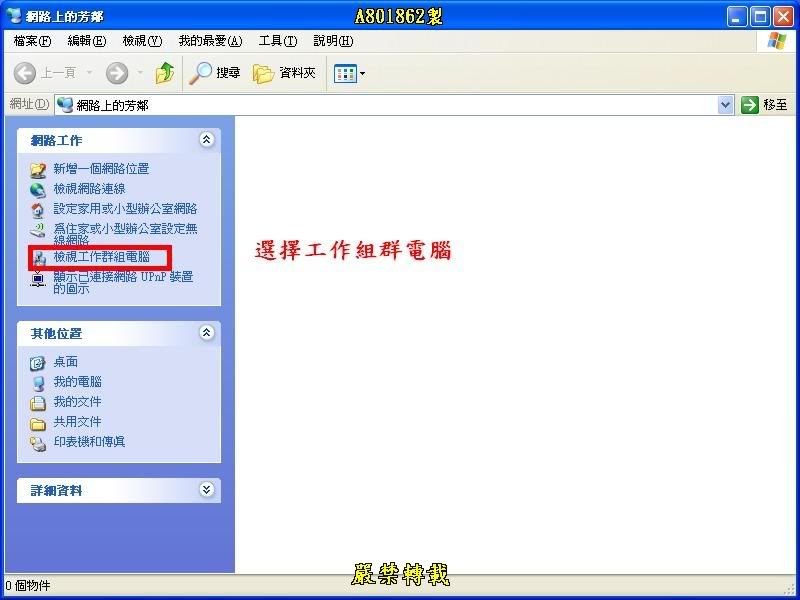
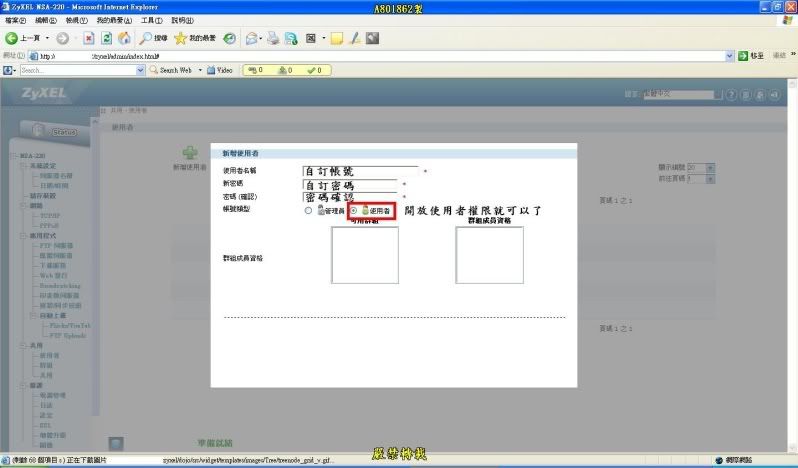
084.回到桌面並開啟網路上的芳鄰並選擇檢視工作尋群組電腦
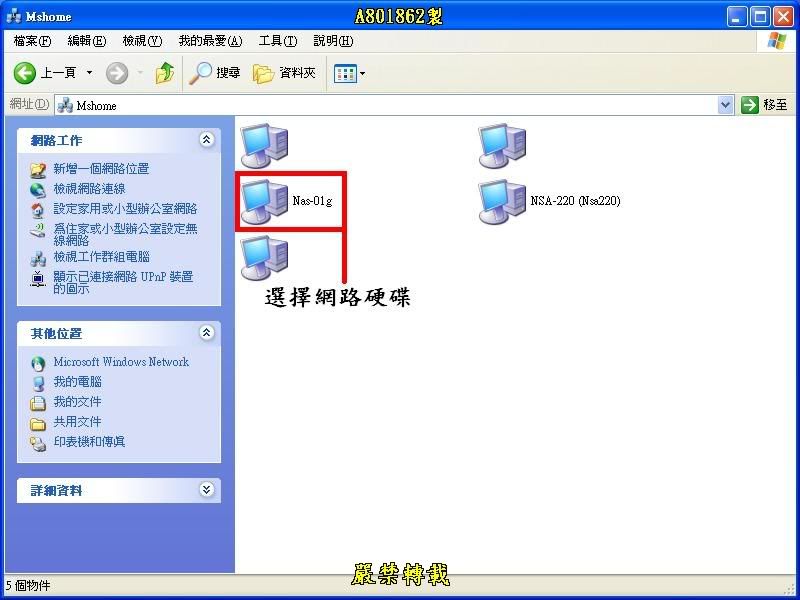
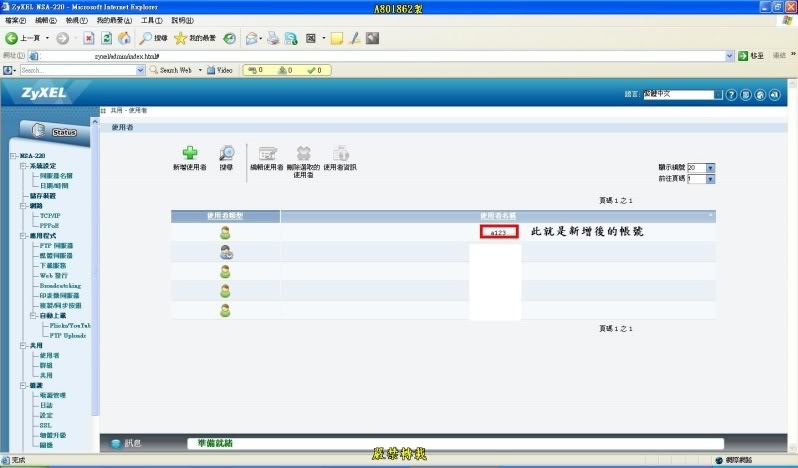
085.選擇你的網路硬碟
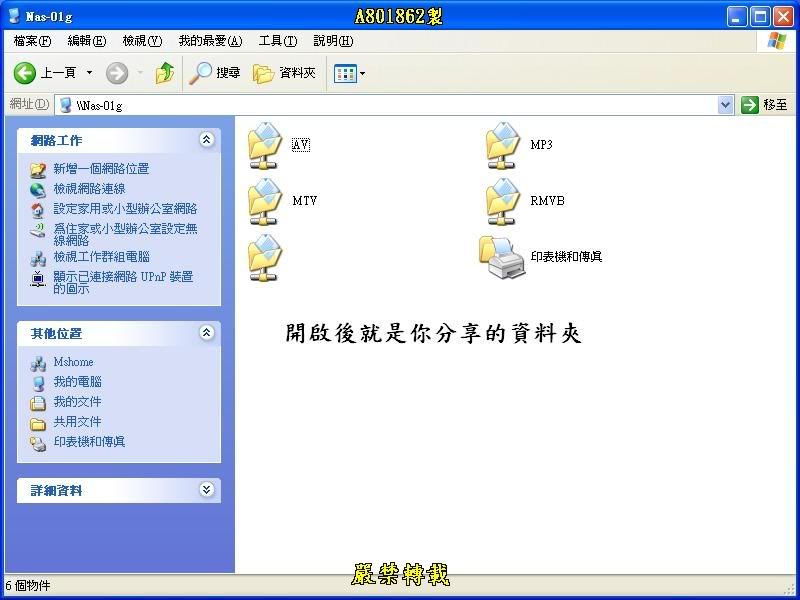
086.開啟後你設定分享的資料夾
087.回到NAS-01G設定裡面選擇其他功能>使用者即可設定使用者權限並新增
088.這就是新增出來的使用者
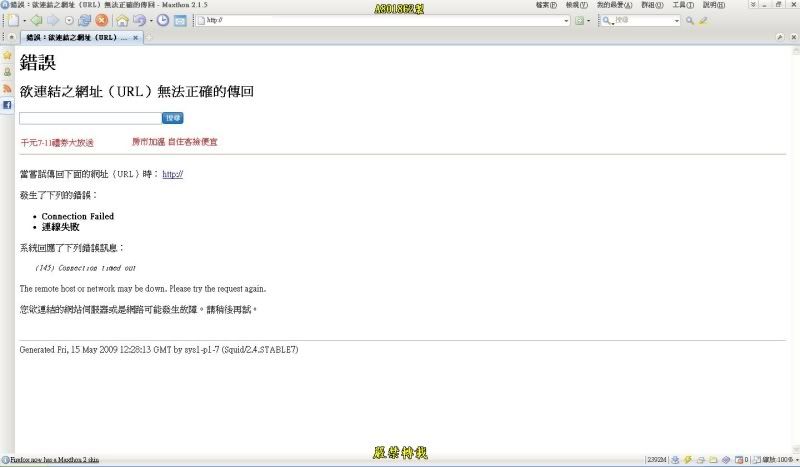
089.若在登入分享器或是網路硬碟時出現此訊息
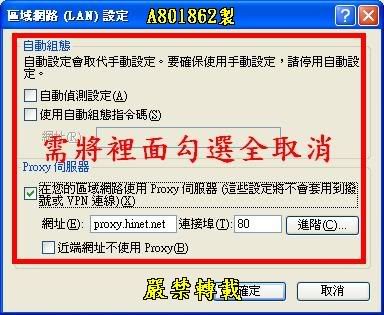
090.請到網際網路裡面選擇聯現在進入區域網路設定裡面把裡面所有有勾選的全部取消
091.下載完NSA-220探索程式後解壓縮並安裝

092.下一步
093.下一步
094.下一步
095.安裝

096.完成
097.桌面的ZyXEL NSA Discovery Utility圖示進入設定
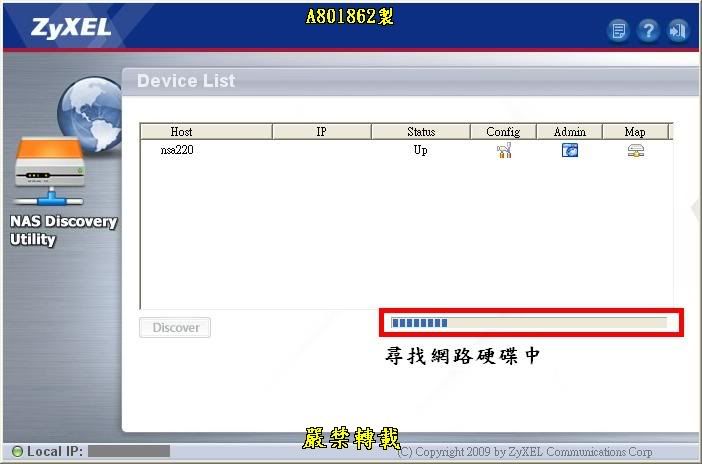
098.尋找網路硬碟中
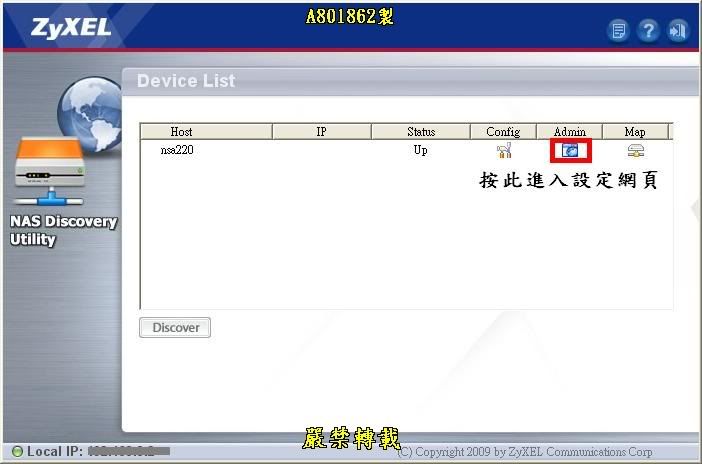
099.照此圖進入設定網頁
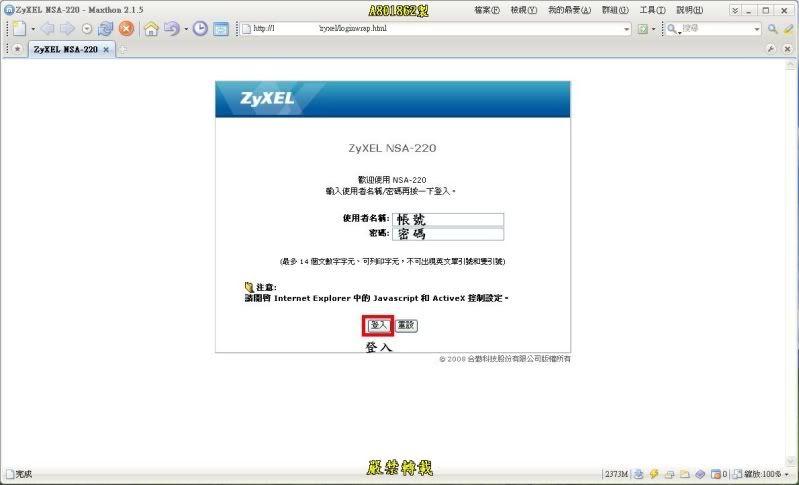
100.輸入帳號密碼後登入
101.進入管理

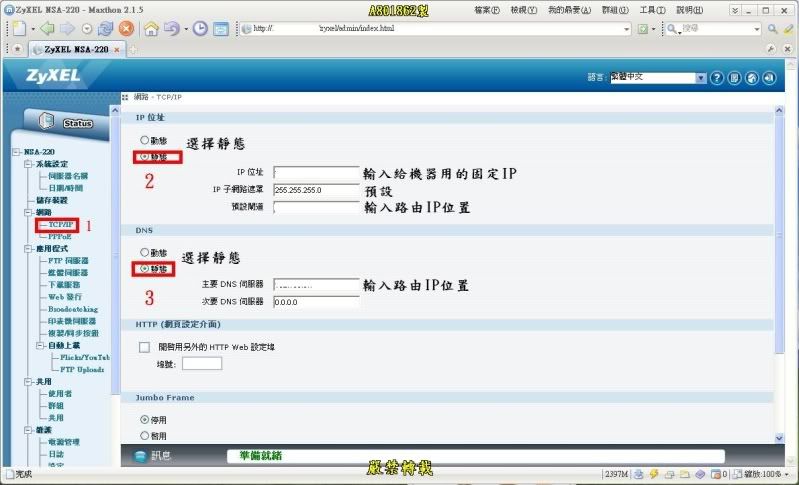
102.進入設定裡面選擇網路>TCP/IP裡面照此圖設定
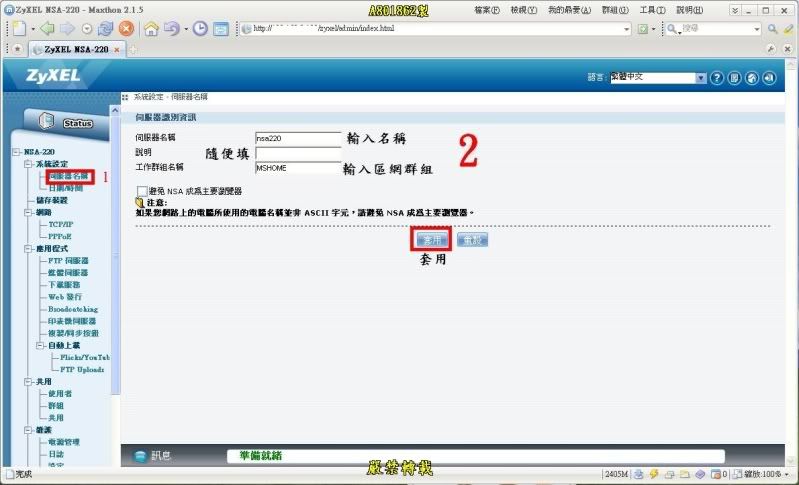
103.回到系統設定裡的伺服器名稱面照此圖設定
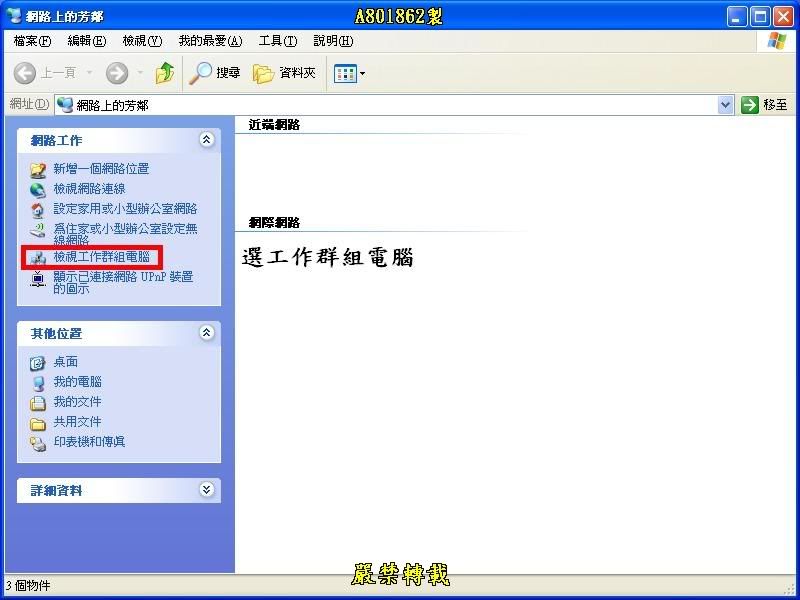
104.開啟網路上的芳鄰並選擇檢視工作尋群組電腦
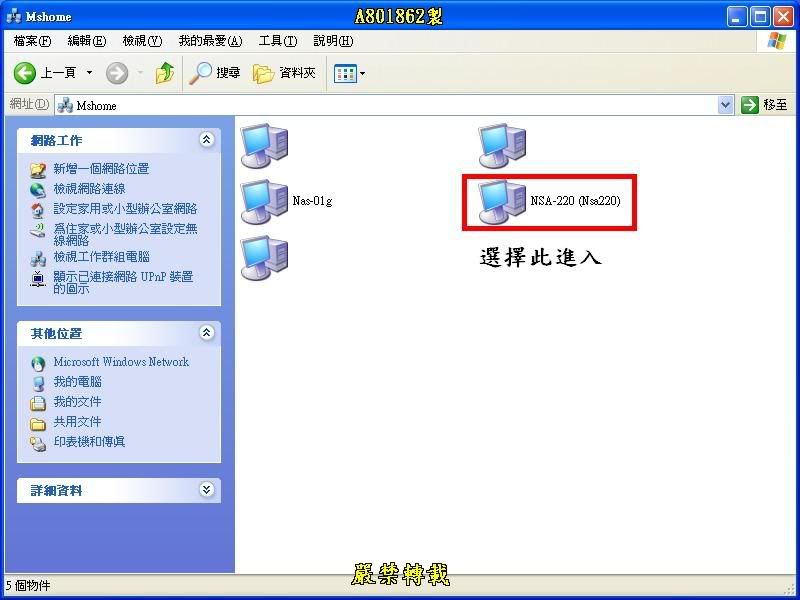
105.選擇你的網路硬碟
106.開啟後你設定分享的資料夾
107.回到NSA-220設定畫面進入共用並選擇(使用者)新增使用者
108.照圖設定
109.此就是新增後的帳號
有設定密碼在區域網路存取資料時要輸入密碼:
110.NAS-01G密碼輸入畫面
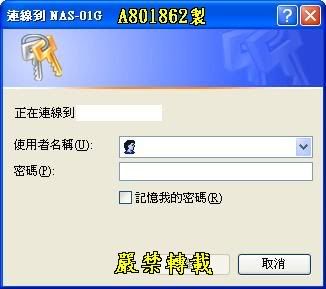
111.NSA-220密碼輸入畫面

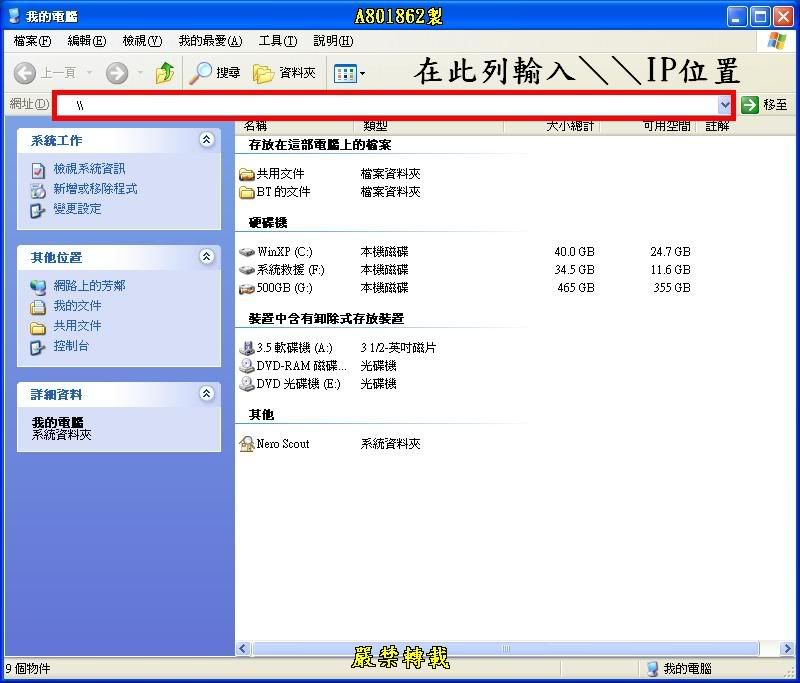
112.或者可以再網址列打入這段字
成果測試:
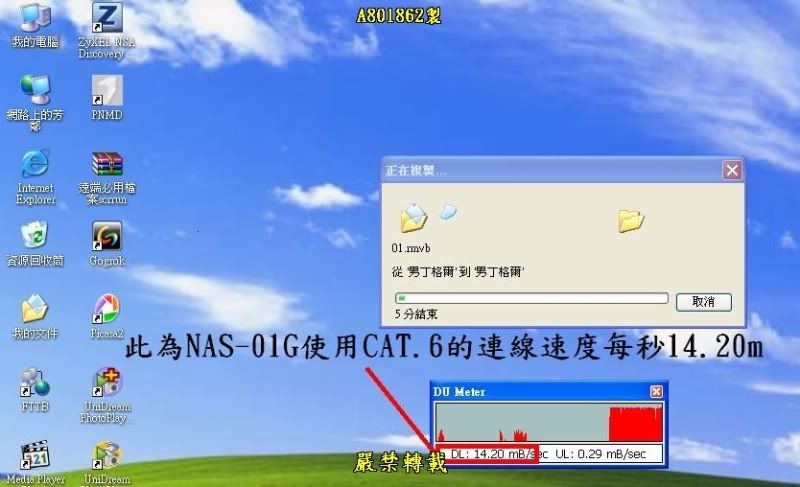
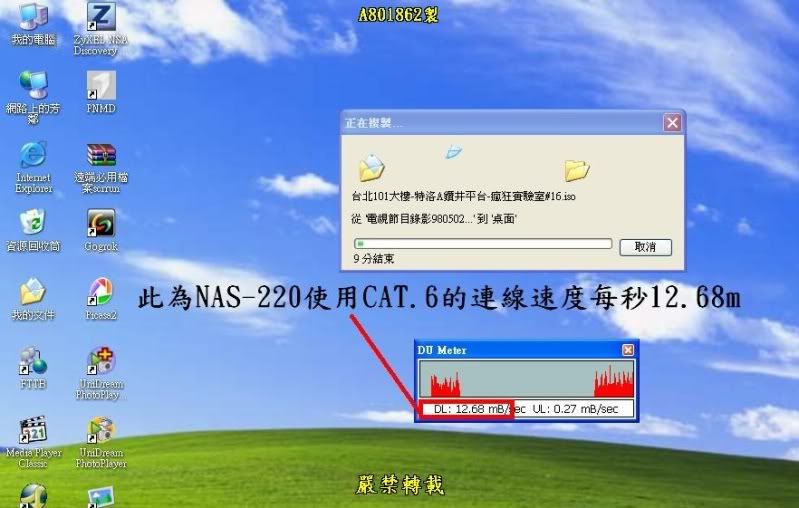
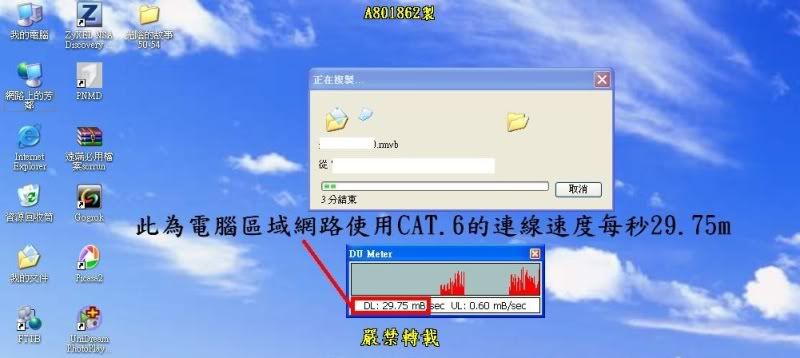
113.使用高速網路線測試

ps:祝大家用的愉快[/FONT]
圖檔流量過大無法顯示請按此:http://photo.xuite.net/aa801862/3287622
更多教學http://tw.myblog.yahoo.com/jw!bjLnQk6TSEeoUAtuK0V7
網路線材:
CAT.5(使用7條)
CAT.6(使用6條)
供電設備:
APC(ES500)
網路設備型號:
光纖數據機(合勤P-870H)
久森BRL-04R(IP分享器)
D-Link(DI-707P路由器)
D-Link(DGS-1005D集線器)
網路硬碟伺服器機型:
久森NAS-01G(硬碟容量320GB)
合勤NSA-220吐司機(硬碟容量1TB)
使用高速區域網路時必須具備以下條件:
1.電腦網路介面必須要在100/1000的網路介面(新電腦大多都有做到1000了,舊電腦就必須裝10/100/1000的網路卡才可)
2.集線器必須買100/1000的才可以
3.網路線不可使用CAT.5要使用CAT.6
4.網路硬碟大部分都有支援1000的網路介面
機器架設方法:
001.歷年架設站台的機器
002.網路連接介面
003.側邊散熱孔
004.光纖數據機高溫散熱孔
005.再來一張
006.光纖數據機連接介面
007.本人機器連接說明
008.光纖數據機側邊散熱孔
009.光纖數據機背面
010.目前使用的DI-707P路由器
011.正面
012.側邊散熱孔
013.接線端說明
014.高速集線器DGS-1005D省電機
015.上方散熱孔
016.側邊散熱孔
017.接線端說明
018.高速集線器DGS-1005D目前版本
019.高速集線器DGS-1005D目前已當後備機使用
020.上方散熱孔
021.側邊散熱孔
022.接線端說明
023.已退休的DI-604目前也是當後備機
024.上方散熱孔
025.側邊散熱孔
026.接線端說明
027.高速網路硬碟伺服器NAS-01G
028.散熱口
029.系統風扇與高速網路介面
030.IDE連接介面
031.硬碟容量320GB採用linux系統格式
032.Seagate硬碟/聯強代理
033.高速網路硬碟伺服器NSA-220
034.散熱口
035.系統風扇與高速網路介面
036.硬碟裝置
037.NSA-220硬碟連接介面
038.硬碟架附把手易拆
039.側邊
040.一號硬碟WD500GB(系統linux格式)
041.二號硬碟WD500GB(系統linux格式)
042.二號硬碟WD500GB固定架
043.一號硬碟WD500GB固定架
044.連接NAS-01G與NSA-220網路硬碟伺服器用的高速網路線CAT.6
045.紅線為架站專用網路線
046.網路硬碟伺服器連接高速網路線
047.切換NSA-220使用固I浮I專用
048.NAS-01G與NSA-22運作指示燈
049.高速網路線CAT.6
050.高速集線器放置位置
051.連接到各網路設備的一堆網路線
052.數據機配線
053.光纖數據機在高速下載時會引發高溫狀態
054.BRL-04R架設站台/網站專用
055.BRL-04R接線說明
056.DI-707P接線說明
057.DI-707P連接到高速集線器用的網路線
058.高速集線器DGS-1005D網路線連接
059.高速集線器DGS-1005D配線介紹
060.運作圖
061.高速與低速燈號狀態說明
062.DI-707P正常連線狀態
063.給網路設備用不斷電防雷擊系統
064.供電說明
系統設定方法
065.按網路上的芳鄰右鍵選>內容
066.選擇區域連線後按右鍵>內容
067.選擇(TCP/IP)後按內容
068.選擇(使用下列的IP位置)IP分配為192.168.0.1~192.168.0.255之間
069.工作群組須跟區域網路一樣
070.修改群組(修改完成後按確定重開機)
071.若電腦與集線器都是100/1000的才會出現1Gbps
072.登入DI-707P路由器設定頁面
073.設定路由IP
安裝探索程式及設定
074.下載完NAS-01G探索程式後解壓縮並安裝
075.準備安裝中
076.下一步
077.下一步
078.下一步
079.完成
080.按桌面的PNMD圖示進入設定
081.按照此圖開啟設定網頁
082.輸入NAS-01G帳號密碼
083.入設定網頁後按網路設定修改主機資料
084.後按IP位置進入設定
084.回到桌面並開啟網路上的芳鄰並選擇檢視工作尋群組電腦
085.選擇你的網路硬碟
086.開啟後你設定分享的資料夾
087.回到NAS-01G設定裡面選擇其他功能>使用者即可設定使用者權限並新增
088.這就是新增出來的使用者
089.若在登入分享器或是網路硬碟時出現此訊息
090.請到網際網路裡面選擇聯現在進入區域網路設定裡面把裡面所有有勾選的全部取消
091.下載完NSA-220探索程式後解壓縮並安裝
092.下一步
093.下一步
094.下一步
095.安裝
096.完成
097.桌面的ZyXEL NSA Discovery Utility圖示進入設定
098.尋找網路硬碟中
099.照此圖進入設定網頁
100.輸入帳號密碼後登入
101.進入管理
102.進入設定裡面選擇網路>TCP/IP裡面照此圖設定
103.回到系統設定裡的伺服器名稱面照此圖設定
104.開啟網路上的芳鄰並選擇檢視工作尋群組電腦
105.選擇你的網路硬碟
106.開啟後你設定分享的資料夾
107.回到NSA-220設定畫面進入共用並選擇(使用者)新增使用者
108.照圖設定
109.此就是新增後的帳號
有設定密碼在區域網路存取資料時要輸入密碼:
110.NAS-01G密碼輸入畫面
111.NSA-220密碼輸入畫面
112.或者可以再網址列打入這段字
成果測試:
113.使用高速網路線測試
ps:祝大家用的愉快[/FONT]